It took quite a bit of research and effort to get the theater done and it is finished!
Actually, the theater was finished a while ago but I realized that we never had the reveal along with additional pics of the finished theater.
So here it is, the home theater final reveal!
Disclosure: Some of the links below are affiliate links. If you decide to purchase any of these products, we earn a small commission at no additional cost to you. We recommend these products only because we have experience with them and use them for our own projects. As Amazon Associates, we earn from qualifying purchases.
The Home Theater Final Reveal
This was a pretty big project, it took loads of research, calculations and choices to get to the final product. We decided to do all the work ourselves, which saved us a ton of money and also gives us a sense of accomplishment. 🙂
We love, love, love our theater and use it regularly. For the most part there isn’t much we would change.
There are a couple of things, which I’ll cover at the end of the post.
The Beginning (ish)
We started the home theater project before we had the idea of starting a blog, and apparently we didn’t do a good job of taking pictures.
Anyhow, here are a few pics of the work in progress.
Laying Out The Home Theater Seating
Before the room was transformed into a home theater, it was a clean slate for us to work in. It was a regular rectangular room with no closets.
You can get an idea of what it was like before in the picture below.
We ordered the seating before we did anything else. There was a sale so we pulled the trigger.
We ordered the seating based on the measurements that they had online. Needless to say we were a bit nervous that the measurements would have been off… luckily everything worked out. 🙂
Once the layout was ironed out I started work on the theater room riser a.k.a. the home theater platform.
And before I got too far into the home theater seating risers construction I tested the height of the risers with the chairs to make sure things were still lining up the way I wanted it to.
That’s me in the last pic testing the home theater riser height with the chairs in place.


Working On The Theater Riser
Now that the riser height was ironed out I could finish the riser.
Before I added the plywood flooring to the risers I needed to I relocate the cable line from this room out into the hallway closet, where all the theater equipment was going to live.
I also needed to add outlets to power the recliners and the LED light for the riser stairs.
I put two on the bottom of the back wall, and two in the center of each step.


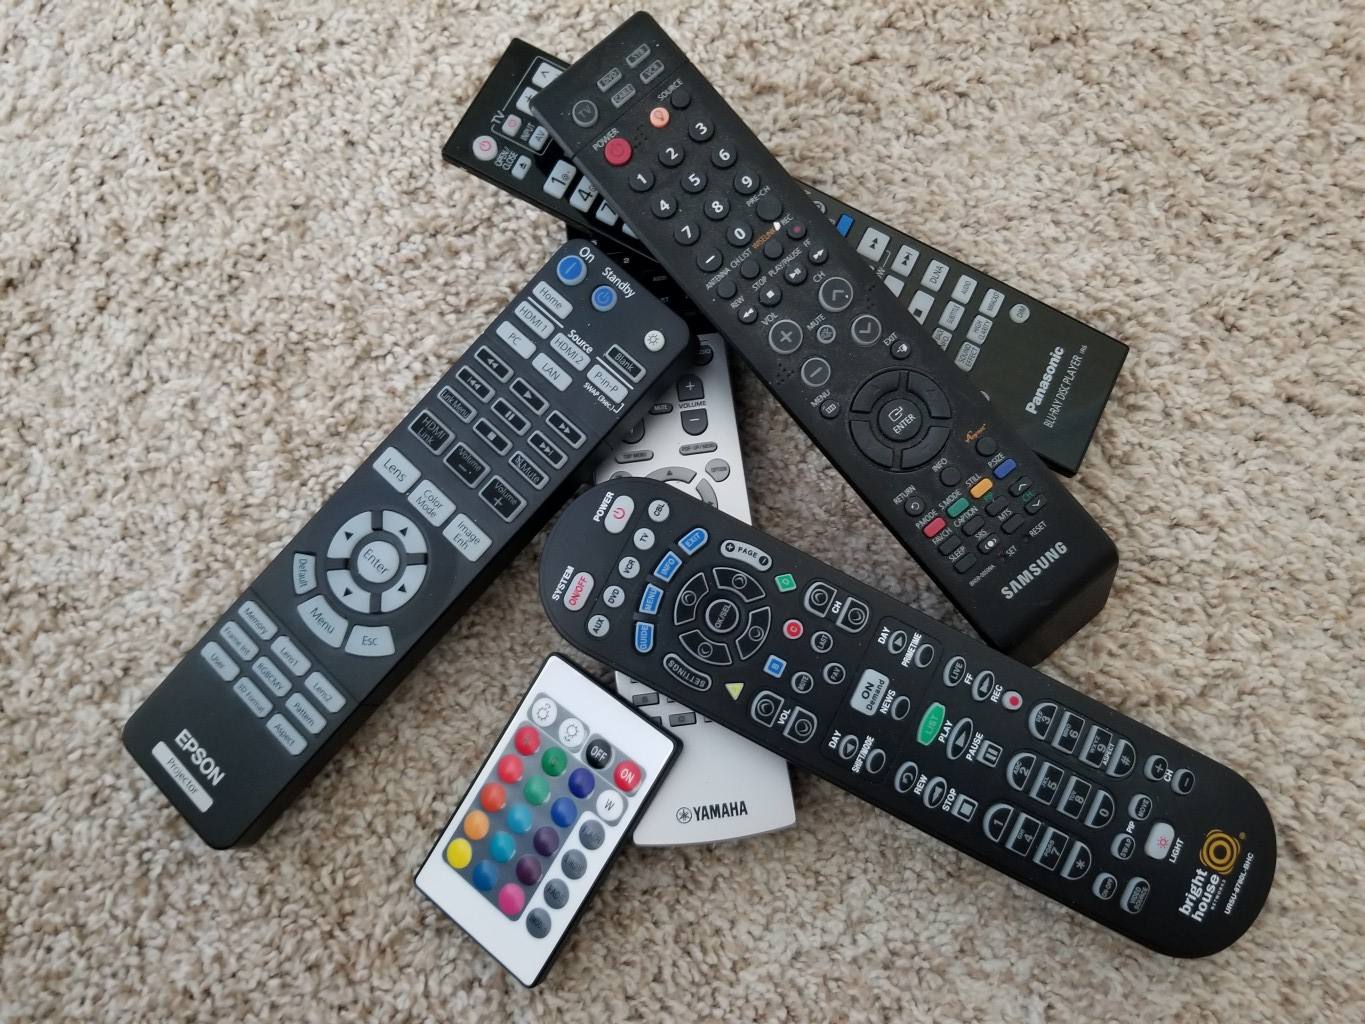
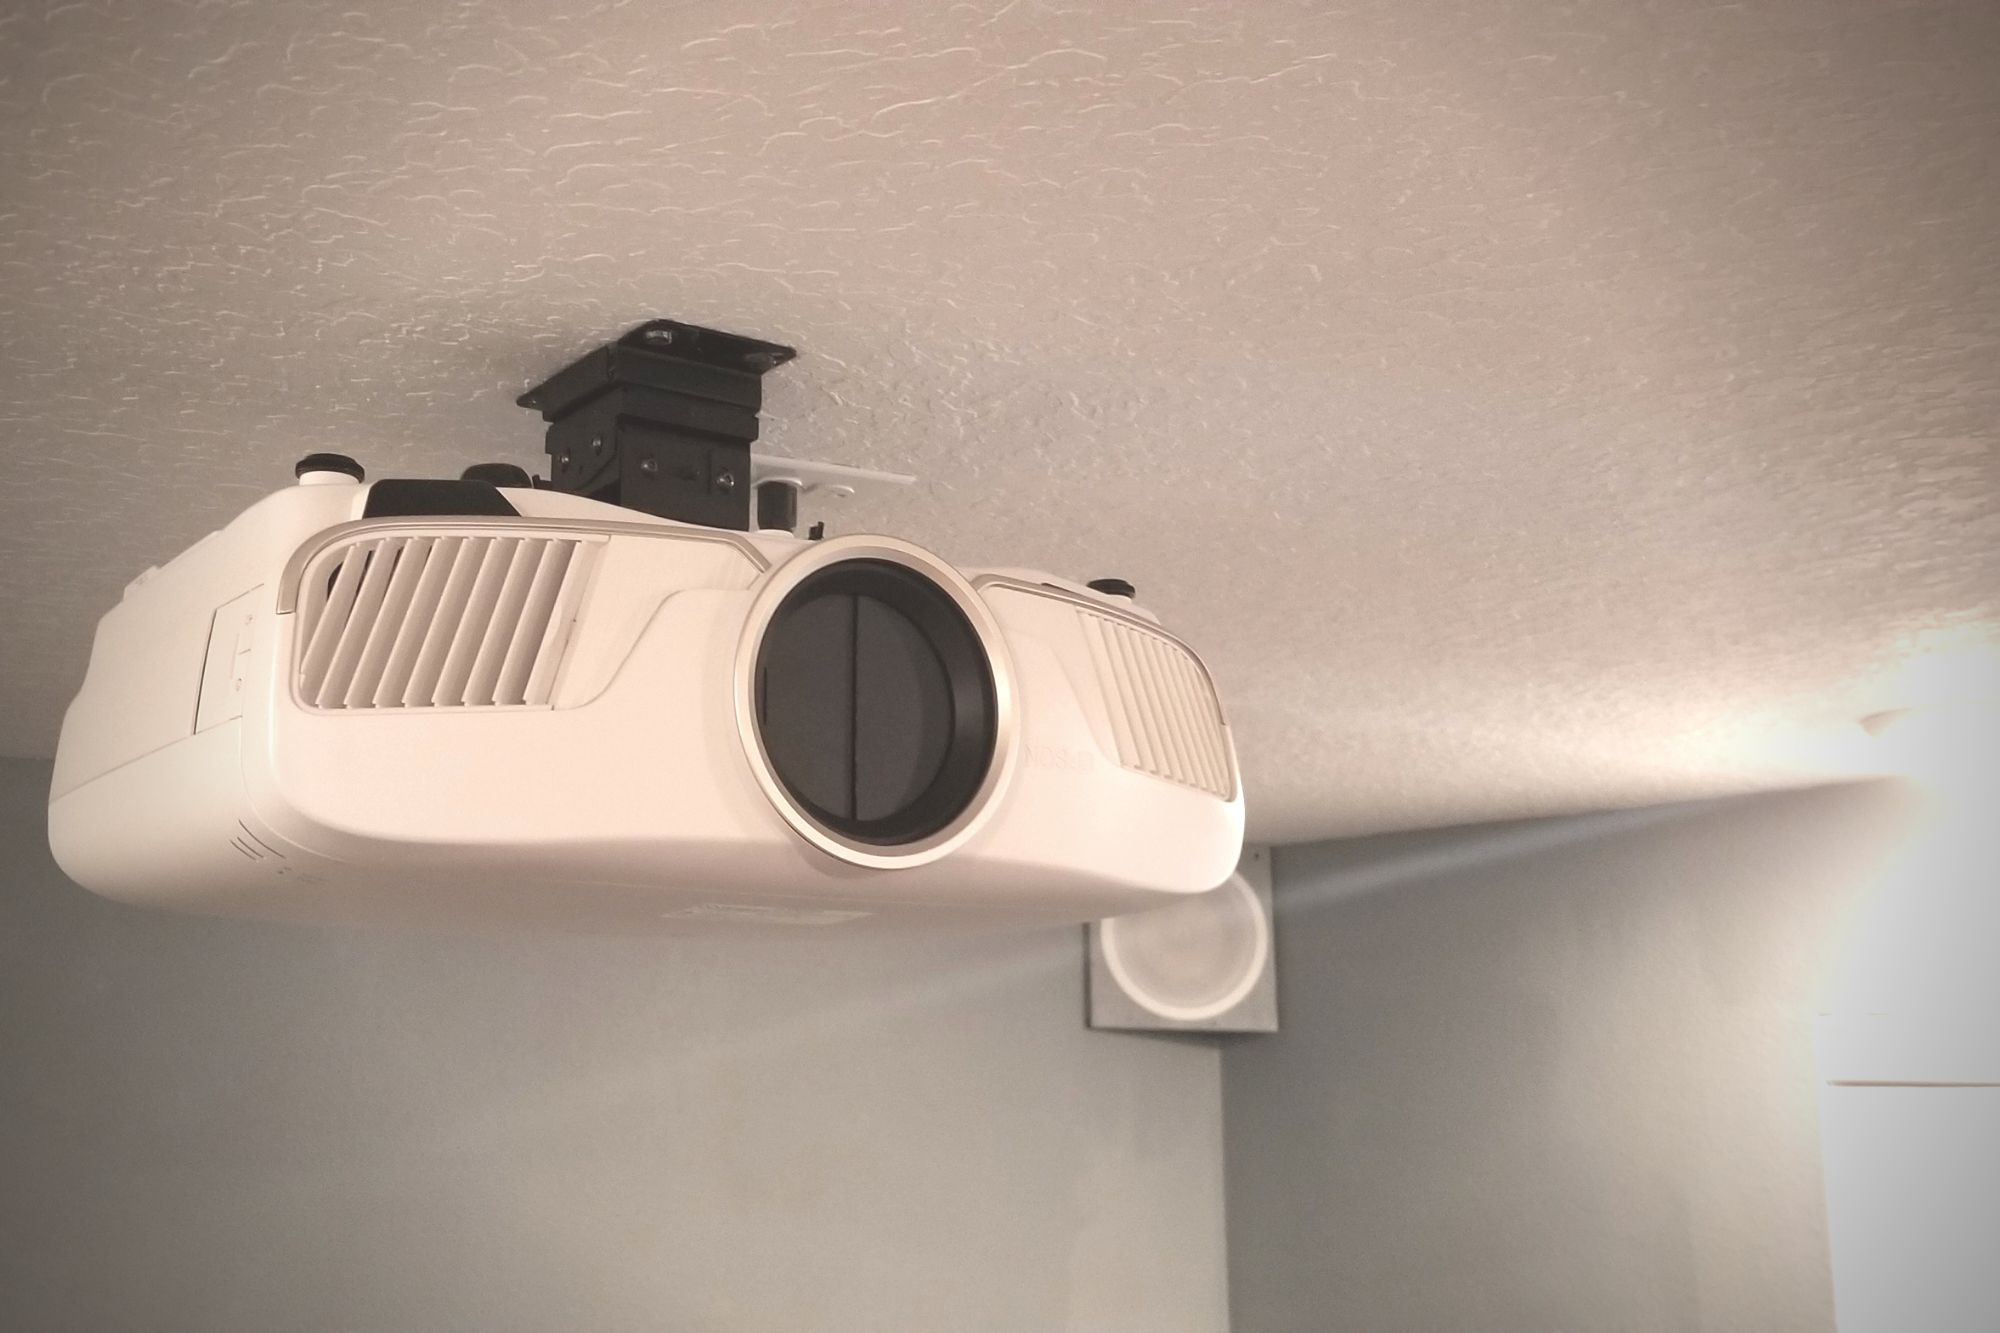
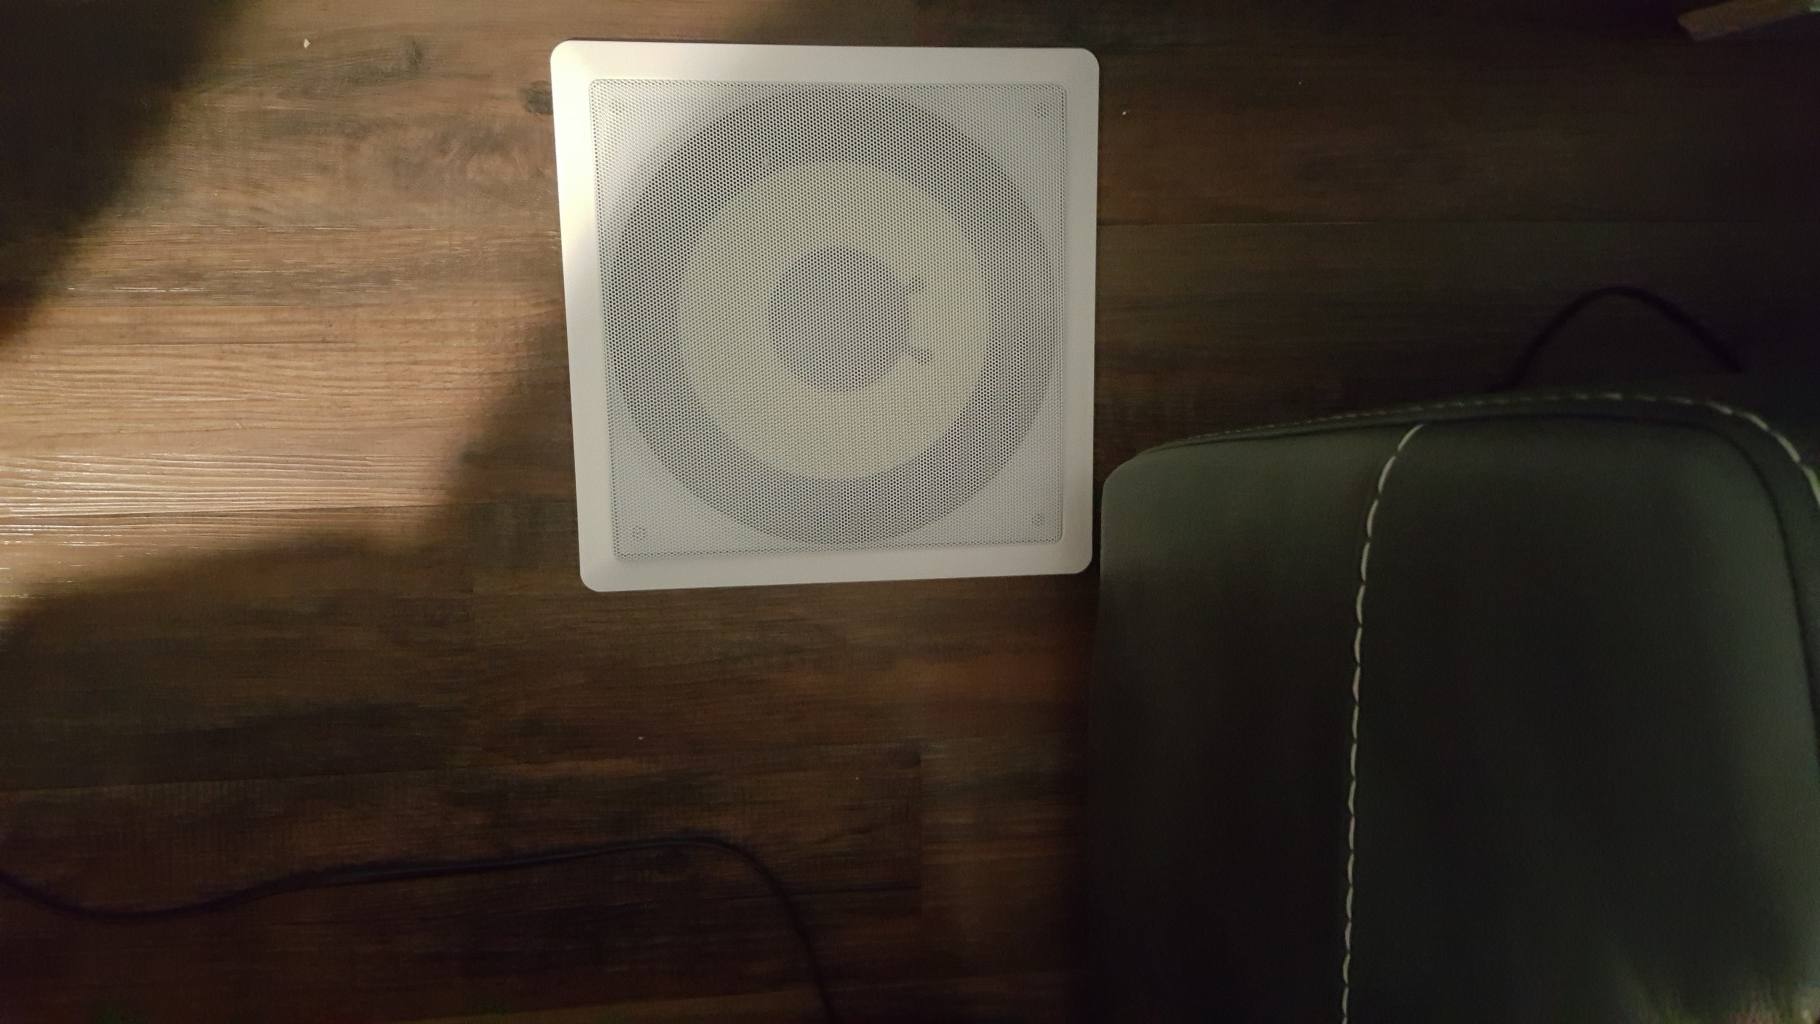
Time For The Good Stuff – The Projector, Screen and Speakers
This part took a lot of research and calculating. Check out these posts for details on the projector, screen, remote, home theater system and speakers.
Once all the calculations were done I tried everything out before making any holes in the walls.
After testing the projector location, I mounted it to the ceiling and ran an electrical outlet right next to it.


The Home Stretch, The Home Theater Entrance Sign and Painting
The entrance sign was not a very hard part of the project. The hardest part was finding the right sized letters to put above the doors.
It did take a while to find the right-sized letters to use, I was able to find these at Target.
Once I found the right letters I:
- Removed the existing top door molding
- Cut out a piece of 3/4″ plywood to fill the space between the top of the door and the ceiling
- Added a crown molding around the top of the plywood and a small piece of molding on the bottom of the plywood to give it more of a finished look.
- Then centered the letters and painted, voila!


The Finished Home Theater
Here are a bunch of pictures of the finished home theater.
I love the way the theater came out, it’s even better than I was expecting.
There are a few more things I still need to do, like making a home for the remote control, something like a cubby hole or shelf where it can be charged.


What I Would Have Done Differently
If we had to do it all over again, there are a few things I would have done differently. Overall, it would be the same home theater – with a few tweaks.
The Stair Lights
The lights I bought were low voltage, which means they have a transformer, and that means they aren’t dimmable.
In the end, I rarely use the lights in the stairs because they are too bright. If I did this again I would buy regular voltage lights that are dimmable.
The IR Repeater
The IR repeater worked great, but it turns out the Logitech remote I bought to replace all the remotes uses a radio signal to communicate with the hub (which is in the closet with the equipment) so I no longer need the IR repeater.
Getting 4K HDR Streaming Content
My idea initially was to get a 4K DVD player and that will have 4K streaming. The first DVD player I bought supported 4K Netflix but the Vudu app on it did not support HDR.
I was building up a movie library on Vudu and wanted to have it in HDR if that was a possibility. So I went on a quest looking for a 4K DVD player that supported Vudu in HDR.
I found one and it worked great, but it was a bit pricy and the menus were kinda slow to get to the streaming apps. I tweeted the macros on the Logitech and got it to work correctly, but slow. As a DVD player it was really good, and the streaming apps were there – just slow to navigate the menus.
Then for some reason, I went and bought a Roku.
Holy cow, that was a game-changer!
It supported 4K everything, HDR everything, and was lightning fast!
If I had to do this again I’d get the cheaper 4K DVD player to play the Ultra-HD DVDs and use the Roku for any Streaming apps.
The Entire Shopping List
Here’s a list of everything that we are currently using in our home theater.
You can click on the picture to buy the same one for yourself.
Projector

Projector Screen

The Projector BackLight Kit

The Amplifier

The Remote

The Passive Amplifier

Roku Ultra

The Speakers

[et_bloom_inline optin_id=”optin_7″]
DIY Home Theater – Finished!
There you have it, pics of the home theater, during the construction and after the DIY home theater was finished.
I hope you find some ideas and tidbits of info in our project that will help you with yours.
What would you do differently in your home theater? Let me know in the comments below!
Enjoy this post? Pin it and share it with others!