5 Veggies You Can Grow From Kitchen Scraps

5 Veggies You Can Grow From Kitchen Scraps

5 Veggies You Can Grow From Kitchen Scraps


Eerst, let me start off with saying there are definitely waaaay more than just 5 veggies you can grow from kitchen scraps, these are just the first ones I tried.

With the Corona Virus causing our vacation rental business to come to a screeching halt, we started putting our attention to other interests.

The latest project we’ve taken on is starting a garden, most likely a container garden.

During my perusing on Pinterest, I found a pin on regrowing vegetables from the kitchen scraps.

I just started this project but already have quite a few types of veggies that can be regrown from kitchen scraps.

Zoals ik al zei, there’s probably many more vegetables you can do this with, but this is a list of the ones I started with.

Openbaring: Sommige van de onderstaande links zijn gelieerde links. Als u besluit een van deze producten te kopen, We verdienen een kleine commissie zonder extra kosten voor u. We raden deze producten alleen aan omdat we er ervaring mee hebben en ze gebruiken voor onze eigen projecten. Als Amazon Associates, We verdienen aan kwalificerende aankopen.

5 Vegetables You Can Grow From Kitchen Scraps

#1Lettuce

This seems to work with all kinds of lettuce, so far I’ve got butter, red leaf and romaine lettuce regrowing from kitchen scraps.

Out of the 3 the romaine seems to have a head start. To be fair, I was apparently more generous with the amount of base I left on the rootI’m guessing that would make a difference.

5 Veggies You Can Grow From Kitchen Scraps - Lettuce

How To Start

When cutting the base of your lettuce head off, cut it about 1 1/2 – 2″ from the bottom. Then take the base and put it in a container with a bit of water on the bottom.

Make sure to change out the water every couple of days and in a few days you’ll start seeing new growth emerging from the center of the base.

Once you a good amount of growth, your new lettuce plant will probably be happier in soil. I’ve read that it would do fine in water, as long as you change out the water every couple of days.

Persoonlijk, when I planted the lettuce in the ground I noticed it started growing better. Maybe its just my imagination, but I’m placing my plants in the soil once they start showing signs of new growth.

Update: I learned recently that lettuce will shoot up right away when the temperature is above 70 degrees. Since we’re in Florida, those temps make it difficult for us to grow lettuce indoors. We keep the temperature around 75 degrees and the romaine lettuce I was testing with, shot straight up.

I’m trying again, this time with butter lettuce. As soon as the lettuce started growing new leaves I put it in dirt. Lets see if that improves things.

I’ll update this post with its progress.

#2Basil

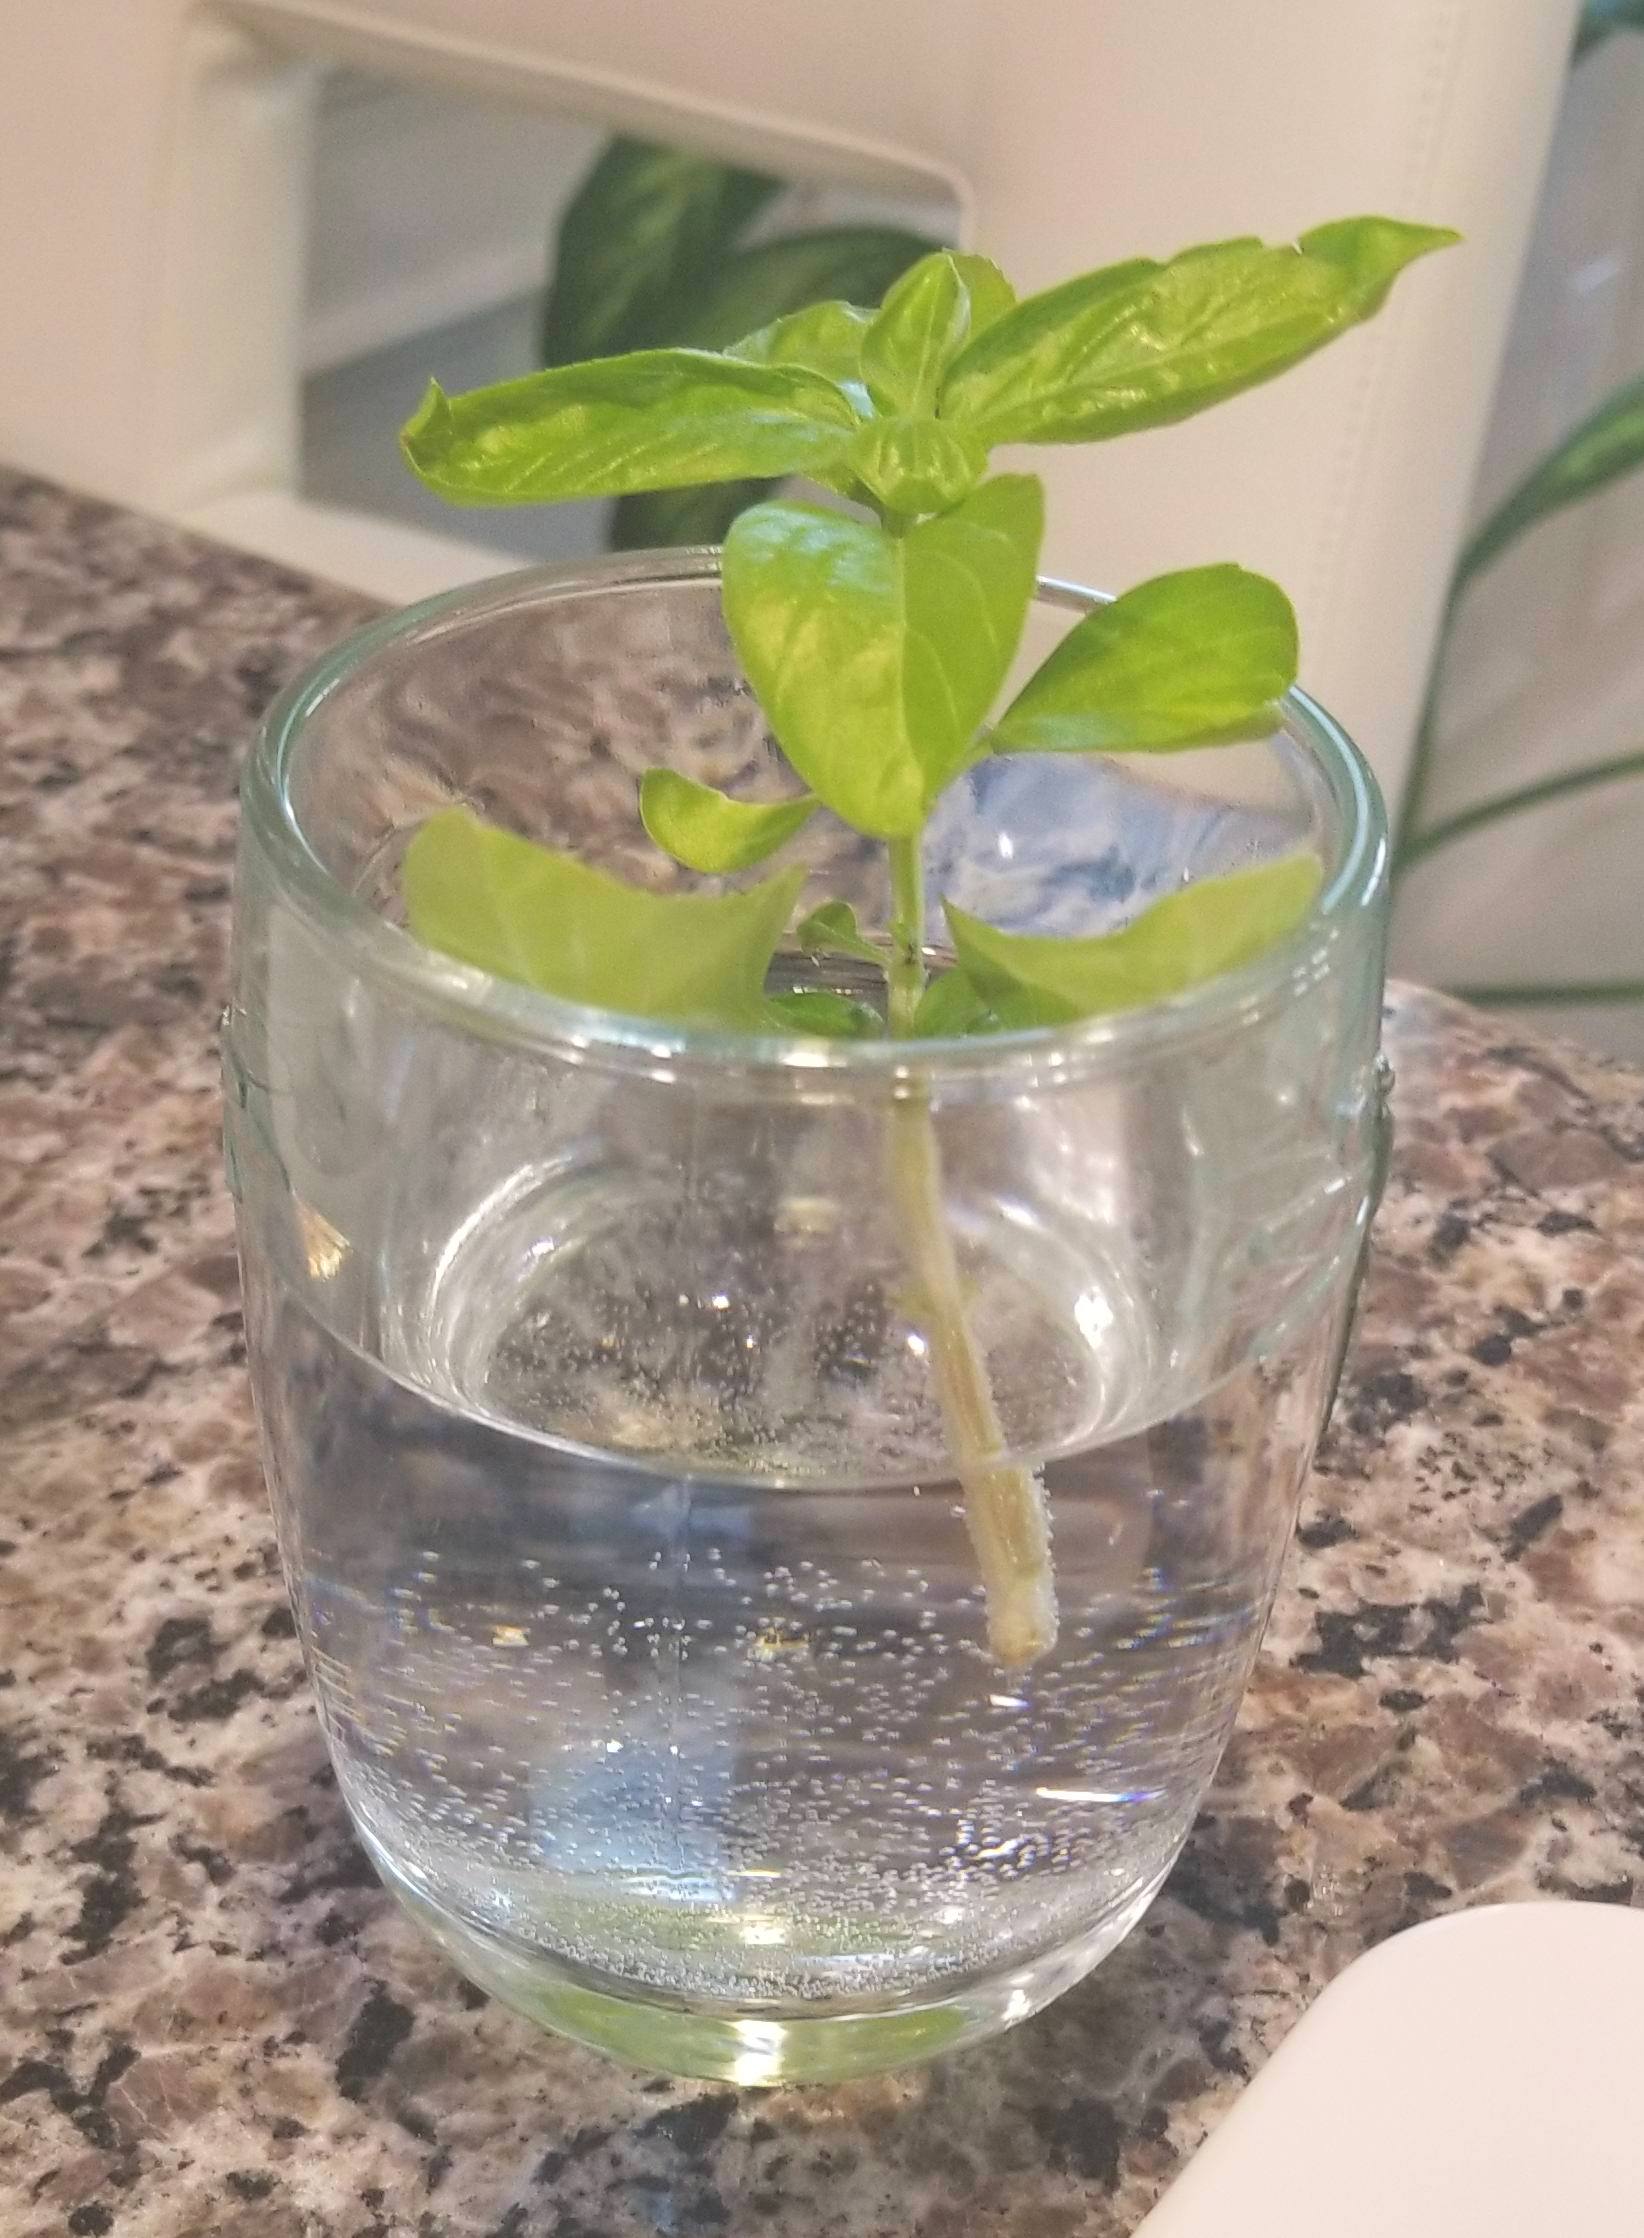
We had a long and leggy basil plant that wasn’t producing many leaves anymore. So I figured I’d try to use a cutting to start a new plant.

So far, the basil I’m trying this with hasn’t made any new roots but I’m pretty confident that it will start rooting shortly.

The cutting looks like it’s doing well in the water, and from what I’ve read, basil is a piece of cake to grow from cuttings.

How To Start

You’ll want to give the cutting enough stem so that it can sit in water without the leaves touching the water. If the leaves sit in the water they’ll start rotting and the water will get cloudy and your cutting will probably die off.

So give the cutting a couple of inches of stem.

Take your cutting and place it in a container with enough water for about an inch of the stem to sit in the water.

Place it in a bright area without direct sunlight and wait. 🙂
5 Veggies You Can Grow From Kitchen Scraps - Basil

#3Onions

The onions seem to grow pretty easily, it’s been a week and they look like they’re ready to be put into dirt.

Not sure if an actual whole onion will grow from this experiment but the green stems that grow from it can be used in cooking. The entire plant had an onion flavor.

5 Veggies You Can Grow From Kitchen Scraps - Onions

#4Scallions

The scallions are the rock stars of my kitchen scrap garden! They have been in water for maybe about 5 days and have several inches of new growth already on them.

How To Start

Similar to the lettuce cuttings, when you cut the base of the scallions off cut it a bit higher than usual. About a couple of inches of the plant from the base.

Put them in a container with water on the bottom and you are all set.

Since they usually already have some roots, these guys didn’t waste any time growing.
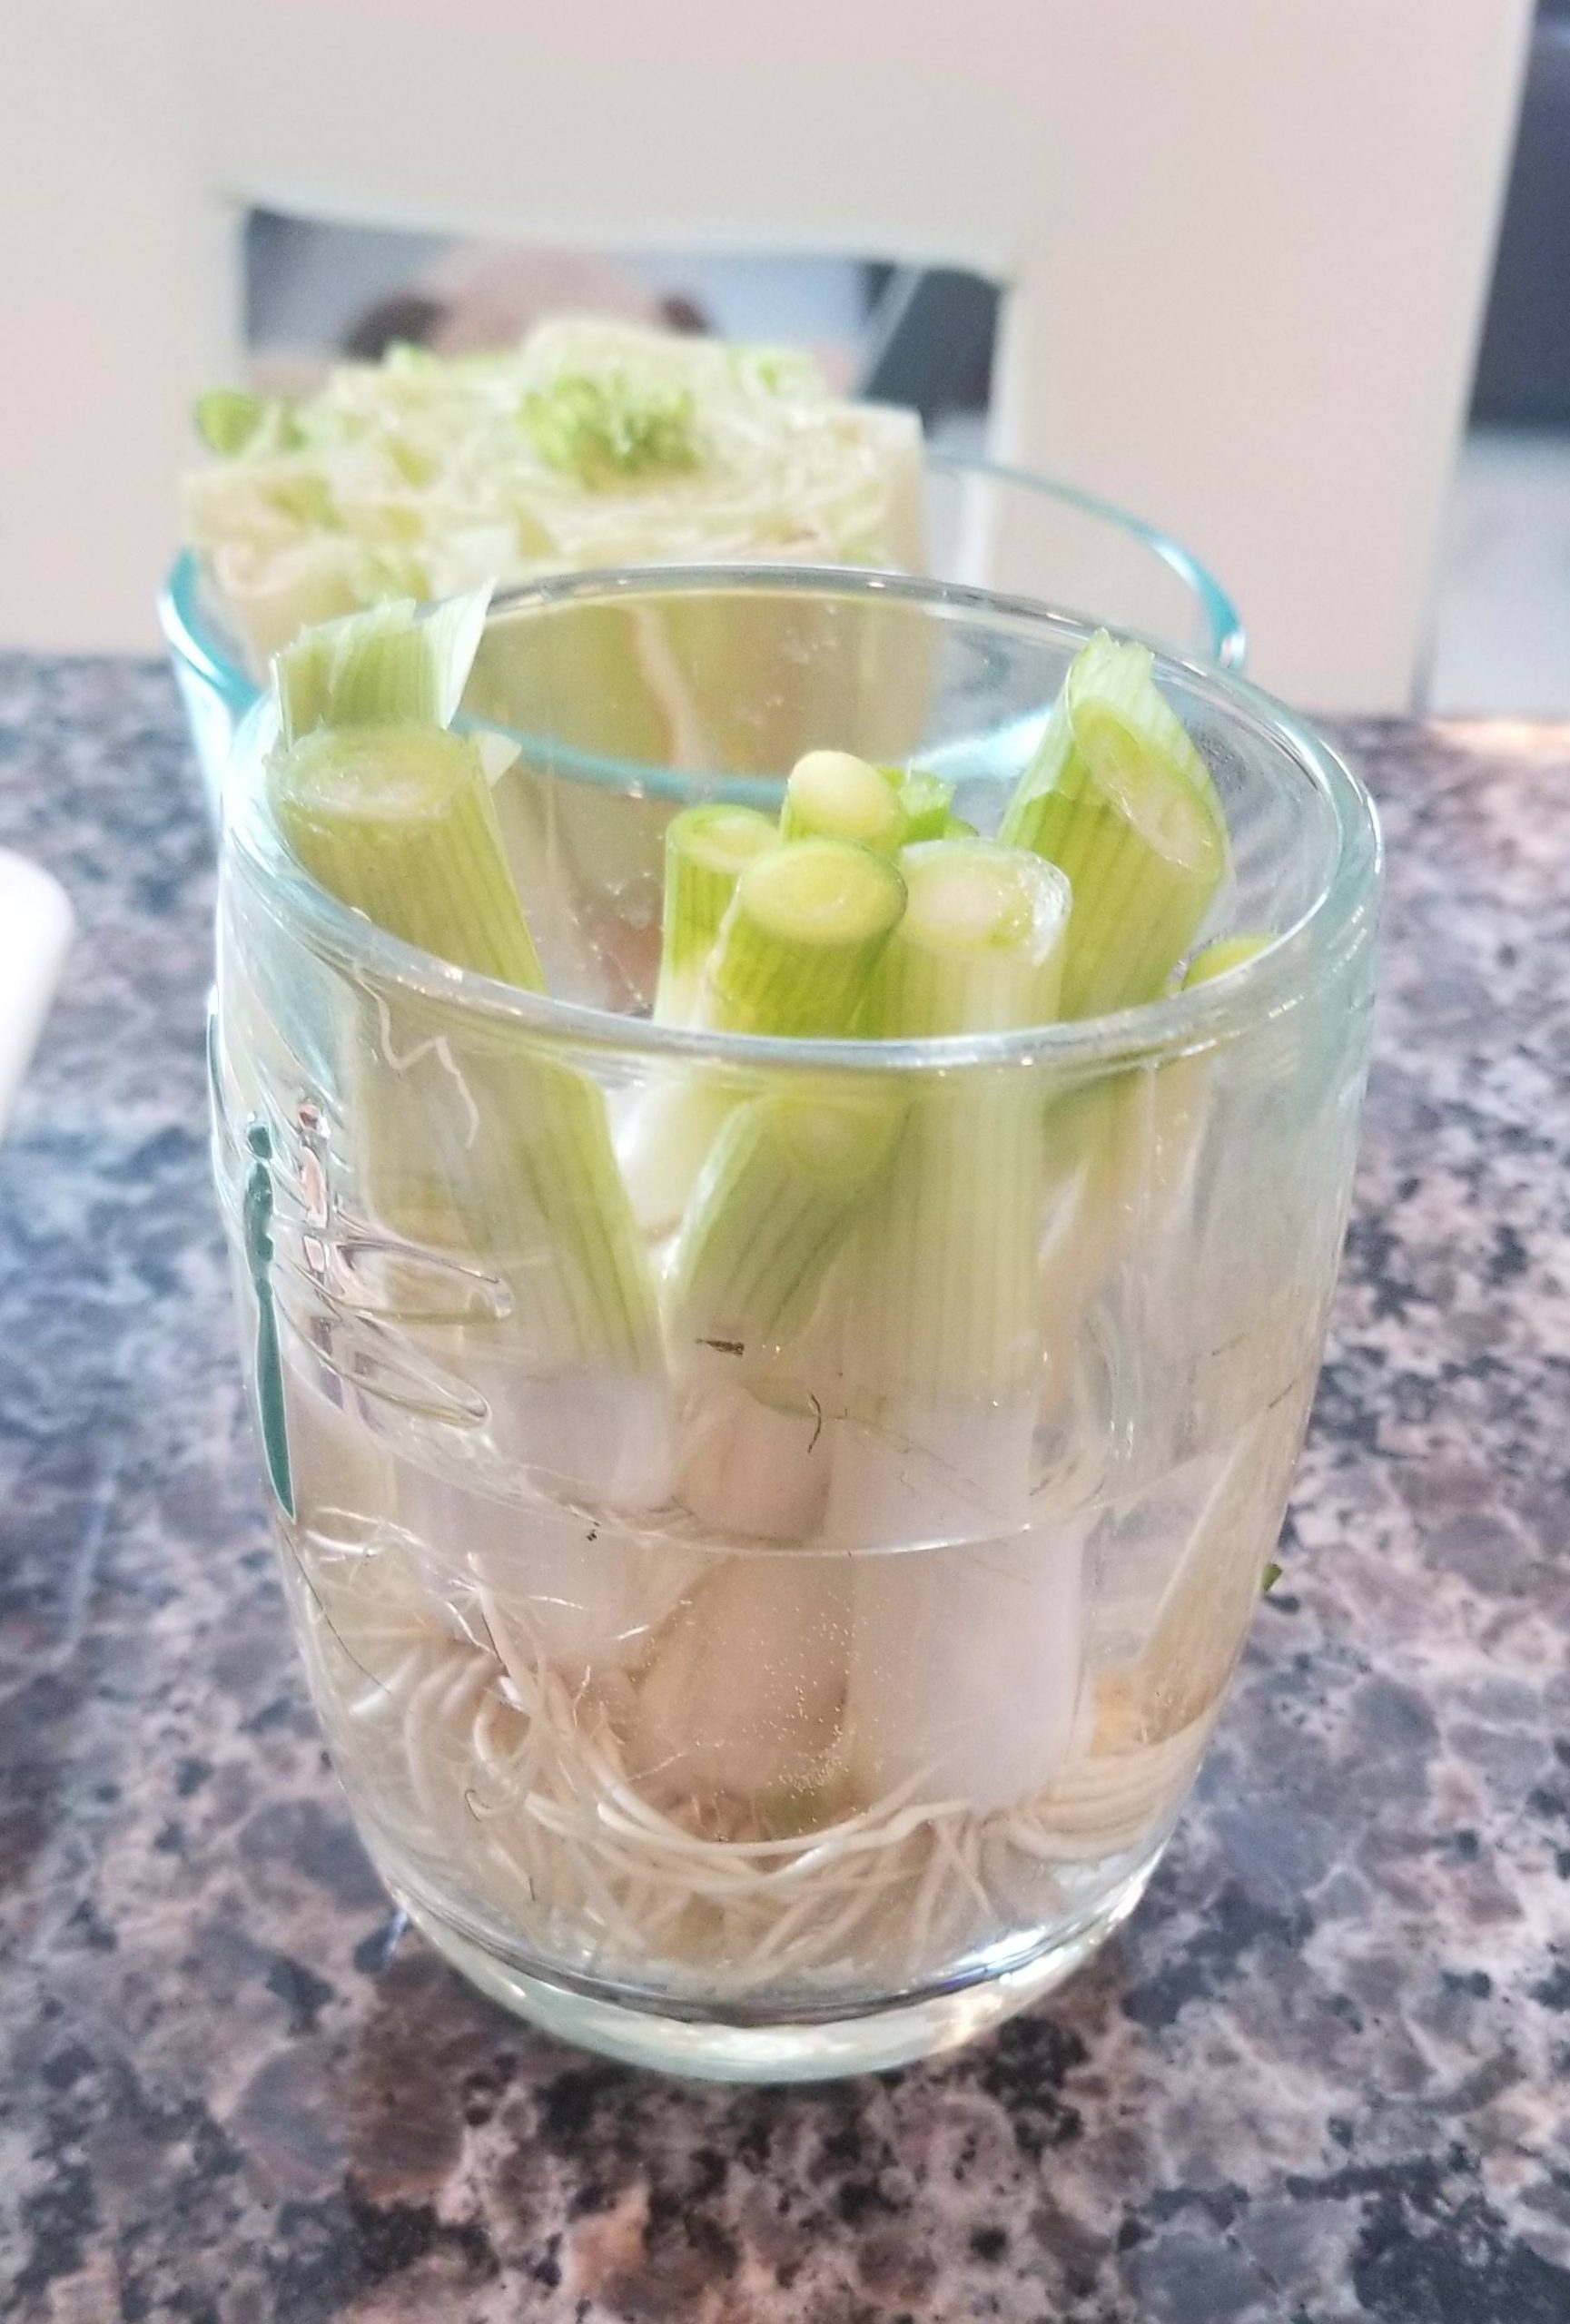
5 Veggies You Can Grow From Kitchen Scraps - Scallions

#5Garlic

OK, so this isn’t exactly using kitchen scraps, since you’re taking the entire unused clove and sticking it into the ground.

Maybe it’s more like a garden tithing. 🙂

I took a few small cloves of garlic and planted them in the dirt next to the tomato slice. They were in the dirt about 3 days and I’m starting to see some green on the tops of a few of the cloves.

I’m guessing they could have also had the base of the garlic sitting in a little puddle of water to get it to start growing but I tried sticking it directly in the ground and that seemed to work like a charm.
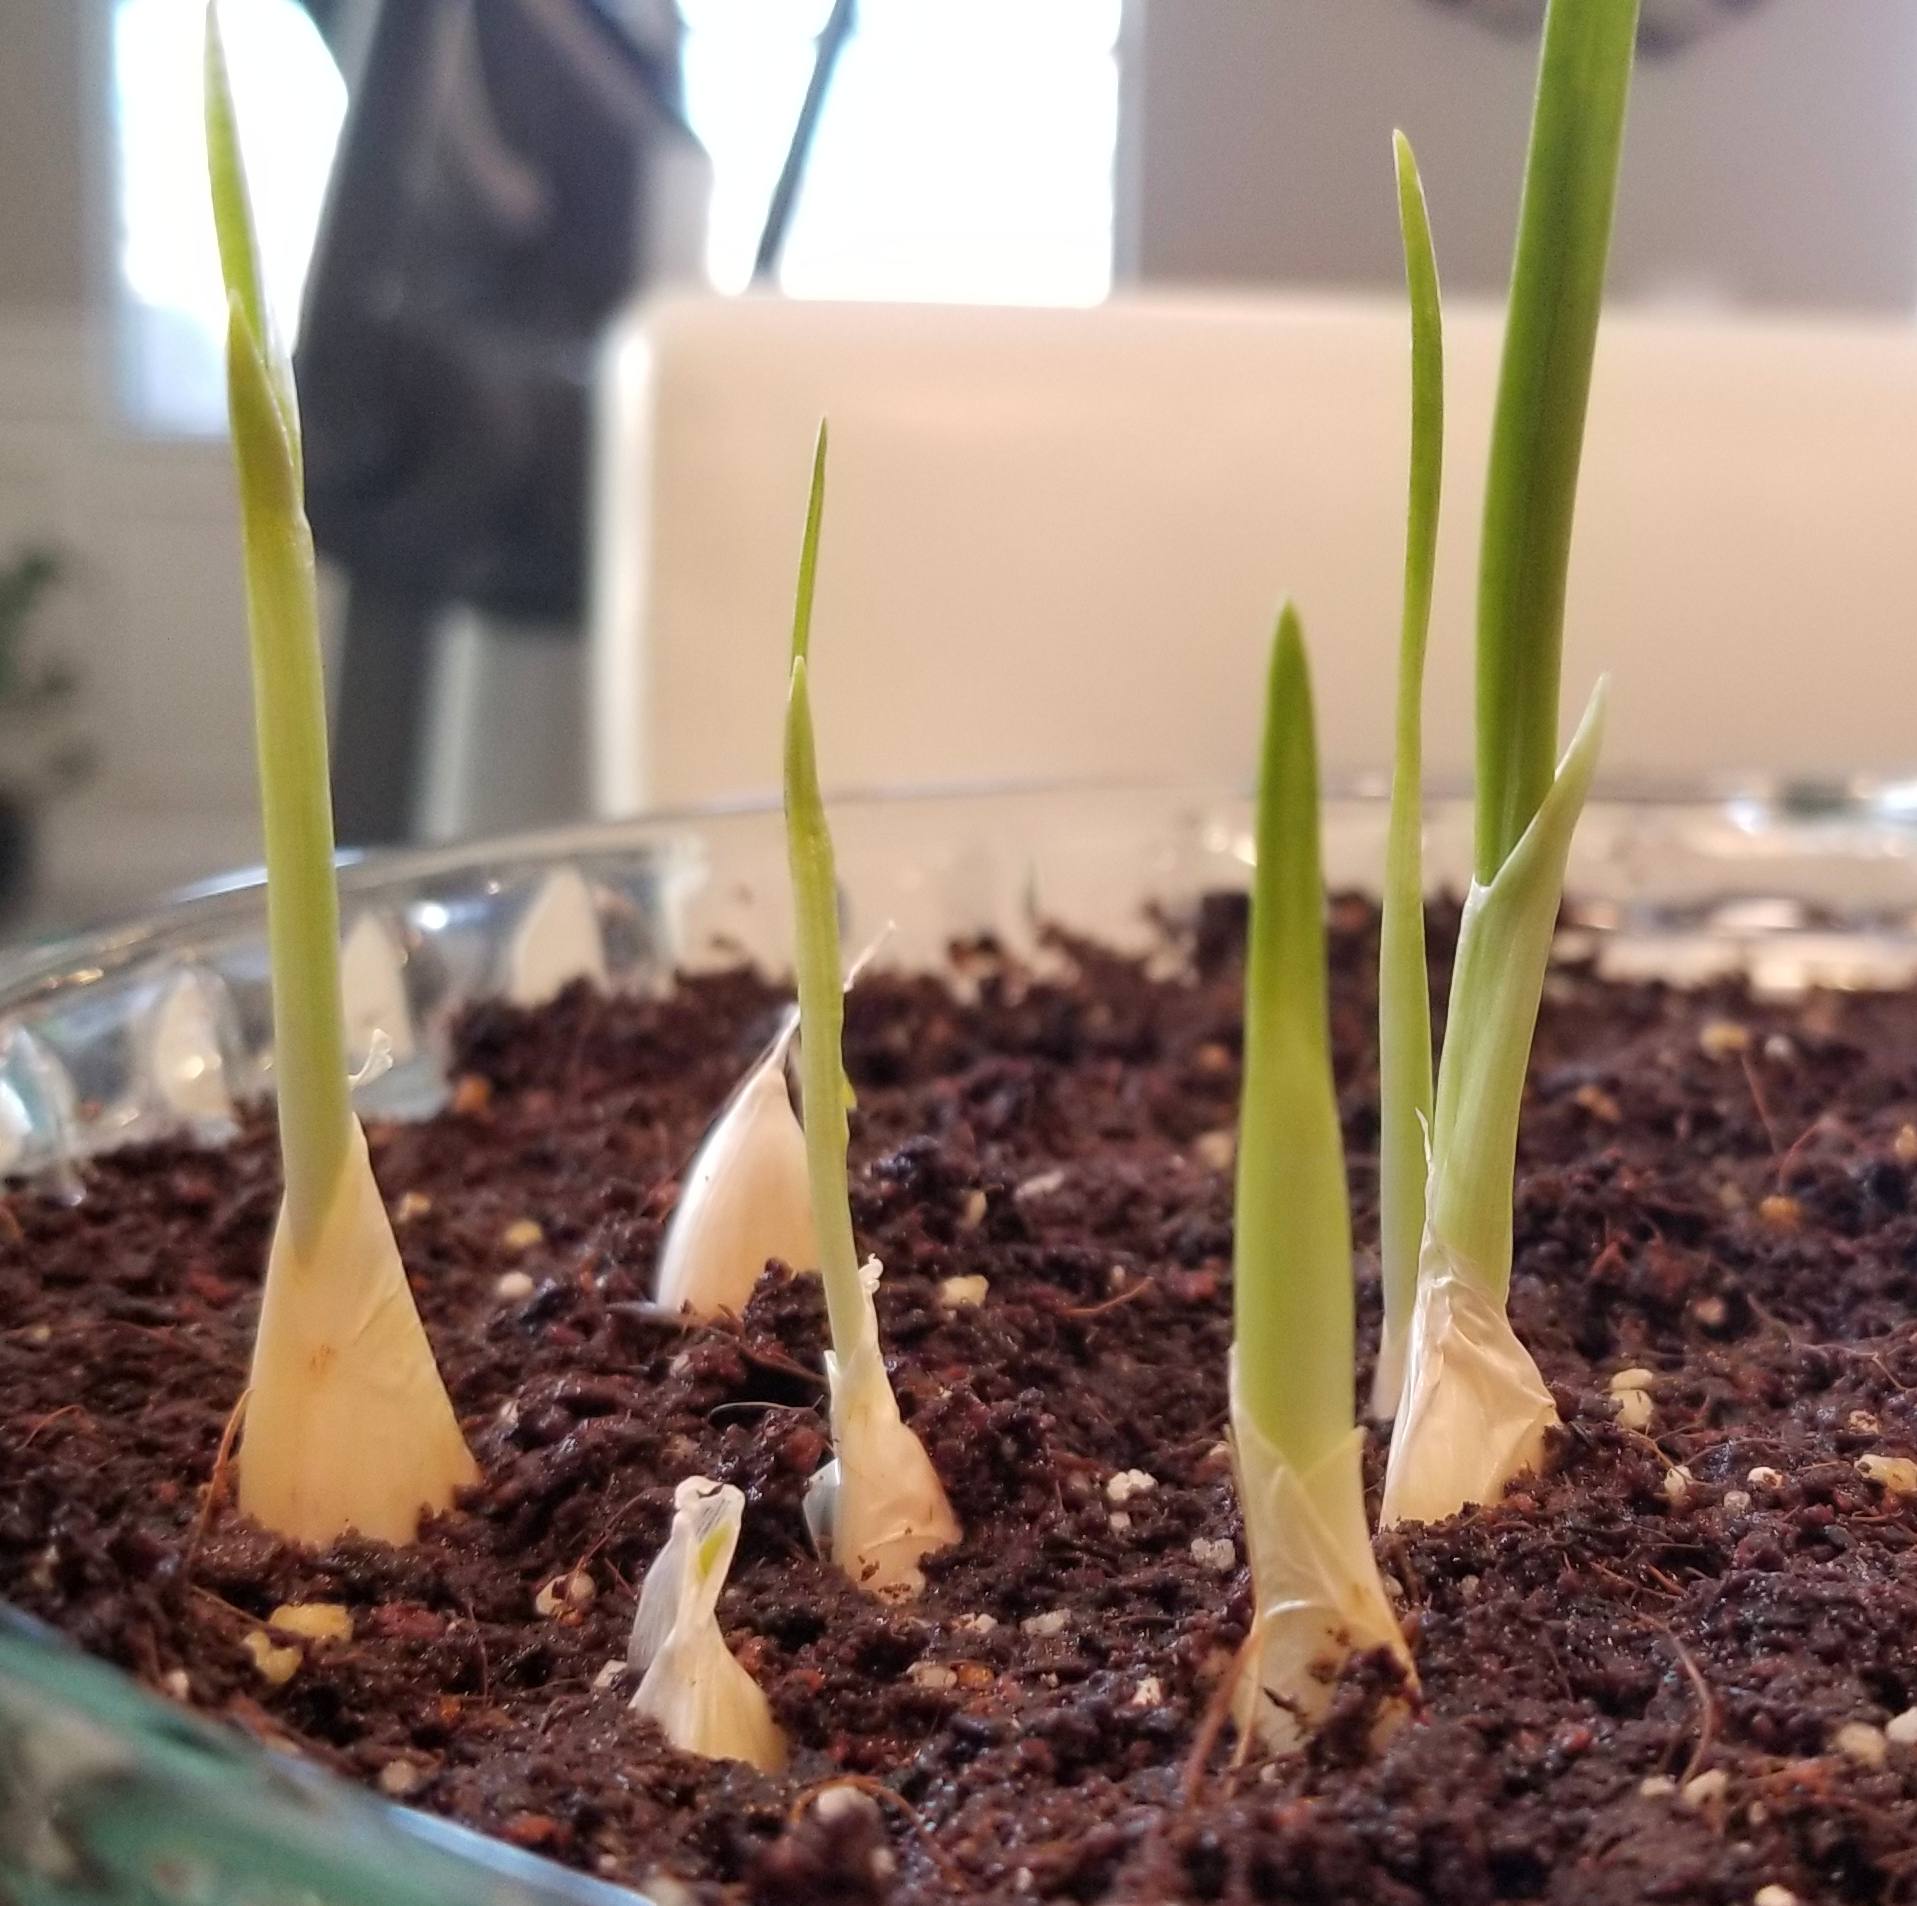
5 Veggies You Can Grow From Kitchen Scraps - Scallions

Caring For Your Kitchen Scrap Garden

It’s pretty straight-forward to care for it. Place them in an area that is bright but doesn’t have direct sun. For the scraps that are in water make sure to swap out the water every day or other day and for the scraps in dirt make sure their dirt stays moistwithout over watering.

Before you know it you’ll start seeing new growth and your kitchen scrap garden will by off to the races! 🙂

Once the kitchen plants turn more into plants (either they grow roots are start growing new leaves) I’ll transplant them into grow bags.

Tip: When cutting the vegetable it seems to help to leave a bit ofmeatalong with it. The lettuce and onions that I cut short didn’t seem to grow as fast or well compared to the ones where I left some moremeat”.

[et_bloom_inline optin_id=”optin_7″]


That’s My Kitchen Scrap Garden List

There are probably dozens of other veggies you can try this with, these are just the ones I’ve started with. I’m sure I’ll be adding other scraps to the list as I come across new ones.

Once the veggies grow a bit I’ll be transferring them to grow bags.

Wat dacht je? I know I personally will never look at kitchen scraps the same way again. 🙂

Have you ever tried recycling your kitchen scraps? If so what veggies did you try? Did it work for you?

Lemme know in the comments below.

Geniet van dit bericht? Pin het en deel het met anderen!

5 Veggies You Can Grow From Kitchen Scraps

3 Tijdbesparende tips voor DIY Plank Multiplex Vloeren

3 Tijdbesparende tips voor DIY Plank Multiplex Vloeren

3 Time Saving Tips for DIY Plank Plywood Floors
Nu we twee projecten voor doe-het-zelf-plankenmultiplexvloeren hebben (de eetkamer en de woonkamer) onder onze gordels, we hebben een heleboel dingen geleerd – dingen die je moet doen en dingen die je niet moet doen. We gaan coveren 3 tijdbesparende tips voor doe-het-zelf multiplexvloeren met brede planken.

Als u van plan bent uw eigen brede plankenvloer van multiplex te maken, Bekijk dan zeker eens deze lijst – het bespaart u veel tijd… en gezond verstand :).

Voor elk van deze projecten schreven we gedetailleerde artikelen (zie hieronder voor links) maar we wilden ook een kort artikel schrijven waarin we de grootste tijdbesparende tips belichten die we hebben.

Hier zijn de 3 dingen die u moet weten voor het maken van uw eigen multiplexvloeren met brede planken. Als u deze tips opvolgt, verloopt uw ​​project soepel en krijgt u mooiere multiplexvloeren.

Openbaring: Sommige van de onderstaande links zijn gelieerde links. Als u besluit een van deze producten te kopen, We verdienen een kleine commissie zonder extra kosten voor u. We raden deze producten alleen aan omdat we er ervaring mee hebben en ze gebruiken voor onze eigen projecten. Als Amazon Associates, We verdienen aan kwalificerende aankopen.

Tips voor doe-het-zelf planken multiplexvloeren

Eerst een bonustip – Snijd de planken zelf

Ja, het is een beetje anders om eerst de bonustip te krijgen, maar een paar van de tips komen hier op terug. Het is dus logisch om dit eerst te delen.

En ik weet dat het zelf snijden van de planken het tegenovergestelde klinkt van tijdwinst, maar laat het me uitleggen.

Er zijn een paar berichten die aanbevelen om de persoon bij Lowes of Thuis Depot zaagt het multiplex voor u in planken.

Ik weet dat het klinkt alsof het je veel tijd zou besparen, omdat je het stekje erop loslaat, maar ik zou het niet aanraden om dat te doen.

Wij hebben gehad thuis Improvement Stores hebben in het verleden het triplex voor ons gesneden bij andere projecten.

Hoewel het je wel tijd bespaart – wij vinden het niet de moeite waard. Hun bezuinigingen zijn niet erg nauwkeurig, als echt onnauwkeurig.

Dat kan perfect gevonden worden voor bepaalde projecten, maar bij dit project zijn consistente bezuinigingen belangrijk.

Als u planken heeft die allemaal ongeveer dezelfde breedte hebben, verloopt uw ​​project soepeler, eenvoudiger en het eindresultaat ziet er veel mooier uit.

#1 Maak een mal

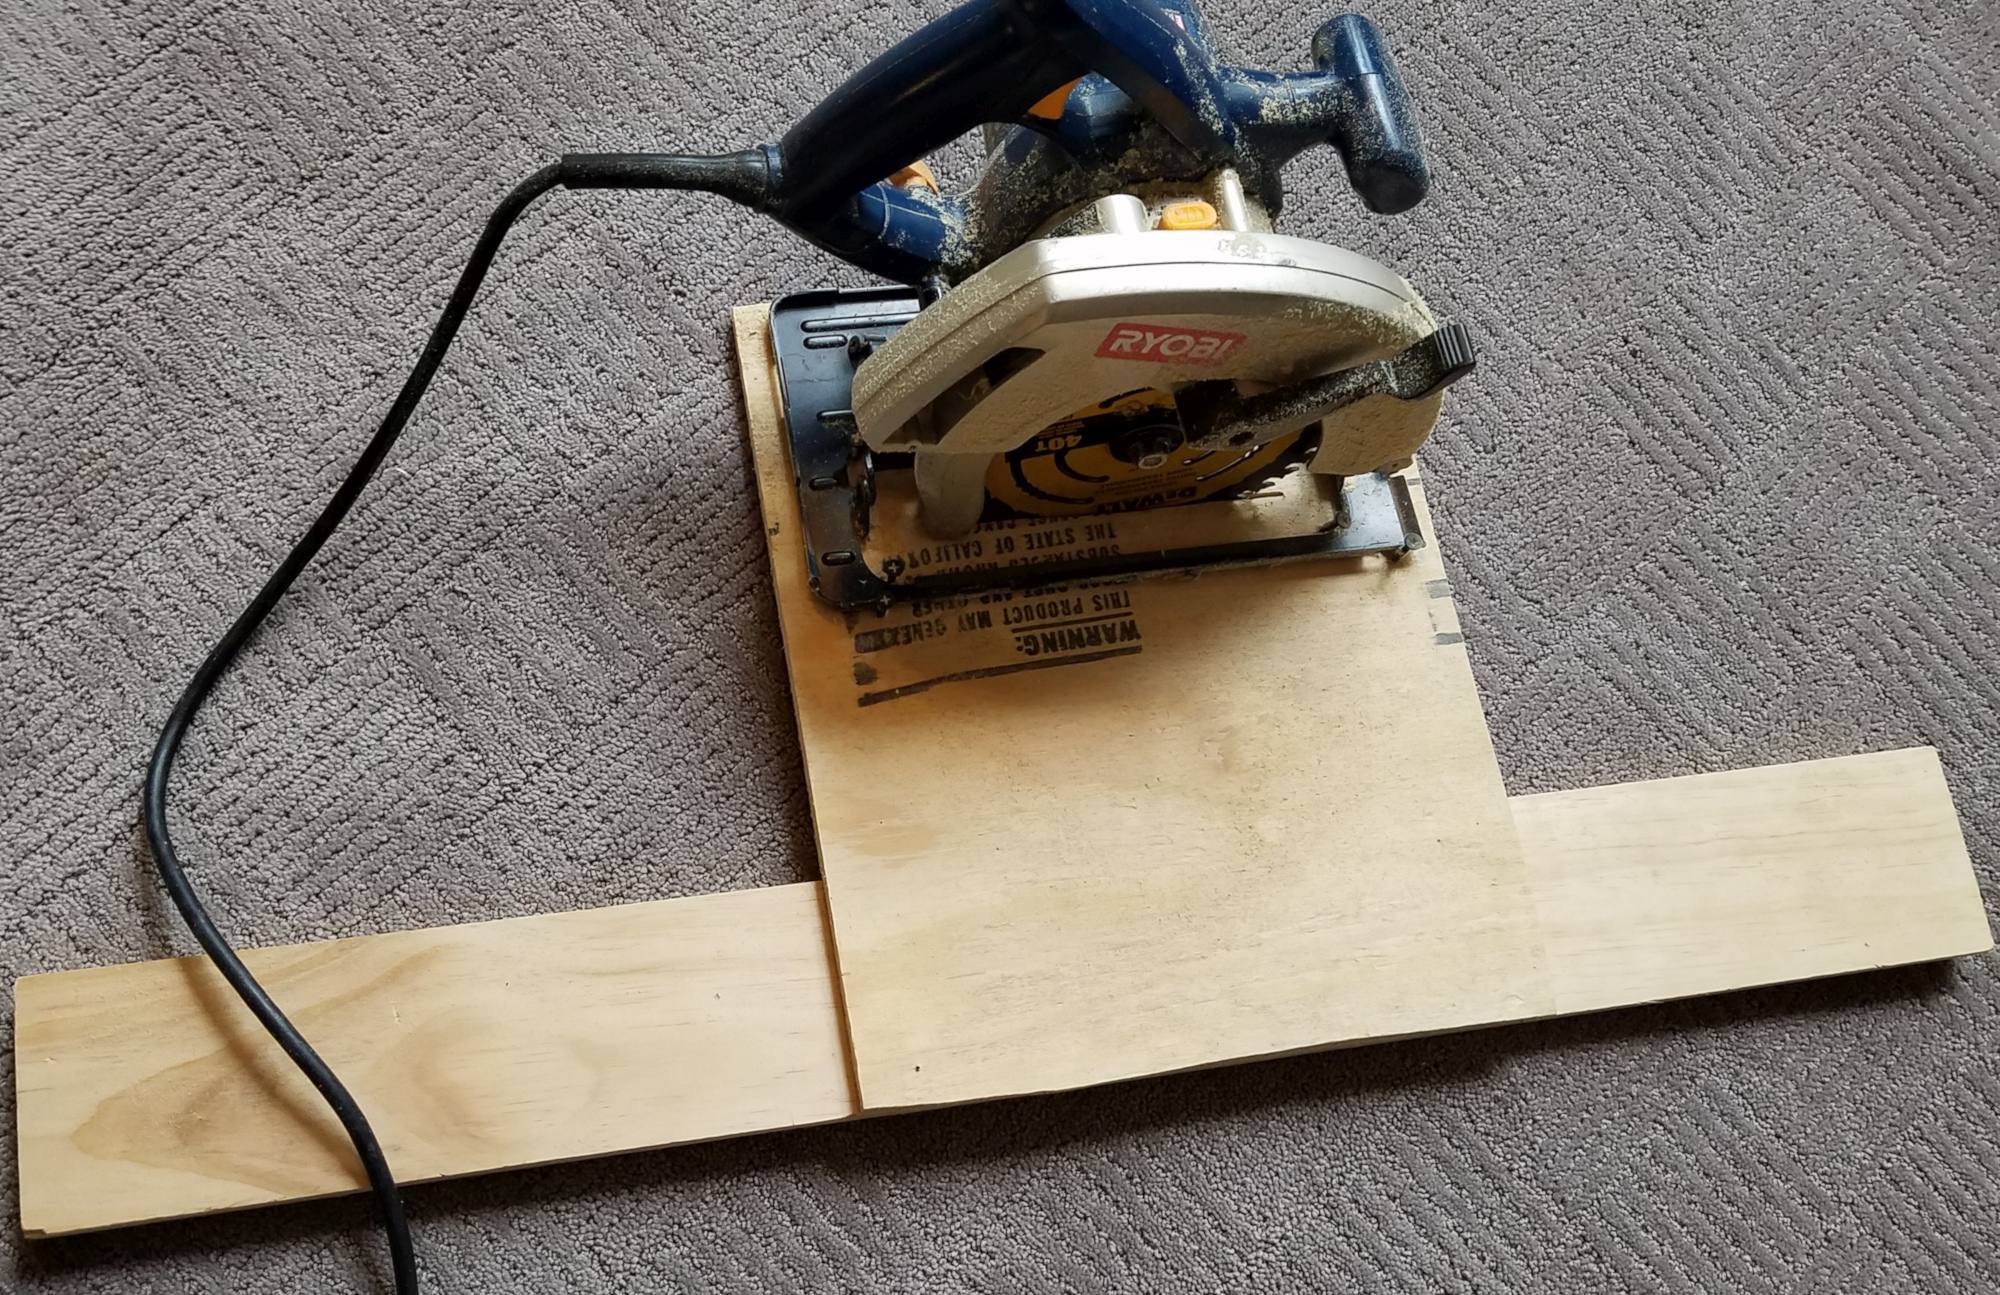
OMG – Als ik geen mal had gebruikt, weet ik niet of ik dit project ooit zou hebben voltooid. De mal zorgt voor consistente sneden en zorgt er ook voor dat je gemakkelijk door de stapel multiplex kunt scheuren.

De volgende beste hulpmiddel te gebruiken zou de tafelzaag zijn geweest, maar het is een super verre seconde na het gebruik van een mal.

De mal was niet moeilijk om te maken en het kostte niet veel tijd.

Bekijk de maldetails in de artikel voor eetkamervloeren.

Daar leest u hoe u er één maakt en hoe u deze op de cirkelzaag bevestigt.

DIY Wide Plank Plywood Flooring - Secure The Jig To The Circular Saw Using Screws

#2 Gebruik geen multiplexblad

Dit verdient nog een OMG. Ik probeerde aanvankelijk een multiplexmes te gebruiken om het multiplex in planken te zagen (want je weet het, het is multiplex) maar dat was een grote fout!

Negeer de multiplexbladen – in plaats van, gebruik de kruisvormige messen.

Zoals ik al zei in de artikel voor eetkamervloeren, het multiplexblad kwam niet eens door twee platen multiplex.

Toen ik het gekruiste mes gebruikte, A enkel mes deed de rest van het triplex voor de eetkamer en ook de woonkamer!!

Als je de score bijhoudt, het multiplexblad scheurde nauwelijks 2 platen multiplex in planken en het dwarsgesneden blad deed 19 platen – en het kan nog steeds meer.

Dit is zonder twijfel het beste mes voor het zagen van multiplexplanken. Het sneed als boter door het triplex, en versplinterde het hout ook helemaal niet.

(Klik op de afbeelding om hetzelfde mes te bestellen dat we op Amazon gebruikten)


The best blade to cut your plywood planks is a cross cut balde

#3 Sla het schuren tussen polyurethaanlagen over

Toen we de vloer van de eetkamer deden, We schuurden de hobbels licht uit de laag polyurethaan met 120 korrelige schuurpapier.

Dit is wat ik altijd dacht dat je moest doen tussen de lagen door en het is ook wat ik las in andere blogposts over multiplexvloeren.

Met de vloeren van de woonkamer, we dachten dat de hobbels een beetje zouden egaliseren nadat meerdere lagen poly waren aangebracht.

diy plywood floors

Daarnaast, De hobbels zouden een beetje meer textuur toevoegen waardoor de vloeren minder glad zijn.

De enige zorg die we hadden was hoe het zou voelen om op blote voeten over de vloer te lopen met meer textuur. Toen we onze handen over de planken lieten gaan, konden we duidelijk de extra textuur voelen, dus we waren een beetje zenuwachtig.

Goed, zo blijkt, de extra textuur was nauwelijks merkbaar als je op blote voeten over de vloer liep. Pff, dat was een opluchting!

Daar heb je het

Dat zijn onze tijdbesparende tips voor doe-het-zelf multiplexvloeren met brede planken. Deze paar eenvoudige tips zullen u UREN en UREN tijd besparen. Zonder hen, ons project zou VEEL langer hebben geduurd en zou moeilijker zijn geweest om te doen.

Alleen al de eerste twee tips voorkomen dat u uw haar uittrekt!

We hopen dat ze u kunnen helpen met uw eigen multiplexvloer met brede planken.

Laat ons weten wat je ervan vindt!

[et_bloom_inline optin_id=”optin_7″]

Geniet van dit bericht? Pin het en deel het met anderen!
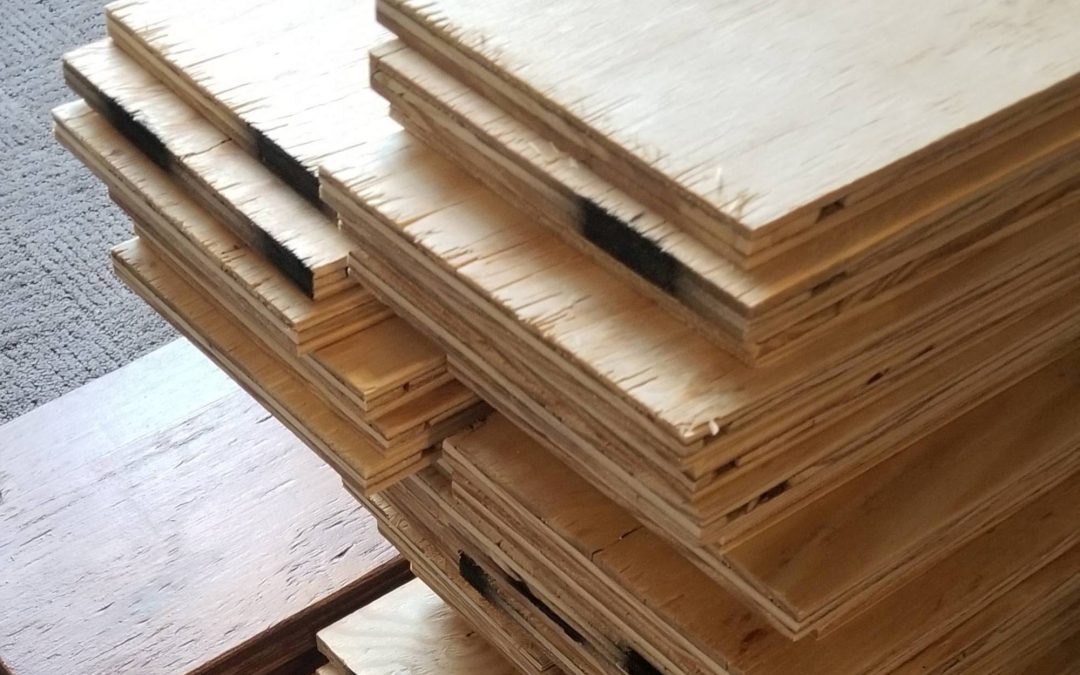
3 Time Saving Tips for DIY Plank Plywood Floors

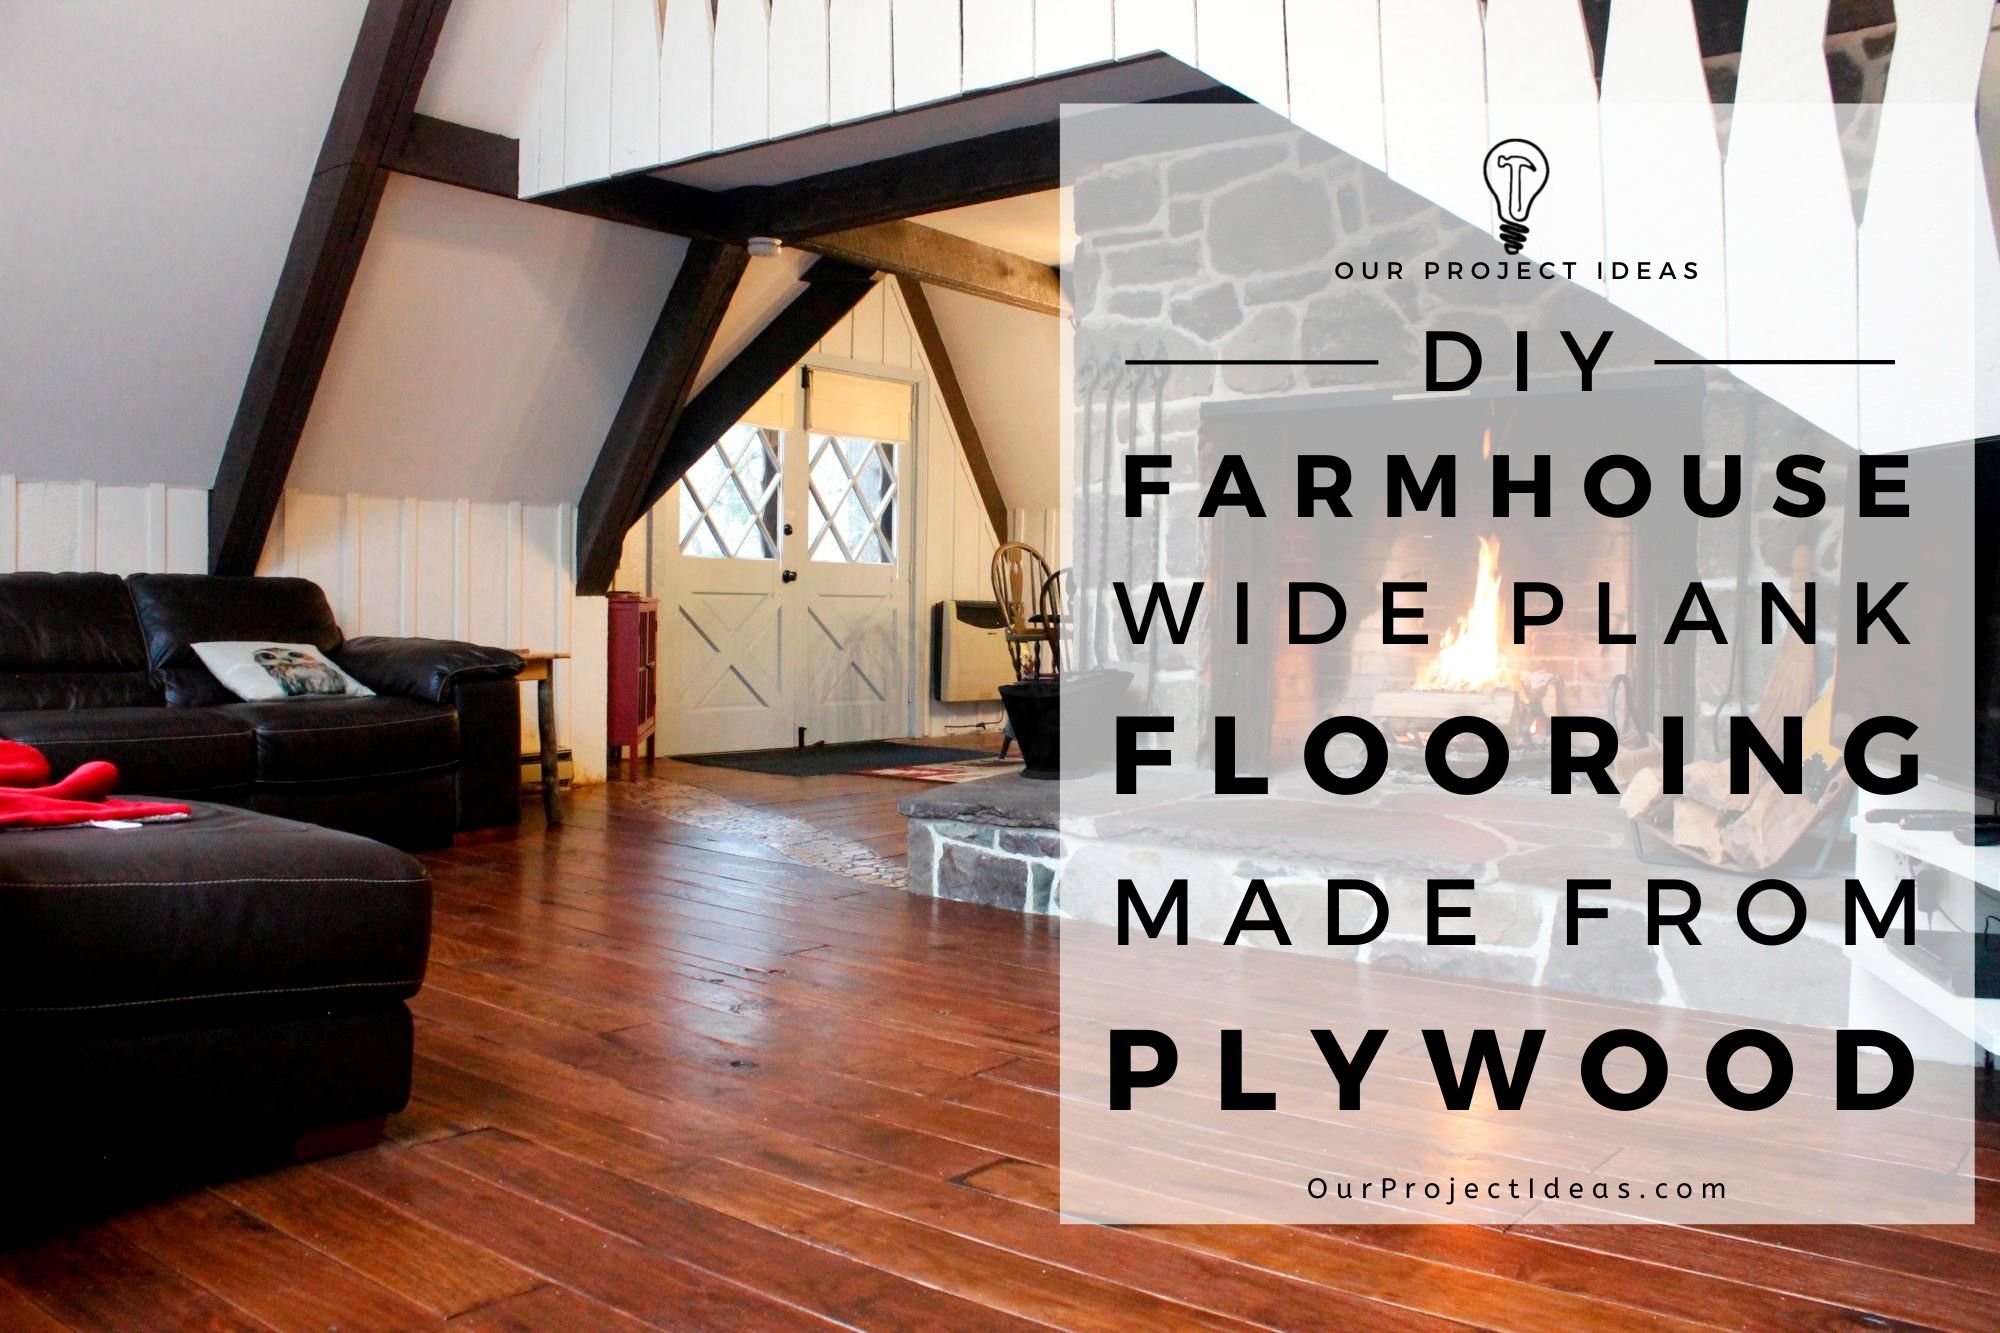
DIY boerderij brede plankvloeren gemaakt van multiplex

DIY boerderij brede plankvloeren gemaakt van multiplex

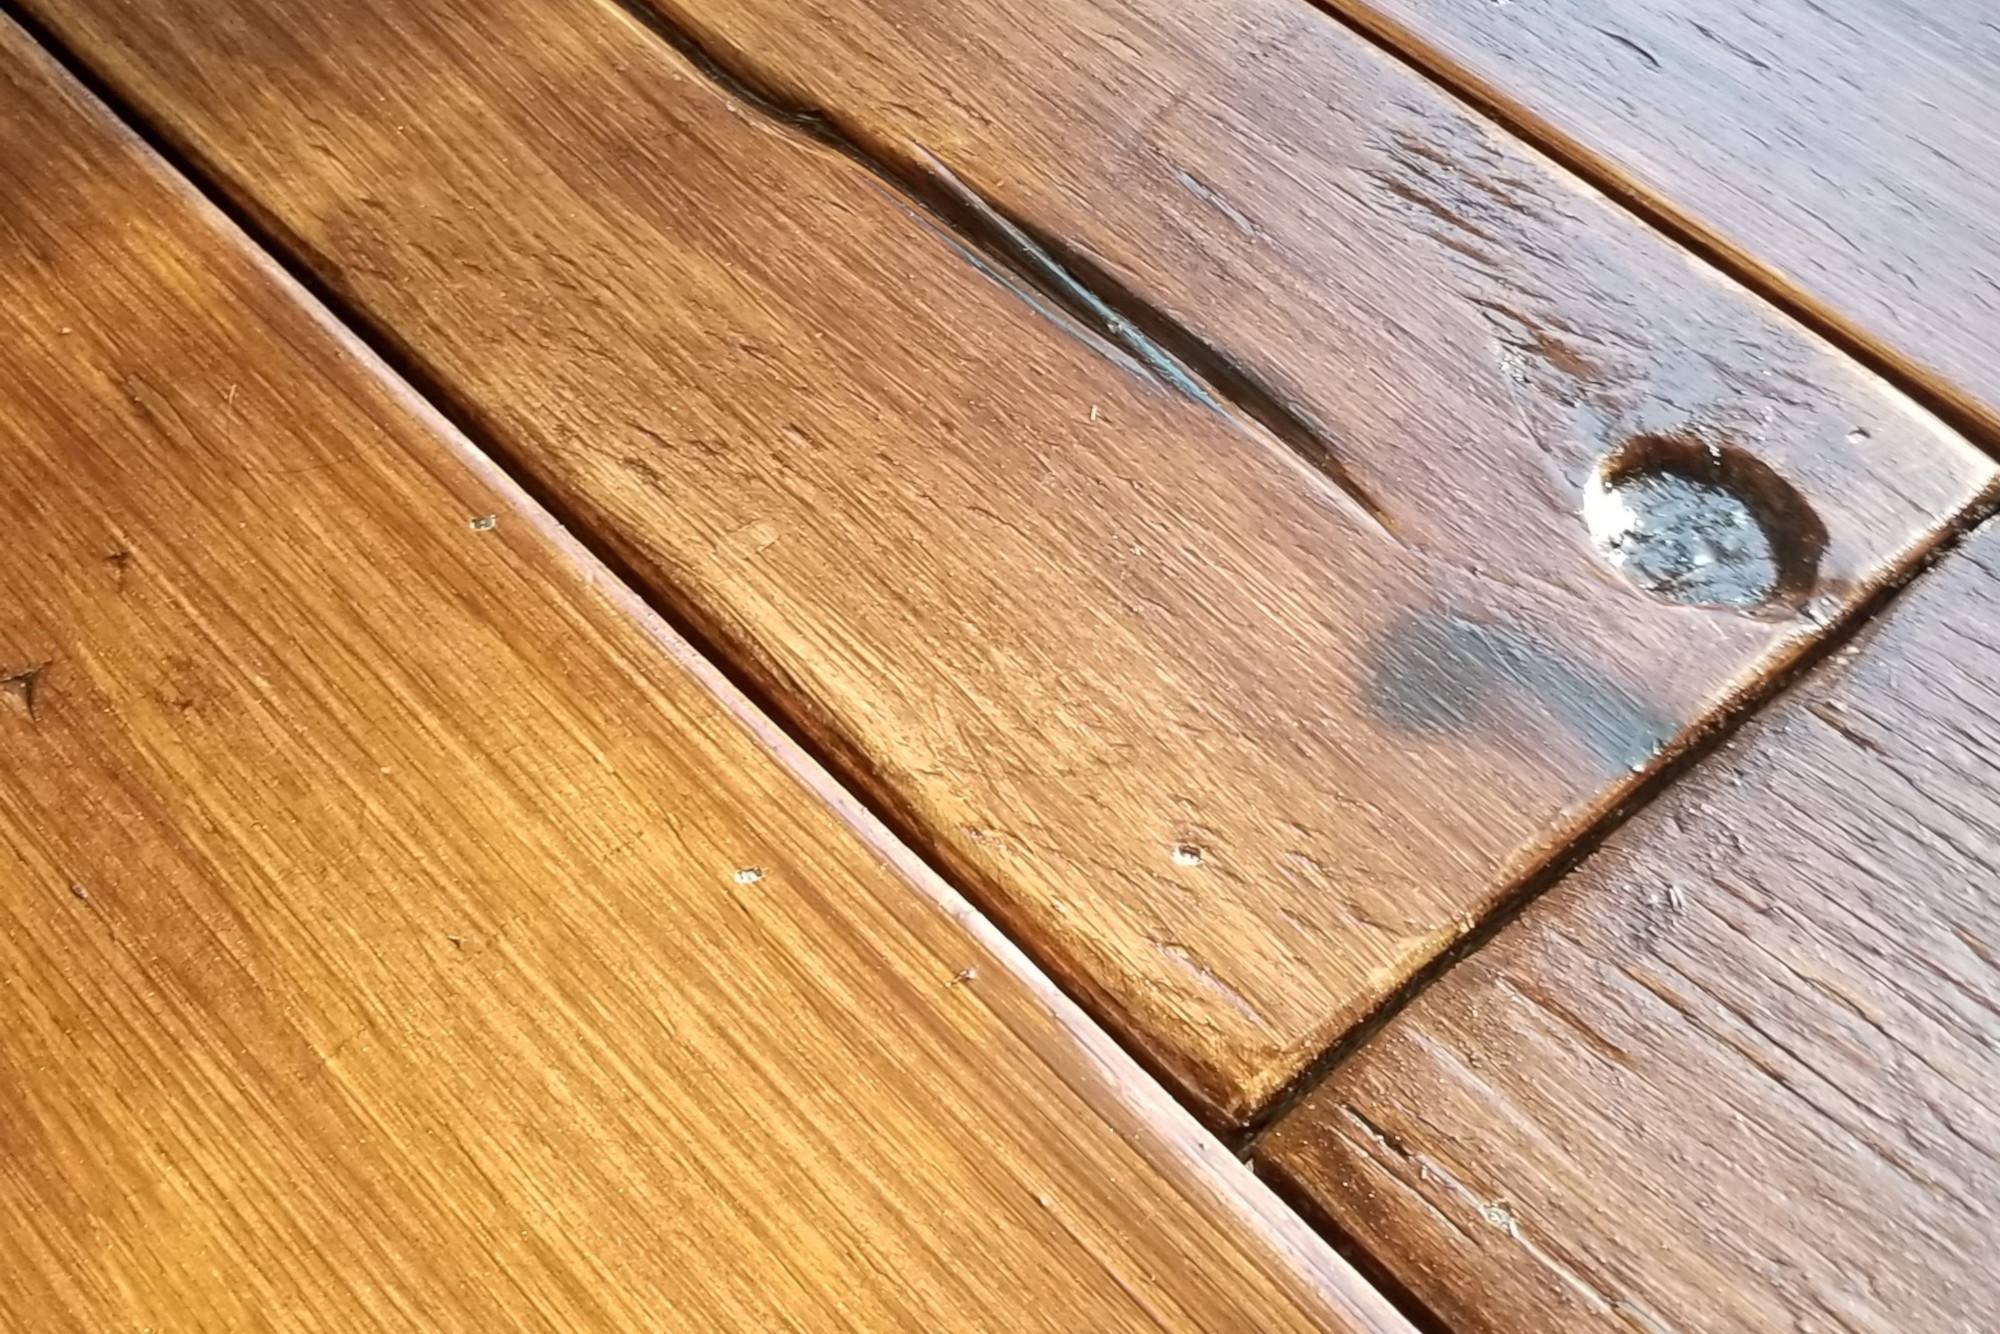
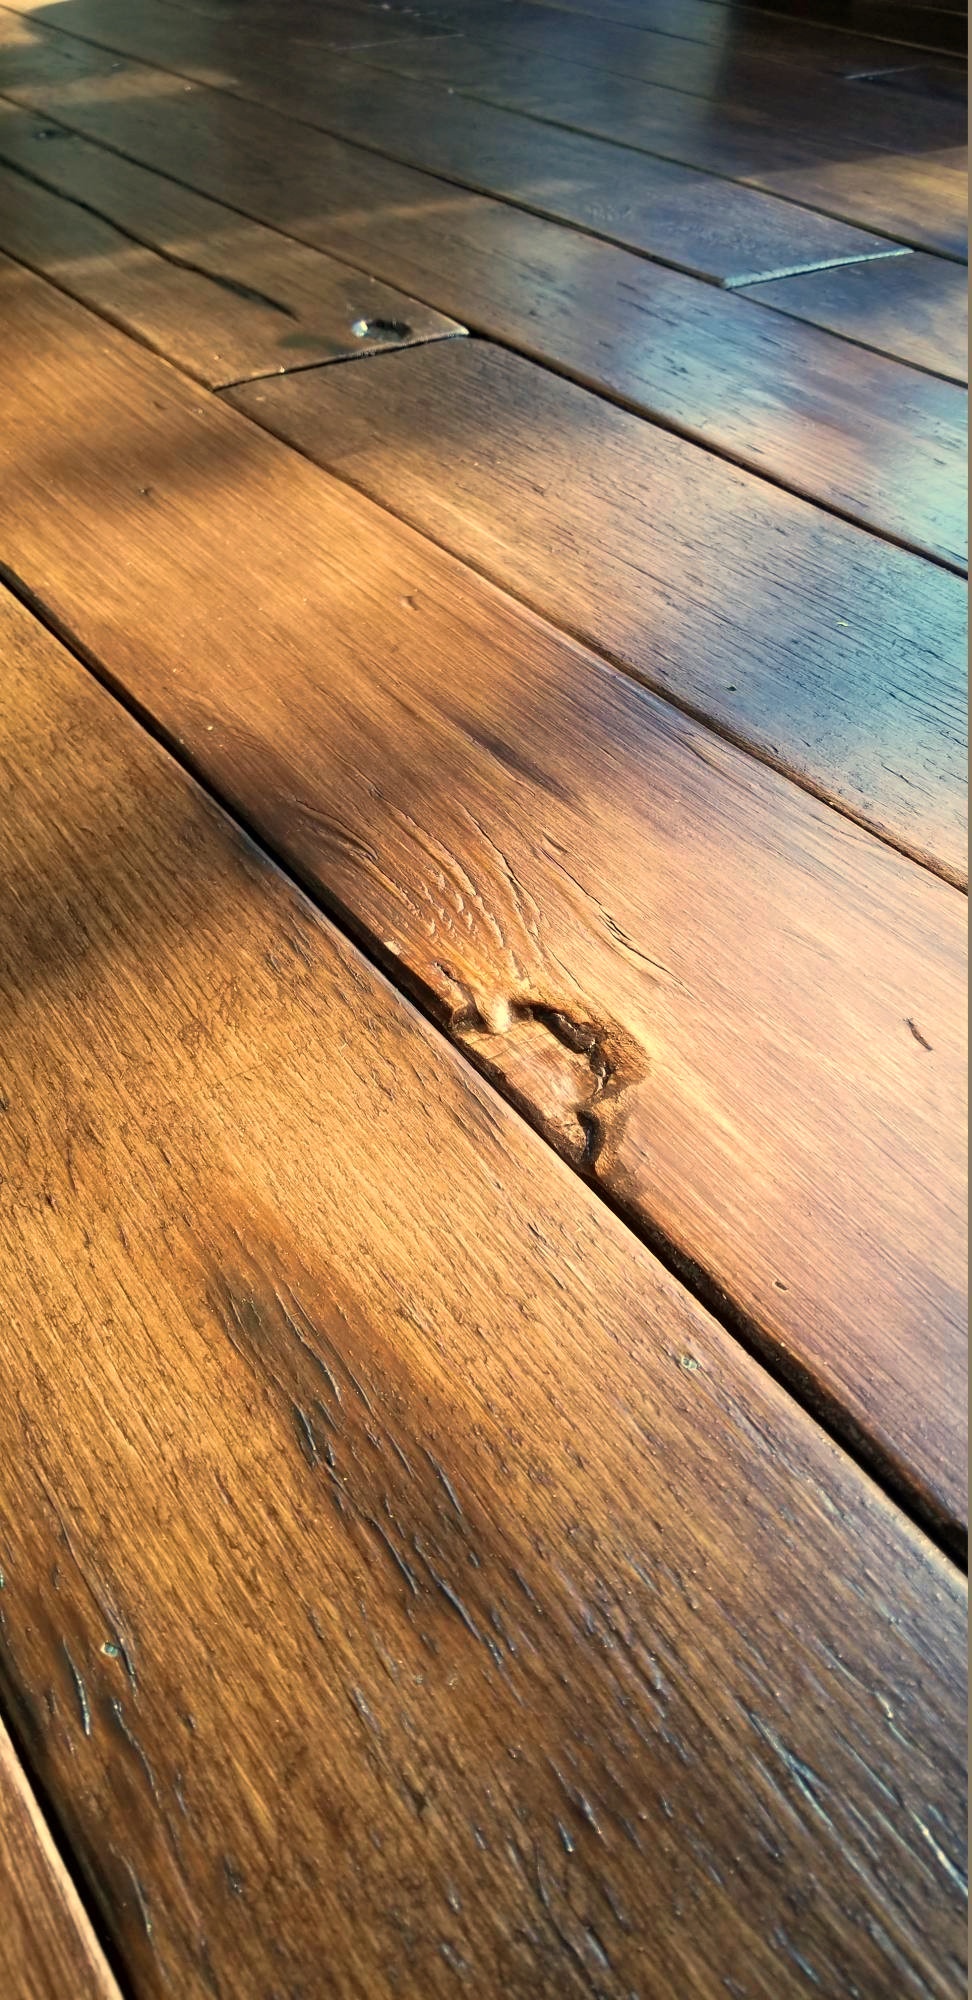
DIY Rustic Farmhouse Wide Plank Plywood Flooring - a closeup of the distressing and Knots

De eerste boerderijbrede plankvloeren gemaakt van multiplexproject dat we deden was eerder dit jaar in de eetkamer.

Goed, We vonden het zo leuk dat we dezelfde brede plankvloeren in de woonkamer deden.

Grotendeels, Beide vloeren werden op dezelfde manier gedaan, Op een paar uitzonderingen na. In dit artikel, We zullen de verschillen tussen de twee verdiepingen bespreken.

Bekijk de eetkamer multiplex vloerartikel Om meer van de stapsgewijze details te zien.

Wat de tijd betreft, De brede plankvloeren van de eetkamer duurden ongeveer een week om te eindigen en de woonkamer duurde veel langer.

De woonkamer is een beetje groter, Maar wat echt tijd aan het project heeft toegevoegd, waren het schurken en de eindig korrelvloeren inleg.

Van start tot finish, Het duurde iets meer dan twee weken om de vloer van de woonkamer af te maken.

Openbaring: Sommige van de onderstaande links zijn gelieerde links. Als u besluit een van deze producten te kopen, We verdienen een kleine commissie zonder extra kosten voor u. We raden deze producten alleen aan omdat we er ervaring mee hebben en ze gebruiken voor onze eigen projecten. Als Amazon Associates, We verdienen aan kwalificerende aankopen.

Wat we anders deden met deze boerderij brede plankvloeren

De methoden die we hebben gebruikt voor de vloeren in de eetkamer en de woonkamer was vrijwel hetzelfde.

In de woonkamer, We trokken het oude tapijt op, verwijderde nietjes, Schilderde de ondervloer een donkere kleur en legde de vloer op dezelfde manier als het in de eetkamer werd gedaan.

De breedte, lengte en dikte van de multiplexplanken was hetzelfde, En we snijden, met schuren, verdrietig, gekleurd en 3 lagen polyurethaan toegevoegd aan de vloer in bijna op dezelfde manier.

Er waren enkele kleine veranderingen die we hebben aangebracht die ons een beetje tijd hebben bespaard en misschien wat meer karakter hebben toegevoegd aan onze DIY -multiplexplankvloer.

Hier zijn de dingen die we een beetje anders hebben gedaan, dit gaan rond.

We hebben geen geschoten tussen polyurethaan jassen

Toen we de vloer van de eetkamer deden, We schuurden de hobbels licht uit de laag polyurethaan met 120 korrelige schuurpapier.

Met de vloeren van de woonkamer, We dachten dat de hobbels op de multiplexplanken zelfs iets zouden uitkomen nadat meerdere lagen poly waren toegepast.

Daarnaast, De hobbels zouden een beetje meer textuur toevoegen waardoor de vloeren minder glad zijn. Niet dat de vloeren van de eetkamer glad zijn – Het was gewoon een manier om het in mijn hoofd te rechtvaardigen. 😉

De enige zorg die ik had was hoe het zou voelen om op blote voeten op de vloer te lopen met meer textuur.

Blijken, Ondanks het duidelijk voelen van de extra textuur bij het uitvoeren van je hand op de plank, Het was nauwelijks merkbaar toen hij erop liep op blote voeten.

De boodschappenlijst

Tools -lijst

Hier is een lijst met de tools die we bij dit project hebben gebruikt, Het is eigenlijk dezelfde lijst met gereedschappen uit het vloerenproject van de eetkamer.

Affiliate links hieronder kunnen vergelijkbaar zijn met vergelijkbare items wanneer exacte items niet online kunnen worden gevonden.

Snaveloze afwerking Nailer

Extra batterij voor afwerking Nailer

Riemschuurmachine

Palmschuurmachine

Verstekzaag

Cirkelzaag

Cross Cut Saw Blade

Oscillerend multi-tool

Gehoorbescherming oormuffels

Tafelzaag


Benodigdhedenlijst

Dit zijn de benodigdheden die bij dit project worden gebruikt.

Affiliate links hieronder kunnen vergelijkbaar zijn met vergelijkbare items wanneer exacte items niet online kunnen worden gevonden.

Varathane Cherrywood gel vlek – We hebben ongeveer 7 liter gebruikt

Op water gebaseerde olie-gemodificeerde poluyrathaan – We hebben 2 gallons gebruikt

3″ Natuurlijke borstelborstel – 6 borstels om de vlek aan te brengen

4″ Polyester synthetische borstel – 4 borstels om de poly aan te brengen

Maskeerpapier – We hebben het maskeerpapier gebruikt om het dek te beschermen bij het aanbrengen van de vlek en poly

6 gauge 1 1/2″ Nagels afmaken

Er werd een nieuwe karakterbouwer gebruikt

Dezelfde originele cast van personagebouwers werd gebruikt met de multiplexplanken in de woonkamer. Een hamer, tang, en een propaan fakkel… En deze keer hebben we een nutsmes toegevoegd aan het arsenaal.

Voor de eetkamer, We zouden in scheuren in het hout graven met behulp van de Sanders om de scheuren te openen en de randen te verzachten.

Deze keer gebruikten we een mes voor nutsbedrijf om de scheuren in het hout te verlengen en te verbreden.

Toen verzachtten we de randen van de scheuren met de schuurmachine.

Het resultaat was zelfs beter dan we hadden gedacht.

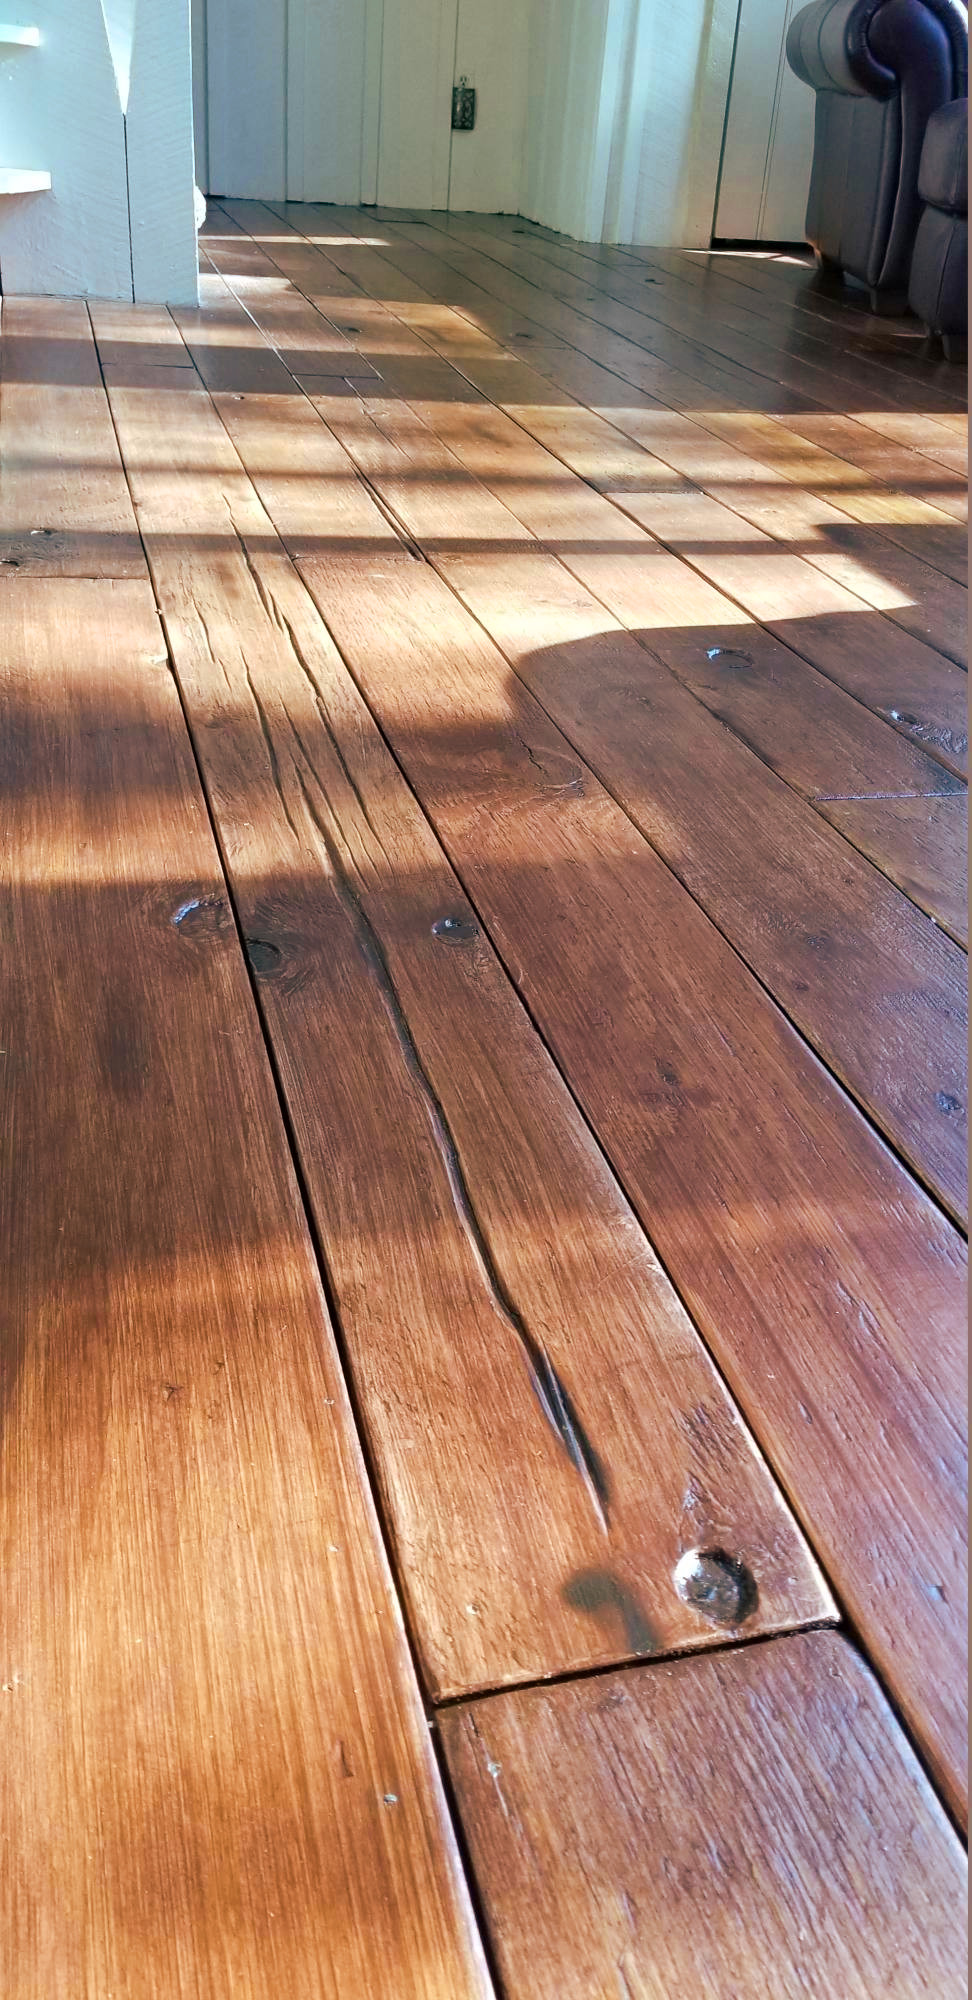
De diepe scheuren die we met het nutsmes hebben gemaakt, gaven ons de ouderen, boerderij brede plankvloeren Kijk waar we voor gingen.

Je zou niet eens raden dat het multiplex was.

DIY Farmhouse Wide Plank Flooring Made From Plywood - The Plywood Floor Finished - Close up of the Distressing Done With A Utility Knife

We hebben vaardigheden toegevoegd

De vloeren van de woonkamer waren veel ongelijker dan de vloeren in de eetkamer.

Tot het punt waar we vaardigheden op de lage plekken moesten toevoegen om dingen een beetje af te richten.

Ik ging rond de vloer met een rechte rand, en waar er ook een dip was, Ik heb er sprong toegevoegd.

Omdat ik wist dat ik een goede hoeveelheid vaardigheden nodig had, Ik heb ze uit een vel van 1/4 gemaakt″ multiplex. Ik heb het laken in 1 gescheurd″ strips met behulp van de tafelzaag.

Zodra de vloer werd geschimpt, We schilderden de vloer een donkerbruine kleur, Net zoals we deden in de eetkamer.

DIY Farmhouse Wide Plank Flooring Made From Plywood - The Plywood Floor Finished - Wood Strips Used To Fill The Low Spots
DIY Farmhouse Wide Plank Flooring Made From Plywood - The Plywood Floor Finished - Starting The Plywood Flooring Install

[et_bloom_inline optin_id=”optin_7″]

De multiplex vloer van de woonkamer is afgewerkt!

Zoals ik al zei, De vloer van de woonkamer duurde veel langer om te doen dan de vloer van de eetkamer deed. Het duurde iets meer dan twee weken om te eindigen, Had ik het niet verprutst met de woodsplakaccentvloer, We zouden over ongeveer 2 weken zijn afgelopen.

Bekijk de Wood Slice Accent Flooring Project hier

We houden van de boerderijbrede plankvloeren in zowel de eetkamer als de woonkamer. Deze stijl was de perfecte pasvorm voor dit huis, We hadden ons niet beter kunnen voorstellen.

Tussen de twee verdiepingen, Ik zou zeggen dat ik me zou houden aan de stappen die op de vloer van de woonkamer worden gebruikt.

Schuren tussen poly -jassen lijkt onnodig te zijn geweest, en het gebruik van het mes om de scheuren in het hout uit te breiden, voegde zoveel meer karakter toe aan de vloer van de woonkamer – HOU ervan!

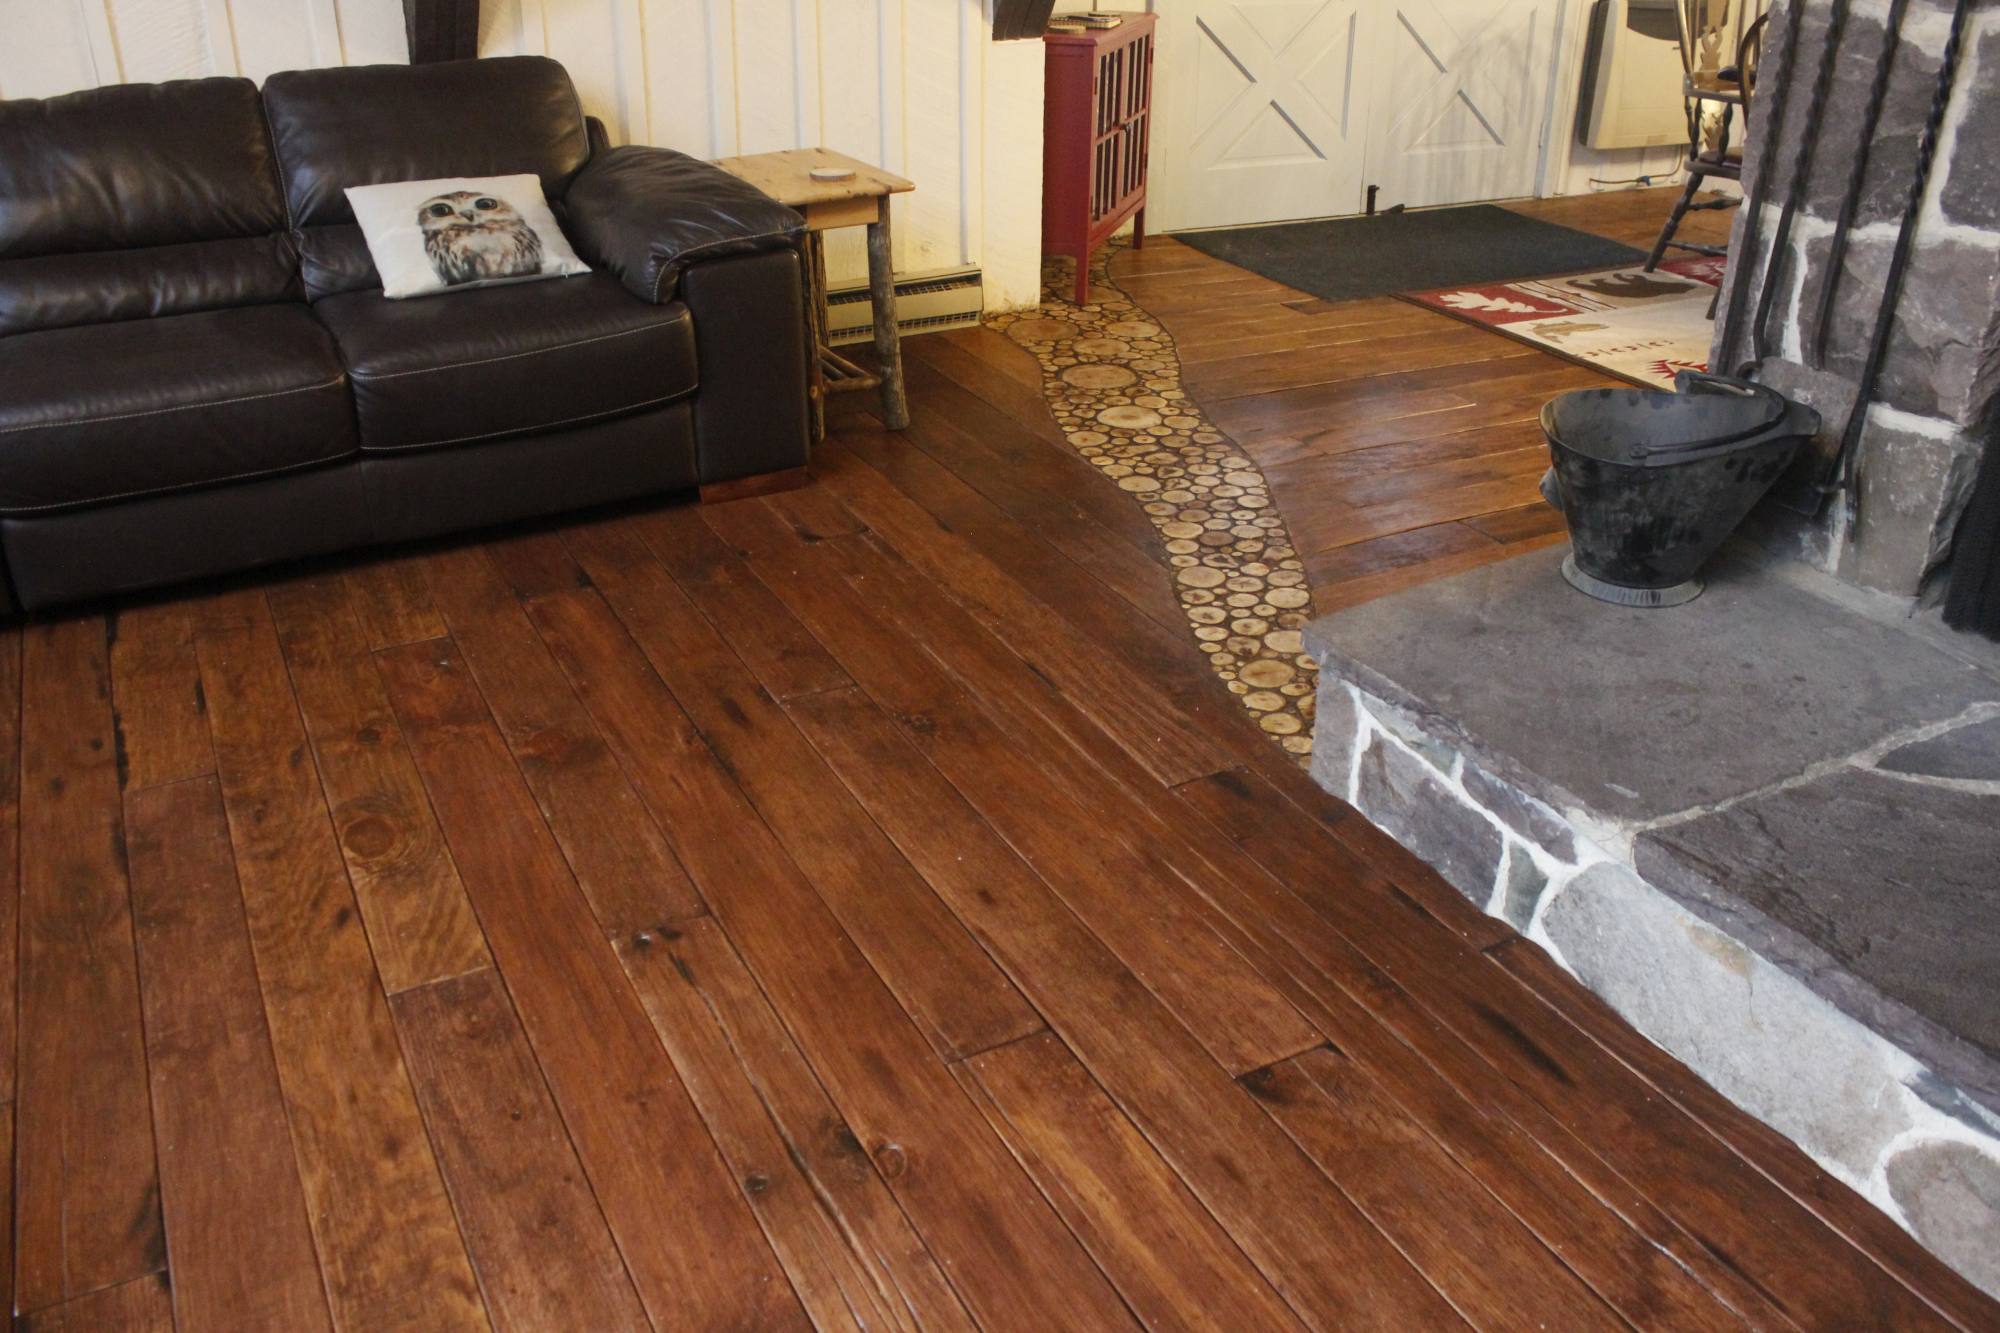
Hier zijn nog een paar foto's van de gebeitste multiplexvloeren op de vloer van de woonkamer.

Laat me weten wat je ervan vindt, is er iets wat je anders zou hebben gedaan? Denkt u erover om doe-het-zelf multiplexvloeren bij u thuis te maken??

Deel uw mening in de reacties hieronder!


DIY Farmhouse Wide Plank Flooring Made From Plywood - The Plywood Floor Finished - Close up of the Distressing
DIY Farmhouse Wide Plank Flooring Made From Plywood - Close up of The Plywood Floor In The Living Room By The Wood Accent
DIY Farmhouse Wide Plank Flooring Made From Plywood - The Plywood Floor Finished - Finished Plywood Floor Seen From The Stairs
DIY Farmhouse Wide Plank Flooring Made From Plywood - The Plywood Floor In The Living Room By The Wood Accent
DIY Farmhouse Wide Plank Flooring Made From Plywood - The Plywood Floor Finished
DIY Wide Plank Plywood Flooring
DIY Farmhouse Wide Plank Flooring Made From Plywood - The Plywood Floor Finished - Another Close up of the Distressing
DIY Farmhouse Wide Plank Flooring Made From Plywood - The Plywood Floor Finished - Seen From The Corner Of The Fireplace
DIY Farmhouse Wide Plank Flooring Made From Plywood - The Plywood Floor Finished By The Fireplace
DIY Plywood Plank Flooring

Geniet van dit bericht? Pin het en deel het met anderen!
DIY Farmhouse Wide Plank Flooring Made From Plywood
DIY boerderij brede plankenvloer gemaakt van multiplex open haard - Portret
DIY boerderij brede plankenvloer gemaakt van multiplex close-up - Portret
DIY boerderij brede plank brede planken multiplexvloeren

Het installeren van een eindkorrelvloeren inleg

Het installeren van een eindkorrelvloeren inleg

Installing An End Grain Flooring Inlay


Creating an end grain flooring inlay was something I was looking forward to for months. We installed plywood wide plank flooring in the dining room and kitchen earlier this year and the living room was next on the list. Here’s a post with details on what we did with the living room floor.

The flooring in the dining room and living room were going to be laid in different directions and a regular threshold separating the two spaces was going to bewell pretty boring.

While initially doing my Pinterest research on flooring, I came across pins with different floor designs created using wood slices.

That gave me the idea of doing an end grain flooring as an inlay. It was the perfect solution!

I couldn’t wait to try this project.


Openbaring: Sommige van de onderstaande links zijn gelieerde links. Als u besluit een van deze producten te kopen, We verdienen een kleine commissie zonder extra kosten voor u. We raden deze producten alleen aan omdat we er ervaring mee hebben en ze gebruiken voor onze eigen projecten. Als Amazon Associates, We verdienen aan kwalificerende aankopen.

De boodschappenlijst

Tools -lijst

Hier is een lijst met de tools die we bij dit project hebben gebruikt.

Affiliate links hieronder kunnen vergelijkbaar zijn met vergelijkbare items wanneer exacte items niet online kunnen worden gevonden.

Riemschuurmachine

Palmschuurmachine

Verstekzaag

Oscillerend multi-tool

RotoZip

Gehoorbescherming oormuffels


Benodigdhedenlijst

Dit zijn de benodigdheden die bij dit project worden gebruikt.

Affiliate links hieronder kunnen vergelijkbaar zijn met vergelijkbare items wanneer exacte items niet online kunnen worden gevonden.

Op water gebaseerde olie-gemodificeerde poluyrathaan we used 1 gallon

4″ Polyester synthetische borstel – 4 borstels om de poly aan te brengen

Liquid Nails

What Is End Grain Flooring?

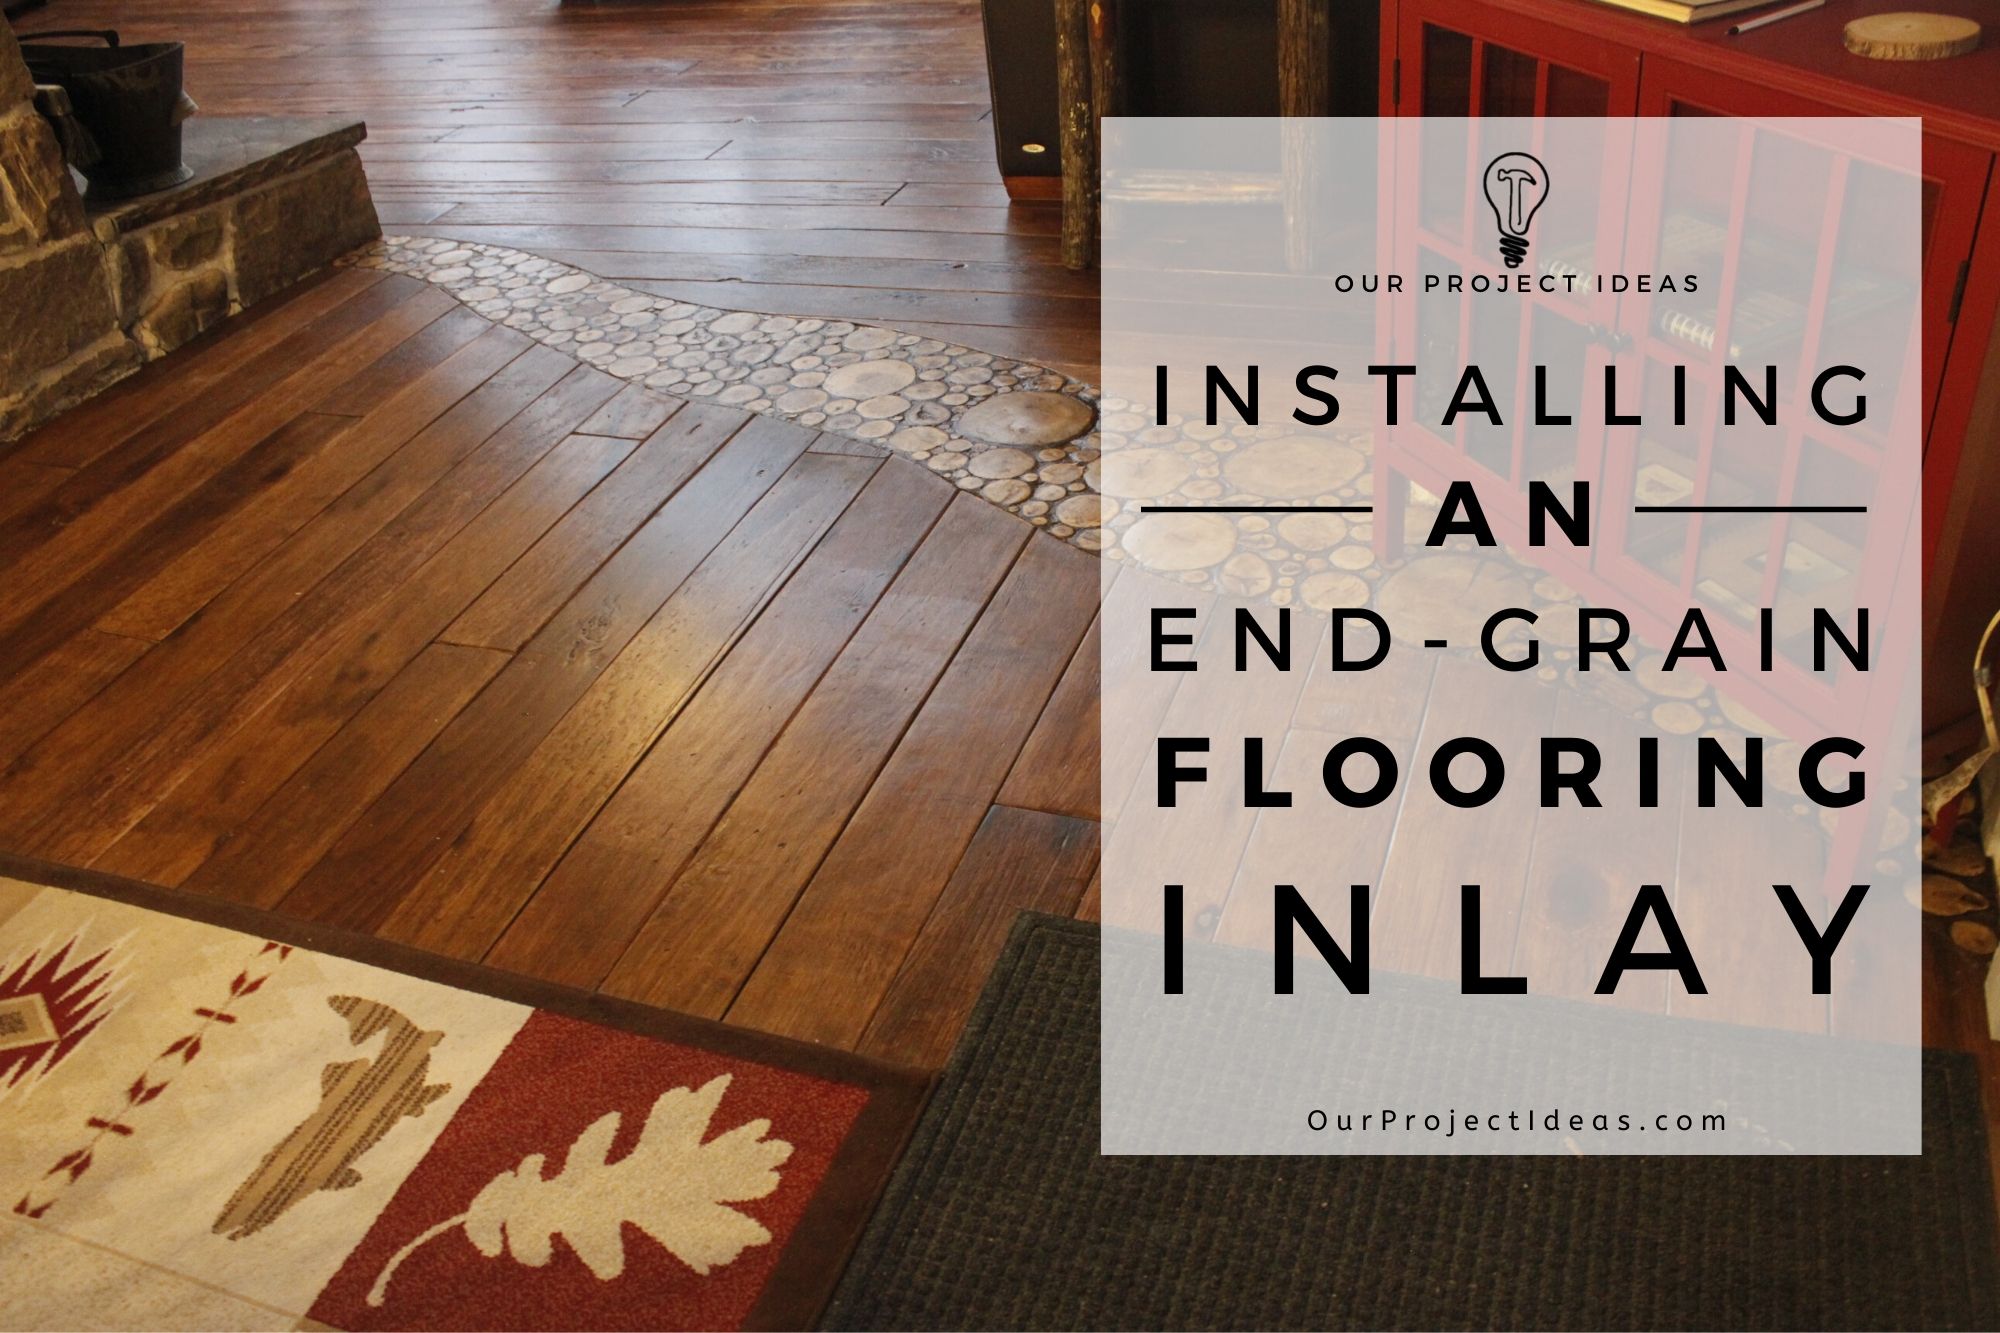
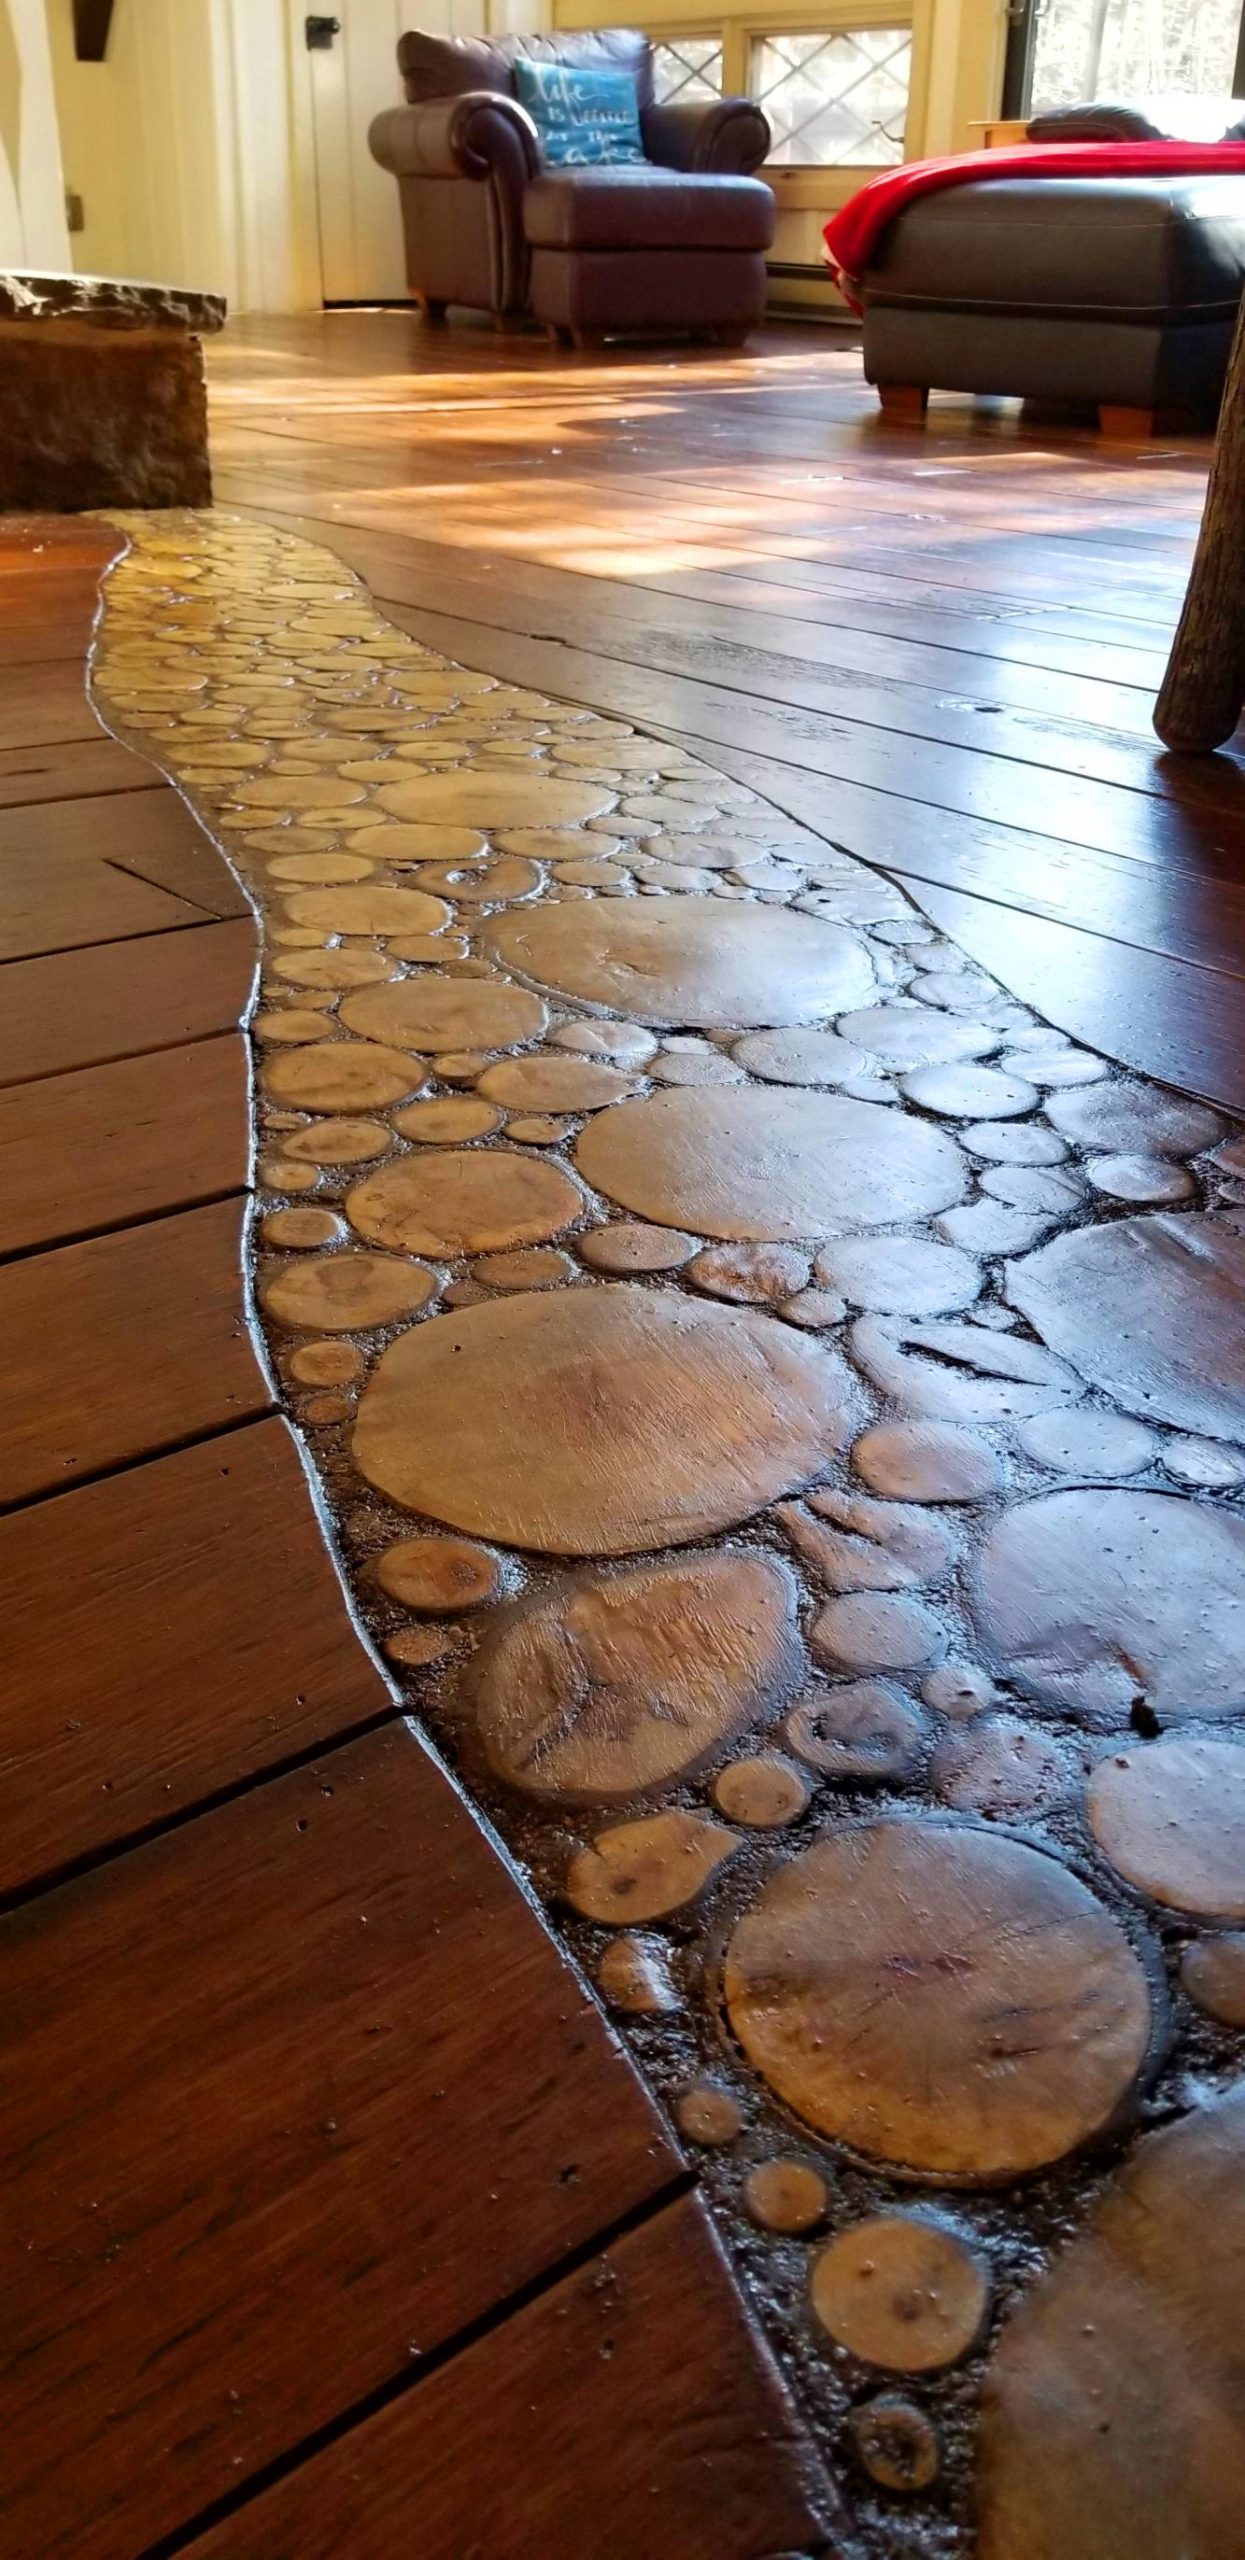
End grain flooring is basically branches and logs cut into slices, then placed in a pattern, in our case, it’s the shape of a river. The slices are glued into place and grout is applied to fill in the spaces between the slices. Then a protective finish is applied and you have yourself an end grain floor!

I call it a wood river, but I’ve seen it called a bunch of different names. Wood slice flooring, Eind korrelvloeren, log end flooring, cordwood floor and even cross-cut tree slice flooring to name a few.

Figuring Out The End Grain Flooring Inlay Layout

The beauty of doing a floor inlay is that there is no limit to the design you make. It can be as simple or ornate as you want.

Since our house is in the Poconos, in a wilderness setting, we figured a river made of wood would go with the house and its surrounding nature.

The end grain flooring inlay would separate the dining room from the living room. Starting in the corner of the dining room and making it’s way to the corner of the living room fireplace.

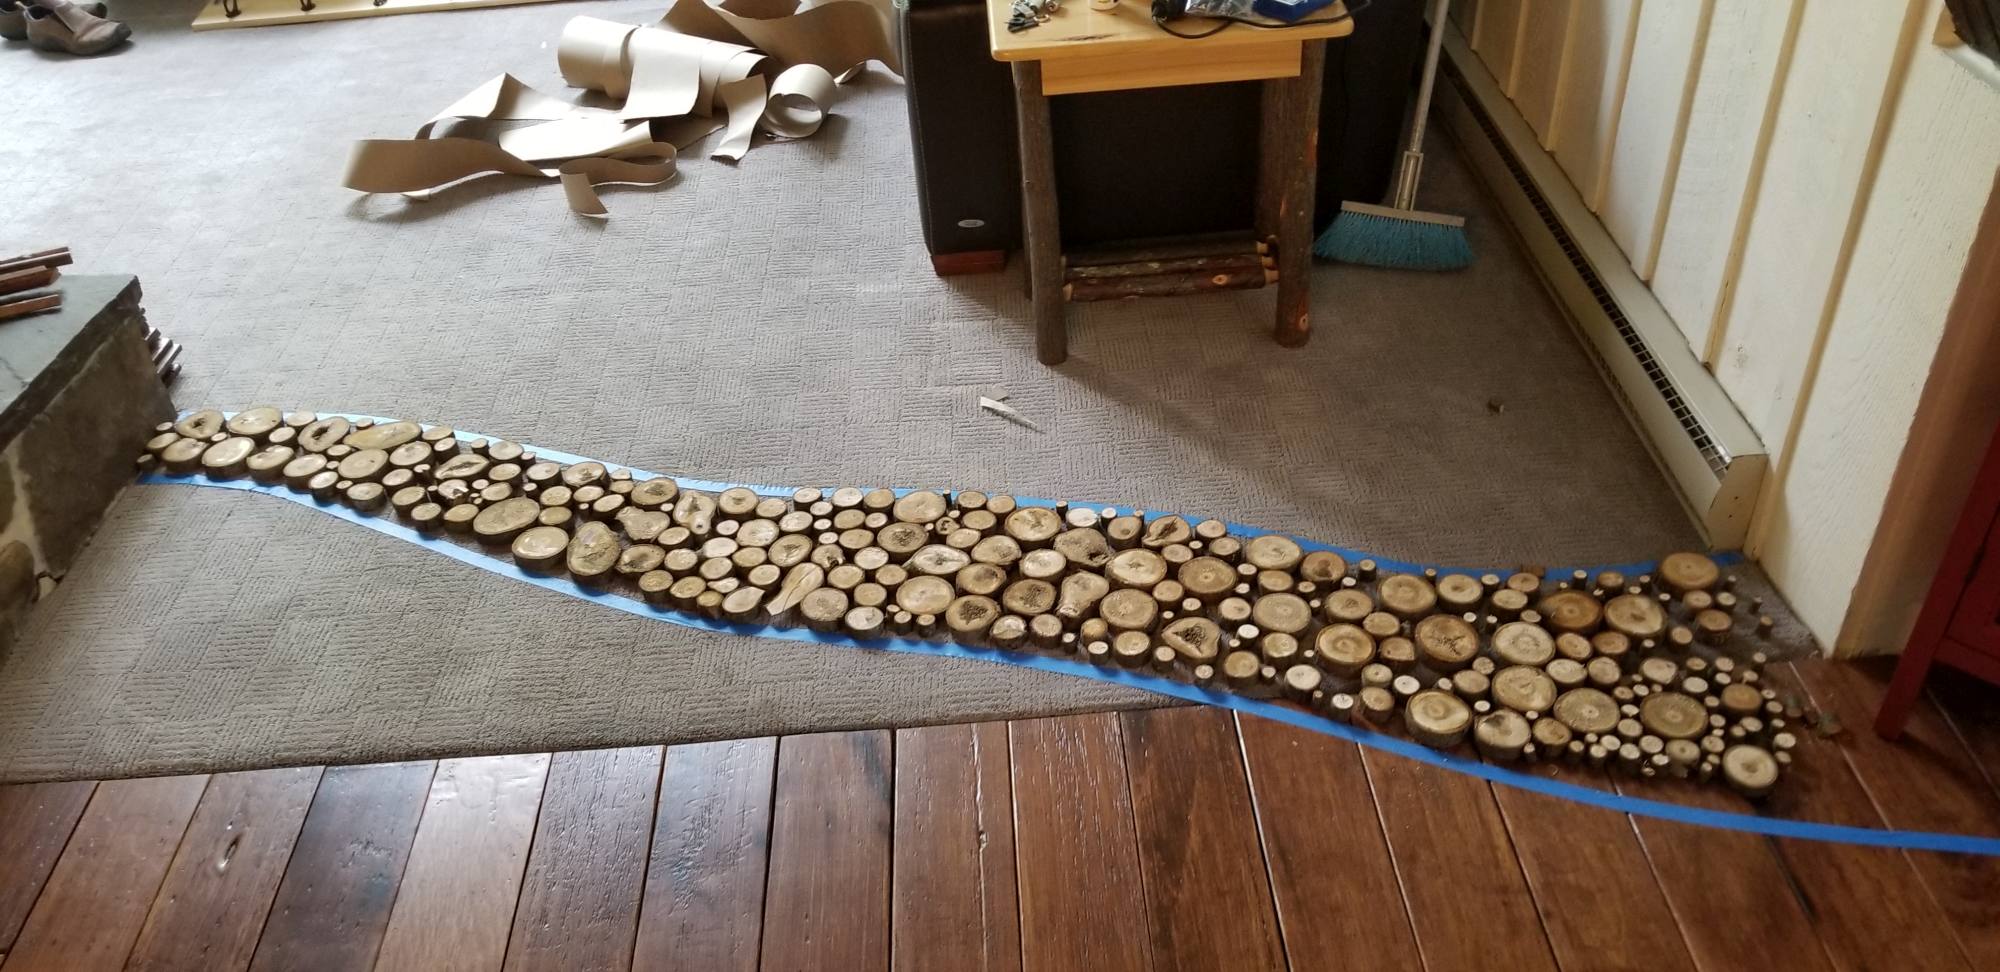
We wanted the flooring inlay to start off wider on one side and have it gently curving its way across the space.

We had the idea when we did the dining room earlier in the year and that’s also when I started cutting the wood slices for the river and traced out the shape of the wood slice flooring accent.

We were going to do the living room floors and the inlay a few months later, so that gave the wood slices time to dry.

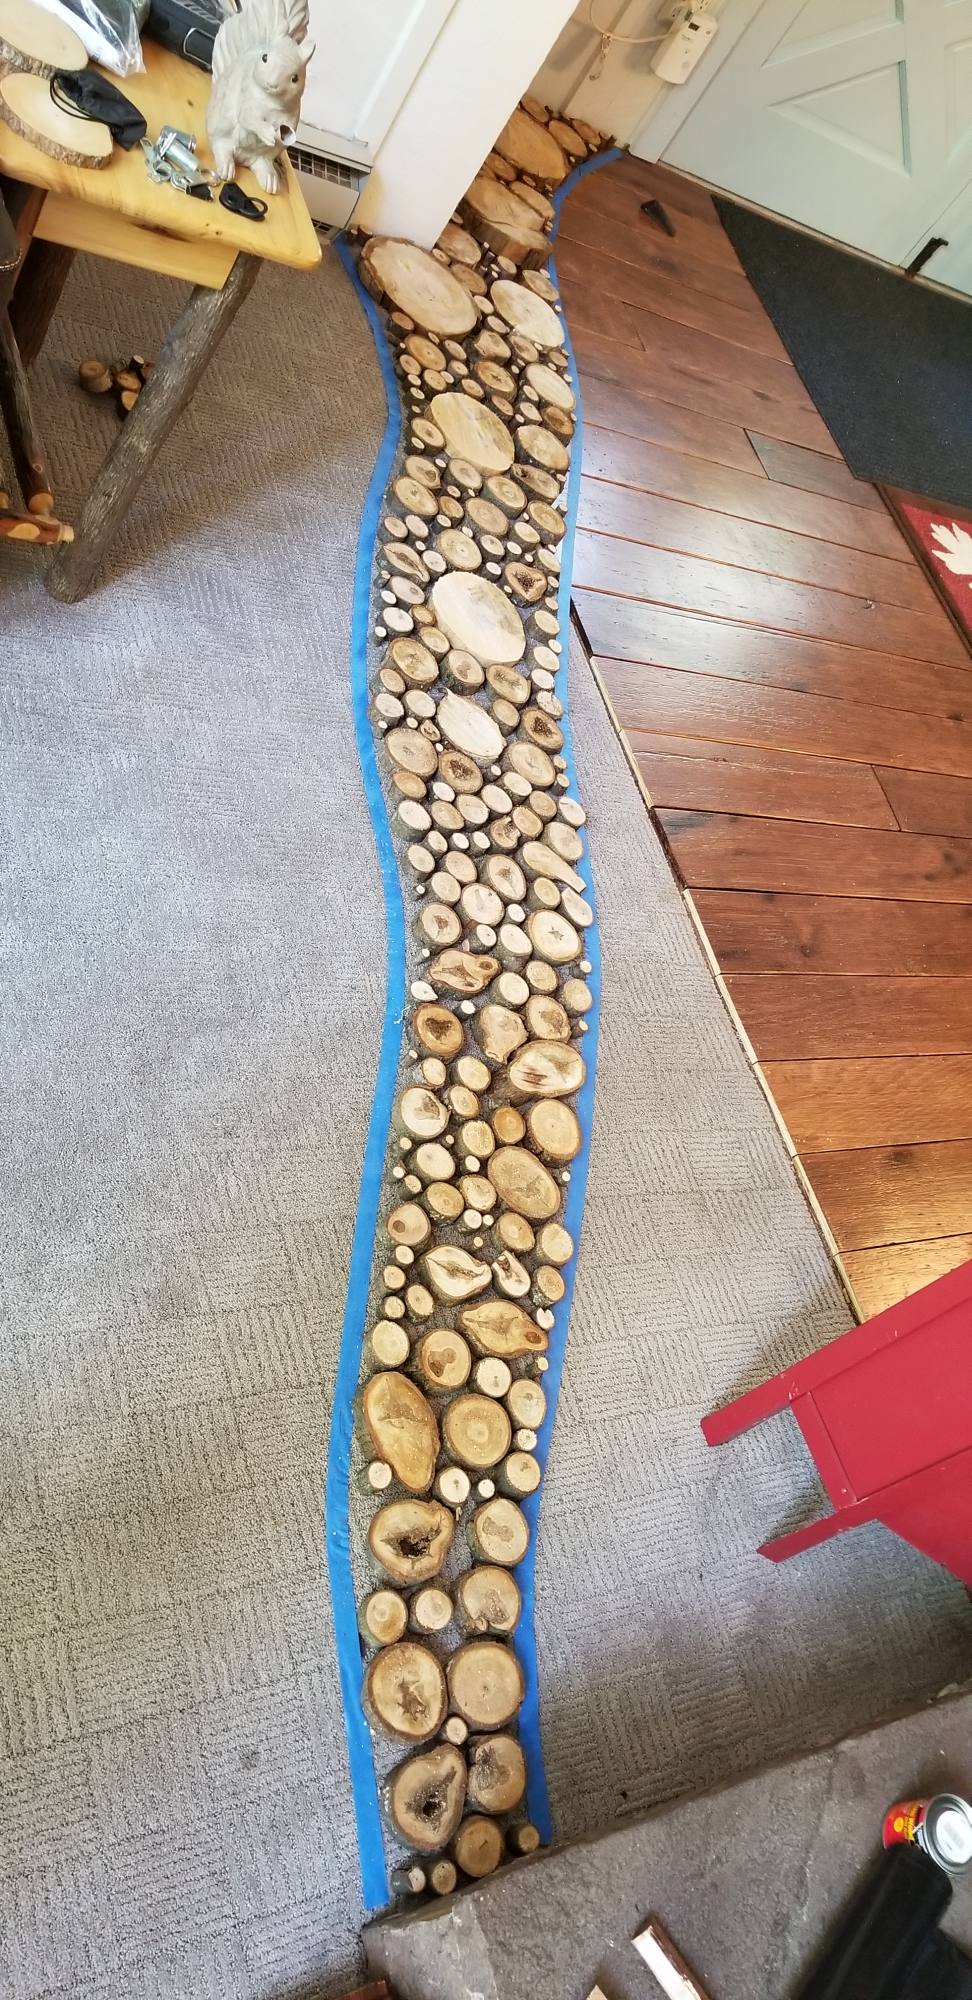
Installing An End Grain Flooring Inlay - The Inlay Traced Out Using Tape and Filled in With Wood Slices - Seen From The Dining Room
Installing An End Grain Flooring Inlay - The Inlay Traced Out Using Tape

Cutting The Wood Slices

Now that the general shape of the end grain flooring inlay was in place, the next step was to fill it in with wood slices. I got a bunch of branches that had fallen on our property and started cutting them to the width I thought I neededmore on that later.

I cut enough pieces of wood to fill in the inlay, with a bunch of various branch thicknesses. I cut them in May to have them dry up a few months before installing them in the fall.

The flooring was 1/2thick and the floors are uneven so I cut the wood slices a bit thickerat least that’s what I thought.that was a big mistake. It’s important to cut them to the right size right off the bat.

I used a miter saw to cut the slices, it went pretty quick considering how many slices were needed.

Important Tip: When cutting the wood pieces try to cut them as close to the final thickness as possible.

I didn’t do that with this project and it took me days to get the slices down to the right size.

I cut the slices 3/4and most of the wood slices needed to be about 1/2″… a big mistake.

That extra 1/4was a struggle to remove.

Installing An End Grain Flooring Inlay - The Inlay Traced Out Using Tape - Seen From The Living Room

Drying The Wood Slices

I had cut most of the wood slices months ago so those were dry when I was ready to install them.

But I guess I was able to get the wood slices tighter together when I was actually doing the projectso I needed more wood slices.

I found this article on drying the wood slices.

http://theplywood.com/drying-wood-in-oven

Using the oven on low heat (200 F), the wood slices were dry in a couple of hours so it worked really well.

Cutting The End Grain Flooring Inlay Into The Floor Boards

The original plan was to cut each floorboard individually using a rotozip. I was going to cut them outside since the rotozip causes a lot of dust.

In plaats van, I ended up cutting the floorboards in place using the Oscillating Multi-Tool. That worked really well and it didn’t make very much dust.

After the boards were cut I went over the cut with the belt sander to soften the curves and round off the edge of the boards. That way there aren’t splinters. 🙂


Installing An End Grain Flooring Inlay - Where The Inlay Will Go
Installing An End Grain Flooring Inlay - Floor Boards Are All Cut
Installing An End Grain Flooring Inlay - Figuring Out What Floor Boards To Use Next To The Inlay
Installing An End Grain Flooring Inlay - The Inlay Cut Into The Floor Boards and Wood Slices In Place - Seen From Fireplace

Placing The Wood Slices In The Inlay

When placing the slices inlay, make sure to mix up the different sizes. That way it looks more organic and natural.

I secured the wood pieces in place with liquid nails. It just takes a dollop on the back of each piece and applying a little pressure to get it to set.

Installing An End Grain Flooring Inlay - The Inlay Cut Into The Floor Boards and Wood Slices In Place - The Inlay Cut Into The Floor Boards and Wood Slices In Place

Seal The Wood Slices Before Applying The Grout

I sealed the wood slices before applying the grout by applying a coat of the polyurethane. Otherwise the grout will darken the wood slices. You’ll be sanding everything down later but sealing the slices makes it easier to get them back to the lighter color.

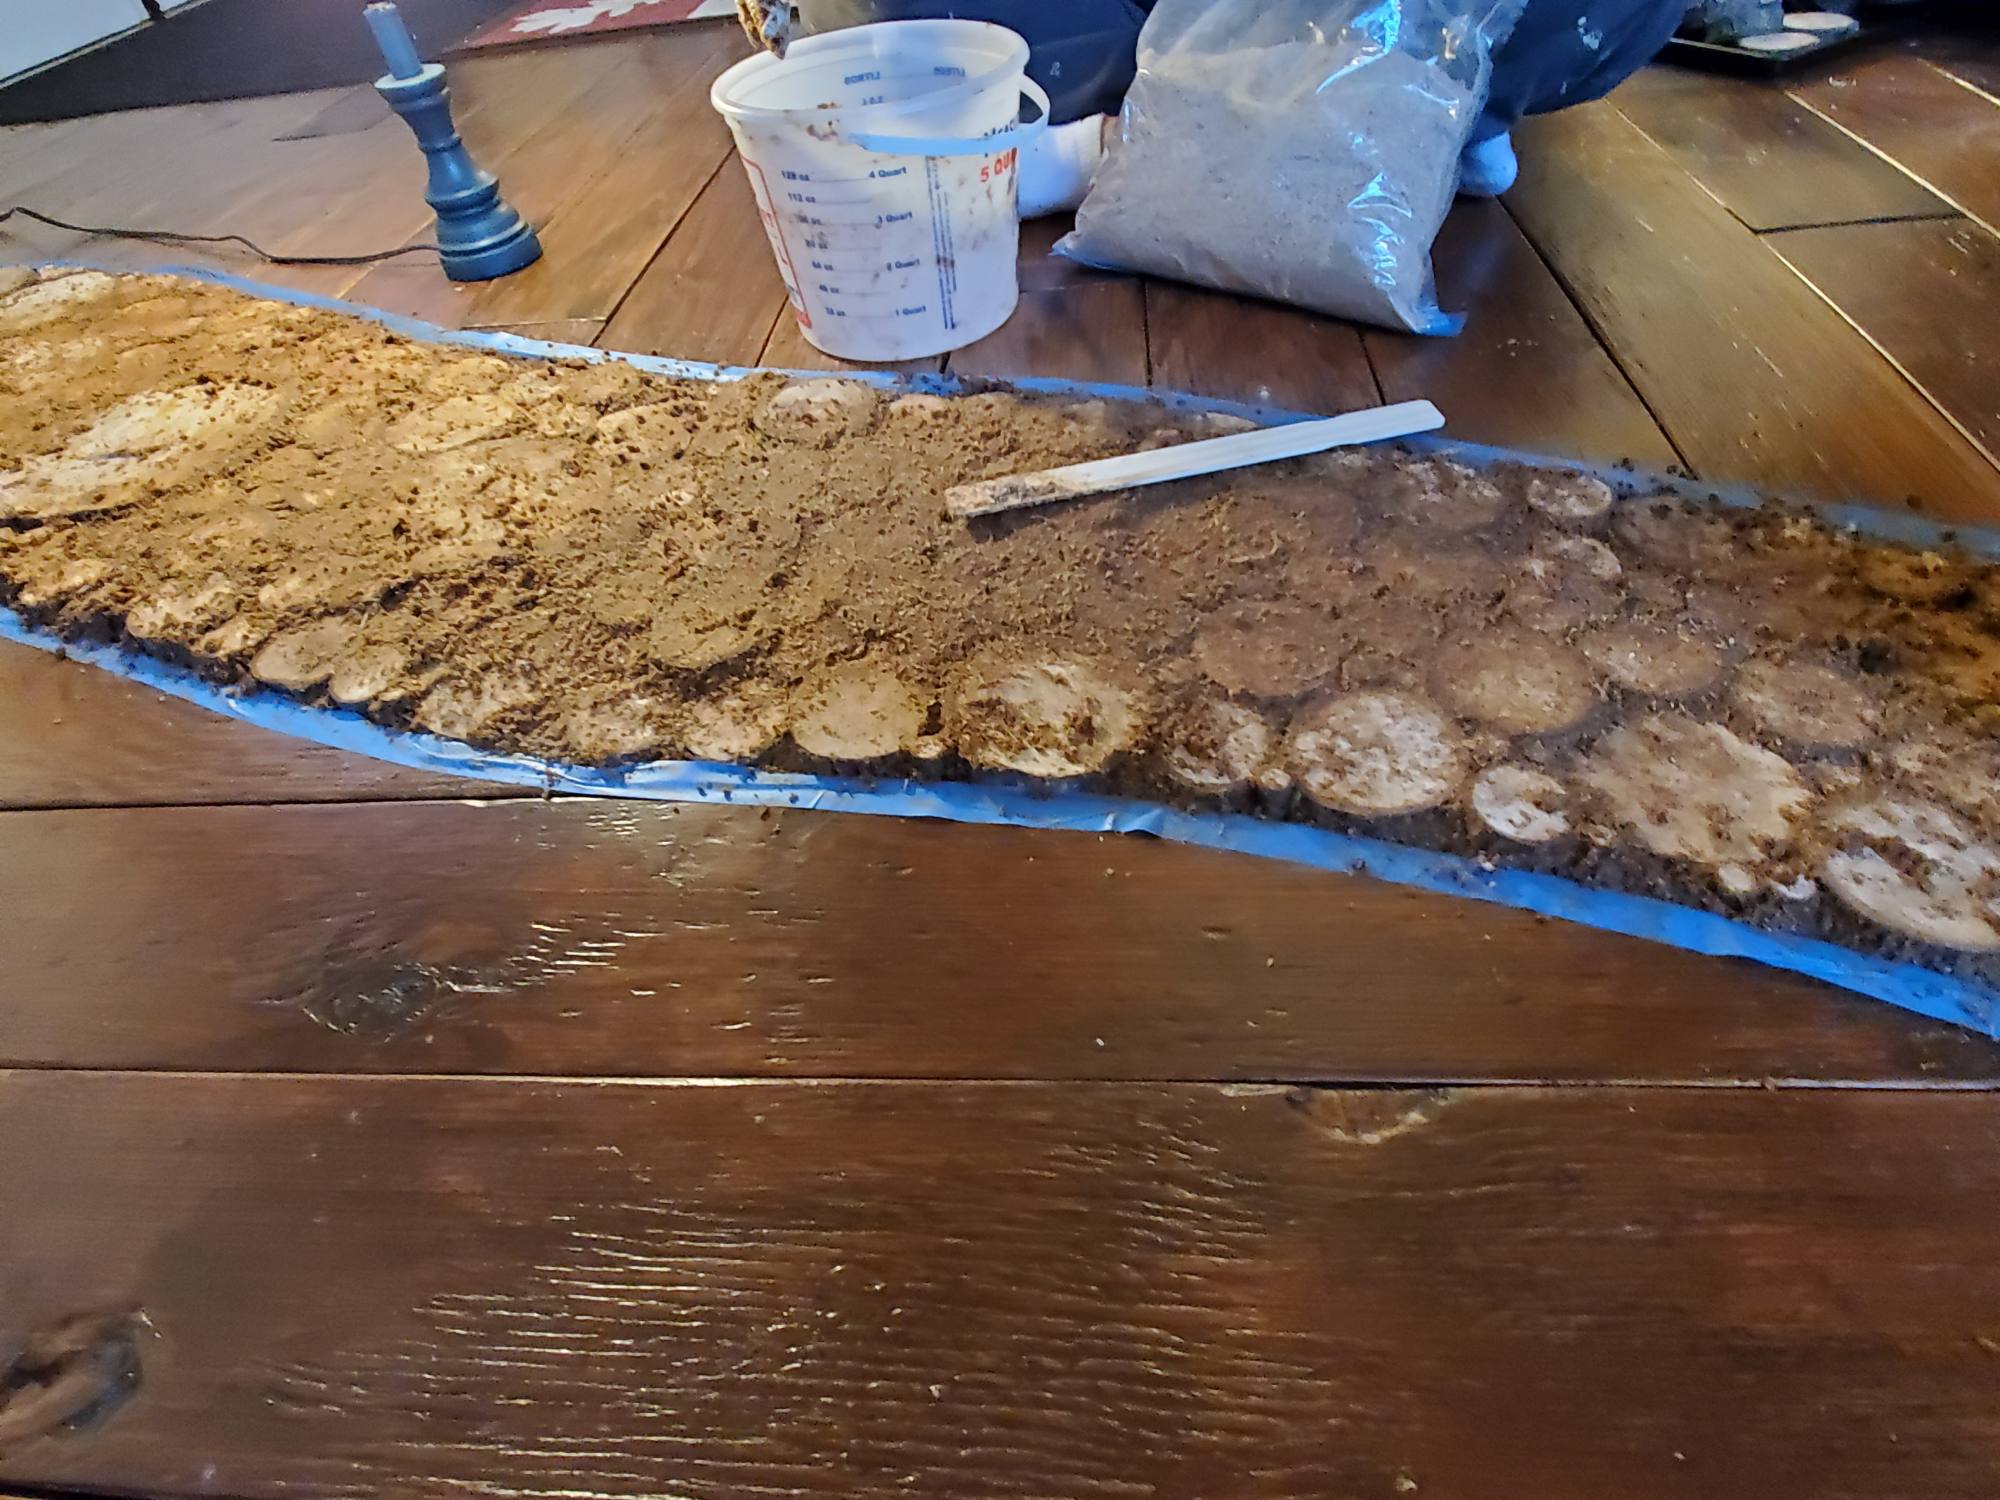
Mixing The Sawdust Grout

I found an article from Bob Villa that talks about the grout that can be used with the wood slices. It’s called sawdust grout.

https://www.bobvila.com/articles/quick-tip-sawdust-grout/

Sawdust grout is a combination of 2 parts sawdust to 1 part polyurethane.

I used a water based, oil-modified fast drying polyurethane for the sawdust grout mix and the finish.

The polyurethane dries quickly and it’s orderless.

It’s the same one we used on the plywood wide plank floor boards in the living dining room and kitchen.

Applying The Sawdust Grout

The Grout is a pretty dry paste that can be pushed into all the nooks and crannies between each wood slice.

Using latex gloves grab a small glob of Grout and push it into the spaces between the wood slices.

Installing An End Grain Flooring Inlay - The wood slices are in place and the sawdust grout is being applied

Sanding The End Grain Flooring Inlay

I used a belt sander to sand down the wood pieces.

Natuurlijk, that was only after I fixed my huge mistake of cutting the wood slices the wrong thickness.

The sand paper I used was 36 grit. I wanted something that gave the wood pieces a rough texture so they wouldn’t be slippery.

Because sanding is a pretty messy task, I tented off the area, that way the dust didn’t go all over the house.


Installing An End Grain Flooring Inlay - The Inlay Tented Off To Reduce The Dust Around The House While Sanding

This is what the wood slices and the sawdust grout looked like after the sanding was done.

I sanded the wood slice inlay to the height of the flooring on either side of it. I also used the sander to knock off the edges of each of the wood slices, removing any hard edges that may be uncomfortable to walk on.

Installing An End Grain Flooring Inlay - The Inlay After Grout Dried And Sanded Before Poly Finish

Adding The Polyurathane Finish

The polyurethane was the same one I used on the wood board flooring and in the sawdust grout mix.

I put three coats of finish on the end grain flooring inlay.

Although the poly is colorless, it did give the wood slices a little bit of a yellow tint.

The sawdust grout also darken quite a bit when I applied the poly on top of it.


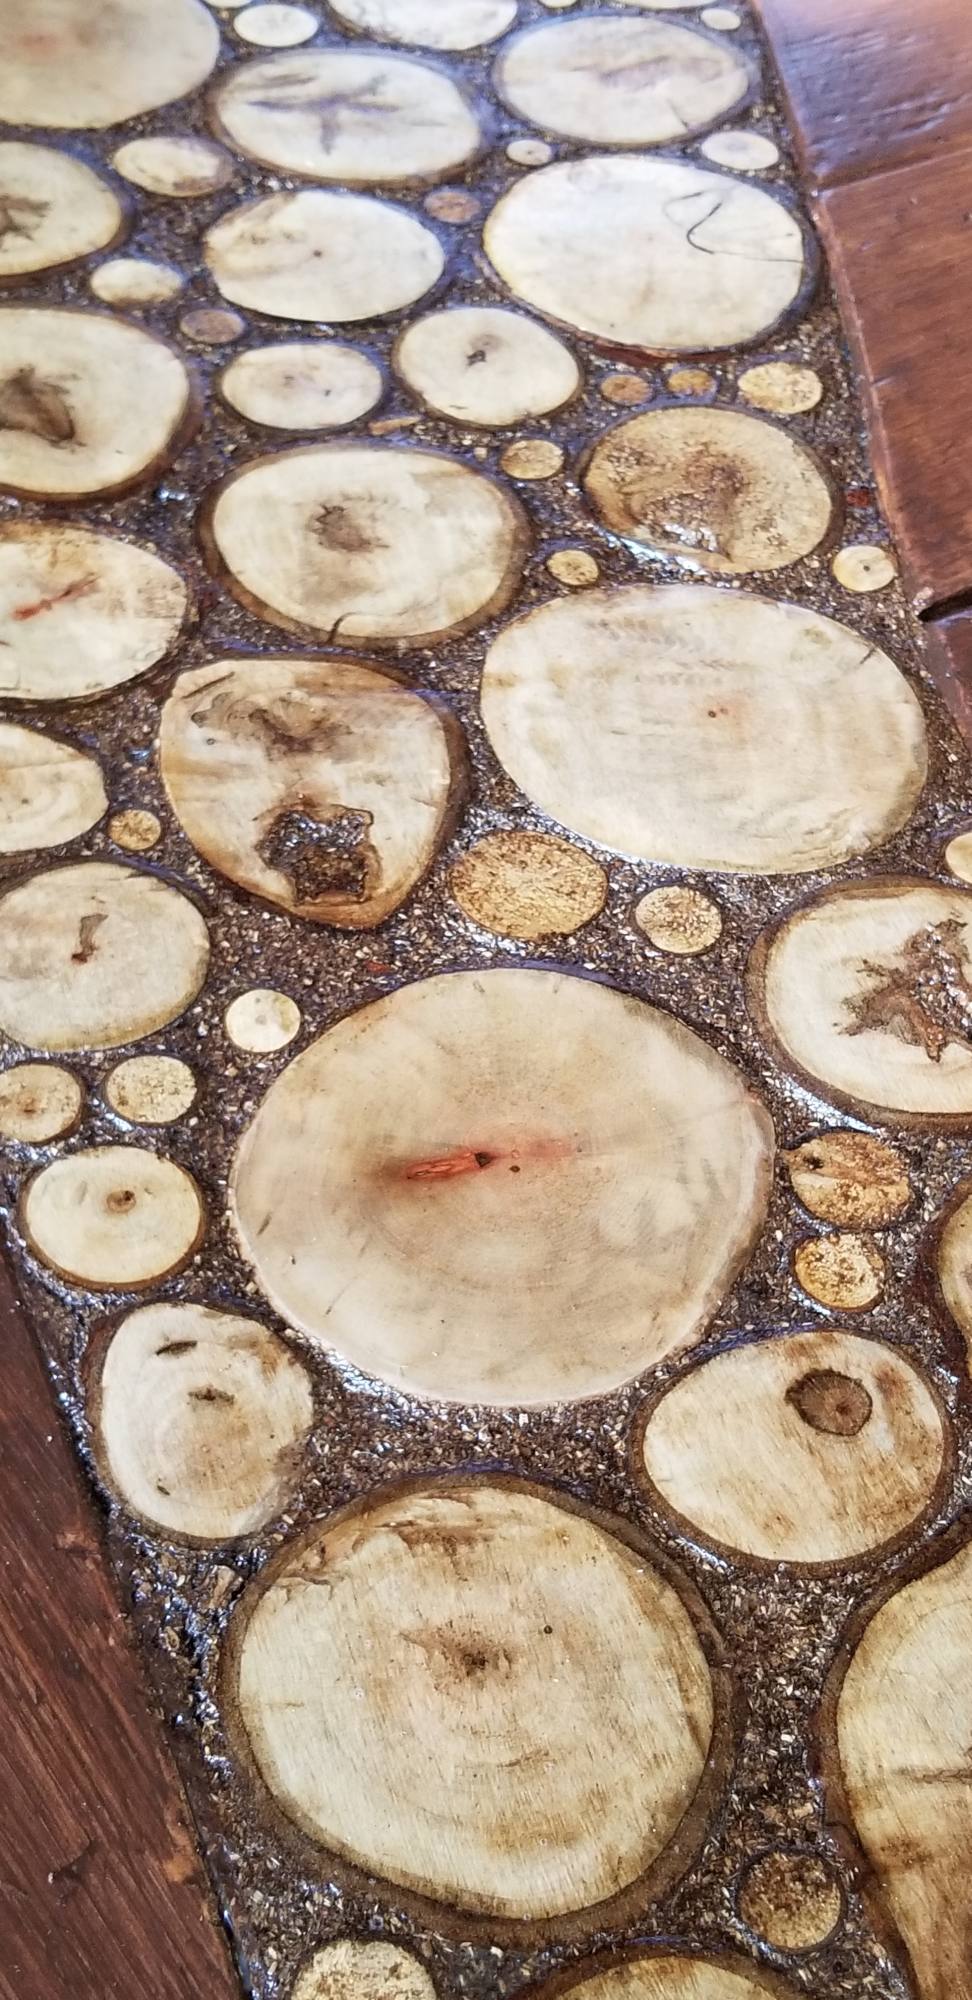
Installing An End Grain Flooring Inlay - The Inlay After Grout Dried And Sanded After Poly Finish

[et_bloom_inline optin_id=”optin_7″]

More Pics Of The End Grain Flooring Inlay

Installing An End Grain Flooring Inlay - cross cut flooring inlay from the dining room
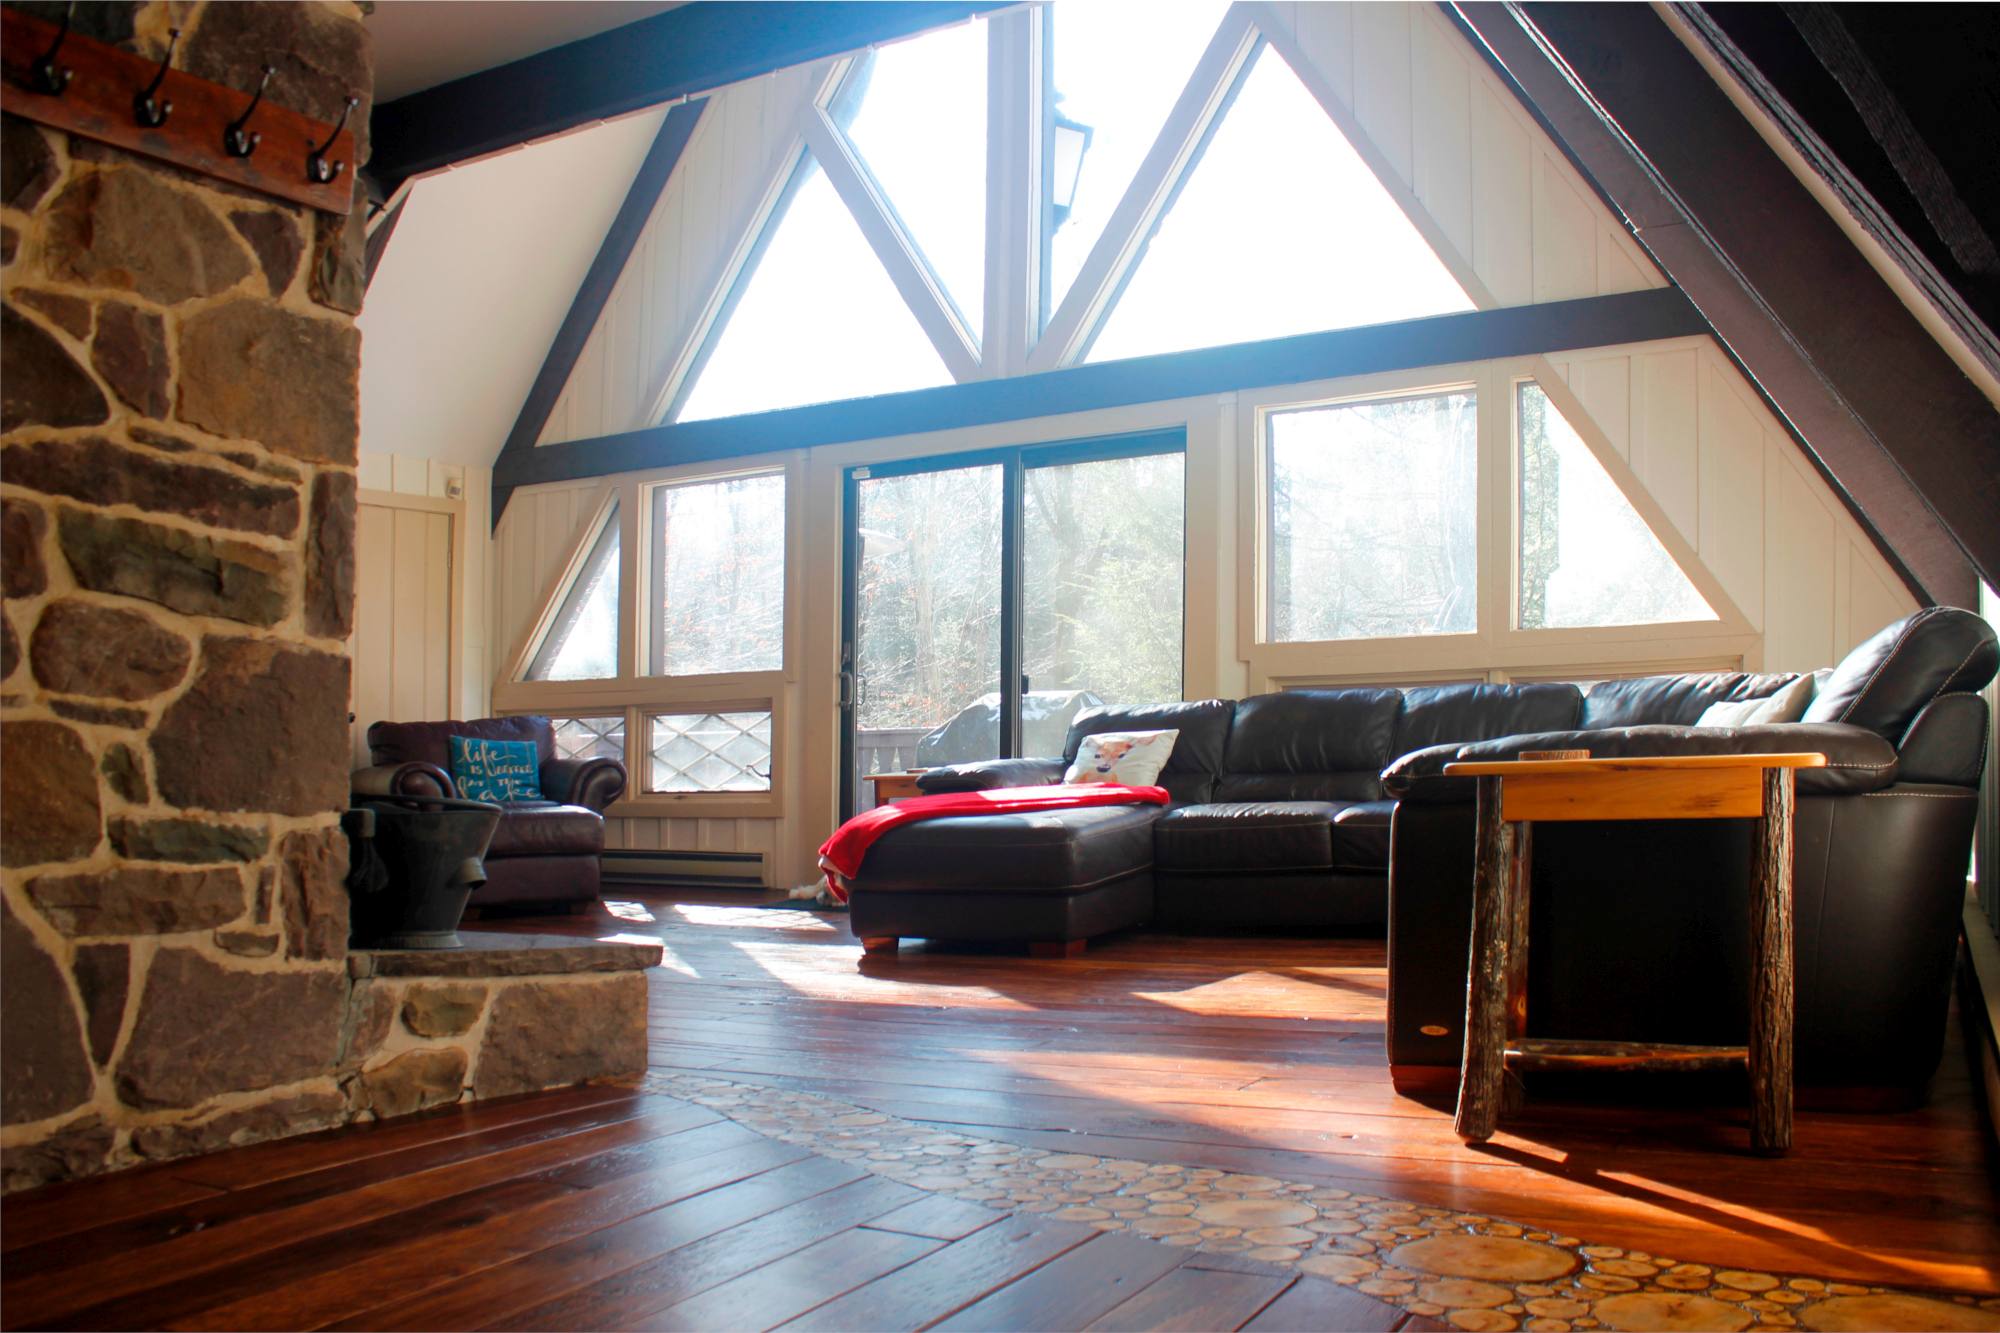
Installing An End Grain Flooring Inlay - The End Grain Flooring Inlay Finished
Installing An End Grain Flooring Inlay - End Grain flooring Inlay from the fireplace
Installing An End Grain Flooring Inlay - Finished - Seen From The Dining Room
End Grain Flooring Inlay Finished - Log End Wood Floor Inlay Closeup
Installing An End Grain Flooring Inlay - End Grain flooring Inlay toward the fireplace

What Do You Think?

We love the way the end grain flooring inlay turned out. It’s so much more character than a simple threshold would have given.

What do you think? Do you like the way it turned out? What would you do differently? We’d love to hear your feedback.

Geniet van dit bericht? Pin het en deel het met anderen!
Installing An End Grain Flooring Inlay - A closeup of the End Grain Flooring Inlay Finished
Wood River Finished - Wood slices flooring accent closeup

Thuisbioscoopontwerp – afstandsbediening voor thuisbioscoop

Thuisbioscoopontwerp – afstandsbediening voor thuisbioscoop

Designing a Home Theater - Home Theater Remote - Choosing The Right Remote


What To Look For In A Home Theater Remote Control

Hoewel het misschien niet in uw Home Theatre-ontwerp zat, je hebt een afstandsbediening voor een thuisbioscoop nodig.

Setting up a home theater buries you in remotes pretty quick. It becomes a 3 or 4 remote task to do anything unless you get a home theater remote.

There are a few different calibers of remote controls. If you only want to reduce the number of remote controls you have, then a basic universal remote would do the trick.

But, if you want a remote control that does more than control the A/V equipment, your choices will be slim.

Features like controlling lights and/or blinds. Or setting up macros/scenes which turn on and off various devices depending on the activity.

In dit artikel, I’ll go over what I looked at when choosing my remote and how I set it up.

Openbaring: Sommige van de onderstaande links zijn gelieerde links. Als u besluit een van deze producten te kopen, We verdienen een kleine commissie zonder extra kosten voor u. We raden deze producten alleen aan omdat we er ervaring mee hebben en ze gebruiken voor onze eigen projecten. Als Amazon Associates, We verdienen aan kwalificerende aankopen.

Why Not Just Use The Remotes You Have

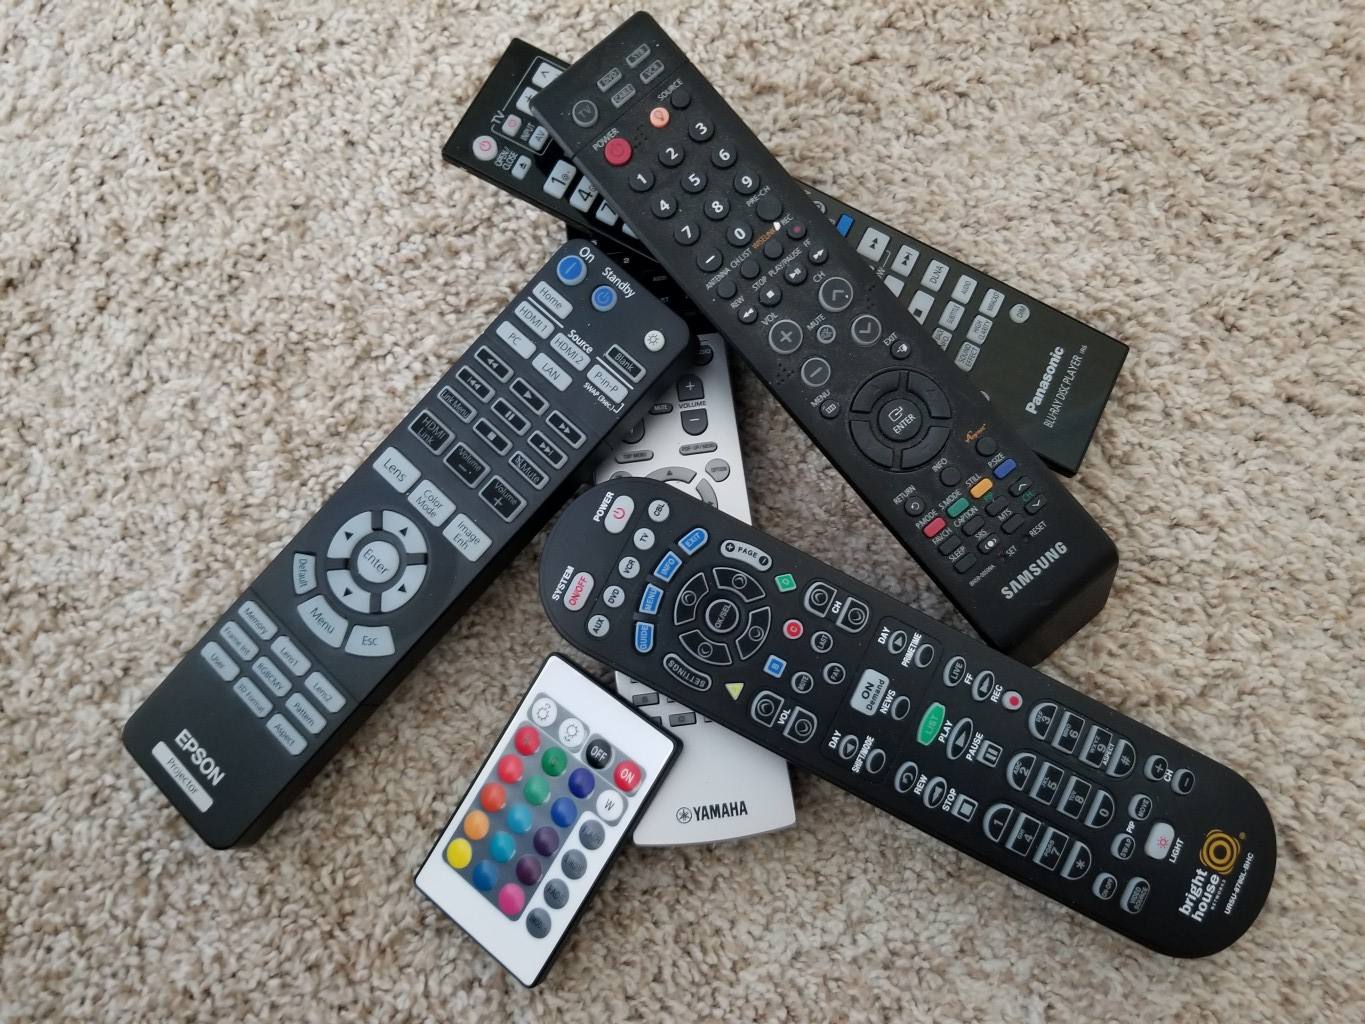
Choosing the right remote control will completely change your home theater experience. A typical home theater will have at least 3 remotes (for the TV/Projector, surround sound, Cable box or DVD Player).

Fumbling between all the remote becomes a pain pretty quickly. Many of the remotes that come with home theater equipment do try to be universal-ish. But they still fall short with home theater scenarios.

The Remote Criteria

The remote I was searching for would control:

  • the projector
  • The surround sound amplifier
  • 4K BluRay DVD player
  • The Cable Box
  • Some way of controlling Insteon lights
A Thuis Theater Remote that can control all that is pretty sophisticated. And the more features a remote has, the more expensive it gets.

On the low end, they are about $100. These remotes will have a low limit on the devices that can it can control and no macros. On the super fancy high end, there is a complete thuis automation system. That system can control just about any electronic device, but of course, it’s at a cost. The Savant is one of those systems and runs about $1000 a room.

For my scenario, I already have a thuis automation system so Savant wasn’t something I had any interest in.

My thuis automation system is an Insteon based system. A Universal Devices ISY controller (Model ISY 994i/IR Pro) that controls everything. Things like the door lock, the thermostats, lights, and door sensors.

Logitech Harmony Ultimate Home

After some research, it became clear the Harmony family of remotes is the best value for the features. They’ve been in the remote control business for a very long time and they have excelled over the years.

Which a Harmony remote, you base your choice on how many devices you plan on controlling. The Harmony remote I chose was the Ultimate Home. It can control up to 15 devices with up to 15 activities. The activities are basically macros. Press one of the macro buttons, and it’ll turn on all the devices you need turned on for that activity.

Update: The remote that I chose is now discontinued. The Logitech Harmony Elite Remote is the latest home theater remote from Logitech. It looks a little different but the specs are very similar.

An added bonus is that the Harmony Elite Remote also works with Alexa!


Designing a Home Theater - Home Theater Remote - Logitech Harmony Elite Remote

Logitech Harmony Elite

Logitech Harmony Elite Remote Control, Hub and App, works with Alexa

Logitech Harmony Home Ultimate Features

The Harmony Home Ultimate (and the Harmony Elite) is a feature-rich remote control.

  • The Harmony App On your Droid or iPhone lets you control your devices using the app
  • Configure macros or activities to set up all your devices with a click of a button
  • Control up to 15 Devices
  • Control devices using infrared, IP and Bluetooth
  • It Syncs the cable providers channel line up with your remote. When the cable provider changes channels around your remote will update itself
  • Save your favorite channels as favorites, which show up as icons in the remote’s screen
  • a digital screen on the remote allows you to customize buttons and activities
  • The hard buttons are all back-lit (very important when you are sitting in a dark theater)

The Parts To The Home Theater Remote Control Setup

There are three physical parts to the remote control. The remote control itself, a Hub and infrared blaster cables.

The hub is the brains of it all, and the remote control communicates to the hub using RF (radio). It’s great for home theater setups like mine, where the AV equipment is in a closet out of sight.

The hub should go where the majority of your electronics are since it’s the one doing most of the controlling.

The AV Equipment

In this setup, there’s a total of 6 devices listed in the MyHarmony app:

  • Universal Devices ISY-994i/IR (Home Automation)
  • Yamaha TSR-7810 (Amplifier)
  • Epson PowerLite Home Cinema 5040UB (Projector)
  • Arris DCX3600M (Cable/DVR)
  • Panasonic DMP-UB900 (4K BluRay Player)
  • Windows Computer

Setting Up The Remote For Your Home Theater

Harmony has done a great job with their remote controls. The basic initial setup was pretty straight forward.

You’ll need to install their MyHarmony software and run the setup. You can either install it on your PC or on your phone and it will guide you through the setup process.

During setup, the hub was able to automatically detect the Yamaha amplifier on the WiFi. For the other devices (cable box, DVD player and projector) I needed to supply the make an model. Based on the make an model, it knew the full set of remote codes for them.

Much easier than the old days where you had to teach your universal remote the codes for each function.


A Home Theater Gotcha

If you have a theater like mine, you have AV equipment tucked away in a closet close by but out of sight.

The Harmony Hub goes in the closet along with all the AV equipment, but one gotcha is the projector.

Aanvankelijk, I wasn’t sure if I’d have to run one of the infrared blasters into the theater to get it to turn on/off the projector.

Goed, luckily Harmony had already thought of that. In the MyHarmony App, you determine what controls the device, either the remote or the hub.

That’s done here:

  • Go to the MyHarmony App and click settings
  • Click More >>
  • Remote and Hub Assignments

Problem solved.

Update: The solution above worked great, but it would only work if you were in the room to turn on the projector. I sometimes use the MyHarmony app on my phone to turn the theater equipment on or off from outside the room.

Since the remote controlled the projector, the projector didn’t turn on. In
the end, I ran one of the IR blasters from the Harmony hub to the theater, and that worked like a charm.

Getting Harmony To Talk To Insteon

Like I said earlier, my thuis automation is Insteon based. When I was setting up my thuis theater I expected to one day be able to control the lights. And maybe even the curtains using my thuis theater remote control.

Insteon has a user-friendly device called InsteonHub, which Harmony can communicate with natively.

My setup uses a Universal Devices controller, which is more flexible but not as user-friendly. Aanvankelijk, it didn’t seem obvious how I could get Harmony and Insteon to talk to each other.

At first, I thought I’d have to use some sort of Rest based commands to control the lights using the Harmony remote.

During my googling, I did see something using a Raspberry PI and something called ISY Helper to do just that.

From what I understand, the ISY Helper is the go-between for the Harmony and your ISY.

For my setup, it sounded like way too many moving parts.

Luckily the ISY I purchased had infrared, I think you can also buy the add-on module for the ISY if your ISY doesn’t have IR.

What Insteon Devices Can You Control With Harmony

With the Insteon Hub, I think you can only control the lights. With the infrared module in the ISY, you can control everything that the ISY can control.

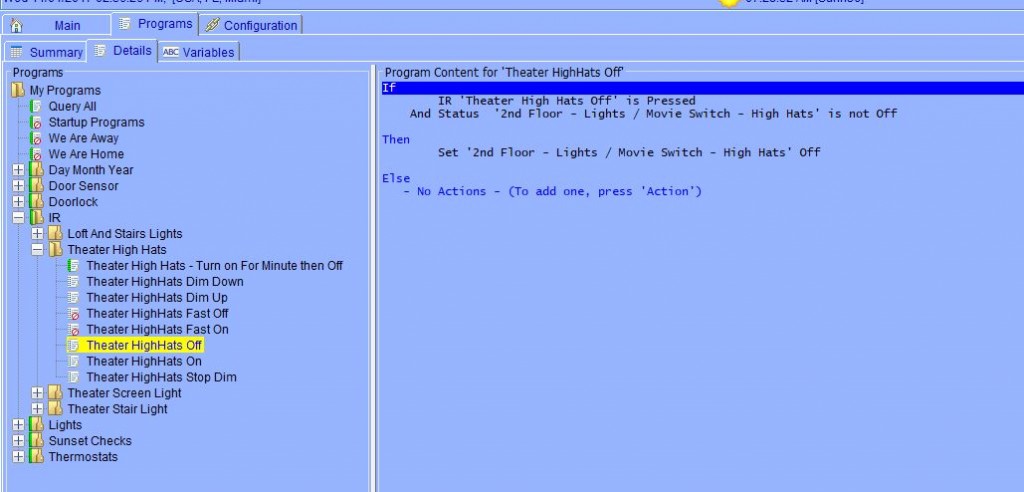
On the ISY you would create a program with the things you want the ISY to do. Then assign that program to an IR code.

Let’s say you want to set the temp at a certain level, dim the lights in the theater and lock the front door for the evening.

Create a program with those steps and assign it to an IR code. Now create an activity on your remote that sends that IR code, you’re all set!

Pretty cool! And you have no limit to the possibilities.

Eigenlijk, you only have 40 IR codes to play with. But each of those codes can be configured to do a whole lot on the ISY side.

Add ISY To The Remote

Adding the ISY to the remote was straight forward. Add a new device in the Harmony app. And use Universal Devices as the manufacturer and ISY994i/IR as the model number.

As soon as you do that it will add the 40 infrared codes that the ISY uses into the remote.

Setup On The ISY

To add the IR codes on the ISY side was just as easy. Go into the admin console, click the IR tab and click the ‘Import Default IR Codes’ button. That adds the same 40 infrared codes into the ISY.

Using You ISY From The Remote

I wanted to be able to turn off/on Insteon lights using the remote control. Both within Harmony activities and independent of the activities.
To add your ISY IR commands on the remotes menus click the buttons option in the MyHarmony app.
Under ‘Screen Options’ select your ISY device, in my case, I called it Lights. and click Go.
Here you can add soft buttons for each IR command you would like to control directly from the remote.
Here’s a list of my configured soft buttons under Lights:
  • High Hat On
  • High Hat Off
  • Screen Light On
  • Screen Light Off
  • Stair Light On
  • Stair Light Off
  • Loft Dim/Off

The ISY Listed as a device on the remote

Designing a Home Theater - The Fixed Projector Screen - The Edgeless Screen
Designing a Home Theater - Home Theater Remote - Logitech Harmony Elite Remote - The Digital Screen with the ISY Commands Listed As Soft Buttons

High Hat Off Program In ISY Admin Console

Designing a Home Theater - Home Theater Remote - Logitech Harmony Elite Remote - ISY Program To Turn Off The High Hats

Setting Up Harmony Activities

This is where the really cool functions of the remote control start to shine.
With the Harmony remote you can set up activities. Activities are basically macros with functions for any of your configured devices.
An example of an activity that I have set up is “Watch TV”. When I press the button for that activity it does the following:
  • Powers on the projector
  • Sets the projector input to HDMI1
  • Powers on the amplifier
  • Sets the amplifier input to HDMI2
  • Powers on the Cable/DVR
  • Turns of the lights in the Movie Theater

When you are done watching TV and want to turn everything off, just press the button next to the activity again and it’ll turn everything off.

Now if you have a thuis theater and don’t yet have a remote control with macros, I think you can appreciate how this remote can have everything on, set and ready to go with the press of one button.

No more fumbling with every remote control you have to get things set up just to watch TV.

Before Harmony these were my steps:

  • Get the projector remote, press the power button
  • Get the amplifier remote, press the power button and set it to HDMI2
  • Get the Cable remote, press the power button
  • If the lights were on, get up and press the button to turn them off

A big difference in user experience.

In a way, the remote control is the mortar in the electronic building blocks of your home theater. It changes your experience completely.

Tweaking The Harmony Activities

MyHarmony has a GUI that helps you create activities in a pretty intuitive way. To set up a basic activity is not very difficult, it’s just a matter of following the prompts.
Once the activity has been created the software will ask you to test the activity. I’d say the majority of what it sets up works pretty nicely.
Activities need tweaking with devices that take a long time to turn on or if it uses cursor commands. An example would be clicking left once then up then enter.
No matter how complex the activity, after a bit of tweaking things will work pretty reliably.
Below are my activities along with their settings.

My Activities List

Here are all my configured activities and settings. De “Lights – IR004entry triggers theTurning off the Movie Theater lightsprogram on the ISY.

The Watch Amazon activity is an example of an activity using cursor movements. The DVD Player has no built-in button for Amazon so I used cursor movements to select the AmazonApp.

I also added mute at the beginning and the volume down at the end because of an annoying ding sound the DVD player made. Every time the cursor in the interface moved there was a ding, and I didn’t like hearing it.

Designing a Home Theater - Home Theater Remote - Logitech Harmony Elite Remote - The Digital Screen with the Activities List

Watch TV

  1. ProjectorPower On
  2. ProjectorInput HDMI 1
  3. AmplifierPower On
  4. Amplifier- Input HDMI 2
  5. Cable DVRPower On
  6. LightsIR004

Watch A Movie

  1. ProjectorPower On
  2. ProjectorInput HDMI 1
  3. AmplifierPower On
  4. Amplifier- Input HDMI 2
  5. Cable DVRPower On
  6. LightsIR004

Watch Netflix

  1. Blu-Ray PlayerPower On
  2. AmplifierPower On
  3. AmplifierInput: HDMI 1
  4. ProjectorPower On
  5. ProjectorInput: HDMI 1
  6. Wait 10 sec
  7. Blu-ray PlayerNetflix
  8. LightsIR004

Watch Amazon

  1. AmplifierPower On
  2. AmplifierInput: HDMI 1
  3. Blu-Ray PlayerPower On
  4. ProjectorPower On
  5. ProjectorInput: HDMI 1
  6. Wait 15 sec
  7. AmplifierMute
  8. Blu-ray PlayerInternet
  9. Wait 14 sec
  10. Blu-ray PlayerDirectionLeft
  11. Wait 2 sec
  12. Blu-ray PlayerDirectionDown
  13. Wait 2 sec
  14. Blu-ray PlayerOK
  15. AmplifierVolumeDown
  16. LightsIR004

[et_bloom_inline optin_id=”optin_7″]

Summing It All Up

Having a Harmony Home theater remote control is way better than trying to manage 6 remotes…. but I had no idea how much better the experience was going to be.

The remote control makes it a real pleasure to turn on and off your devices. If you have a home theater getting a Harmony remote control is a must!

The simplicity of use that a remote like this gives you is amazing.

In my opinion, a home theater design is incomplete if it doesn’t include a home theater remote control.