
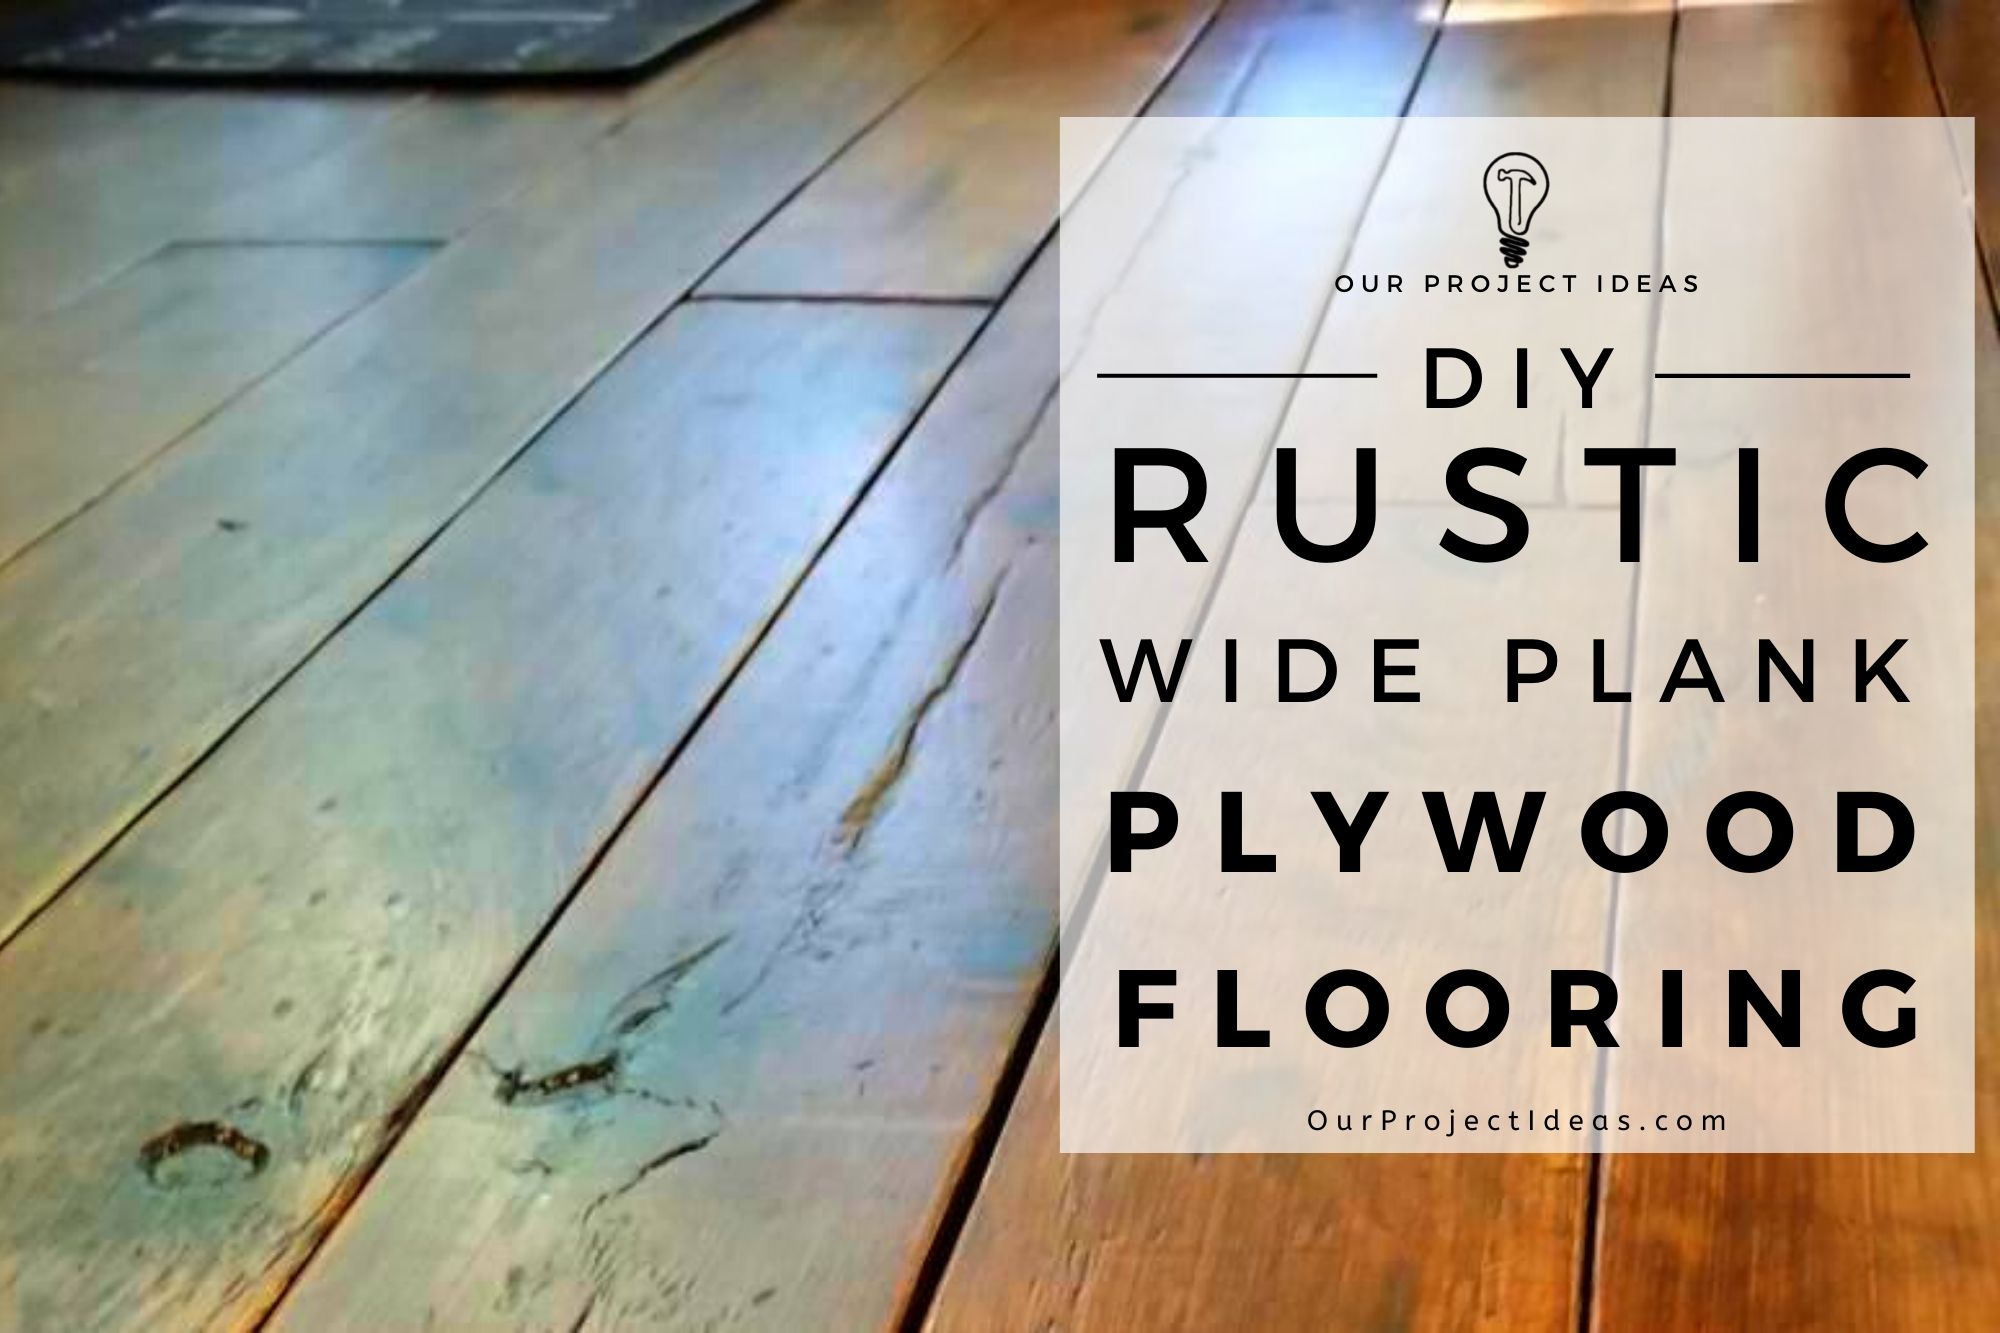
Zoals je zou verwachten, DIY-rustieke multiplexvloeren met brede planken duren veel langer om af te werken dan alleen het installeren van vooraf gemaakte planken.
Dit project was het ware gevoel van doe-het-zelf. Alles, van het zagen van multiplex tot brede planken, te schuren, kleuring, het afwerken en plaatsen van de multiplex planken… allemaal doe-het-zelf.
Alles bij elkaar genomen, het gehele project, van begin tot eind duurde niet Dat lang.
Van het zagen van de planken uit multiplex, om uiteindelijk de vloeren in zowel de eetkamer als de keuken te plaatsen – duurde ongeveer een week.
Als je bereid bent er tijd in te steken en te zweten, het is absoluut de moeite waard!
De vloeren zien er prachtig uit (de foto's doen het geen recht) en je zou echt niet weten dat het gebeitste multiplexvloeren zijn.
Lees verder om te zien wat er nodig was om onze rustieke multiplexvloeren met brede planken te maken en te installeren en hoe u uw eigen unieke multiplexvloer kunt installeren.
Openbaring: Sommige van de onderstaande links zijn gelieerde links. Als u besluit een van deze producten te kopen, We verdienen een kleine commissie zonder extra kosten voor u. We raden deze producten alleen aan omdat we er ervaring mee hebben en ze gebruiken voor onze eigen projecten. Als Amazon Associates, We verdienen aan kwalificerende aankopen.
Update: It has now been several years since we first laid these plywood plank floors, and they have held up great to everyday use and vacation-rental traffic. We get asked about longevity a lot, and the honest answer is that the finish is what makes or breaks it. Keep a solid coat of polyurethane on them and they wear really well.
Is Plywood Plank Flooring a Good Idea?
Ja. Plywood plank flooring is a durable, budget-friendly alternative to hardwood when it is sealed well. You rip sheets of plywood into planks, then stain and seal them, so you control the plank width, kleur, texture, and finish for a fraction of the cost of solid hardwood. Our floor came to about $1,040 in materials for roughly 700 square feet, around $1.50 a square foot, and it has held up to years of vacation-rental traffic. The main trade-offs are the labor, since cutting and finishing the planks takes time, and the need for a good polyurethane sealer to protect the softer plywood surface.
Inhoudsopgave
Waarom multiplexvloeren gebruiken
De keerzijde van multiplexvloeren
Multiplex plankdikte
Multiplex plankbreedte
Het type multiplex
Vóór foto's
Hoeveel multiplex we hebben gebruikt
De ondervloer voorbereiden
Ondervloer schilderen
Het zagen van de planken
Een mal maken
De plank schuren
Karakter toevoegen
Het verbranden van de multiplexplaten
Het kleuren van de planken
Het aanbrengen van de afwerking
Het leggen van de planken
Het beveiligen van de planken
Enkele foto's
Waarom wij voor W kozenide Plank Multiplexvloeren
Een deel van de vloerbedekking in onze vakantiewoning in Poconos moest vervangen worden. Namelijk, de zwevende hardhouten vloer in de eetkamer en keuken en het tapijt in de woonkamer.
Ons doel was om nieuwe vloeren te hebben die er oud uitzien, warm, en versleten – alsof ze er altijd al waren geweest. In principe, hoe meer het op boerderijvloeren of schuurhout leek, hoe beter het voor ons was.
We hebben gekeken naar tegels, steen, en hardhouten vloeren. Het probleem met allemaal was dat ze allemaal een vlakke ondervloer nodig hadden en die van ons was ongelijk… zoals echt ongelijk.
Omdat het hele huis is gemaakt van ruw gesneden eikenhout, de vloer is niet eens bijna vlak.
Dat maakt tegel, stenen en zelfs hardhouten vloeren zijn zeer moeilijk te installeren. De extra moeilijkheid vertaalt zich ook in zeer dure installatiekosten.
Het was tijd om creatief aan de slag te gaan, DIY-vloeren waren in onze toekomst. Om meer vloerideeën op te doen, wendden we ons tot Pinterest. Na veel scrollen, we kwamen een rustieke boerderij multiplexvloer met brede planken tegen!
Op Pinterest, er was een miljard (Nou ja, misschien niet zo veel) ideeën voor multiplexvloeren, maar degene die het beste bij ons paste, was de brede plankenvloer.
De foto's van de projecten van multiplex met brede planken die anderen hadden gepost, waren ongelooflijk – dit was het! Dit was de perfecte vloer voor oneffen vloeren.
We waren verkocht op het idee.
Bij twijfel – Wabi Sabi
Er is een concept dat ik op Pinterest tegenkwam en dat een belangrijke rol speelde bij mijn keuze voor multiplex boven andere vloersoorten.
Het heet wabi-sabi.
Het is een Japanse traditie die de kunst is om kapotte dingen beter te maken dan gloednieuwe.
Het idee is om de onvolkomenheden naar voren te brengen – ze perfect onvolmaakt te maken.
Met dit nieuwe perspectief, Ik was op zoek naar onvolkomenheden om te pronken – in plaats van ze te vermijden.
Als (of wanneer) de vloeren krijgen een nieuwe slijtplek of kras, het draagt bij aan het karakter van de vloer. Het is een heel bevrijdend concept waar ik heel blij mee ben.
Klik op de foto om de Pinterest-pin te zien die mij inspireerde, Ik hoop dat het voor jou hetzelfde doet.

Waarom multiplexvloeren gebruiken? Het is betaalbaar.
De meeste mensen besluiten multiplex plankenvloeren te installeren vanwege de betaalbaarheid.
Het is veel goedkoper om een multiplexvloer te plaatsen dan traditioneel hardhout of zelfs laminaat, het is zelfs goedkoper dan vinyl maken.
Voor onze multiplex boerderijvloeren, de kosten speelden niet echt een rol in ons besluitvormingsproces.
Begrijp me niet verkeerd, het is altijd leuk om wat geld te besparen… het stond gewoon lager op onze lijst.
Hoger op onze lijst stond een stevige vloer, zag eruit alsof het er altijd al was, passen bij de stijl van het huis en zijn eenvoudig te plaatsen op een oneffen vloer.
Tussen de mogelijkheid om bredere planken te maken en de afstand ertussen – Multiplexvloeren met brede planken pasten perfect bij dit huis.
De afstand tussen elke plank maakt het vergevingsgezinder in scenario's zoals de onze, waarbij de vloer niet waterpas is.
Daarbovenop, Door het Japanse concept dat ik tegenkwam, realiseerde ik me dat eventuele oneffenheden die de vloer zal krijgen naarmate deze ouder wordt, alleen maar zullen bijdragen aan de schoonheid van de vloer.
Het hoefde dus niet zo stevig te zijn als hardhout, we zullen gewoon de onvolkomenheden die daarmee gepaard gaan omarmen! 🙂
Nog een reden om Plywood vloerplanken? De veelzijdigheid
Een ander groot voordeel van multiplex vloerplanken is de veelzijdigheid van het ontwerp.
Ik hou ervan hoe mijn multiplex plankenvloeren bleek. Er is werkelijk niets dat ik zou veranderen, maar één ding is geweldig multiplex planken is dat er geen limiet is aan wat u kunt doen.
Ik hou van de manier waarop het rustiek is multiplex vloerplanken kwamen eruit, maar de multiplexplanken hadden er net zo goed uit kunnen zien met een moderne uitstraling.
Kijk eens naar multiplex vloerplanken op Pinterest. Je zult zien dat er geen limiet is aan de stijl, kleur, vorm, maat, of textuur. Het is allemaal gewoon een kwestie van voorkeur – hoe gaaf is dat?
De kosten van onze doe-het-zelf multiplexvloeren
We wisten dat we behoorlijk wat geld hadden bespaard door te kiezen voor multiplex faux plankenvloeren, maar we wisten niet hoeveel geld totdat iemand in de opmerkingen om een overzicht vroeg..
We hebben een ton bespaard!!
Natuurlijk, wat u in dollars bespaart, verliest u in de loop van de tijd. Wij beschouwden het echter niet als tijdverlies, het zag het als een geweldige manier om onze creatieve sappen te laten stromen en gaf ons een vloer die volkomen uniek is – en het heeft ons bovendien een hoop geld bespaard! Winnen – winnen – winnen!
Totale kosten
22 vellen multiplex @ $ 32/blad = $ 704
17 liter vlek @ 16,30/liter = $ 276
5 gallon Poly @ $12/gallon = $60
TOTAAL = $ 1040
Vierkante voet
22 vellen * 32 vierkante meter. ft./blad = 704 vierkante meter. ft.
$ 1040 /704 m². ft. = $ 1,47 per vierkante meter. ft.
De keerzijde van multiplexvloeren
Het enige negatieve dat ik zag multiplex vloerplanken was de duurzaamheid. Het is geen hardhout, dus het krast gemakkelijker dan een eikenhouten vloer.
Nu met mijn nieuwe wabi-sabi-perspectief, Ik kijk eigenlijk uit naar de krassen en deuken.
De oneffenheden zullen alleen maar bijdragen aan de schoonheid van de vloer. Als er een kras is die echt lelijk is, Ik kan iets creatiefs toevoegen om het schoonheid te geven.
Perfect onvolmaakt.
De boodschappenlijst
Tools -lijst
Hier is een lijst met de tools die we bij dit project hebben gebruikt.
Affiliate links hieronder kunnen vergelijkbaar zijn met vergelijkbare items wanneer exacte items niet online kunnen worden gevonden.
Extra batterij voor afwerking Nailer
Benodigdhedenlijst
Dit zijn de benodigdheden die bij dit project worden gebruikt.
Affiliate links hieronder kunnen vergelijkbaar zijn met vergelijkbare items wanneer exacte items niet online kunnen worden gevonden.
Varathane Cherrywood gel vlek – We hebben ongeveer 7 liter gebruikt
Op water gebaseerde olie-gemodificeerde poluyrathaan – We hebben 2 gallons gebruikt
3″ Natuurlijke borstelborstel – 6 borstels om de vlek aan te brengen
4″ Polyester synthetische borstel – 4 borstels om de poly aan te brengen
Maskeerpapier – We hebben het maskeerpapier gebruikt om het dek te beschermen bij het aanbrengen van de vlek en poly
De dikte van de multiplex plankenvloer
De dikte van de multiplex plankenvloer die we gebruikten is 1/2″ dik. Als onze vloeren niet zo ongelijk waren, hadden we 3/4″ kunnen gebruiken, maar de flexibiliteit die een 1/2″ multiplex heeft was perfect om zich aan te passen aan de contouren van onze ongelijke ondervloer.
Ik denk dat een bijkomend voordeel van het 1/2″ multiplex is dat de ruimtes tussen de planken minder gemakkelijk vuil vasthouden.
Het klinkt misschien alsof dat een beetje lang is, maar ik denk dat als het 3/4 "multiplex was, de extra 1/4″ multiplexdikte kan het voor een stofzuiger moeilijker maken om dingen eruit te zuigen die vast komen te zitten in de ruimtes.
We wisten niet zeker hoe het zou gaan met het stof en de dingen die erin zouden vallen, maar tot nu toe gaat het goed: niets wat een goede stofzuiging niet kan oplossen. 🙂
Behalve dat er mogelijk dingen vast komen te zitten in de ruimtes tussen de planken, Ik zie geen enkele reden waarom je 3/4 niet zou kunnen gebruiken″ dik multiplex voor uw plankenvloer. Dat wordt gezegd, Ik zie ook niet echt een voordeel om het meer dan 1/2 te gebruiken″ multiplex.
De breedte van de multiplexplank
We wilden een boerderij- of landelijke uitstraling, dus een brede plank is waar we voor gingen.
We wilden ook de hoeveelheid verspild multiplex verminderen, dus de breedte die we bedachten was 5 7/8″ voor elk bord. Dat geeft ons 8 planken per plaat en een klein strookje aan het eind.
We hebben andere multiplexvloeren gezien waar ze gingen voor planken van 8 inch of zelfs 12 inch. Wij wilden ze niet maken Dat breed omdat we vonden dat het duidelijk maakte dat het een multiplexvloer was.
En een breed bord zou het gevreesde multiplex zebrapatroon hebben laten zien waar ik niet om geef (later meer over het multiplex zebrapatroon).
Het type multiplex dat we hebben gebruikt
In de opmerkingen stonden een aantal vragen over het type multiplex dat werd gebruikt voor de multiplexplanken.
Het multiplex is normaal 3-laags, goedkoop huilerig, gewoon Jane, ruw afgewerkt 1/2″ grenen multiplex.
De exacte naam van Lowes is:
Plytaan 15/32″ KAT PS1-09 vierkante structurele multiplex grenen
In principe, het goedkoopste multiplex dat we konden krijgen.
Omdat we een rustieke uitstraling wilden, waren de knopen en onvolkomenheden geen probleem.

Sommige vóór foto's
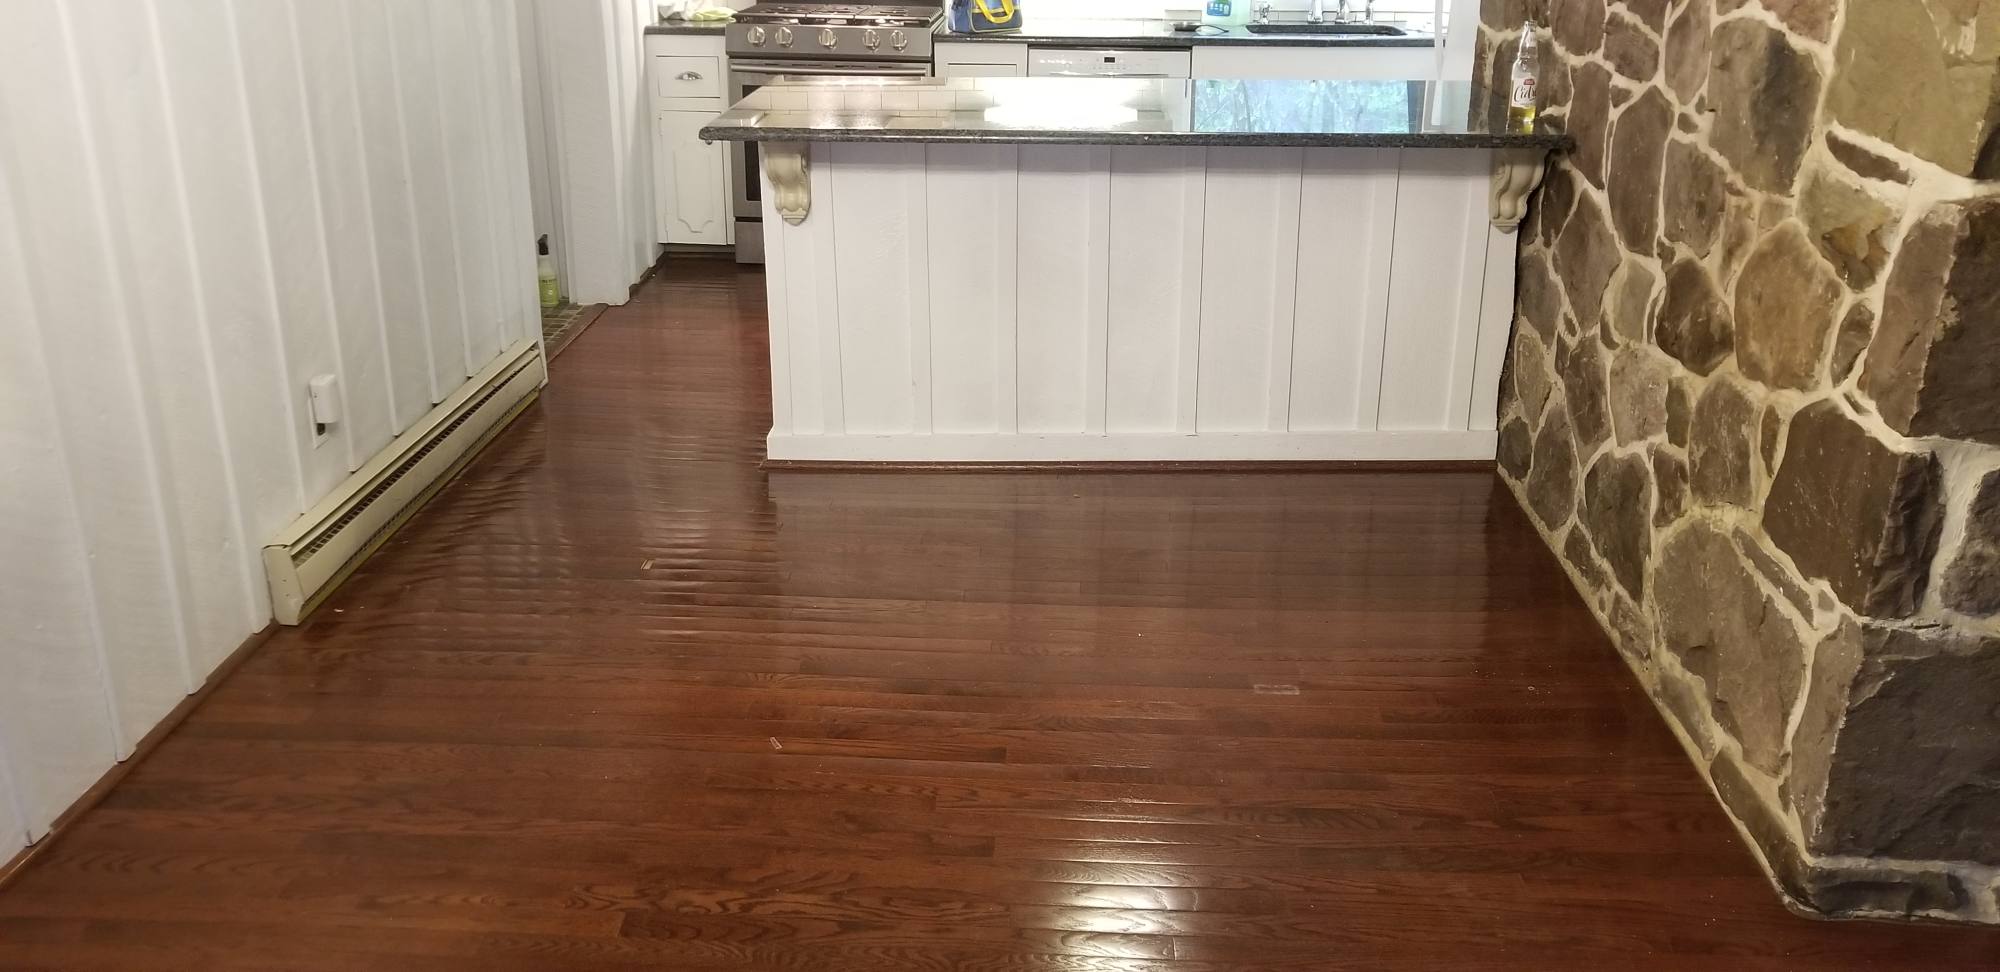
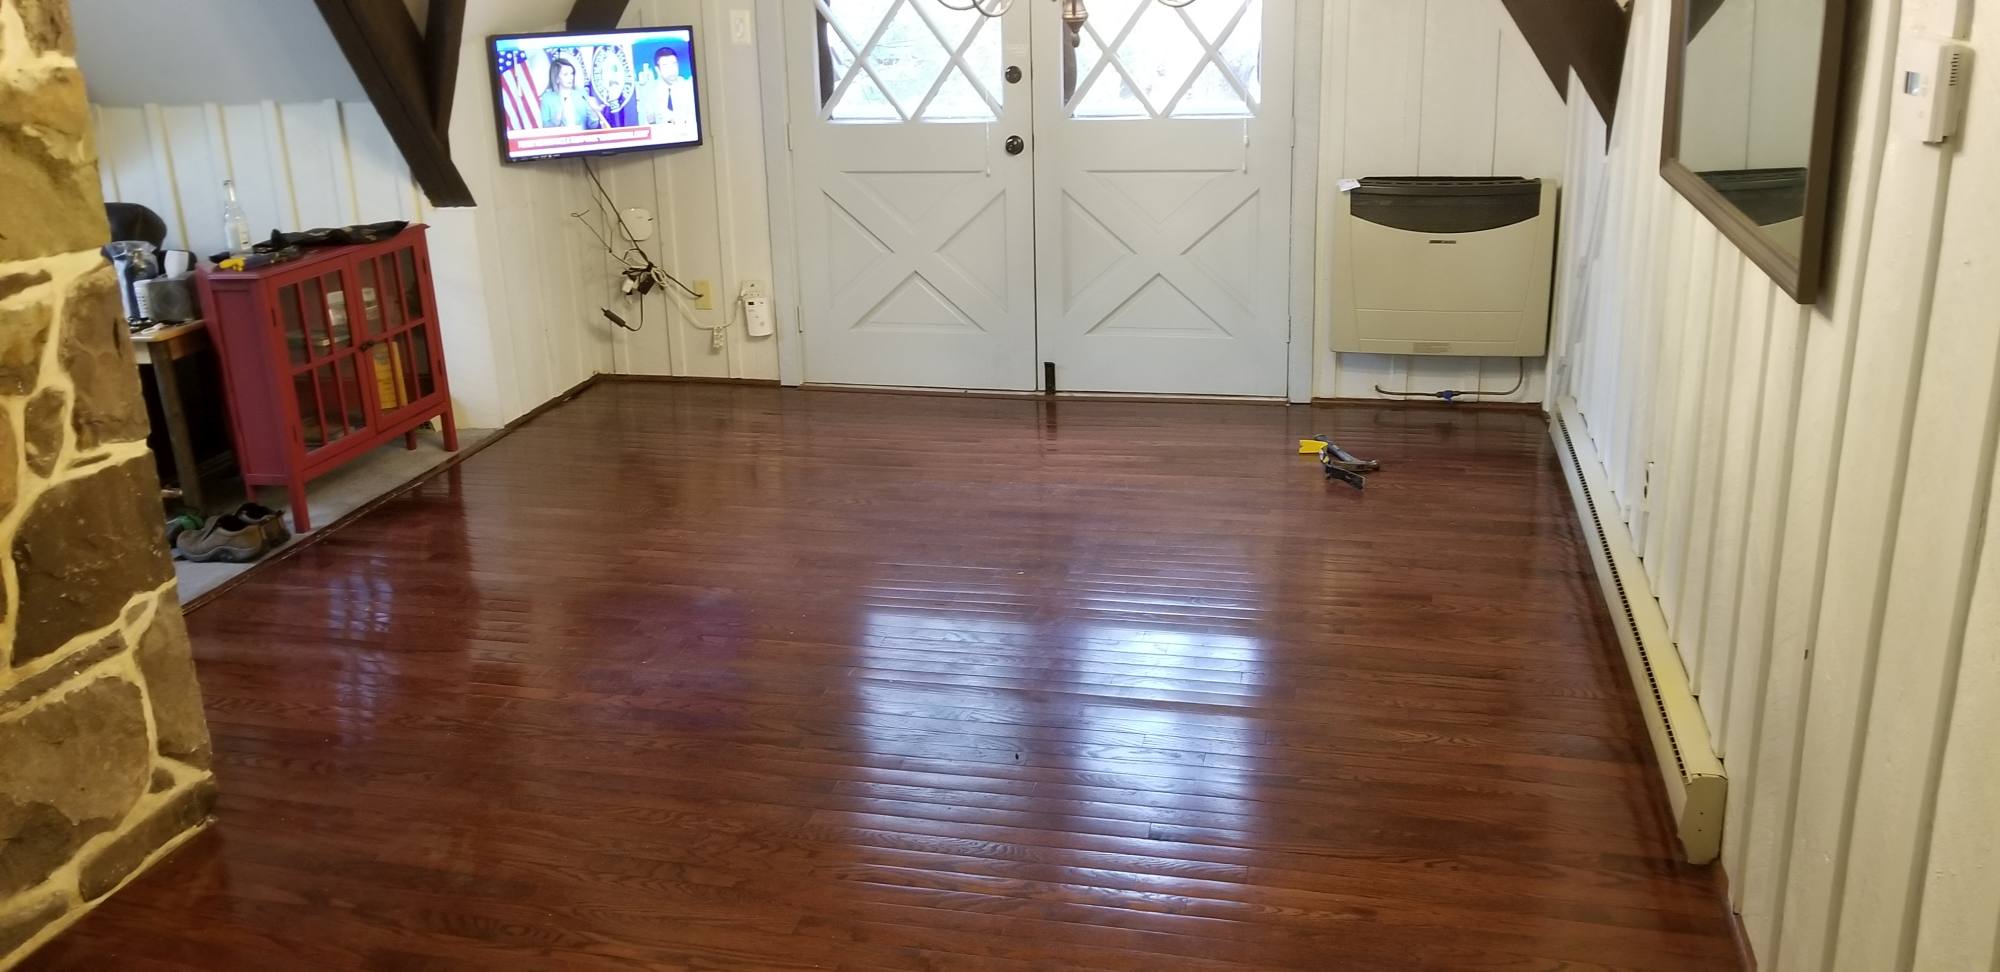
Hier zijn enkele voorfoto's van de ruimte met de originele vloer.
We hielden van de kleur van de originele vloeren, maar de vloer paste nooit echt bij de stijl van het huis. Het was een 3/8″ zwevende vloer en de houtstrips waren vrij dun. Omdat het zweefde en een vrij dunne vloer had, het klonk altijd een beetje hol als je erop liep.
Het echte probleem met de oude vloer was dat deze op sommige plekken kromp, waarschijnlijk vanwege de manier waarop het is geïnstalleerd.
Dat knikken was een van de redenen waarom we vonden dat de brede plankenvloer van multiplex perfect zou zijn voor deze ruimte.
De brede plankenvloer heeft ruimte rond elke plank, die afstand zou voorkomen dat de nieuwe vloer knikt.

Hoeveel multiplex heb je nodig
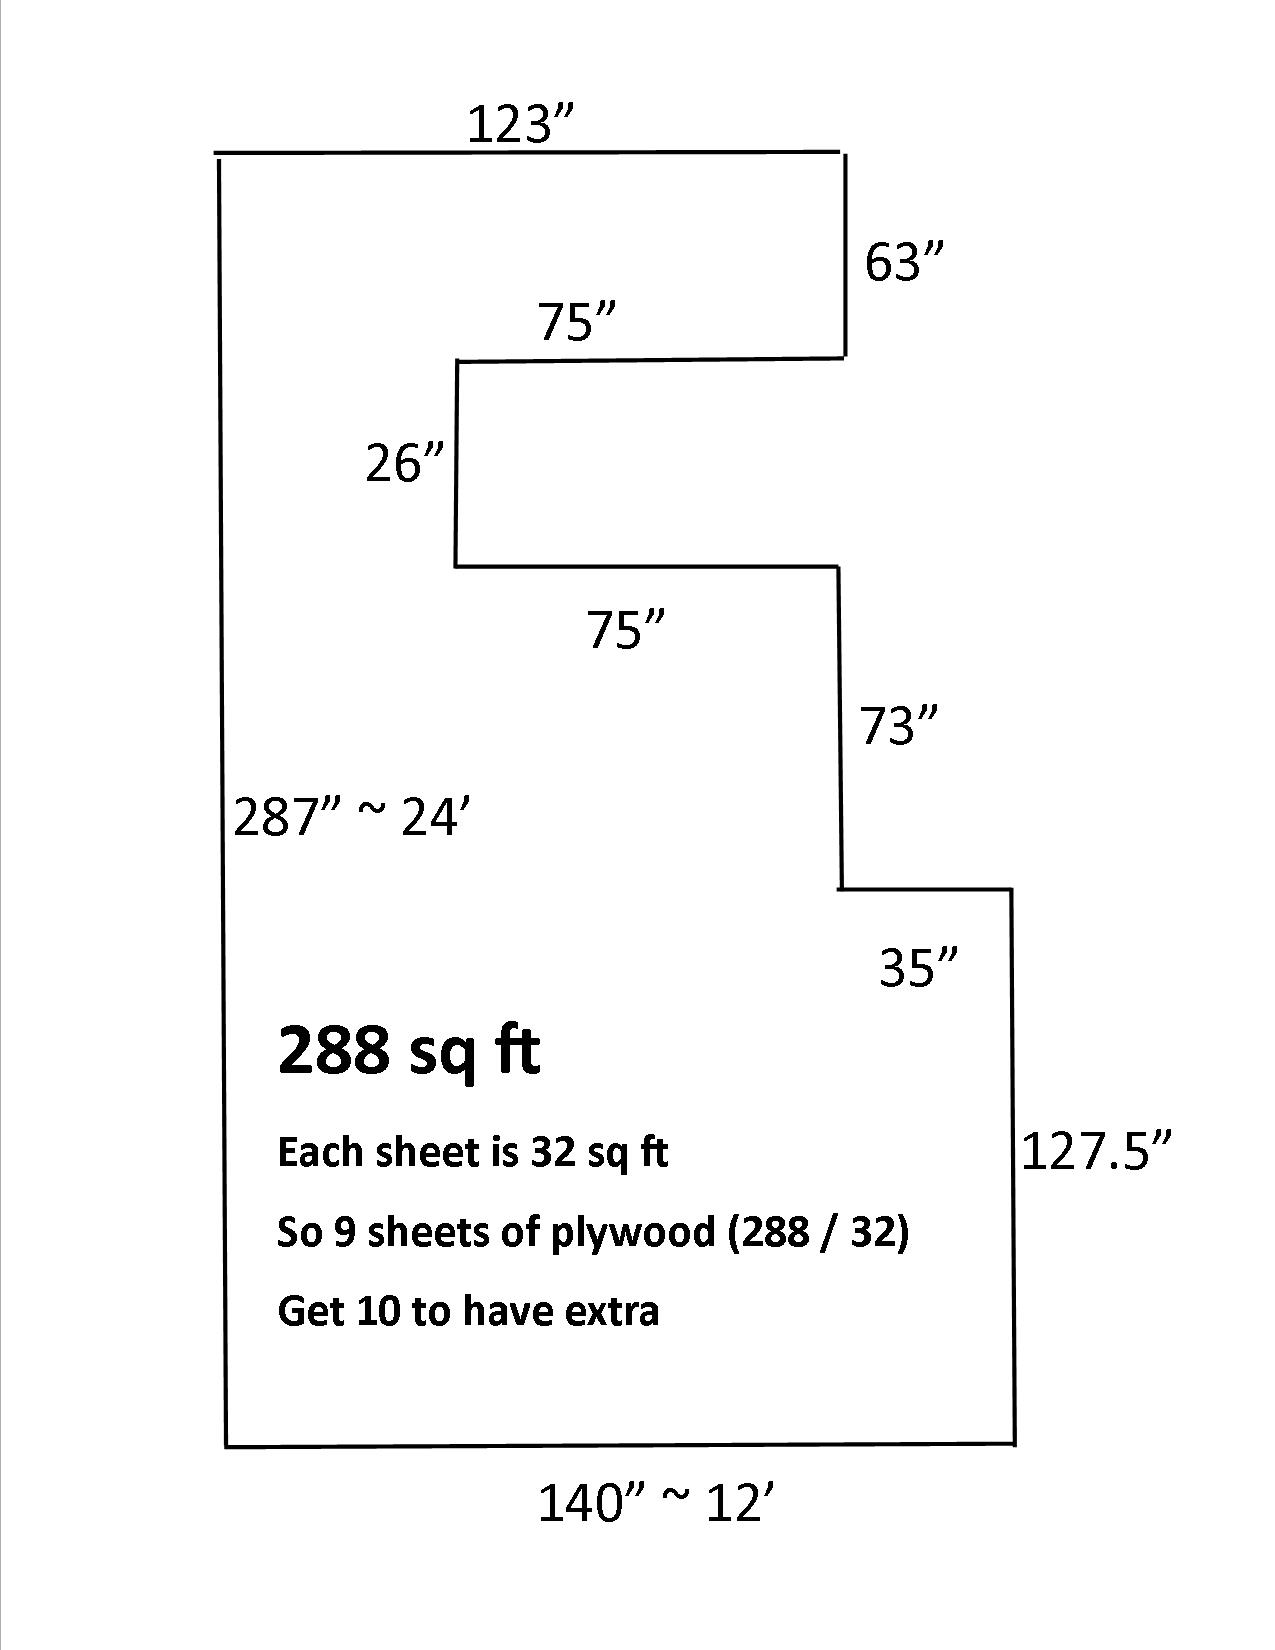
De metingen hoeven niet supernauwkeurig te zijn. Door de metingen naar boven af te ronden en een extra multiplexplaat aan het totaal toe te voegen, zou u voldoende speelruimte moeten krijgen.
Voor onze ruimte, Ik behandelde het als een grote rechthoek. De lengte was 287″ (afgerond naar 24′) en de breedte was 140″ (afgerond naar 12′).
24 x 12 is 288 vierkante meter.
Elk stuk multiplex is 4 'x 8', dus dat geeft je 32 vierkante voet per vel.
Toen ik de totale vierkante voet verdeelde (288) per vierkante meter per vel (32) het vertelde me dat ik 9 platen multiplex nodig had.
Daarna heb ik een extra vel toegevoegd als buffer.
De definitieve cijfers
We kochten 10 vellen multiplex van 1/2 ″ voor ons project en zodra het voltooid was, we hadden nog ongeveer 1 vel over.
De ondervloer voorbereiden
Totale tijd: 2 personen ongeveer 2 uur
De originele vloer was een 3/8″ hardhouten vloer die met veel nietjes is gelegd…. zoals veel nietjes.
In eerste instantie, het voelde alsof het verwijderen van de nietjes een eeuwigheid duurde.
Toen we eenmaal in het ritme kwamen, duurde het eigenlijk maar een paar uur voordat we ze er bijna allemaal uit hadden.

Ondervloer schilderen
De ondervloer die we hadden was ongeverfd multiplex.
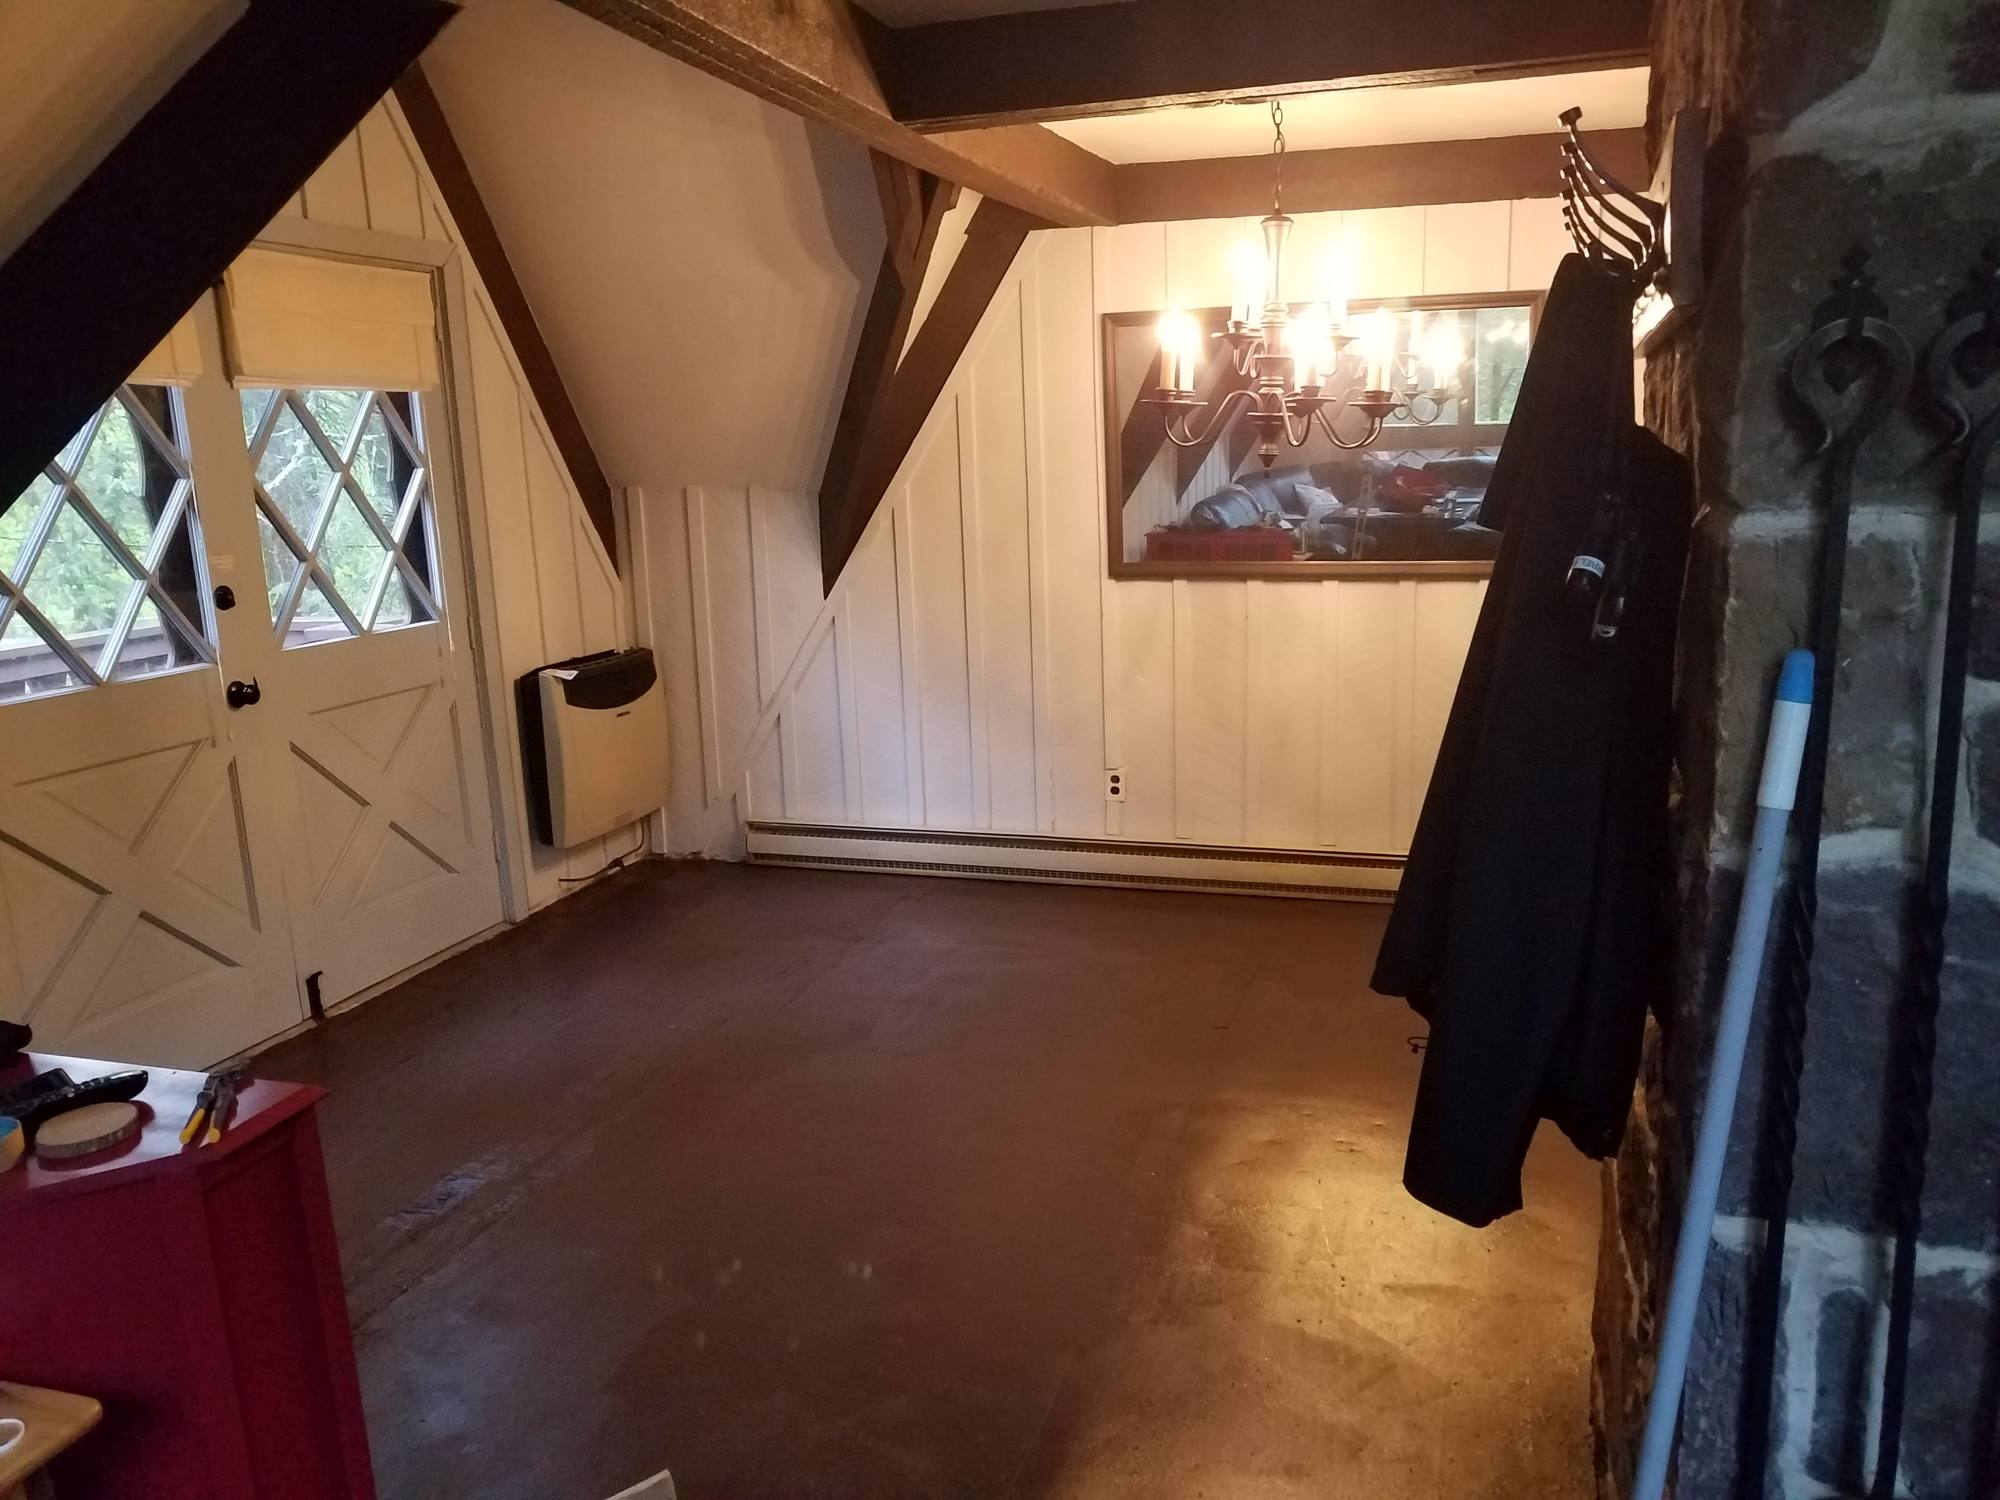
Als we de multiplexvloer met brede planken hebben geïnstalleerd zonder eerst de lichter gekleurde ondervloer te schilderen, het zou door de ruimtes tussen de planken zichtbaar zijn geweest.
Om te voorkomen dat dat gebeurt, we hebben de ondervloer een zeer donkerbruine kleur geverfd, met verf die we al hadden.
Elke donkere verfkleur zou het werk doen – blijf gewoon bij een verf die eierschaal of satijn is.
Je wilt niet dat er een glanzende ondervloer door de ruimtes tussen de planken heen zichtbaar is.
Het multiplex in planken zagen
Totale tijd: Met het juiste mes zou dit minder dan 2 uur duren voor 10 vellen
Ik blijf ze planken of planken noemen, maar eigenlijk, bij deze stap heb ik de platen multiplex genomen en in lange stroken gesneden.
Veel van de Pinterest-posts die ik tegenkwam, zeiden dat ze een persoon uit Lowes of Thuis Depot sneed de platen voor hen.
Het is zeker een optie. Ik heb in het verleden gebruik gemaakt van hun snijdiensten toen de sneden niet erg precies hoefden te zijn.
In dit geval, Ik wilde nauwkeurigere sneden, dus heb ik ervoor gekozen om het zelf te doen.
Het duurt VEEL langer, maar ik dacht dat het de extra tijd waard was om multiplexplanken van consistent formaat te hebben.
Op die manier, Ik was er zeker van dat elk stuk dat zou zijn ongeveer dezelfde breedte.
Om het snijden van de stukken VEEL gemakkelijker te maken en ze dezelfde breedte te houden Ik heb een mal gemaakt.
Ze zeggen dat de achterste plaats 20/20 is, Als ik er nu op terugkijk, zou ik de multiplexstrips voor de vloer nog steeds zelf op maat zagen.
Ik heb onlangs de snijdiensten gebruikt voor een ander project waarbij het me niet kon schelen hoe breed ze het man o man sneden, Ik denk niet dat er twee sneden waren die dezelfde breedte hadden.

Het beste zaagblad om te gebruiken
We hadden 10 platen multiplex om in brede multiplexplanken te zagen. Ik dacht dat een multiplexblad het beste zou zijn. Ik dacht dat al het andere een heel ruw randje aan het hout zou achterlaten.
Goed, Ik was erg, heel fout.
Gebruik geen multiplexblad – Gebruik in plaats daarvan een Cross Cut-mes
Het multiplexblad ging niet erg lang mee en kostte veel moeite om door het triplex te gaan. Het begon te roken en had veel meer moeite met het snijden van nauwelijks halverwege het tweede stuk multiplex.
Uiteindelijk moest ik naar buiten om een ander mes te kopen. Deze keer heb ik een kruisvormig mes geprobeerd, OMG wat een verschil.
Het kruisgesneden mes ging als boter door het multiplex en liet een nog betere snede achter dan het multiplexmes. Ik kon de rest van het multiplex doen met alleen dat ene kruisvormige mes.
Als je hetzelfde gekruiste mes wilt hebben dat ik heb gebruikt, klik gewoon op de onderstaande afbeelding.

De Jig
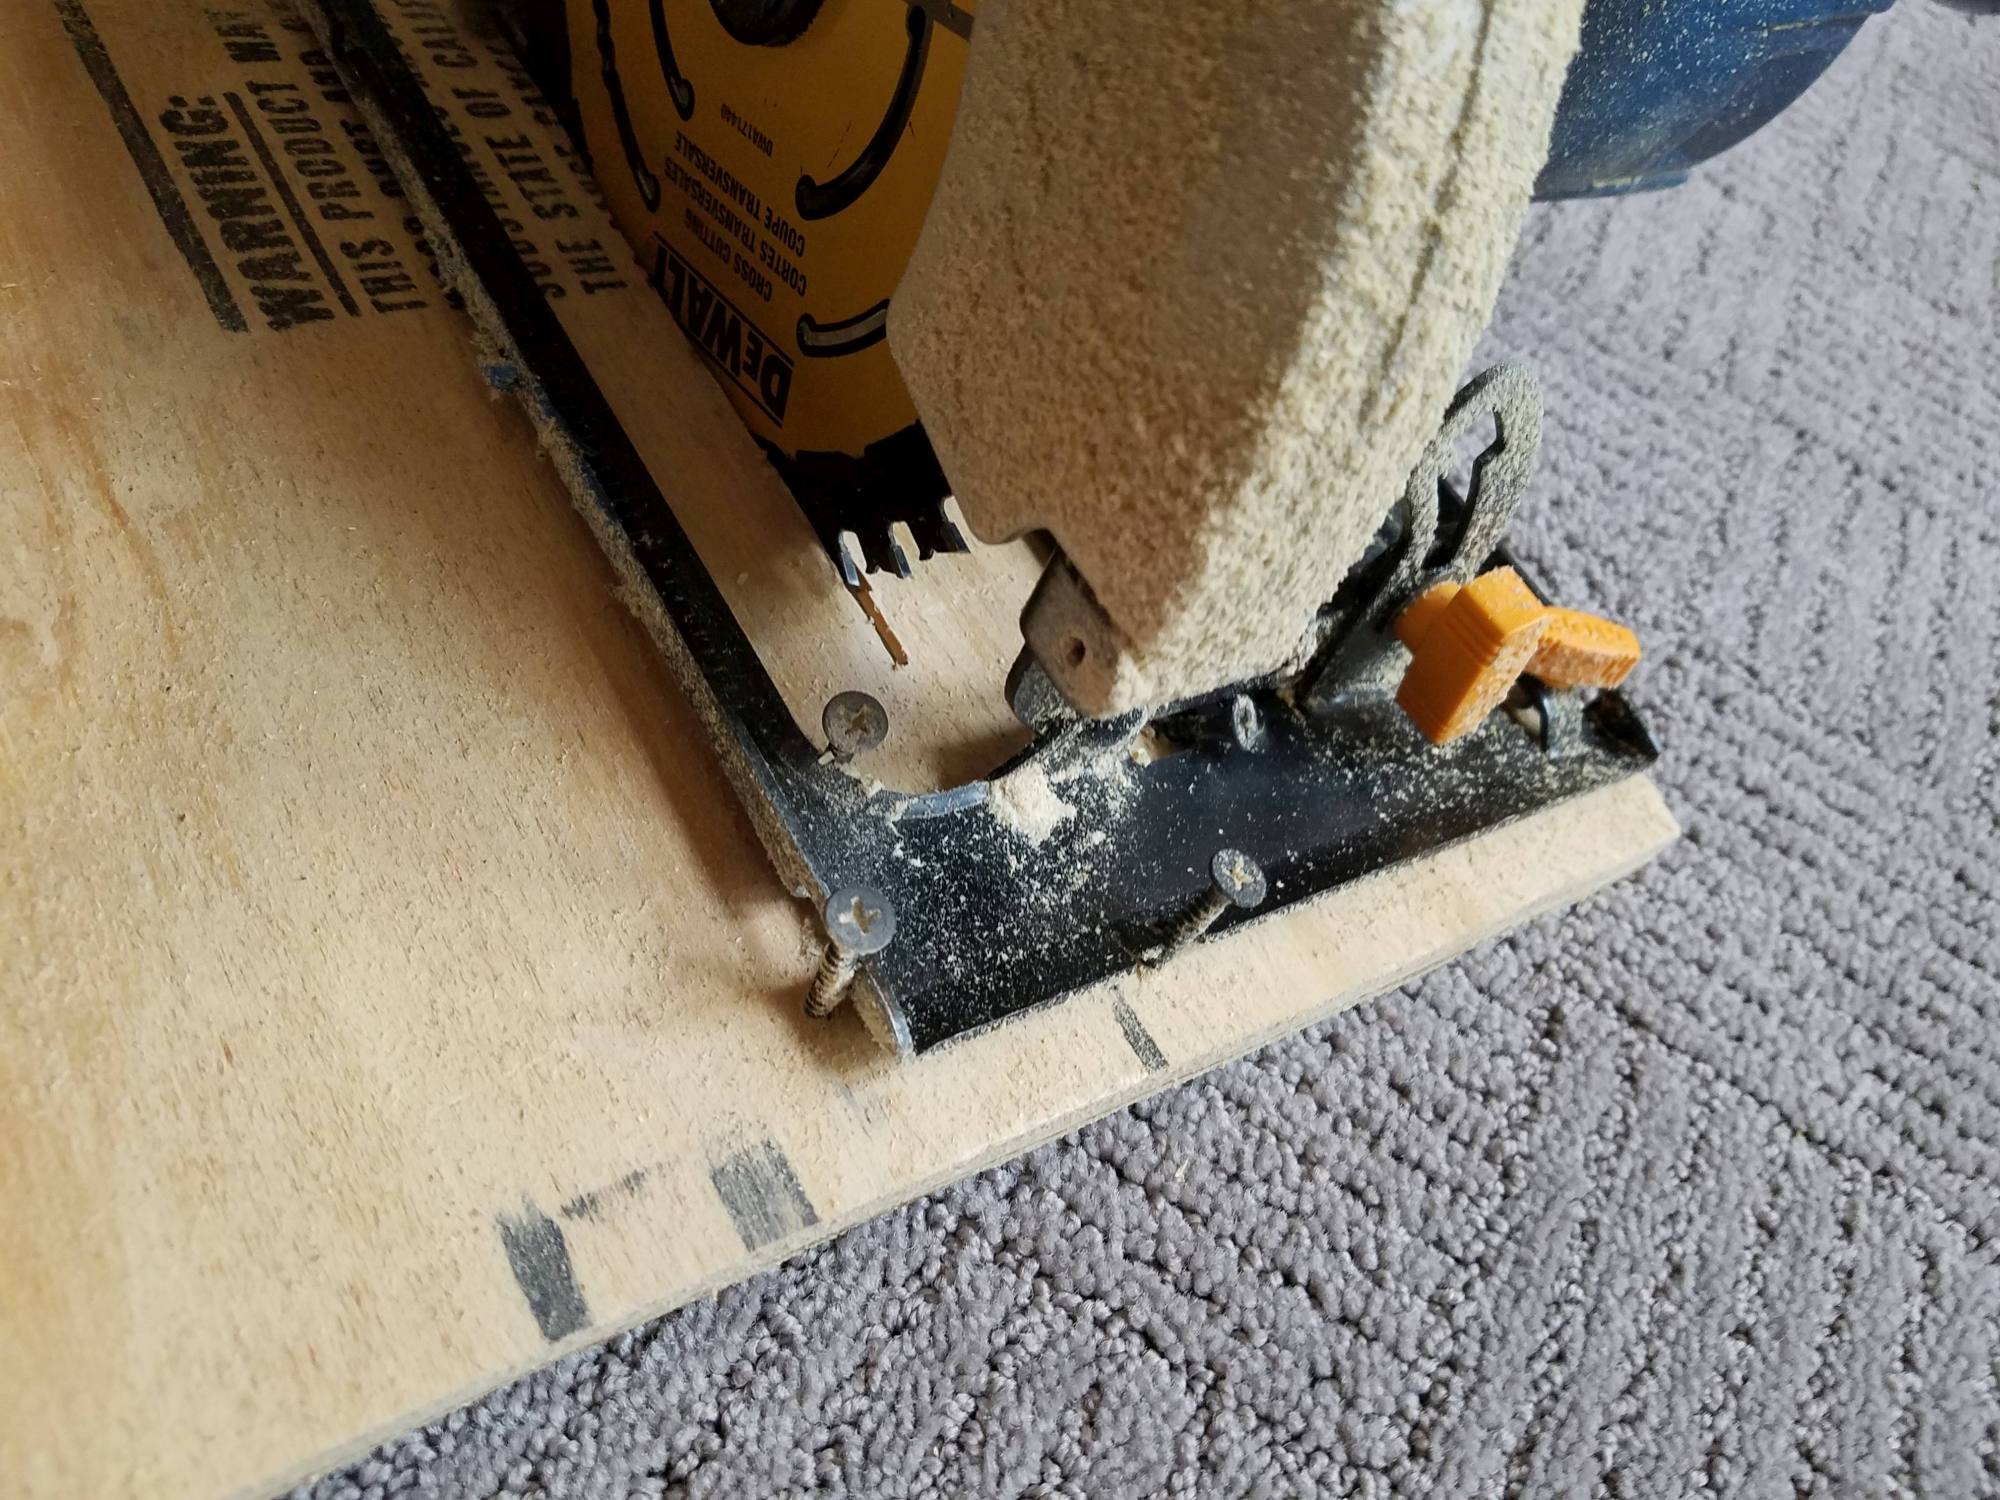
Een mal is mooi gepraat voor een sjabloon. Het maakte een vervelende en tijdrovende taak echt supergemakkelijk.
Het was eigenlijk een 1/2″ stukje oud multiplex had ik met een stukje schroot van 1 x 4 erop vastgeschroefd.
De ruimte tussen het zaagblad en het stuk van 1 x 4 was 5 7/8″, de dikte die we wilden dat onze multiplex vloerplanken zouden zijn.
Om de mal te maken, heb ik het blad van de zaag helemaal naar boven gezet, bevestigde de zaag aan het multiplex met schroeven rondom de zaag, het op zijn plaats vastklemmen.
Daarna liet ik de zaag langzaam in het triplex zakken en mat 5 7/8″ vanaf de binnenkant van de invalsnede en daar heb ik de 1 x 4 vastgeschroefd.


Voor meer informatie over de mal en wat extra tips over het zagen van de planken, bekijk dit bericht, 3 Tijdbesparende tips voor DIY Plank Multiplex Vloeren.
Tip: Als je je eigen planken snijdt je moet een mal maken. Bij het maken van je mal, Verleng de 1 x 4 weg voor en achter de zaag, zoals het op de foto's staat.
Hierdoor kunt u de zaag uitlijnen voordat het blad in contact komt met het triplex. Het geeft ook meer stabiliteit, eindigend met een rechtere snede.
Elke plank schuren
Totale tijd: 2 personen ongeveer anderhalve dag
Dit onderdeel heeft even geduurd, maar het is belangrijk om er tijd in te steken.
We hebben de voorkant van het triplex geschuurd om eventuele splinters en de tekst die soms op het triplex is gestempeld te verwijderen.
We hebben ook de schuurmachine gebruikt om de randen rondom de voorkant van elke plank af te ronden.
De afgeronde rand geeft het een heel mooi afgewerkt uiterlijk en helpt in gevallen zoals het onze, waar de vloeren niet erg vlak zijn.
Afgeronde randen zorgen voor een zachte overgang tussen twee planken als ze niet helemaal op één lijn liggen.
Dit is ook waar u kiest welke kant van het multiplex het gezicht zal zijn, de mooie kant of de lelijke kant.
Toen we partij kozen, Ik zou zeggen dat we 80% van de tijd de lelijke kant kozen.
Het ging in tegen wat ik normaal zou doen, maar nu zou ik willen dat ik meer voor de lelijke kant ging.
Voor het meeste schuurwerk hebben we een bandschuurmachine gebruikt. Je zou een handpalmschuurmachine kunnen gebruiken als je niet te veel vloeren aan het doen bent, maar in ons geval, de bandschuurmachine was veel sneller.
Het schuurpapier dat we gebruikten was korrel 120, het was perfect voor de bandschuurmachine.
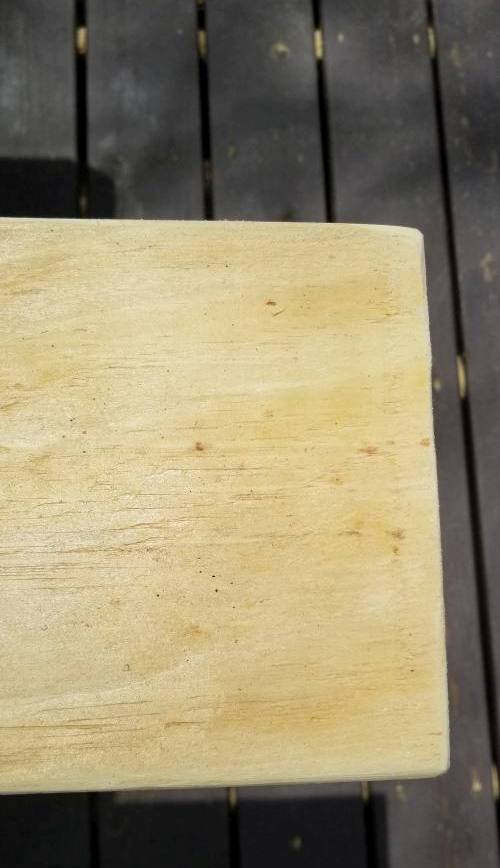
Tijdens dit deel van het project, je zult twijfels hebben over het gebruik van het knoestige deel van het triplex.
MAAR VERTROUW ME – zodra je de beits op het multiplex aanbrengt, zul je versteld staan van hoe goed het eruit ziet.
Op het einde, de mooiste planken waren de planken met imperfecties.
Tip:
Als er een knoop of scheur in een plank zit, plaats het niet opzij en gebruik het niet op een plek die u niet kunt zien.
In plaats van, maak het nog opvallender. Graaf met de schuurmachine in de knoop of scheur om de scheur of knoop meer te benadrukken. Het helpt bij het verwijderen van splinters rond de knoop of barst en voegt ook karakter toe.

Het verontrusten van de multiplex plankenvloer
Totale tijd: Wij deden dit tegelijk met het schuren, dus het is inbegrepen in de anderhalve dag schuren
Dit is het verontrustende deel van de noodlijdende multiplexvloeren.
Er waren drie wapens bij uitstek om het karakter van het multiplex toe te passen (ook bekend als. verontrustend), een hamer, een grote tang en een propaantoorts.
Van de drie gebruikte ik de tang het meest en de hamer het minst.
Een tang gebruiken, Ik sloeg herhaaldelijk met de achterste hoek van de tang op de voorkant van het triplex.
Met de hamer, Ik heb de zijkant van de hamer gebruikt, en de klauw om inkepingen in het triplex te maken.
Als je op de foto naar de vloer recht boven de hamer kijkt, zie je de inkepingen aan de achterkant van de tang links.
Ik heb ook een mes gebruikt om eventuele scheuren in het hout te openen, om ze meer uitgesproken te maken.
Ik deed het door het mes schuin te plaatsen en langs de scheur te snijden, het openmaken van de scheur, vergelijkbaar met wat er met scheuren in beton wordt gedaan als je een scheur wilt opvullen.
Het verontrustende (oftewel karaktervorming) is een belangrijke stap voor verweerde rustieke multiplexvloeren.
Door de scheur en scheur zien de planken er authentiek uit, hoe verontrustender hoe beter.

Nog meer karakter toevoegen – Het verbranden van de multiplexplaten
De propaantoorts was veruit mijn favoriete karakterbouwer – en dat was niet omdat het tot mijn innerlijke pyro sprak…. nou ja, misschien een beetje vanwege mijn innerlijke pyro lol.
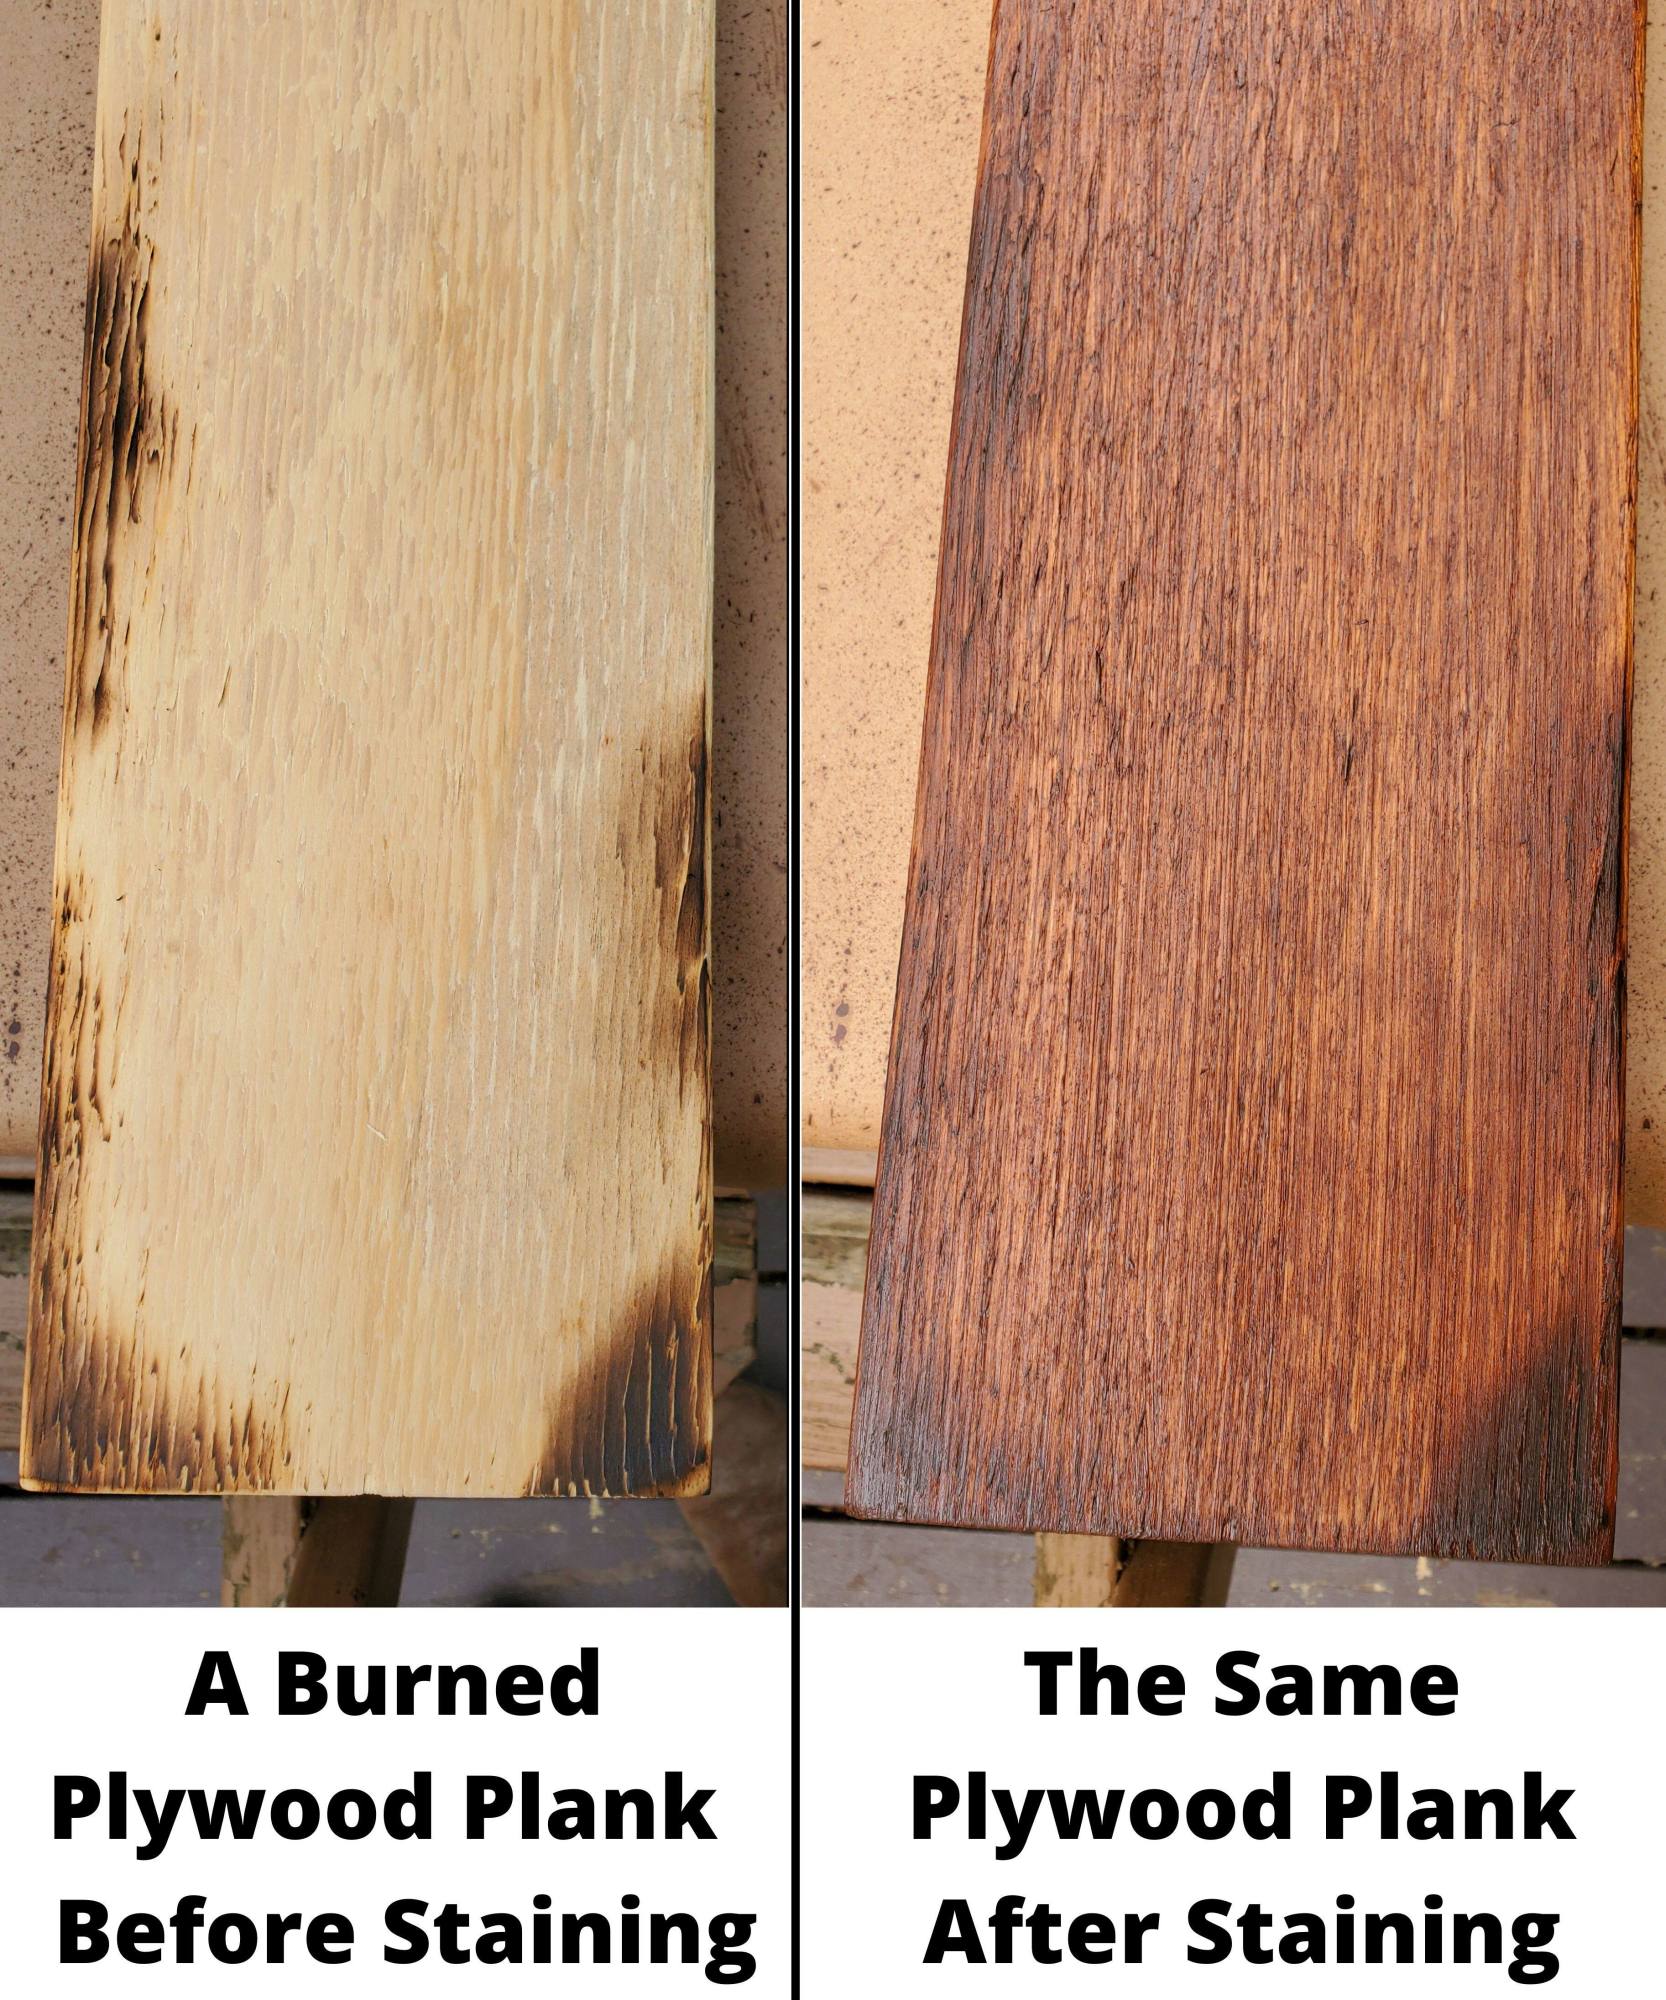
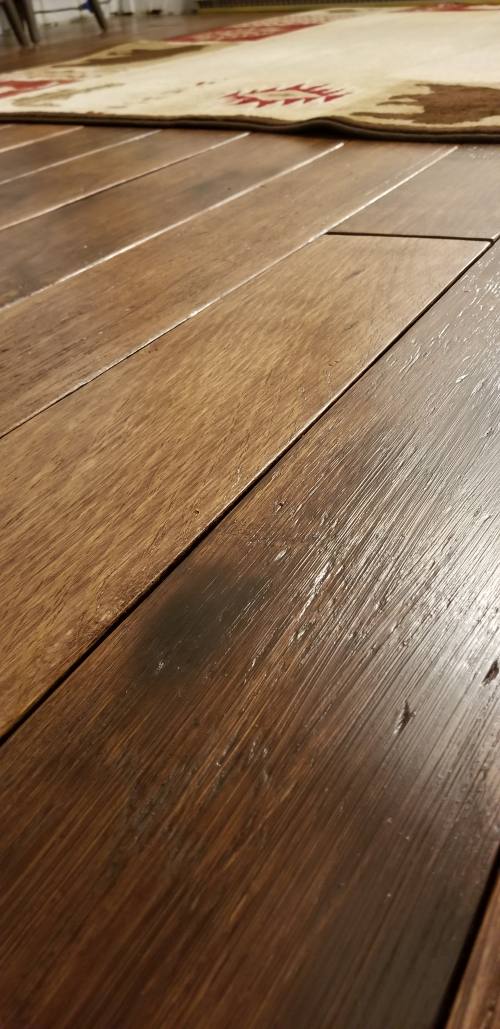
Het verbranden van het multiplex geeft meteen een verbazingwekkende, verouderde uitstraling.
Dit is een ander deel van het proces waarbij ik veel heb geaarzeld.
Maar zodra de vlek aanhoudt, de multiplexplanken veranderen onmiddellijk in een prachtig verouderde vloerplaat!
Bekijk de voor en na foto van de verbrande multiplexplank.
Bij het verbranden van het hout zijn er zeker gedachten aan Oh My God! Dit is te veel!
Maar, zodra de vlek doorwerkt, het combineert de duisternis van de brandwond prachtig met de rest van de multiplexkleuren.
Telkens kwamen we een plank tegen die er een beetje saai uitzag, we hebben er wat karakter in gebrand om de boel op te vrolijken. 🙂
Kijk eens naar de pijlen op de afbeelding, elk van die donkere vlekken is het werk van de propaantoorts.
Tip: Bij het verbranden van het multiplex, de lichtere delen van het hout branden veel gemakkelijker dan de donkere delen.
Omdat ik dat zebrapatroon van multiplex vermeed, Ik heb het hout niet verbrand waar er een zwaar patroon was.
Als je dat gebied verbrandt, wordt het patroon alleen maar benadrukt – en dat wilde ik niet.
Als het deel van het hout alleen donker of alleen licht was, kwam het in aanmerking voor verbranding.

Hier is een video van hoe we de rustieke multiplexvloer met brede planken hebben verbrand.
We kozen voor gelvlek, Dit is waarom
Het proces begon met het eerst uitproberen van een aantal verschillende vlekken op stukjes multiplex, en dit was veruit onze favoriet!
We hebben gekozen voor een gelbeits in plaats van een gewone beits, omdat deze het zebrapatroon van multiplex dat we niet wilden heel goed verbergt..
Het is volledig een persoonlijke voorkeur, maar ik hou niet van het patroon dat je krijgt van gewone vlekken op multiplexvloeren.
Kijk eens naar deze foto die ik van Pinterest heb gekopieerd, voor een voorbeeld van waar ik het over heb.
Normale beits is vloeibaarder en wordt in verschillende snelheden door het multiplex geabsorbeerd. Zachtere delen van het hout nemen de vlek sneller op dan de dichtere delen van het hout.
Een oplossing zou ook zijn om een houtconditioner te gebruiken voordat u gewone beits aanbrengt.
In plaats van, we gebruikten de gelvlek.
Omdat we de gel gebruikten, we konden de houtconditioner overslaan.
Plus, de gelbeits voegde een mooi houtnerfpatroon toe aan het oppervlak van het bord, waardoor het minder op multiplex lijkt….BONUS!

De gelvlek die we hebben gekozen
De gelbeits die we gebruikten was donker van kleur en zorgde voor een lichtere vlek op het hout. Het resultaat was een kersenkleurig hout met een donker nerfpatroon erop, precies wat we zochten.
Hoe dikker je de vlek aanbrengt, hoe donkerder het bord zal zijn.
Ook, hoe langer je wachtte voordat je de overtollige vlek wegveegde, hoe donkerder de plank zal zijn.
Als er op een plank een zwaar zebrapatroon stond, we hebben de vlek er dik op aangebracht en nog een tijdje gewacht voordat we hem droog hebben geborsteld.
Dat is behoorlijk goed gelukt om het zebrapatroon te minimaliseren.
De borstel die we voor de vlek gebruikten, was goedkoop breed (ongeveer 4″) echte borstel.
De vlek heeft een sterke polyurethaangeur, dus hebben we het dek geverfd en de planken daar ook laten drogen.
Als jij hetzelfde gaat doen, Zorg ervoor dat u eerst de weersvoorspelling controleert!
We gebruikten ongeveer 7 liter vlek om ons project te doen.

Het verven van multiplexvloeren
Totale tijd: 2 personen ongeveer een dag
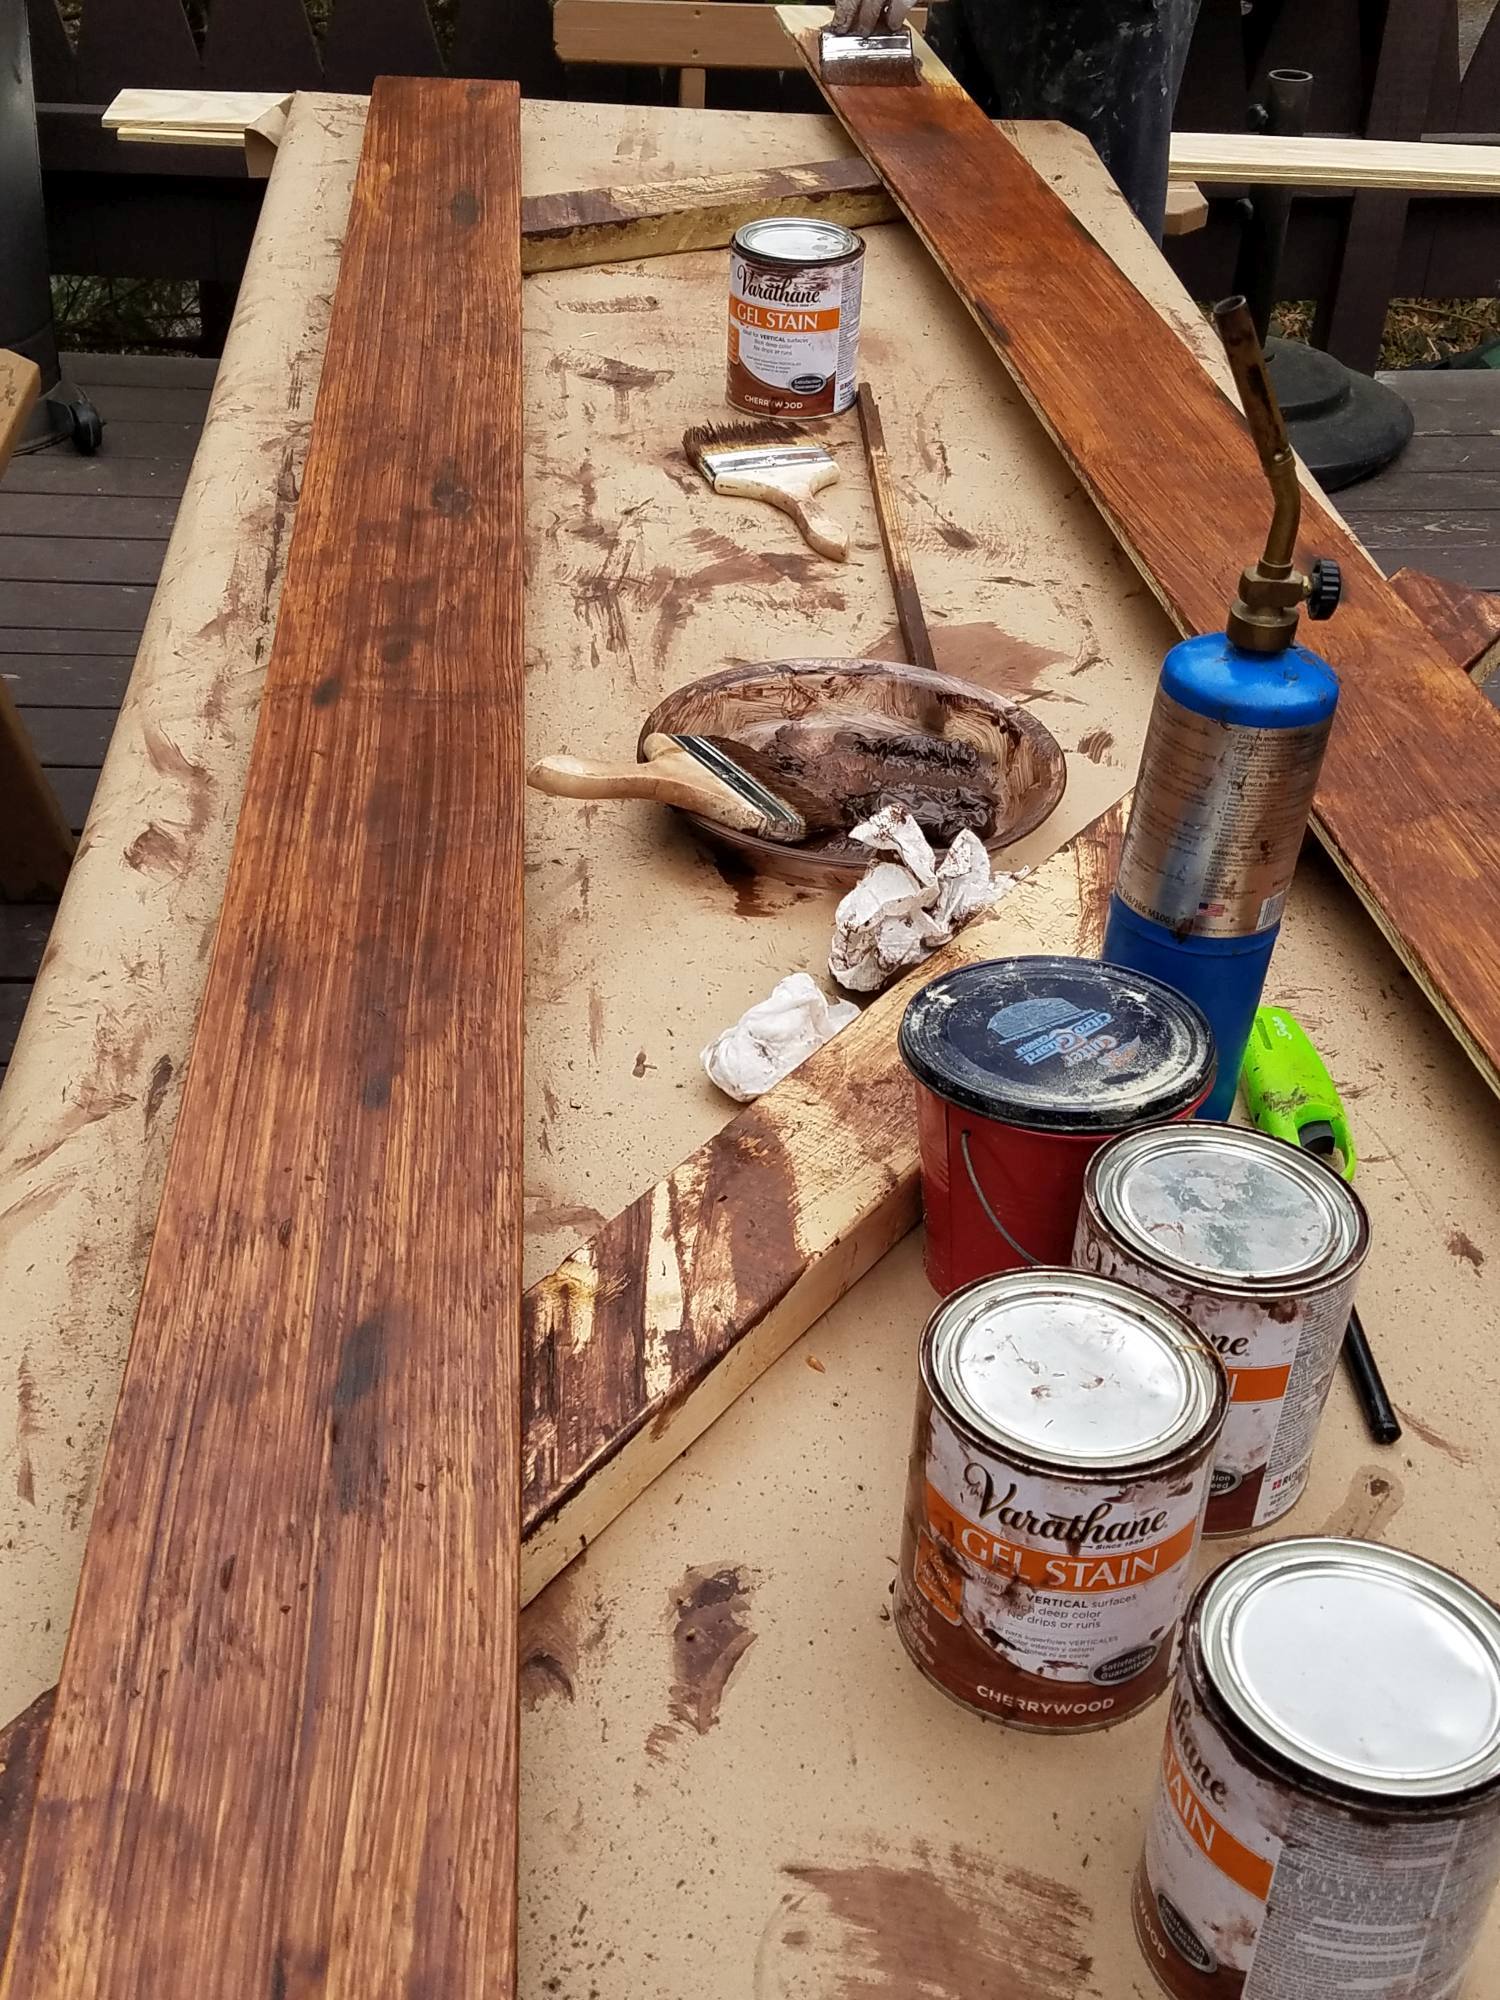
Toen we de multiplexvloeren bevlekten, we hebben één laag beits aangebracht met behulp van de droge borsteltechniek.
In principe, eerst hebben we de beits aangebracht met de natte borstel, Gebruik vervolgens een droge borstel om de overtollige vlek weg te borstelen.
Met elke passage van de droge borstel, we veegden de droge borstel af met keukenpapier om het grootste deel van de vlek te verwijderen.
We hebben voor de droge penseelmethode gekozen omdat deze een mooi donker houtpatroon achterlaat.
Bij het aanbrengen van de beits en droog borstelen, we konden spelen met de textuur die de vlek op het triplex achterlaat.
Door het te mengen en golvende penseelstreken te gebruiken om een nerf te simuleren of rond een knoop in het hout te borstelen, werd elke plank uniek..
Herinneren, hoe langer de vlek blijft zitten en hoe langer deze droogt voordat je de droge borstel gebruikt, hoe donkerder het bord zal zijn.
Meestal brachten we de vlek aan en wachtten een paar minuten voordat we de droge borstel gebruikten.
Als we een plank tegenkwamen met veel van dat zebrapatroon erop, brachten we een dikkere laag aan en lieten deze iets langer zitten.
De dikkere vacht en de langere wachttijd maskeerden het zebrapatroon beter.
Nadat de beits was aangebracht, wachtten we 24 uur voordat we de polyurethaan aanbrachten.
Het aanbrengen van de afwerking
Totale tijd: 2 personen ongeveer anderhalve dag
Voor de afwerking hebben we een helder satijn gebruikt, op waterbasis, olie-gemodificeerd polyurethaan.
Dit product was perfect voor ons project omdat het de kleur van de vlek niet veranderde, snel gedroogd en het beste van alles – het is geurloos!
Als je ooit een polyurethaanproject hebt gedaan. je weet dat de geur van polyurethaan geen grap is… en het blijft dagen en dagen hangen. Dit heeft helemaal geen geur!
We kozen voor een satijnen afwerking omdat we een verouderde look wilden en een glanzende vloer zou daar het tegenovergestelde van zijn.
Op alle planken zijn drie dunne lagen poly aangebracht, inclusief de zijkanten van de planken. Tussen elke laag, we hebben ongeveer 2 uur gewacht voordat we de volgende laag aanbrachten.
Vervolgens hebben we na de laatste laag 24 uur gewacht voordat we de planken installeerden.
We hebben niet geschuurd tussen de eerste en tweede laag, maar hebben wel licht met de hand geschuurd met schuurpapier met korrel 120 voordat we de laatste laag aanbrachten.
De borstel die we voor de poly gebruikten, was goedkoop breed (ongeveer 6″) synthetische borstel.
We gebruikten 2 gallons polyurethaan voor ons project.

Tip: Bij het aanbrengen van polyurethaan, bubbels zijn iets dat je wilt vermijden.
Dat komt omdat de bubbels niet knappen. In plaats van, ze drogen tot poly… en dat is geen goed gezicht. lol
Om bubbels te voorkomen, meng de poly met behulp van een mengstok met vloeiende cirkelvormige bewegingen.
Hier mag je het blikje niet schudden!
Update: Toen we oorspronkelijk de eetkamervloer deden, hebben we licht geschuurd voordat we de laatste laag poly aanbrachten.
Onlangs hebben wij de woonkamer vloer en voor die vloer, we hebben het schuren vóór de poly overgeslagen.
We dachten dat het niet schuren de planken wat meer textuur zou geven bespaart ons een hoop tijd.
Het werkte heel goed! Vanaf nu, we zullen niet schuren vóór de laatste polylaag.
Het draait allemaal om die ruimte
De ruimtes tussen elke plank waren perfect voor de stijl die we zochten.
De tussenruimte zou het meer dat boerderijgevoel geven en het knikken waar de vorige verdieping last van had, voorkomen.
In een paar berichten op Pinterest werd het gebruik van kwartjes als afstandhouders genoemd, dus dat is wat we gebruikten.
Ons brede planken multiplexvloer heeft kleine variaties in de afstand, vooral vanwege de ongelijke vloeren – maar dat is oké – wabi-sabi. 😉
Waar te beginnen met het leggen van de multiplexplanken
Ik heb een tip gebruikt die ik tegenkwam op een van de Pinterest-posts, beginnend aan de kant van de kamer waar de vloer het meest zichtbaar is.
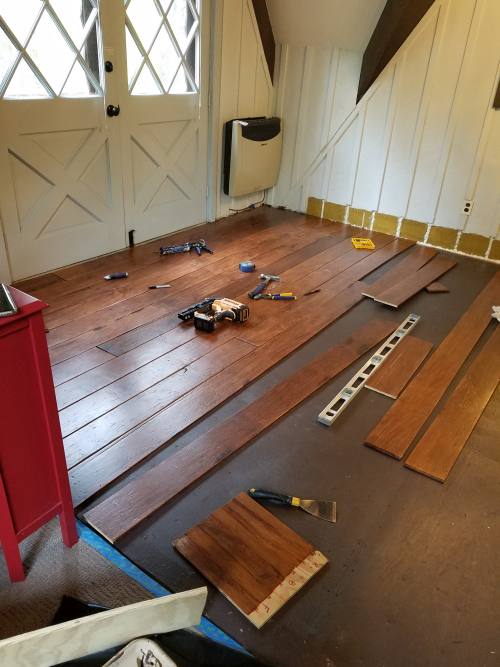
Voor onze ruimte was het meest zichtbare deel van de vloer bij de voordeur, dus daar zijn we begonnen.
Toen we het andere uiteinde van de ruimte bereikten, eindigden we met de laatste rij planken die doormidden moesten worden gescheurd.
Zorg ervoor dat u de naden uit elkaar houdt
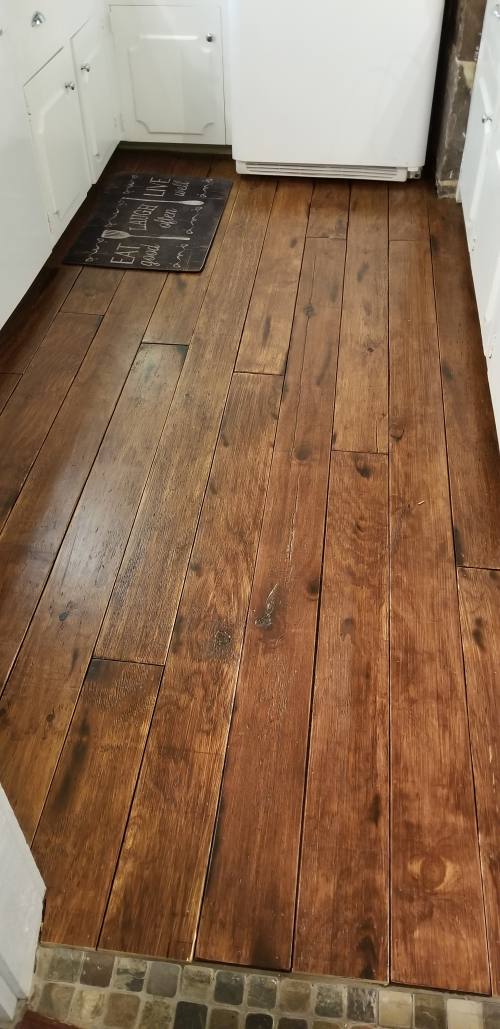
Elke plank was 2,5 meter lang en de kamer was iets meer dan 3,5 meter breed, dus er waren niet al te veel naden om mee te werken.
De vuistregel is om niet twee opeenvolgende rijen te hebben die minder dan een voet van elkaar verwijderd zijn.
Het multiplex zagen Bplaatss Naar lengte
Ik heb een verstekzaag gebruikt om de planken op lengte te zagen. Vrij rechttoe rechtaan. Een tip is om ervoor te zorgen dat het mes op volle snelheid komt voordat u in het triplex gaat zagen. Dat geeft je een schone, gladde snit.
Tip: Af en toe zorgde het maken van een snede ervoor dat er een dunne lijn kaal hout ontstond aan de uiterste rand van de snede. Toen dat gebeurde, gebruikte ik een donkergekleurde scherpte om dat kale hout te kleuren en dat mengde het er precies in.
Ik gebruikte een zwarte scherpte, maar een bruine scherpte zou net zo goed werken.
Ik heb de scherpte eigenlijk veel gebruikt met de lengtesneden.
De rustieke multiplexvloer met brede planken op zijn plaats houden

Tip: Als je uiteindelijk hetzelfde schiethamer koopt, raad ik je aan ook een extra batterij te kopen. Er wordt al één batterij meegeleverd, Door de extra batterij te kopen, blijft uw project vooruitgaan.
Nog een opmerking
De multiplexvloer die we hebben geïnstalleerd is 1/2 "dik en de vorige vloer was 3/8" dik.
De 1/8″ Het verschil betekende alle ruimtes waar de vorige vloer paste – de nieuwe vloer paste niet meer.
Dat verschil betekende veel onderbieding. Niet alleen de deurlijsten, maar ook alle verkalkte stroken die de naden van de eikenhouten planken aan de muren bedekken.
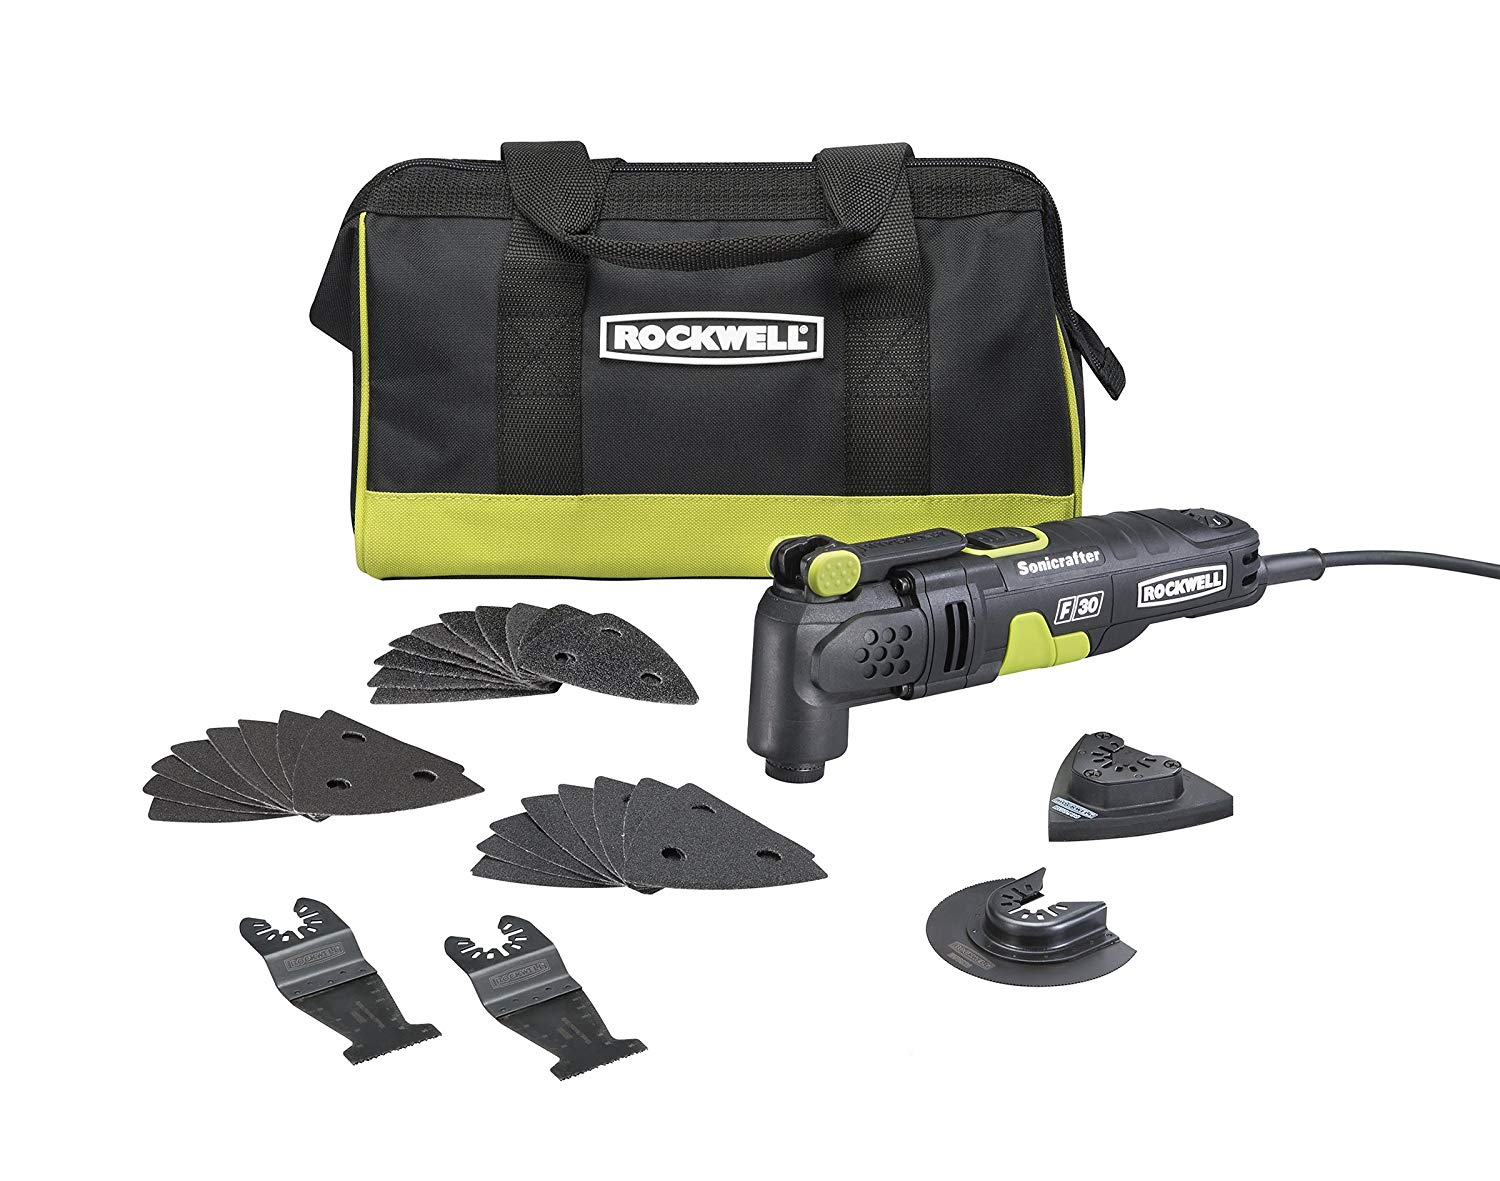
Ik had het ook met een zwaluwstaartzaag kunnen doen, maar omdat ik nogal wat bezuinigingen moest doen, Ik heb een oscillerend gereedschap gekocht. Het werkte perfect!
De tool wordt geleverd met een aantal verschillende bijlagen. Ik heb het nog nergens anders voor gebruikt, maar ik kan er in de toekomst een paar verschillende toepassingen voor bedenken.
Alles klaar – Dat is het!
Dus, alles verteld, het duurde ongeveer een week om het te doen multiplex plankenvloeren – van volledige start tot volledige afwerking. Inclusief het verwijderen van de oude vloer, ondervloer geschilderd, 10 platen multiplex in reepjes gesneden, met schuren, verdrietig, bevlekt, polyed en geïnstalleerd.
Het was een groot project waar veel energie in gestoken werd, maar het was het zeker waard. Wij hebben nu een geheel unieke vloer die perfect bij de woning past, en ziet er fantastisch uit!!
In de herfst, we gaan dezelfde rustieke multiplexvloer met brede planken in de woonkamer installeren, en ik kijk er enorm naar uit.
We gaan ook een unieke overgang maken tussen de woonkamer- en eetkamervloeren… kan niet wachten.
Update: Goed, we redid the living floors recently and we also installed the wood slice accent flooring. Alles bleek perfect!
Wij schreven ook over die ervaringen, bekijk die berichten hier:
[et_bloom_inline optin_id=”optin_7″]
Enkele foto's
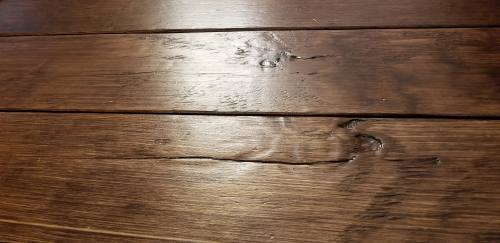
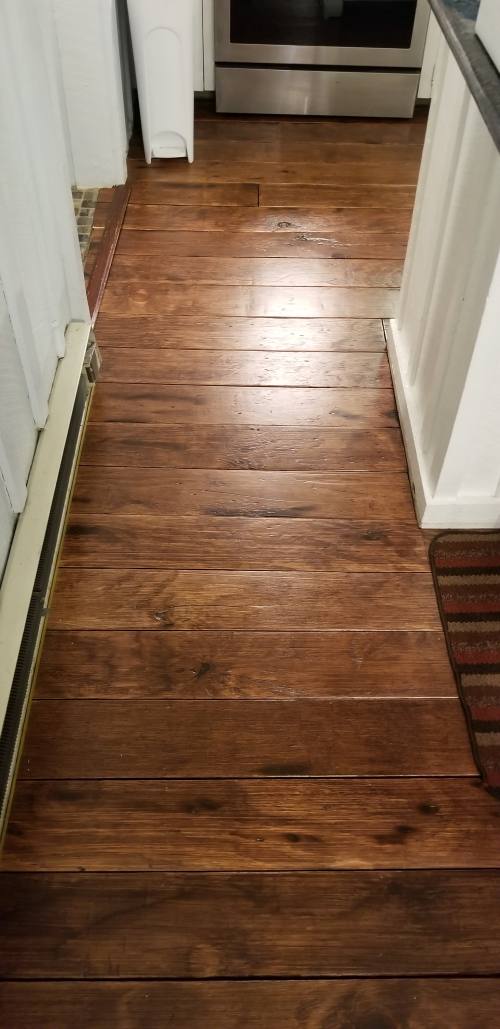
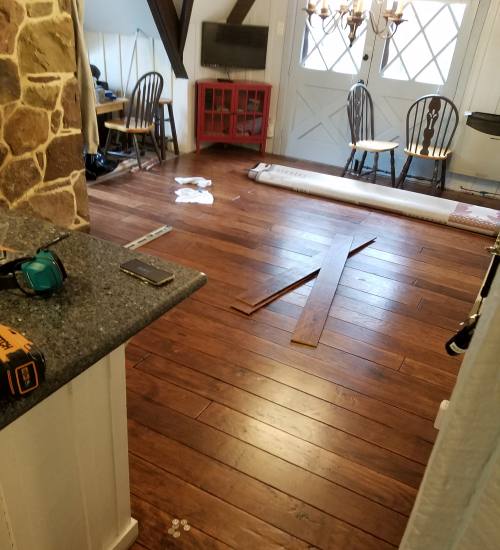
Hier zijn nog enkele foto's van het werk in uitvoering en de afgewerkte multiplex plankenvloer.
Laat me weten wat je ervan vindt, is er iets wat jij anders zou hebben gedaan??
Deel uw mening in de reacties hieronder!




Plywood Plank Flooring FAQs
How much does plywood plank flooring cost?
Our plywood plank floor cost about $1,040 in materials to cover roughly 700 square feet, which is around $1.50 per square foot. That was $704 for 22 sheets of plywood, $276 for stain, and $60 for polyurethane. It is a fraction of what solid hardwood would have cost.
How thick should plywood plank flooring be?
We used 1/2-inch plywood. A 1/2-inch plank is flexible enough to conform to a slightly uneven subfloor, and the thinner gaps between planks trap less dirt. You can step up to 3/4-inch if your subfloor is nice and flat.
What kind of plywood is best for plank flooring?
We used the cheapest rough-finished 1/2-inch pine plywood (Lowe’s Plytanium 15/32-inch structural plywood). Because we wanted a rustic look, the knots and imperfections were a feature, not a problem. For a smoother finish you can move up to a better-grade sanded plywood.
Is plywood plank flooring durable?
Ja, as long as you seal it well. Ours have held up to years of vacation-rental traffic. The key is several coats of polyurethane, since that finish is what protects the softer plywood surface from wear and moisture.
Geniet van dit bericht? Pin het en deel het met anderen!




Well finally here is the best plywood plank flooring tutorial I have found. Thank you so much for sharing this. I to have been bothered by the zebra effect that you get when staining plywood. And you’ve given me the solution, I’d almost given up on plywood flooring. Fingers crossed I’m off to Home Depot. Nogmaals bedankt
God! Thanks for the feedback, glad the post helped. Best of luck with your plywood project! Feel free to reach out if you have a question along the way. 🙂
The main question we have is about how you keep dirt out of the spaces between the boards. Did you put a finish coat of poly on the entire floor after it was done? How do you keep it clean?
Hallo David!
That’s a great question! The 3 coats of poly were applied to each board individually, before putting them down.
We figured it was more important to have a good coating of poly on the sides of each board, to make them a bit more resistant to moisture (especially in the kitchen).
The dining room/kitchen floor is about 9 months old, and so far everything has cleaned up very nicely.
We were a little worried about having little bits of food falling in the cracks in the kitchen, but vacuuming seems to pick up everything that’s in the cracks pretty easily.
Maybe it’s because the floors are only 1/2″ dik? It’s possible a thicker flooring (like 3/4″ flooring) would make it harder for the vacuum to get debris out of the cracks.
Hoop dat helpt!
What kind of plywood did you use? My dad keeps telling me he thinks it’s an oak plywood.
Hi Brook!
I just used regular 15/32 in. (1/2″) 3-Ply RTD Sheathing plywood, like this https://www.homedepot.com/p/15-32-in-x-4-ft-x-8-ft-3-Ply-RTD-Sheathing-132411/100067329
The oak plywood is usually a lot more expensive and is usually finished plywood. I was looking for a rustic look, so the regular plywood was a perfect fit… not to mention a lot cheaper!
Ik hoop dat dat helpt!
What kind of plywood did you use? Was it oak plywood?
Hi Brook,
I added a blurb to the article about the type of plywood since that was unclear before.
Thanks for the feedback!
Thanks for your time and effort putting this together. Your systematic, step by step explanation of the process is a real confidence booster and the result is beautiful. I agree that the typical plywood zebra pattern is not desirable. Am I understanding correctly that the gel stain and dry brush technique is used to CREATE a more pleasing wood grain pattern? In a sense “painting” on a wood grain look?
Hi Dan,
Hartelijk dank voor de vriendelijke woorden, I’m glad it’s been helpful to you. 🙂
That’s exactly right! This stain is the same stuff that’s used to create a wood pattern on surfaces like steel doors.
The grain you see in the close-ups is, for the most part, a pattern created by the stain.
What type of plywood did you use? I can’t seem to find that anywhere.
Hi Courtney,
The plywood is regular 15/32 in. (1/2″) 3-Ply RTD Sheathing plywood. You’re the second person to ask what the type of plywood it is so I’ll make sure to add that info to the article.
Thanks for your comment!
Hey Steve, this is great. Loved your ideas! My question is about moisture – with the cracks between the planks and the sub floor underneath, could you put a top coat of sealer to fill the cracks or possibly seal the sub floor? Any ideas? We have kids and are considering doing this in our main living area which includes the dining room. I am pretty confident it will subject to moisture sometimes. Bedankt!
Hi Jeremiah,
Ontzettend bedankt!!!
Hmmm, our plywood flooring is on the second floor so we didn’t have to worry about moisture coming from underneath.
If the moisture your concerned about is coming from above – as in kids will be dropping water on top of the flooring, that shouldn’t be a problem.
By finishing each board individually, you’ll be able to apply “poly” all around the plank, making it more resilient to water being dropped on it. That’s why we chose to finish each plank individually, instead of finishing the whole floor at once.
We did add a couple of coats of dark paint on the subfloor to give it a layer of protection from moisture from above.
If you’re really concerned about the subfloor getting moisture (which sounds more and more like what you’re concerned about as I go through the process of answering your question) then you can definitely apply a sealer to the subfloor before installing the plywood flooring.
Als alternatief, you can apply a coat of the “poly” on the subfloor. If that’s the path I was taking, I’d paint the subfloor a dark color first, then apply the “poly”. I’d use a flat finish poly on the subfloor, that way the cracks won’t be shiny.
Oh one more thing, you mentioned filling the cracks with sealer. I’d avoid doing that. We face-nailed the planks to the subfloor and kept spacing between each plank to allow for expansion. If the cracks were filled, the plywood wouldn’t have the space to expand and that may lead to problems.
Hoop dat helpt!
Best of luck!
A great, step-by-step , comprehensive explanation of how to go from start to finish with the plywood floors! Excited to try. Thank you for taking the time to share.
Grateful,
Sallye
Thank you so much Sallye! Best of luck with your flooring!
Hi great article. Bedankt. I would like to use this technique of flooring in an outdoor patio. It is screened in but occasionally rain is blown in and the floor becomes wet. Do you think I could put a sealer on top? Or do you have advice for outdoor use of plywood?
Hi Patz,
Bedankt! I’m glad you enjoyed it. Wow that’s a tough one. The obvious question is how much rain gets blown in? If the existing flooring (or subflooring) is plywood and is holding up, then I can see this working well.
In the kitchen, the flooring does get its fair share of “accidents” and it has held up perfectly… but my occasional accidents are no measure to what mama nature can throw at the floors.
If I were thinking of doing this project in an area that is partially exposed to the elements, I’d probably lean toward using pressure-treated plywood. Its pricier but it would be worth the additional cost.
It would be horrible to finish a project like this and love the way your floors look, only to have the floor ruined by unusually heavy rain.
Ja, my suggestion would be to use pressure-treated plywood. The stain will cover up the yellow tint of pressure-treated plywood, so it would basically look the same and you wouldn’t have to worry about the rain.
Ik hoop dat dat helpt.
Steve
This is absolutely beautiful. Thank you so much for putting together such a detailed tutorial. This is exactly what we’re looking for in our new home. We haven’t moved in yet, but I will be taking the next few weeks to make all of the plywood boards for when we do move in! Did you finish all the sides of the plywood planks including the underside? And then when you made cuts to length and had unfinished wood, did you do anything to finish it before installing?
Hi Eric! Ontzettend bedankt, and congrats on the new home!
At the start of our project the plan was to finish the boards on every side. But once we started we realized that was a lot of extra work and changed our minds.
If the floor was going in an area that had a lot of moisture then I would have definitely added a coat of the polycrylic to the underside. Since this was on a second floor there would be less chance of moisture entering the wood from underneath.
With the cuts to length, that cut goes toward the wall, so we didn’t need to add any finish to it. Since the cuts from the compound miter saw were so clean (no splintering) none of the bare wood was visible.
Oh, there is something I never mentioned in the post, for cuts that went length-wise, like around kitchen cabinets, the cuts were not nearly as clean. With those cuts I used a dark-colored sharpy (brown or black) to color in the cut so that it wouldn’t show.
I used the sharpie to color in any part of the wood that we had somehow missed when applying the stain. There weren’t many but there were more than one spot that needed some coloring. Mostly around the holes and once in a while there was an edge that didn’t quite get enough stain. The sharpie covered it up perfectly.
I hope that answers your questions. Best of luck with your project!!
Steve
When you were putting the boards i lace where in the board did you nail them? I love this look but my husband doesn’t want the nail to be seen.
Hi Nikki,
I nailed the boards on their faces about every foot all around the board, sometimes more if I noticed the board wasn’t quite snug enough.
I’d recommend getting a rechargeable nail gun like the one that is in the post. It made the project go so much faster than nailing them in manually. Heck, I think I’d still be nailing boards in if I had to do it manually! lol
The nails have super tiny heads that the nailgun does a really good job of countersinking.
Take a look at all the pictures in the post, can you find a nail head? I just looked at the pics and I can’t any… and I nailed them in! 🙂
If you do the same look on your boards you’ll have a ton of texture on the surface. That texture also helps hide the nail holes by distracting the eyes.
Ik hoop dat dat helpt. 🙂
I don’t know if I just overlooked it in the article or not, but what did you use to keep even spacing in the gaps between the boards?
Hallo David,
We used quarters as spacers between the boards. I’ve heard of also using credit cards or nickels for spacers. We tried it out with a few different things before nailing down the boards and liked the spacing we had with quarters the most.
Hoop dat helpt!
Steve
This is the best blog post I have read, and I have read a lot on plywood flooring! I put mine down in my living room in 2015 and in my kitchen in 2018. I wish I had known a few of your tips then. I will be doing my dining room soon and plan to try them this time around. Thank you for taking the time to share all of this! Your floors look incredibly awesome!!
Hi Wren, Bedankt! That is so nice of you to say! I’m really glad you’re finding this post useful.
Best of luck with your dining room floors!
Hoi!
I love this post so much. You explained everything perfectly. I was wondering if I could use a filler or something between planks? I know it needs space. Would filler stop it from flowing?
Hi Evelyn!
Ontzettend bedankt, I’m glad you found the post helpful. For our look we liked the spacing between each plank. If you didn’t want to have gaps between each plank there may be fillers you can use. I’ve seen a few on Pinterest which may work for you. One idea I’ve seen is using rope, another is the sawdust grout I used for the end grain inlay.
I don’t know how well the sawdust grout would work between the planks but it’s held up well (so far) in the inlay.
Not sure what’s involved with using the rope as a gap filler but I can tell you that if you choose to use the sawdust grout it will require a TON of time to finish. If the room isn’t too big it may be manageable but if I had chosen to use sawdust grout as a gap filler in our floors I think I would have died LOL
It would have been too much of a project for me.
Hoop dat helpt, let me know how your plywood plank project turns out.
Best of luck!
Loved your floors so gave it a try. So excited they turned out… your detailed instructions were perfect. Bedankt!
Hi Sandy!
Wow that’s fantastic!!
You made my day, I’m so glad to hear that my post helped you out. And that you love your new floors. 🙂
Thanks for sharing!
Steve
Good evening Steve! This seems to be a nice substitute for tile. What are your recommendations for attaching the wood plank strips if your sub floor is concrete and not wood?
Hallo David,
That’s a great question. I haven’t tackled installing it on concrete yet but I’m planning on doing the same floors downstairs and that is a concrete slab. Maybe I’ll do another article on that when I go through the install. I found some info on installing wood flooring over concrete that seemed promising. I’ll look for it in my pins tomorrow and post links to the info here.
Really great tutorial thanks for posting it! I have just put the last coat of poly on my planks and they are staggeringly beautiful.. from ugly plywood sheathing! They really do look and feel like expensive hardwood. I would never have even attempted this without your tutorial. The process has been so inexpensive and the results are so wonderful that I’m looking to do the same for a ship lap type ceiling covering.
I used a weed burning type torch with a 5 gallon propane tank to burn all of my planks quickly and easily. With the relatively even heat (vs. the small torch) applied over large area they ‘paint’ themselves along the grain lines in the presttiest way. Absolutely gorgeous deep tones and contrast.. I am thrilled. Nogmaals bedankt!
Hi Jess, that’s fantastic! I’m glad to hear you love your floors.
Thats awesome! I love the look the big blow torch give – it wasn’t quite the look I was looking for in this house.
I’m thrilled that it workedout for you!!
Steve/Sandy:
Incredible! You have inspired me and I am going to do this in our old farmhouse. You noted 1/2 inch plywood worked for you and 4′ x 8′ vellen. Would this product here work for me then? https://www.menards.com/main/building-materials/panel-products/plywood-sheathing/roseburg-fir-plywood-sheathing/1231100/p-1444452505667-c-13331.htm?tid=9156335534500254858&ipos=1
Hi Frank,
Zeker, you could use that plywood. I think the plywood I used was a bit cheaper but basically the same. I used something like this:
https://www.homedepot.com/p/15-32-in-x-4-ft-x-8-ft-3-Ply-RTD-Sheathing-132411/100067329
In principe, I used the cheapest 1/2″ plywood they had. Gebruikelijk, the cheaper sheets have an ugly side and a not so ugly side. You can use either the ugly or not so ugly side of the plywood. Not so ugly to have a pretty normal looking floor and the ugly side for a dramatic aged flooring look.
Since you said it’s an old farmhouse I would absolutely use the ugly side up. That will give you an instant aged look with tons and tons of character.
Ik hoop dat dat helpt!
Best of luck,
Steve
First off, BRAVO on a gorgeous job and thank you for the well articulated breakdown. It is my forever dream floor and now I have the confidence to give it a whirl.
Thanks Jayleen! I’m glad you found it inspiring. It’s a big project, but take it one step at a time and before you know it you’ll have your own beautiful version of these floors!
Best of luck!
Hallo David,
I when through my pins and this was the post I came across that gave me the idea that this could be done on concrete too.
https://www.familyhandyman.com/project/how-to-carpet-a-basement-floor/
My ground floor currently has carpet on top of concrete. I think I’d probably use the dimpled polyethylene to make sure no moisture affects the floors but that is not a bridge I have crossed yet.
I hope this info helps you with your floor.s
Steve
Your floors look fantastic. I was surprised to read they were plywood planks. From the article it appears you put these down about 1.5 years ago. How are they holding up in the kitchen? Do you keep rugs down to protect the area?l from water?
Thank you so much Brenda!
Wauw, it’s already been a year and a half?! That was fast! The floors are holding up great. We have an area rug under our dining room table but everywhere else it’s just the beautiful wood floor.
Keep in mind this house is also a vacation rental!
Typically guests don’t treat a house quite as nicely as you would, and despite that, the floors have still faired really nicely. 🙂
Hallo! This tutorial is so helpful! I’d love to try this technique in our new home. I have a question – how would you suggest we install these over a cement subfloor? We are moving into a home with epoxy painted cement floors.
Hi August,
I’m glad you found it helpful!
A cement subfloor is much trickier. I’ve thought about it but haven’t done this type of flooring on cement yet.
The biggest gotcha applying this flooring on concrete is the moisture. There needs to be a good vapor barrier between the concrete and the plywood flooring.
Here’s a link that has some insight on installing carpet on a concrete floor:
https://www.familyhandyman.com/project/how-to-carpet-a-basement-floor/
the only difference is that you’d be installing plywood planks instead of carpet. 🙂
Hoop dat helpt!
Steve
Love love this project! My husband and I are in the process of staining the plywood. We are using the same gel stain. We had to bring the boards inside to stain them. We stained 7 boards last night and this morning they are still not dry. Not sure what we did wrong?? Any suggestions??
Hi Melanie,
I’m so glad you like it!
Hm, we brought ours indoors to dry overnight also.
My first thought was maybe the coat was too thick but the. I thought about my boards and I had some boards that I put pretty thick coats on and they dried at about the same rate as my other boards.
One thing that may have sped up the drying time for us is the temperature. We put them in a room where we were able to crank the temperature.
Maybe you can try using a blow dryer to speed up the drying.
I hope that helps you out!
Whoa! I’m glad I found this tutorial! Since it’s been some time, would you change anything? I had thought about a barrier, like the snap together planks in the store require. Do you is the plywood planks on plywood sub floor sufficient for you?
Thanks so much for sharing!
Erin
Hi Erin, I’m not familiar with the snap-together planks you’re referring to, but yeah I feel the plywood planks on the plywood subfloor was sufficient. Maybe if I saw the snap-together planks I’d feel differently. 🙂
Looks absolutely amazing… Yall done a wonderful job.. Thanks for sharing, Im getting ready to build a small cabin and After seeing your project I think im gonna do the same thing with the floors. Thanks for breaking all the steps down and sharing your experience. You guys really done an amazing job. Thx Tim
Thank you so much Tim!
Hallo Steve, thanks so much for this incredible tutorial.
Ik vroeg me af, because the boards don’t seem to be nailed specifically to joists below but just to the plywood subfloor, have they warped and lifted at all? I, too, am looking for something rustic to lay on top of extremely uneven subfloor—did the boards have any sort of give that allowed you to follow the curvature of the subfloor while you were nailing them down? Thanks so much for putting this together!
Hi Kate! Thanks so much for the kind words. 🙂
The boards haven’t warped at all. There have been a couple of boards in the high traffic areas that needed more securing. It was just a matter of getting the nail gun and adding a couple more nails.
That was the beauty of this flooring! Ja, there is A LOT of give. It would have been impossible to install tongue and groove flooring in those spaces. That floor is rough cut oak, and when they say rough they really meant it. LOL
De 1/2″ plywood is pretty flexible, and since it’s rustic and there are spaces all around each plank, nothing needs to be perfect. 🙂
I’ve done this type of flooring on a previous house in a pantry and did a whitewash and absolutely loved it. I’m thinking about it in my current home but am on a concrete slab, so I can’t nail it down. What would you recommend in this case?
Hi Angela! That’s awesome! A concrete subfloor is definitely much trickier. I haven’t done this on concrete… nog. You’ll definitely need to a vapor barrier between your flooring and the concrete and you would also need to put something between the concrete and your planks to be able to nail the planks into something. Concrete nails on the top of the plywood planks probably wouldn’t be a great look. 😉
A possibility would be to install a vapor barrier over the concrete, then install sheets of plywood nailed to the concrete, and finally the plywood planks nailed into the sheets of plywood.
Veel succes ermee!
Love the floors! Seriously looking for an economical way to do flooring in my 890 sf cottage using real wood. I would really enjoy aging them just as you did! Love the color too. Spot on!
Thank you so much Renee! Best of luck with your cottage!
This is absolutely beautiful! We live in an old farmhouse and our floors are uneven in the kitchen and living room. I have been researching the plywood floors and i think this is what I will do! Have your floors scratched easily? Are they still holding up?
Hi Stacy, Bedankt!
Eerlijk gezegd, they’ve held up better than I ever though they would! They have gotten scuff marks, not bad at all though. It being a vacation rental I figured they would be in worse shape by now, but no. 🙂
I always try to remember that I’m going for the old worn look so scuff marks just help with that.
Steve, I concur with everyone else… GREAT job. The floors look great! I am thinking about not leaving a gap between planks. But distressing the corners and edges more. Is the threat of expansion and buckling really that great. I thought that that was one of the great benefits of plywood. The alternating directions of the plys prevented that. The floor is in an off grid cabin and cracks would fill with dirt/dust. Thanks for any opinion.
Thanks John! That’s a great point, it’s what I thought also. The previous flooring in the dining and kitchen area was a floating floor that was basically thin finished plywood strips and when that floor was installed, they didn’t leave any room on the sides of the walls for expansion and it was buckling in a lot of spots.
I was afraid of that happening to the floor I was putting down, so I added a space between each plank. Maybe I didn’t need to add that much space between each plank, but in the end I really liked the look and I wasn’t willing to take the chance. 🙂
This is a great blog post. Thank you so much for putting the time in for it.
I’m wondering if you think finishing the boards before installing would work. I have 3 cats and 3 dogs, so finishing it in place would mean trying to keep pet fur out of the finish and that would be nearly impossible around here. Can you see any issue with finishing each board in my shop before bringing it in and installing them? I’m sure it would take a lot longer, but I can’t think of any other solutions. Even if I could keep all 6 animals out of the main living areas I need to put flooring in, the hair still manages to float around.
I feel like little touchups would be doable. Just not the entire surface at once.
Hi Candace,
Oh yeah, definitely! That’s exactly what we did! I guess I need to make that clearer in the post. 🙂
Ja, we didn’t have a shop to finish them but We did all the cutting, sanding, kleuring, and poly-ing out on the deck.
Finishing the boards before installing them I think was the key to them holding up so well, because it allowed us to stain and poly the board tops as well as each side of the boards, That protects them from spills.
It didn’t really take all that long to finish them before installing them. I kinda prefer doing it that way anyways. No worries about the stain smell in the house, no waiting for it to dry and of course no desperate attempts to stop anyone from walking on the floor before it was okay. 🙂
Pretty nice post. I just stumbled upon your blog and wished to say that I’ve truly enjoyed browsing your blog posts. In any case I will be subscribing to your rss feed and I hope you write again soon!
Thank you for such a great blog post. It looks as though you made the floor quite a few years ago. How is it holding up?
Hi Georgina! Bedankt!
It’s holding up really well. It gets nick and scratches, the beauty of it all just adds more character to the floors. I haven’t had to do much to it at all, there were a couple of places where the edge of a plank got dinged and the natural wood color was showing. I used a black sharpie to fill in the wood and voila, more character. I couldn’t be happier with the flooring. 🙂
Hoi. This was EXTREMELY thorough and helpful. I’m about to do this in my home. What I’m mostly curious about is how it’s held up all these years later? Because it’s a softer wood that’s been my biggest concern. Ook, are you satisfied with the 1/2″ or do you wish you’d gone with 3/4″ thickness? I’ve heard arguments both ways. Bij voorbaat dank!
Hi Allyson,
Hartelijk dank voor de vriendelijke woorden! I’m glad it’s helpful. 🤗
Eerlijk gezegd, it’s held up sooo much better than I would have ever expected, remember this flooring is in a vacation rental. There are new dings and dents that happen, but because I already added plenty of dings and scratches to the flooring I feel very differently about the new dings. It all just adds to the character!
1/2″ or 3/4″ is a fantastic question. I was VERY hesitant to do 1/2″ – I ended up going with the 1/2″ because the floor I was installing this on was SOOO un-even. I needed to install something with a certain amount of give and 3/4″ plywood has very little give.
Op het einde, I don’t regret using the 1/2″ plywood at all. I don’t think 3/4″ would have extended the life of the flooring at all.
One thing I do regret is not putting more spacers under the planks in the areas where the floor dipped significantly. Maybe I should have even used a floor leveling compound in those spots. I was eager to get started with the flooring and let that get the better of me. lol
Your question made me think of what I would have done differently, and that is basically the only thing I would change. If you have super un-even floors like I did, you should level off the floor as much as you can before installing the flooring.
Best of luck with your install!!
Could you do the staining after the floor is installed
You can of course. We did it before installing the flooring for two reasons. First we installed the planks with spacing between each plank and it doesn’t take much spacing to see the naked wood on the sides. The other reason was to protect the wood a bit more, especially in the kitchen. We were afraid that it would warp if renters (it’s a vacation rental) kept dropping liquids on the floor. we felt staining and poly-ing the sides of the wood helped give the flooring a bit more protection. 🙂
Hi again. Thanks for your previous response, it was very helpful. I did come up with another question about the quantity of stain & polyurethane. In the article itself you said you used about:
-7 quarts of the gel stain and
-2 gallons of the polyurethane,
but in the cost breakdown you said you used:
-17 quarts of stain
-5 gallons of Poly
Did I maybe misread it? I’m flooring about 1200 sqf so I’m trying to get the right ballpark amount of each item. Bedankt!
Hi Allyson!
Wauw, great catch! They are kind of both right. 🙂
When I wrote the first article it was after doing the flooring in the dining room and kitchen, so the numbers in the article are relative to that space.
Then, after I did the living room I had more information to share and started writing another post, and updating the original post.
Dit:
-7 quarts of the gel stain and
-2 gallons of the polyurethane
Was what we used when doing the dining room and the kitchen roughly, 288 sq ft
These:
-17 quarts of stain
-5 gallons of Poly
Are the sum of the living room AND the dining room and kitchen roughly 704 sq ft
Hope that helps and best of luck on your project!!!
Bedankt voor de gedetailleerde instructies! My husband and I recently did our living and dining room with plywood plank flooring. For cost reasons we used a non gel stain. We also applied the polyurethane after installing the floors. Other than that we didn’t really make any changes. It turned out absolutely beautiful and we’re excited to tackle the remaining rooms soon.
That’s great Anita, congrats! 🙂
Excellent project and this is what were going to do now for our flooring. The link for the gel stain took us to Home Depot which seems they are going to discontinued this brand. At least for the color we want. Says discontinued. So will be looking for different brand of Gel stain.
Hi Ethan, I tried the link and it seems to be in stock again.
Bedankt! I’m glad you found it inspirational. 🙂
I am wondering now after all these years how has the floor held up? I am wanting to do this in my kitchen/dinning room. I do have animals and a couple kids still at home. Would you think I would need to poly both sides of the boards or if I just poly the sub floor that should be ok?
Hi Naomi,
The first area I did was our kitchen/dining area – that was really the reason I decided to poly the tops and the sides of each board. I figured that would give the wood an extra little protection since out of all the areas in the house the kitchen would be the space where the chances of the wood getting wet are pretty high. The floors are still holding up great, I can’t tell you if the reason they held up so well in the kitchen is because of the poly on the side – but I can tell you it didn’t hurt. 😉
Absolutely love it. How would mixing in 6 and 8 inch boards look do you think? Would you still use the back side of the plywood if you had to do it again? I want to do this in my work shop in the near future. You have really inspired me.
Hi Cory, hmmm, that could be cool. I guess that would be doable, would it be complete rows of the same width or would you mix and match them? It sounds like you’d have an extra dimension of complexity where you’ll need to keep track of when to use which but if you’re feeling it, it’s definitely worth giving it a try!
Best of luck with your project Cory!