Lambris de bricolage – Partie 1 – Conception et mise en page

Lambris de bricolage – Partie 1 – Conception et mise en page

Si vous recherchez des lambris sur Pinterest, vous trouverez toutes sortes de styles et de versions différents de lambris., du super simple à l'incroyablement orné.

Je voulais un design de lambris élégant sans en faire trop et je ne voulais pas qu'il soit trop difficile à installer..

Je pense que ce que nous avons choisi a fait exactement cela, il a ajouté une tonne de style et de caractère et a fière allure. Et cela n'a pas pris beaucoup de temps à faire.

J'ai d'abord fait les lambris du rez-de-chaussée, puis environ un an plus tard, j'ai décidé de faire aussi des lambris à l'étage. Si j'additionne le temps entre l'étage et le rez-de-chaussée, cela a probablement pris au total environ 2 semaines pour les deux.… mais gardez à l'esprit que ce sont des espaces assez grands.

Le projet va être décomposé en un tas de posts.

Dans cet article, nous nous concentrerons sur le design que nous avons choisi et pourquoi nous l'avons choisi., comment nous avons trouvé nos dimensions de lambris, et comment mesurer les lambris.

Ensuite, dans les prochains articles, nous reviendrons sur la découpe des lambris., installer les lambris et je pense en faire un autre sur les lambris dans les escaliers, (alerte spoil, il y a plus de maths mdr).

Peu importe le style que vous choisissez, vous trouverez ici des conseils pour rendre votre installation plus fluide.

Je pense que le secret pour installer des lambris consiste à utiliser des gabarits et des entretoises.. Étant donné que la plupart des pièces du lambris ont la même taille, vous pouvez créer des modèles pour les couper plus rapidement et les entretoises permettent un espacement constant sans avoir à mesurer chaque espace..

L'utilisation de modèles et d'entretoises avec vos lambris de bricolage aura un impact énorme sur la durée de votre installation..

Divulgation: Certains des liens ci-dessous sont des liens d'affiliation. Si vous décidez d'acheter un de ces produits, nous gagnons une petite commission sans frais supplémentaires pour vous. Nous recommandons ces produits parce que nous avons de l'expérience avec eux et de les utiliser pour nos propres projets. En tant qu'Amazon Associates, nous gagnons des achats éligibles.

Choisir un style de lambris

Nous avons examiné de nombreuses épingles de lambris Pinterest pour en trouver une qui corresponde au style que nous avions en tête..

Honnêtement, si vous ne savez pas quel style vous aimeriez, faire une recherche sur Pinterest est un excellent moyen de découvrir les choix qui s'offrent à vous.

Bien sûr, si vous aimez le lambris disposition et moulures que nous avons utilisées, n'hésitez pas à copier ce que nous avons fait. 🙂

Idées de lambris de bricolage – Il y a tellement d'options

Il y a tellement d'idées de lambris, et ils sont tous superbes à leur manière.

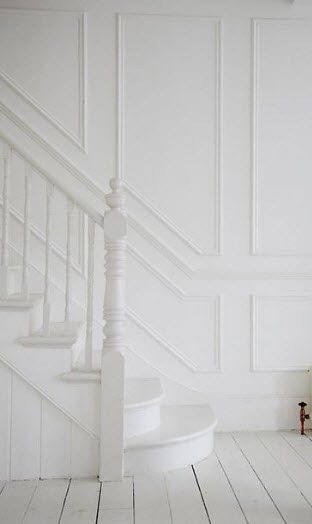
Jetez un œil aux différentes dispositions de lambris qui existent sur Pinterest, faites une recherche et vous trouverez d’innombrables modèles de lambris. Si vous ne trouvez pas exactement ce que vous voulez, créez votre propre saveur de lambris en mélangeant un ou deux motifs que vous aimez.

Voici quelques-uns dessins de lambris que nous avons aimé:

wainscoting paint colors

L'épingle qui nous a inspiré

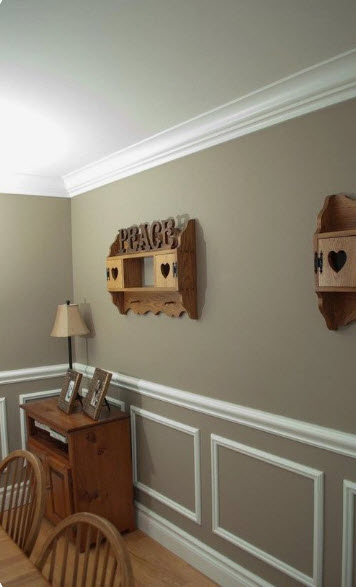
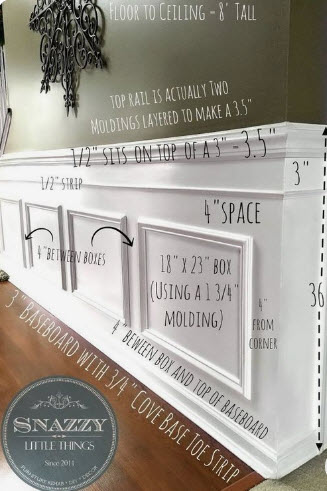
C'est l'épingle qui a inspiré notre style de conception de lambris.. Nous avons adoré son apparence et avons adoré la deuxième moulure horizontale entre les boîtes ou les cadres et la moulure de la chaise..

wainscoting paint colors

La conception des lambris que nous avons utilisée

Notre saveur de lambris diffère de l'épingle qui l'a inspiré de plusieurs manières – mais je pense que tu peux voir la similitude.

Les différences:

  • Utilise une deuxième moulure horizontale plus lourde (c'est le même que celui que nous avons utilisé pour les cadres de lambris)
  • La chaise est-elle moulée plus haut (donc il était aligné avec le bar de la cuisine en bas et le demi-mur à l'étage)
  • Utilisez des rectangles debout au lieu des carrés ou des rectangles couchés (ce qui semble assez courant)
  • Nos espaces autour des places sont des 3 1/2″ (la largeur d'un morceau de 2×4)


wainscoting - molding the design we used

Le style

Nous avons examiné de nombreuses épingles de lambris Pinterest pour en trouver une qui corresponde au style que nous avions en tête..

Nous avons aimé que les cadres de lambris soient plus rectangulaires que carrés et plus hauts que larges..

Initialement, nous allions seulement avoir la moulure de la chaise au-dessus des cadres, mais après l'avoir essayé, nous avons réalisé qu'il lui fallait un petit quelque chose en plus, nous avons donc ajouté une autre moulure horizontale entre la moulure de la chaise et les cadres.

Le Wainscoter Hauteur

Jusqu'à quelle hauteur voulez-vous que vos lambris aillent?

Je suis tombé sur un article qui traite en détail de la hauteur des lambris.. Son conseil était d'utiliser la règle des tiers, ce qui signifie que les lambris ne doivent pas dépasser le tiers de la hauteur du mur..

Voici le lien si vous souhaitez en savoir plus.

Je n'ai découvert l'article qu'en commençant à écrire ce post, mais même si je l'avais déjà rencontré, Je n'aurais probablement toujours pas suivi la règle des tiers. En effet, pour chaque étage, nous voulions que la hauteur des lambris s'aligne avec quelque chose d'autre dans l'espace. – et ça ne correspondait pas à un tiers de la hauteur du mur.

Au premier étage, c'était le dessus du bar de la cuisine et au deuxième étage, c'était le demi-mur du grenier..

Si vous essayez de trouver une hauteur à utiliser, Essayez la règle des tiers, ou alignez-le avec autre chose dans l'espace, ou s'il n'y a rien dans l'espace avec lequel vous souhaitez que les lambris s'alignent, vous pouvez utiliser les mesures que nous avons utilisées comme point de départ et les ajuster comme bon vous semble.. 🙂

La hauteur (du sol jusqu'au sommet de la moulure de chaise) au 1er étage il y avait 41″ et la hauteur au 2ème étage était de 41 1/2″.

Wainscoting Frames Install the whole space has picture frames

Déterminez la largeur du cadre

C'était l'une des plus grosses pierres d'achoppement pour moi lorsque j'ai démarré ce projet.. Comment allais-je faire en sorte que tous les cadres aient la même largeur?

Puisque tous les murs sont de tailles différentes il semblait impossible de les faire tous de la même largeur… et bien – c'est.

J'ai finalement compris que chaque cadre de lambris n'a pas besoin d'avoir la même largeur ni même la même hauteur.. En fait, il est impossible pour eux d'être la même largeur car les tailles de mur seront toutes différentes.

Je ne voulais pas que les cadres soient de forme carrée si je pouvais l'éviter et, en fonction de la hauteur des lambris, j'ai visé des cadres d'environ 18 pouces de large..

J'ai fait un outil que vous pouvez utiliser pour calculer la largeur des cadres d'image, Vérifiez-le en cliquant sur le bouton ci-dessous.

Les dimensions des lambris

Je voulais souligner ceci. Les dimensions des lambris seront différentes pour chaque mur que vous réaliserez. Les dimensions du cadre de lambris sur un même mur seront les mêmes, Mais ils seront différents quand sur un nouveau mur, car plus probablement que le nouveau mur sera une largeur différente.

En effet, même si la hauteur du cadre reste la même, la largeur du cadre de lambris changera en fonction de la largeur du mur et du nombre de cadres de lambris.

L'espace autour des cadres

L'espacement entre les cadres est LA chose qui doit être cohérente. Gardez l'espacement le même et votre cerveau pense que toutes les cadres d'image sont de la même taille.

Tant que l'espacement autour des cadres est le même, tout ira bien..

Pour le nôtre, nous avons choisi un espacement de 3 1/2″ tout autour de chaque cadre, comme ça on pourrait utiliser des morceaux de 2×4 comme entretoises. 😉

Le Wainscoter Mesures que nous avons utilisées

L'image présente toutes les mesures de lambris que nous avons utilisées.

Parce que chaque mur a une largeur différente, le les dimensions des lambris pour chaque mur doivent être différentes.

Toutes les dimensions de les cadres de lambris sur le même mur sont les mêmes.

Toutes les mesures sur la photo restent les mêmes pour chaque mur de la pièce, Sauf pour la largeur du cadre de lambris (16 5/8″ sur la photo) qui changera en fonction de la largeur du mur et du nombre de cadres utilisés sur le mur.

Nous savions que la hauteur totale des lambris était de 41 1/2″ (s'aligner avec la hauteur du demi-mur dans l'espace) nous avons donc travaillé à rebours à partir de cette mesure.

Nous avons placé le haut de la moulure de chaise à 41 1/2″ et j'ai placé la plus petite moulure horizontale en dessous pour voir quel espacement entre elle et la moulure de la chaise nous convenait. Nous en avons trouvé 3″ (l'épaisseur de notre niveau).

Parce que je savais aussi que j'allais utiliser des morceaux de 2 x 4 comme entretoises, je pouvais maintenant déterminer la hauteur des cadres des lambris..

Voici comment nous avons calculé la hauteur des cadres de lambris.:


La hauteur totale du lambris 41 1/2″
Moins l'épaisseur de la moulure de la chaise – 2 3/4″
Moins l'espace sous la moulure de la chaise – 3″
Moins la deuxième épaisseur de moulure horizontale – 1 1/4″
Moins L'espacement au dessus du cadre – 3 1/2″
Moins L'espacement sous le cadre – 3 1/2″
Moins L'épaisseur de la plinthe – 4 1/2″
Égal au lambris Cadre Hauteur = 23″
Wainscoting Measurements

Déterminer la largeur des cadres de lambris

D'accord, tu as trouvé le style, moulage, hauteur, l'espacement et les couleurs – maintenant il est temps de faire quelques maths!

Cette partie peut sembler un peu intimidante mais croyez-moi, c'est beaucoup plus facile à faire qu'il n'y paraît.

Comme tous les autres aspects de ce projet, il existe probablement un million d'autres façons de comprendre cela, mais voici un exemple de la façon dont je l'ai mesuré.

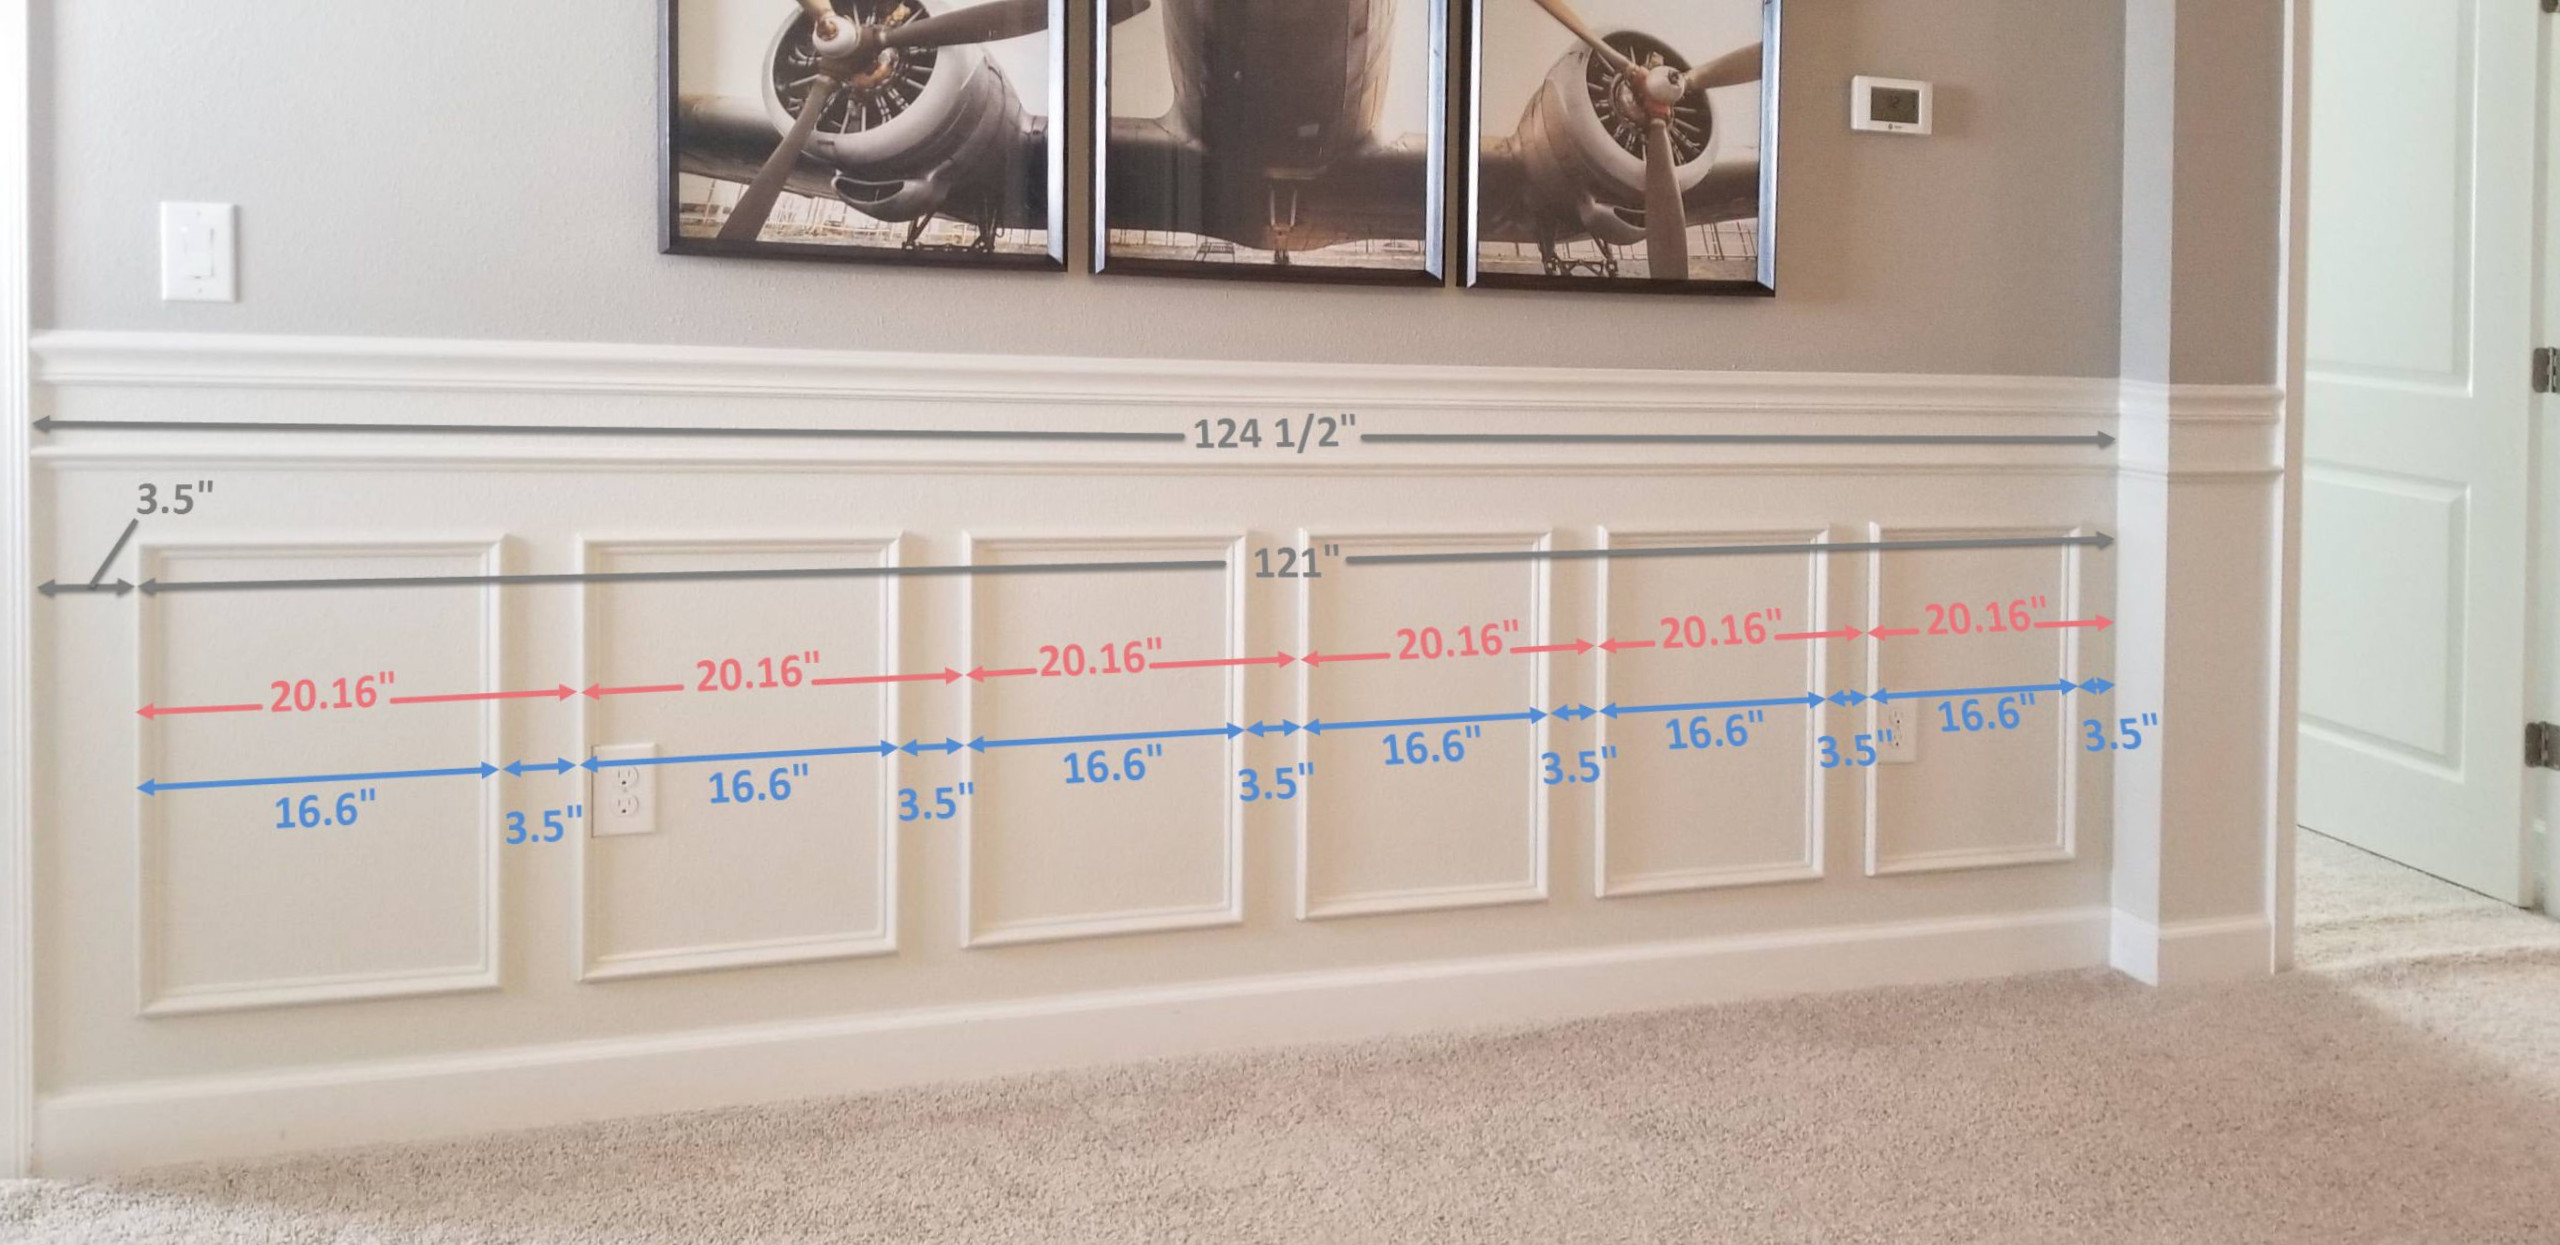
Utilisons le mur de l'image pour l'exemple, le mur mesurait 124 1/2″ et j'ai fini par utiliser 6 cadres de lambris.

Mise à jour: J'ai décidé de créer un simple calculateur de lambris auquel vous donnez la largeur du mur, la largeur des espaces entre les cadres et le nombre de cadres et il vous donne la largeur de chaque cadre de lambris.

Cliquez sur le bouton ci-dessous et vous n'aurez pas besoin de faire le calcul.

Wainscoting Box Measurements

Calcul pour les 6 images Montré

Première, Je soustrais l'espacement gauche du total, ce qui pour moi est 3 1/2″ ou 3,5″, jetez un oeil à la photo pour plus de visuel.

Cela me fait 121″, maintenant divisez 121″ par le nombre de cadres qui, selon vous, conviendraient. Dans l'exemple illustré, j'ai utilisé 6.

121″ / 6 = 20,16″

Donc chaque image + son espacement à droite serait égal à 20,16″ en largeur (Les flèches rouges).

La taille des images serait donc de 20,16 moins l'espacement à droite..

La taille du cadre serait désormais de 20,16 – 3.5″ = 16,6″ (Les flèches bleues)

Puisque je voulais une forme rectangulaire, 16.6″ a bien fonctionné. Fondamentalement, J'essaye la même formule avec un frame supplémentaire ou moins un frame, et trouvez celui qui vous convient le mieux.

Wainscoting Box Measurements

Disons que nous avons calculé pour 5 cadres

Si j'essayais 5, ce serait 121″ / 5 = 24,2 Cela signifie que chaque image + l'espacement à droite serait de 24,2″. La taille du cadre serait donc de 24,2″ – 3.5″ (la taille de l'espacement) ce qui serait 20,7″

Ce qu'il faut garder à l'esprit, c'est qu'il n'y a pas de bien ou de mal dans tout cela.. Je voulais que mes montures aient une forme plus rectangulaire que carrée et une largeur de 20,7″ serait assez proche de la hauteur de 23″ donc au lieu de faire 5 images j'en ai opté pour 6.

Conversion de décimales en fractions

Alors maintenant, vous savez que les images devraient être de 16,6″… comment diable peux-tu comprendre ça sur un ruban à mesurer?!

Déterminer les nombres était nettement plus facile avec une calculatrice, mais j'ai rencontré un problème de conversion de la décimale de la calculatrice en une fraction que je pourrais utiliser avec un ruban à mesurer..

La réponse à l'époque était un widget que j'ai découvert et qui convertit les décimales en fractions pouvant être utilisées avec un ruban à mesurer.. Ce n'était pas 100% car parfois la fraction que ça me donnait était de 231/356… ce qui n'aide pas. lol

Maintenant, J'ai créé un calculateur de lambris. Donnez-lui les mesures en fractions que vous trouveriez sur un ruban à mesurer et il déterminera le cadre du lambris et vous donnera la largeur en fractions que vous pouvez utiliser sur le ruban à mesurer.. Plus de maths et plus rien 231/356! lol

Comment gérer les fenêtres avec des lambris

C'est quelque chose auquel j'ai pensé après. Si la fenêtre descend en dessous de la hauteur de vos lambris, il serait préférable de mesurer ce mur par sections., avec l'espace sous la fenêtre comme sa propre section.

J'ai vu des photos de lambris où ils utilisent en quelque sorte “L” cadres façonnés pour s'adapter autour de la fenêtre… Je ne pense pas que ça ait l'air si génial.

Je pense que cela semble plus cohérent si les cadres sous la fenêtre ont une largeur et une hauteur différentes. – tant que l'espacement autour des cadres est le même que celui du reste du mur, tout s'emboîtera.

Je n'avais qu'une seule fenêtre qui a affecté ma disposition de lambris, Et heureusement, cela n'a pas trop affecté les choses. Une fois que je l'ai fait, j'ai réalisé qu'il aurait l'air mieux si je divisais le mur en morceaux et traité chaque pièce comme un mur séparé.

Jetez un œil sur la photo ci-dessous, C'est la fenêtre dont je parle. Ça n'a pas l'air mal, Mais c'était de la chance plus que toute autre chose. J'allais de droite à gauche lors de l'installation de mes lambris, Je suis arrivé à la fenêtre réalisée que je devrais faire quelque chose de différent sous la fenêtre (Remarquez que les deux cases sous la fenêtre ne sont pas aussi larges que celles à côté d'eux), Je l'ai sauté plus tard et j'ai repris mes cadres d'image de l'autre côté de la fenêtre.

Wainscoting Picture Frames Around A Window

Au lieu, Je devrais l'avoir aurait été mieux si j'avais les cadres d'image sous la fenêtre en ligne avec la largeur de la fenêtre et traité les espaces de chaque côté de la fenêtre sous forme de murs séparés et a fait des calculs pour chaque côté séparément.

What I should have done with wainscoting frames under windows

J'ai édité l'image pour montrer à quoi cela aurait ressemblé si j'avais les cadres sous la fenêtre en ligne avec les bords de la fenêtre. Excusez l'édition approximative, Mais je pense que cela donne une idée de ce que ça aurait l'air mieux.

Encore, La fenêtre n'a pas eu trop de tabac, Mais je peux voir où cela pourrait devenir très moche si vous ne planifiez pas la fenêtre à l'avance.

The frames under the window now line up with the window edges

Le moulage que nous avons utilisé

Nous avons utilisé deux moulures différentes pour le lambris., un pour la moulure de chaise et l'autre pour les cadres et la moulure horizontale entre la moulure de chaise et les cadres.

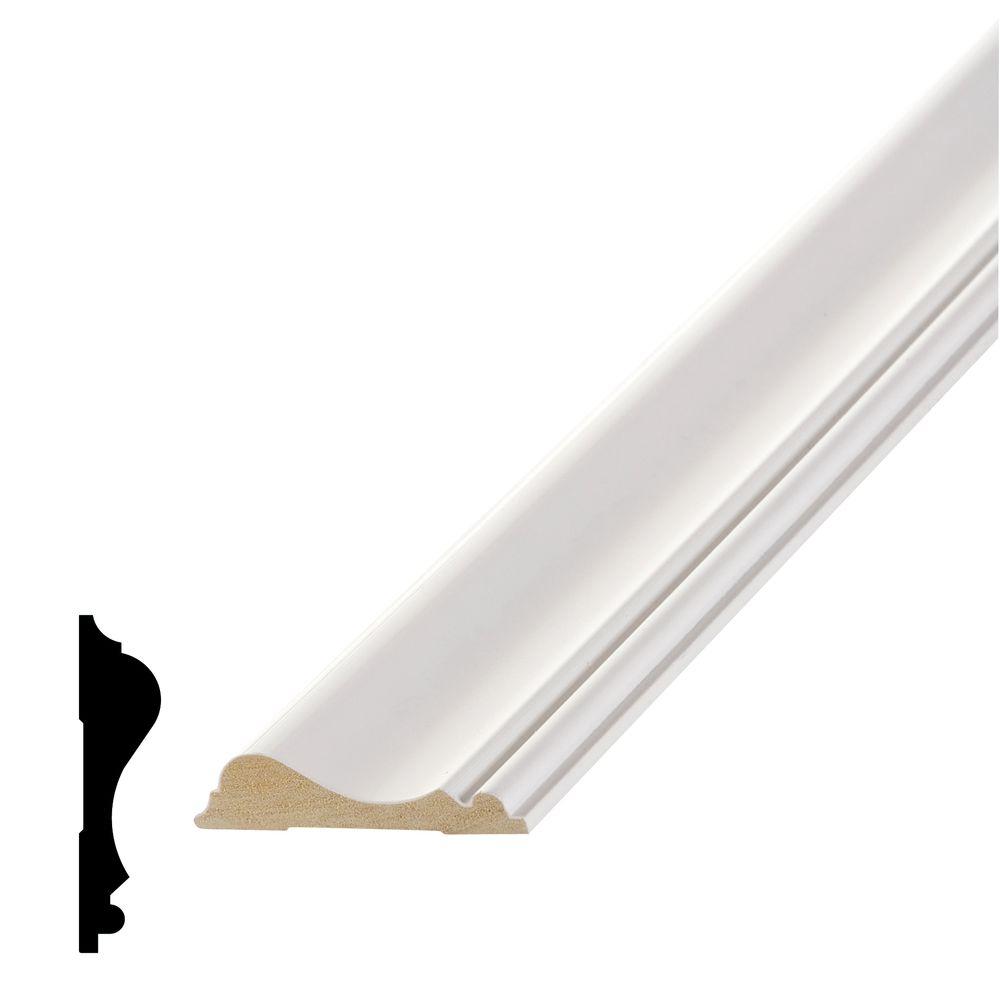
Nous les avons achetés tous les deux chez Home Depot. Les voici, vous pouvez cliquer sur l'image si vous souhaitez obtenir la même moulure.

La moulure de chaise (Moulure supérieure)

C'est la moulure de la chaise. Il y avait une version poly de cette moulure qui est beaucoup moins chère mais les caractéristiques étaient un peu plus exagérées et nous aimions mieux l'apparence de la version en bois..

Le moulage des cadres

C'est la moulure que nous avons utilisée pour les cadres et comme deuxième moulure horizontale (sous la moulure de la chaise).

C'est une moulure en poly donc c'était vraiment bon marché… Heureusement parce que nous en avons acheté BEAUCOUP. 🙂

Nos couleurs

Pour les couleurs des murs nous avons choisi des couleurs grèges (un mélange de gris et de beige).

De nombreuses photos de lambris que nous avons vues laissaient les cadres des lambris blancs sur un mur de couleur différente.. Cela fait ressortir davantage le cadre des lambris., mais nous avons choisi de peindre les cadres de la même couleur que le mur.

Peindre les lambris de la même couleur que le mur lui donne un aspect intégré, que nous avons aimé.

Si vous souhaitez utiliser les mêmes couleurs, voici les deux couleurs que nous avons utilisées:


Couleur de la peinture inférieure

Sherwin Williams

Blanc esthétique (SW7035)

Vitrine

Intérieur satiné

Couleur de la peinture supérieure

Sherwin Williams

À nouveau gris (SW7030)

Vitrine

Coquille d'œuf intérieure

wainscoting paint colors

C'est tout pour la conception et l'aménagement des lambris

Voilà pour la conception et l'aménagement de vos lambris DIY. Maintenant que vous avez compris tous les détails de votre lambris, il est temps de commencer à découper quelques moulures.! J'en parlerai dans le prochain post!

Cliquez sur le bouton ci-dessous pour continuer à lire:

Quelques photos des billets finis

Voici d'autres photos des lambris. I’m thinking of doing a post on the wainscoting in the stairs since that was a bit trickier. I haven’t used math like that since High school! lol

Laissez-moi savoir ce que vous pensez, Y at-il quelque chose que vous auriez fait différent?

Partagez votre opinion dans les commentaires ci-dessous!

wainscoting - in the stairs
wainscoting - in the stairs from the top to the bottom
wainscoting - in the stairs on the other side the top to the bottom
wainscoting - in the stairs the bottom section
Wainscoting shapes
wainscoting - in the stairs the bottom section

Profitez de ce poste? Épinglez-le et partagez-le avec d'autres!

Easy Way To Do Wainscoting - Designing and Layout

Révélation finale du cinéma maison bricolage

Révélation finale du cinéma maison bricolage

DIY Home Theater Design - The Final Reveal


It took quite a bit of research and effort to get the theater done and it is finished!

Actually, the theater was finished a while ago but I realized that we never had the reveal along with additional pics of the finished theater.

So here it is, the home theater final reveal!

Disclosure: Some of the links below are affiliate links. If you decide to purchase any of these products, we earn a small commission at no additional cost to you. We recommend these products only because we have experience with them and use them for our own projects. As Amazon Associates, we earn from qualifying purchases.

The Home Theater Final Reveal

This was a pretty big project, it took loads of research, calculations and choices to get to the final product. We decided to do all the work ourselves, which saved us a ton of money and also gives us a sense of accomplishment. 🙂

We love, love, love our theater and use it regularly. For the most part there isn’t much we would change.

There are a couple of things, which I’ll cover at the end of the post.

The Beginning (ish)

Unfortunately, we don’t have any before pics and very few during pics. 🙁

We started the home theater project before we had the idea of starting a blog, and apparently we didn’t do a good job of taking pictures.

Anyhow, here are a few pics of the work in progress.

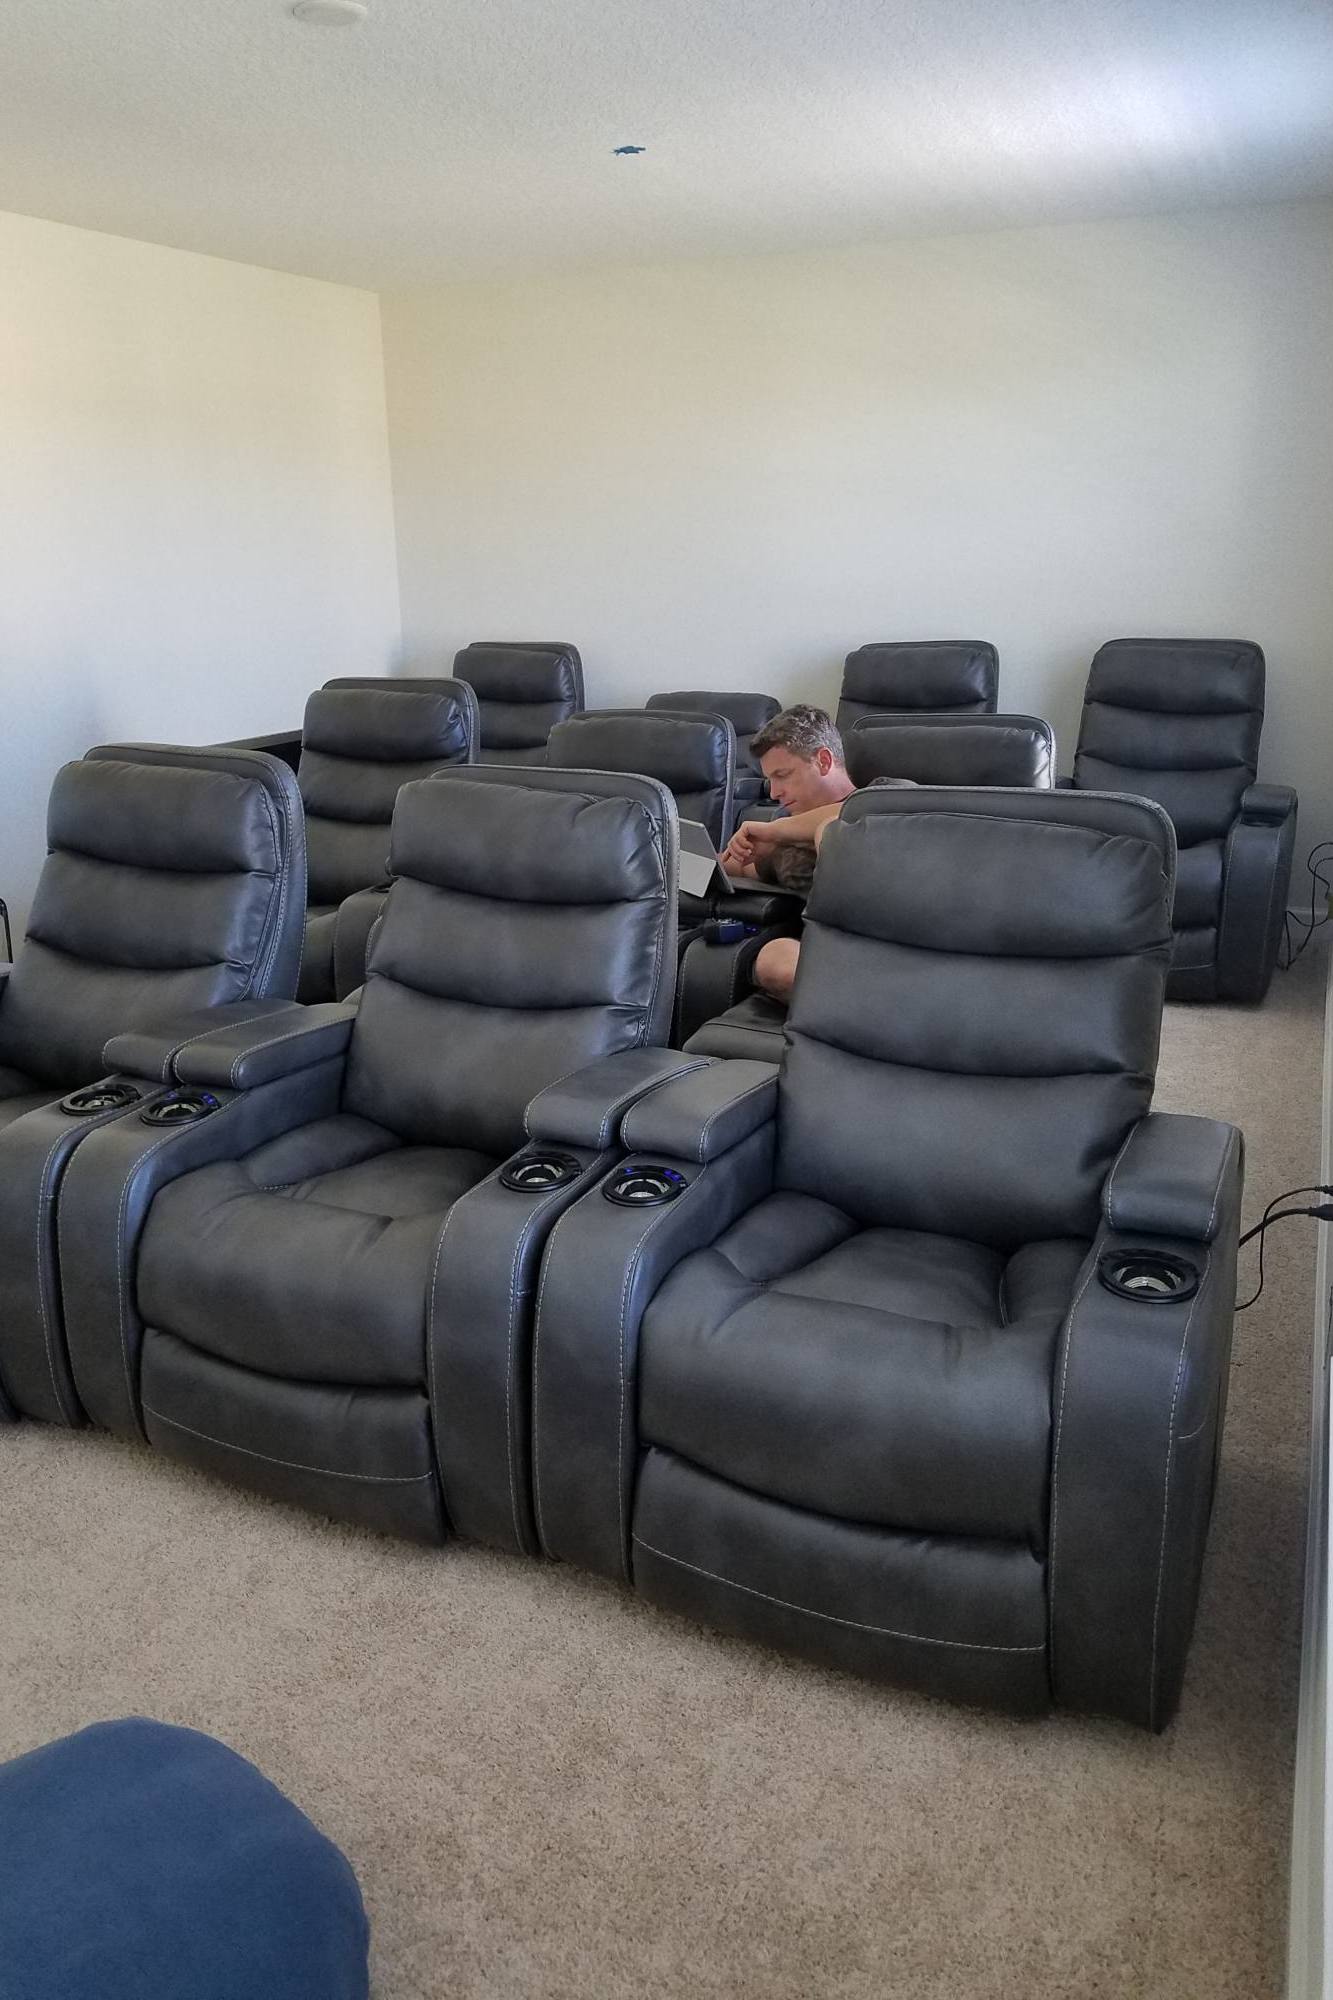
Laying Out The Home Theater Seating

Before the room was transformed into a home theater, it was a clean slate for us to work in. It was a regular rectangular room with no closets.

You can get an idea of what it was like before in the picture below.

We ordered the seating before we did anything else. There was a sale so we pulled the trigger.

We ordered the seating based on the measurements that they had online. Needless to say we were a bit nervous that the measurements would have been off… luckily everything worked out. 🙂

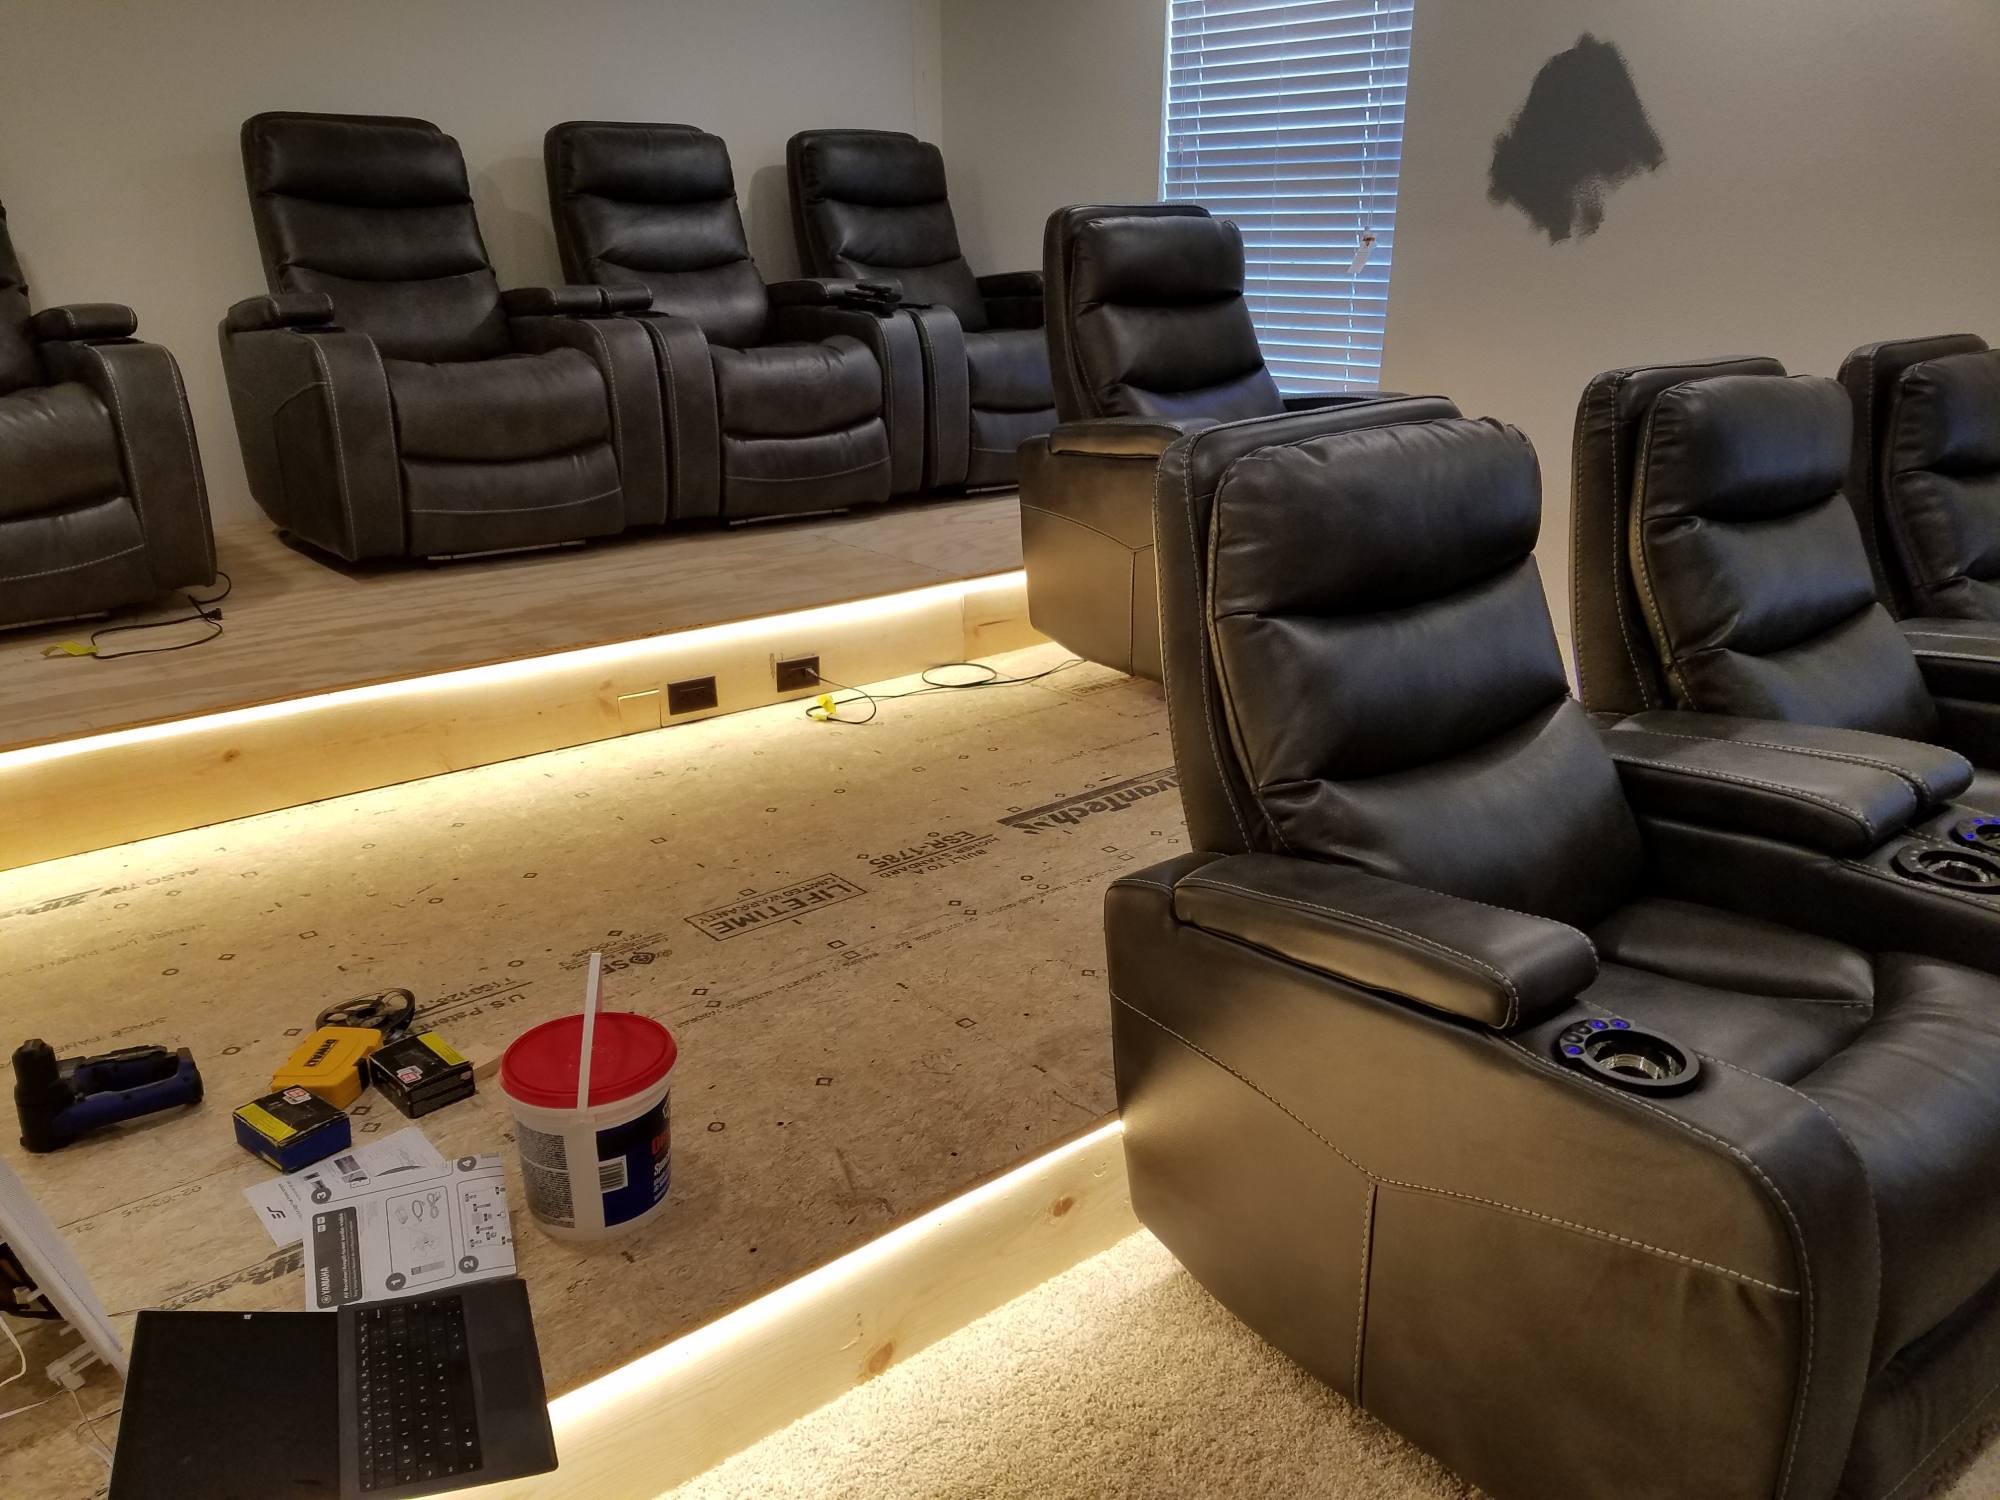
Once the layout was ironed out I started work on the theater room riser a.k.a. the home theater platform.

And before I got too far into the home theater seating risers construction I tested the height of the risers with the chairs to make sure things were still lining up the way I wanted it to.

That’s me in the last pic testing the home theater riser height with the chairs in place.

Laying Out The Home Theater Seating
Testing The Home Theater Seating Layout With The Height Of The Risers
Laying Out The Home Theater Seating

Working On The Theater Riser

Now that the riser height was ironed out I could finish the riser.

Before I added the plywood flooring to the risers I needed to I relocate the cable line from this room out into the hallway closet, where all the theater equipment was going to live.

I also needed to add outlets to power the recliners and the LED light for the riser stairs.

I put two on the bottom of the back wall, and two in the center of each step.

Adding Lights In The Risers Steps Portrait
The Riser Flooring For The Home Theater Is Installed

Time For The Good Stuff – The Projector, Screen and Speakers

This part took a lot of research and calculating. Check out these posts for details on the projector, screen, remote, home theater system and speakers.

Once all the calculations were done I tried everything out before making any holes in the walls.

After testing the projector location, I mounted it to the ceiling and ran an electrical outlet right next to it.

Testing The Projector Location
Installing The Wiring For The Speakers
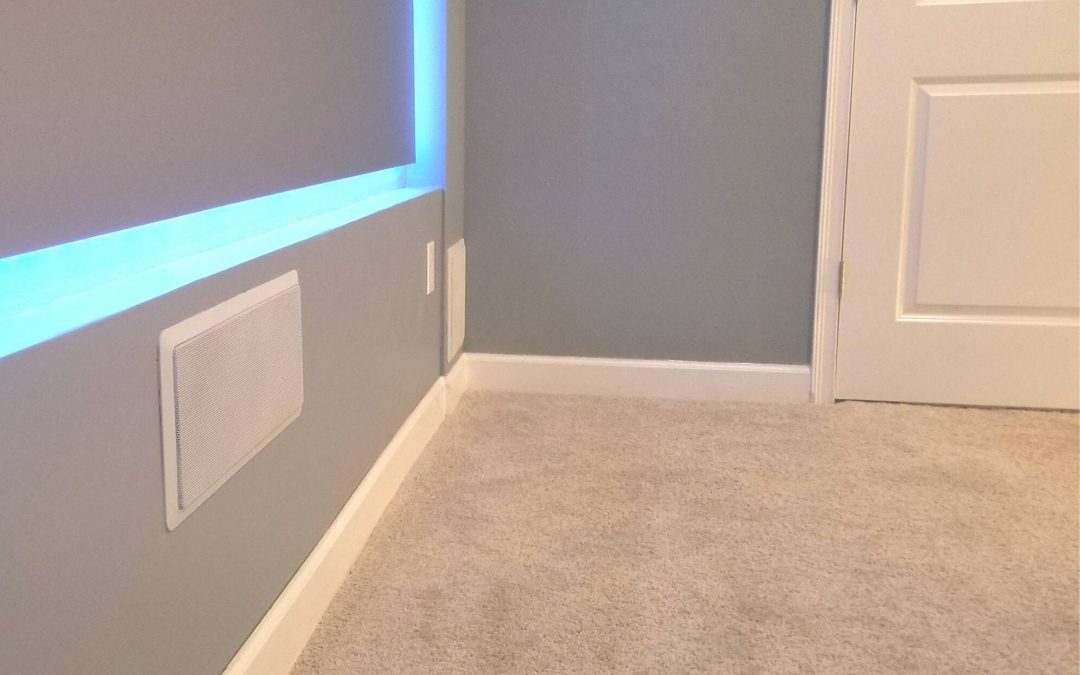
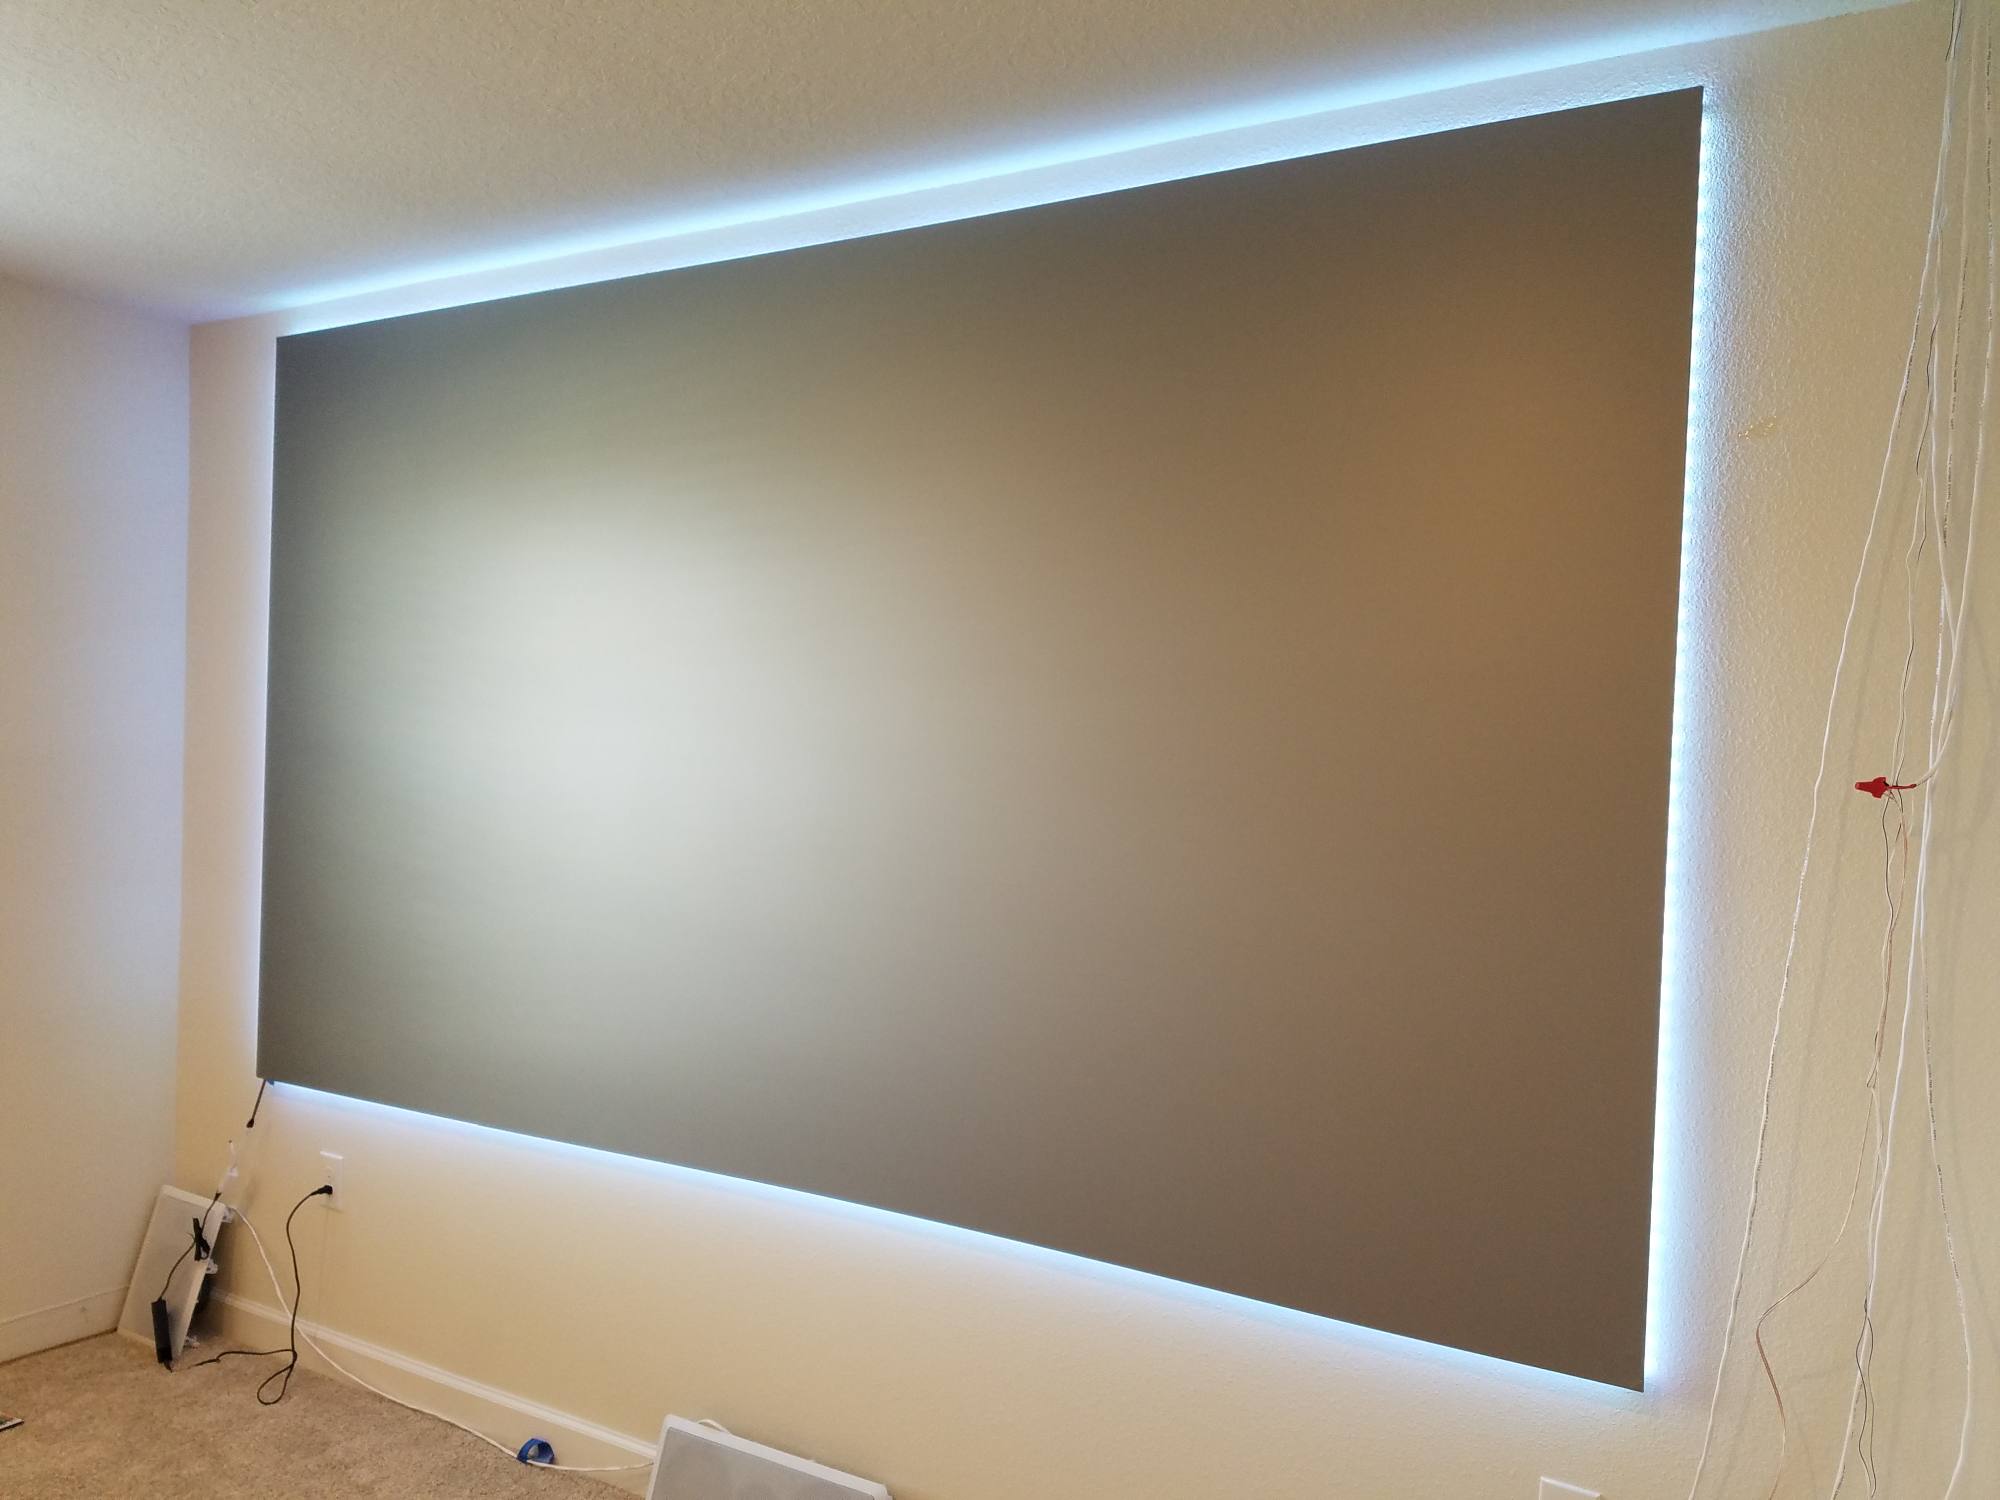
The Home Theater Projector Screen Is Up

The Home Stretch, The Home Theater Entrance Sign and Painting

The entrance sign was not a very hard part of the project. The hardest part was finding the right sized letters to put above the doors.

It did take a while to find the right-sized letters to use, I was able to find these at Target.

Once I found the right letters I:

  • Removed the existing top door molding
  • Cut out a piece of 3/4″ plywood to fill the space between the top of the door and the ceiling
  • Added a crown molding around the top of the plywood and a small piece of molding on the bottom of the plywood to give it more of a finished look.
  • Then centered the letters and painted, voila!
Testing The Letter Size Above The Home Theater Doorway
The Home Theater Riser Is Complete - Still Need To Paint
Installing The Home Theater Entrance Sign

The Finished Home Theater

Here are a bunch of pictures of the finished home theater.

I love the way the theater came out, it’s even better than I was expecting.

There are a few more things I still need to do, like making a home for the remote control, something like a cubby hole or shelf where it can be charged.

DIY Home Theater Entrance Sign
DIY Home Theater Entrance Sign From Front
DIY Home Theater Design - The Final Reveal

What I Would Have Done Differently

If we had to do it all over again, there are a few things I would have done differently. Overall, it would be the same home theater – with a few tweaks.

The Stair Lights

I installed lights in the stairs, which is a look that I thought would be great.
The lights I bought were low voltage, which means they have a transformer, and that means they aren’t dimmable.

In the end, I rarely use the lights in the stairs because they are too bright. If I did this again I would buy regular voltage lights that are dimmable.

The IR Repeater

I bought an IR repeater to have the remote’s signals sent to the closet in the hallway, where the theater equipment is.
The IR repeater worked great, but it turns out the Logitech remote I bought to replace all the remotes uses a radio signal to communicate with the hub (which is in the closet with the equipment) so I no longer need the IR repeater.

Getting 4K HDR Streaming Content

This was an expensive lesson. The projector itself doesn’t do any streaming, you need to have a device connected to it that will do that for you.
My idea initially was to get a 4K DVD player and that will have 4K streaming. The first DVD player I bought supported 4K Netflix but the Vudu app on it did not support HDR.

I was building up a movie library on Vudu and wanted to have it in HDR if that was a possibility. So I went on a quest looking for a 4K DVD player that supported Vudu in HDR.

I found one and it worked great, but it was a bit pricy and the menus were kinda slow to get to the streaming apps. I tweeted the macros on the Logitech and got it to work correctly, but slow. As a DVD player it was really good, and the streaming apps were there – just slow to navigate the menus.

Then for some reason, I went and bought a Roku.

Holy cow, that was a game-changer!

It supported 4K everything, HDR everything, and was lightning fast!

If I had to do this again I’d get the cheaper 4K DVD player to play the Ultra-HD DVDs and use the Roku for any Streaming apps.

The Entire Shopping List

Here’s a list of everything that we are currently using in our home theater.

You can click on the picture to buy the same one for yourself.

Projector

Designing a Home Theater - The Video Projector - Epson Home Cinema 5040UB 3LCD Home Theater Projector with 4K Enhancement

Projector Screen

Designing a Home Theater - The Fixed Projector Screen - Elite Screens - A Fixed Projector Screen

The Projector BackLight Kit

Designing a Home Theater - The Fixed Projector Screen - The LED Kit

The Amplifier

Designing a Home Theater - Home Theater System - Yamaha TS-R7810

The Remote

Designing a Home Theater - Home Theater Remote - Logitech Harmony Elite Remote

The Passive Amplifier

Designing a Home Theater - Home Theater Subwoofer Amplifier

Roku Ultra

Roku Ultra

The Speakers

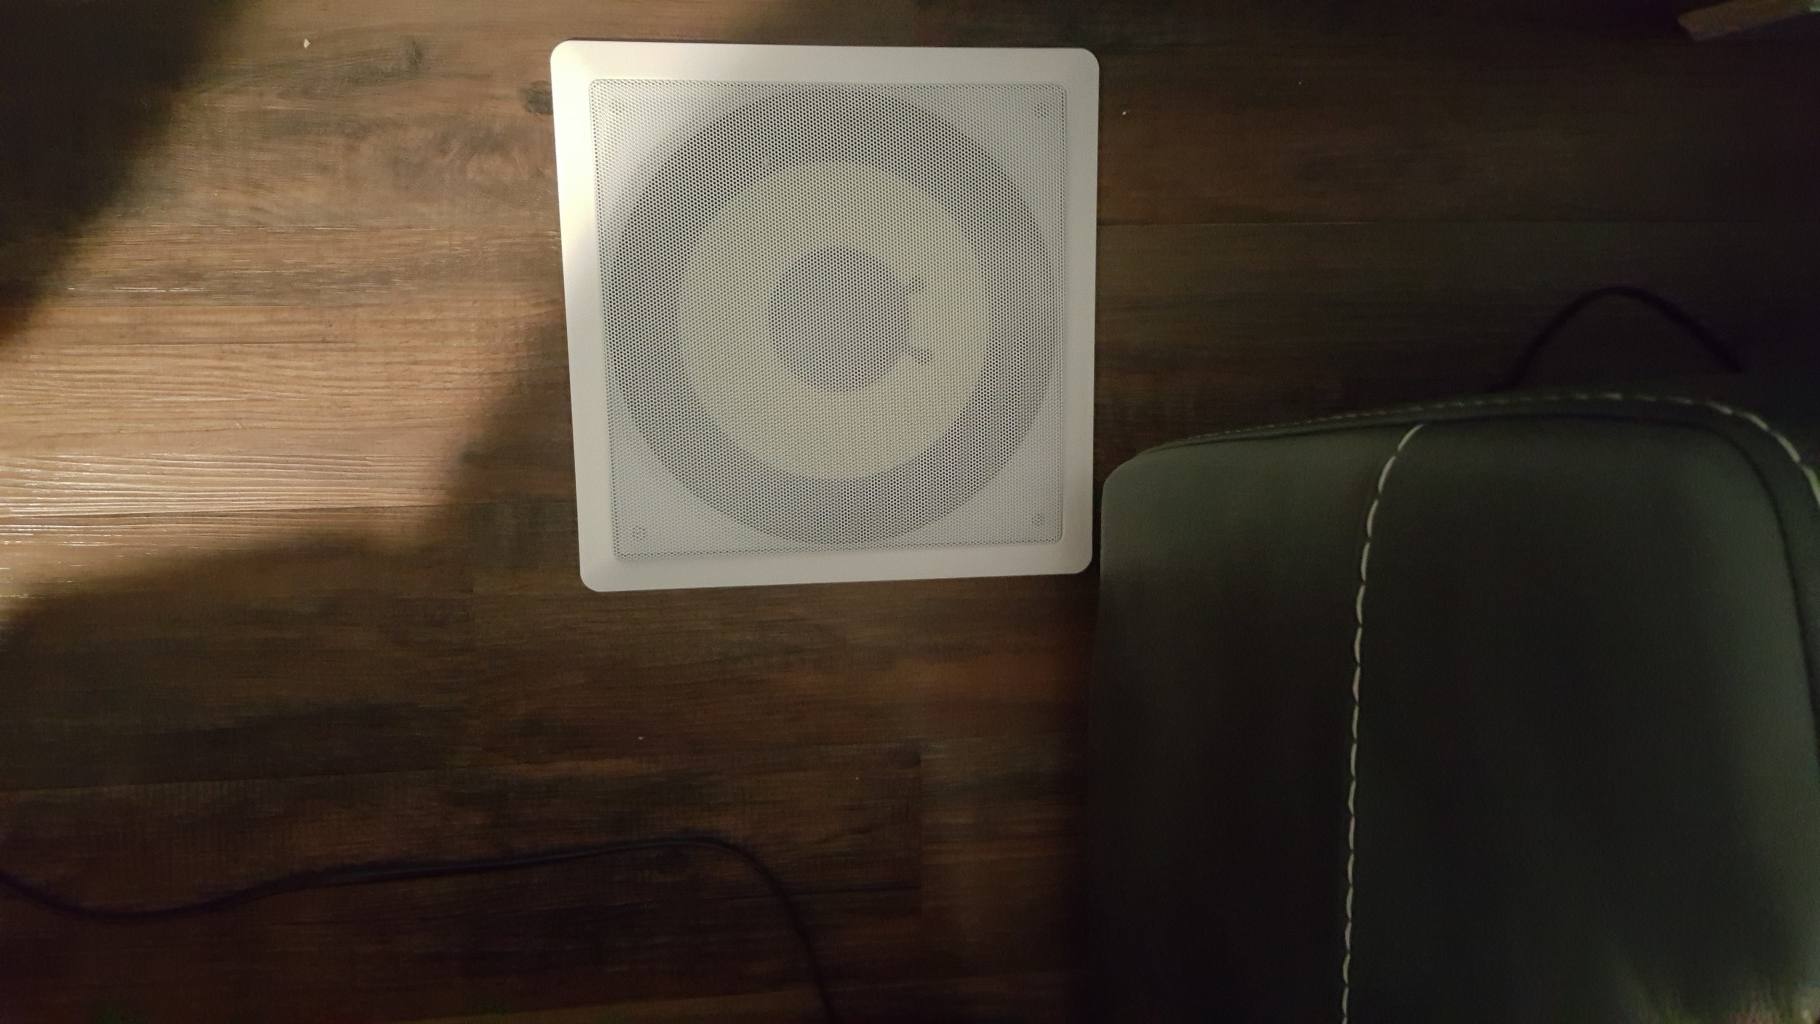
Designing a Home Theater - Home Theater Speakers - Acoustic Audio HD728 in-wall ceiling home theater 7.2 surround 8 inch speaker system

DIY Home Theater – Finished!

There you have it, pics of the home theater, during the construction and after the DIY home theater was finished.

I hope you find some ideas and tidbits of info in our project that will help you with yours.

What would you do differently in your home theater? Let me know in the comments below!

Enjoy this post? Pin it and share it with others!

DIY Home Theater Design - The Final Reveal - Portrait

How To Start A Grow Bag Victory Garden

How To Start A Grow Bag Victory Garden

How To Start A Grow Bag Victory Garden


Our latest project is indoor gardening. Our initial attempt at a green thumb was trying to give our kitchen scraps a chance at a second life. We’re still doing that, and in addition we’re also planting seeds.

Since Corona Virus is forcing a ton of people into self-isolation, many have taken on new hobbies. With the news now saying that there may be shortages in fresh produce this summer, it came as no surprise that we weren’t the only ones that chose gardening as our new hobby.

So much so that the trend was even given a name, they’re calling them victory gardens.

We would have loved to grow our victory garden in the yard but in our community the HOA doesn’t allow gardens. 🙁

As an alternative, we started using grow bags. We bought a couple of different sizes to accommodate the different types of plants we were thinking of planting.

Disclosure: Some of the links below are affiliate links. If you decide to purchase any of these products, we earn a small commission at no additional cost to you. We recommend these products only because we have experience with them and use them for our own projects. As Amazon Associates, we earn from qualifying purchases.

What You’ll Need To Start Your Grow Bag Victory Garden

You don’t need very much stuff:

  • grow bags
  • potting soil
  • and maybe a bag of seed starter mix if you prefer to start your seeds in a start mix

The Grow Bags

We bought the grow bags in a couple of different sizes, to give us flexibility in what plants we could grow.

The grow bag size you’ll need will, of course, depend on what you plan on growing and how much of it you plan on planting.

We figured we’d use the deeper bags for plants that needed the depth, like potatoes, carrots, and beats. Basically, anything that required a deeper root system.

We also got shallower and wider grow bags, giving us more planting surface for with plantings that don’t have deep root systems. Things like lettuce, scallions, onions, garlic, herbs, etc…

The Deep Grow Bags

For the deep grow bags we purchased a couple of packs of 7 gallon grow bags, measuring 13″ diameter x 12″ high.

Each pack has 8 bags, that’s a whole lotta bags to plant veggies in. 🙂

You can click the picture of the bag to get the same deep grow bags.

The Wider Grow Bags

With the wider grow bags we purchased 3 grow bags, each measuring 24″ diameter x 8″ high. It didn’t indicate how many gallons each grow bag was but they are perfect for the plants with shallower root systems.

You can click the picture of the bag to get the same deep grow bags.

The Potting Soil

The potting soil we used was MiracleGro Performance Organics.

We didn’t know how much potting soil we were going to need, so we took a guess and bought 9 – 25 quart bags.

We ordered it from Lowes and had it delivered.

So far we’ve used a couple of bags and we’re using 4 deep grow bags.

Although only one is filled to the top, the others are filled about half way.

How To Start A Grow Bag Victory Garden- Potting Soil

Prepping Your Grow Bag Garden

Prepping your grow bag garden is really as straight forward as you’d imagine.

  • Unfold the grow bag
  • Fill the grow bag up with potting soil
  • Plant your seeds or transplant your plants
  • give your plants a good watering
  • Place the bags in a bright area without too much direct sunlight

One thing I did notice is that although the grow bags breath, they also do a great job of keeping the moisture.

Be careful not to over water your plants. I did that in the beginning and soon found out the plants didn’t like my overly generous watering.

Warning: The grow bags are designed to breath – which is a good thing. But as a result, they also allow moisture to permeate through the bag. If you’re placing your grow bag on carpet, or wood floors make sure to put something underneath the grow bag so it doesn’t stain or damage your floors. I put a sheet of plastic underneath mine to protect the carpet.

Tip: When using the deeper grow bags you don’t need to go to the top of the bag if what you are planting has shallow roots. You can fold back the top of the bag, similar to what you do to jeans when they are too long.

That way you don’t use more potting soil than you need to.

What Do You Think Of Our Indoor Victory Garden?

That’s pretty much it. So far, we are loving our new hobby. It really is exciting to see the progress the plants make every day.

We’re not at the point of having new veggies yet but at this rate, the veggies will be here before we know it. 🙂

I hope this post inspires you to start your own indoor grow bag victory garden and shed some light into how easy it is to start one.

What did you think? Have you ever grown things in a grow bag? How did it work out for you?

Let me know in the comments below! Thanks for reading.


Enjoy this post? Pin it and share it with others!

How To Start A Grow Bag Victory Garden
5 Veggies You Can Grow From Kitchen Scraps

5 Veggies You Can Grow From Kitchen Scraps

5 Veggies You Can Grow From Kitchen Scraps


First, let me start off with saying there are definitely waaaay more than just 5 veggies you can grow from kitchen scraps, these are just the first ones I tried.

With the Corona Virus causing our vacation rental business to come to a screeching halt, we started putting our attention to other interests.

The latest project we’ve taken on is starting a garden, most likely a container garden.

During my perusing on Pinterest, I found a pin on regrowing vegetables from the kitchen scraps.

I just started this project but already have quite a few types of veggies that can be regrown from kitchen scraps.

Like I said, there’s probably many more vegetables you can do this with, but this is a list of the ones I started with.

Disclosure: Some of the links below are affiliate links. If you decide to purchase any of these products, we earn a small commission at no additional cost to you. We recommend these products only because we have experience with them and use them for our own projects. As Amazon Associates, we earn from qualifying purchases.

5 Vegetables You Can Grow From Kitchen Scraps

#1 – Lettuce

This seems to work with all kinds of lettuce, so far I’ve got butter, red leaf and romaine lettuce regrowing from kitchen scraps.

Out of the 3 the romaine seems to have a head start. To be fair, I was apparently more generous with the amount of base I left on the root – I’m guessing that would make a difference.

5 Veggies You Can Grow From Kitchen Scraps - Lettuce

How To Start

When cutting the base of your lettuce head off, cut it about 1 1/2 – 2″ from the bottom. Then take the base and put it in a container with a bit of water on the bottom.

Make sure to change out the water every couple of days and in a few days you’ll start seeing new growth emerging from the center of the base.

Once you a good amount of growth, your new lettuce plant will probably be happier in soil. I’ve read that it would do fine in water, as long as you change out the water every couple of days.

Personally, when I planted the lettuce in the ground I noticed it started growing better. Maybe its just my imagination, but I’m placing my plants in the soil once they start showing signs of new growth.

Update: I learned recently that lettuce will shoot up right away when the temperature is above 70 degrees. Since we’re in Florida, those temps make it difficult for us to grow lettuce indoors. We keep the temperature around 75 degrees and the romaine lettuce I was testing with, shot straight up.

I’m trying again, this time with butter lettuce. As soon as the lettuce started growing new leaves I put it in dirt. Lets see if that improves things.

I’ll update this post with its progress.

#2 – Basil

We had a long and leggy basil plant that wasn’t producing many leaves anymore. So I figured I’d try to use a cutting to start a new plant.

So far, the basil I’m trying this with hasn’t made any new roots but I’m pretty confident that it will start rooting shortly.

The cutting looks like it’s doing well in the water, and from what I’ve read, basil is a piece of cake to grow from cuttings.

How To Start

You’ll want to give the cutting enough stem so that it can sit in water without the leaves touching the water. If the leaves sit in the water they’ll start rotting and the water will get cloudy and your cutting will probably die off.

So give the cutting a couple of inches of stem.

Take your cutting and place it in a container with enough water for about an inch of the stem to sit in the water.

Place it in a bright area without direct sunlight and wait. 🙂

5 Veggies You Can Grow From Kitchen Scraps - Basil

#3 – Onions

The onions seem to grow pretty easily, it’s been a week and they look like they’re ready to be put into dirt.

Not sure if an actual whole onion will grow from this experiment but the green stems that grow from it can be used in cooking. The entire plant had an onion flavor.

5 Veggies You Can Grow From Kitchen Scraps - Onions

#4 – Scallions

The scallions are the rock stars of my kitchen scrap garden! They have been in water for maybe about 5 days and have several inches of new growth already on them.

How To Start

Similar to the lettuce cuttings, when you cut the base of the scallions off cut it a bit higher than usual. About a couple of inches of the plant from the base.

Put them in a container with water on the bottom and you are all set.

Since they usually already have some roots, these guys didn’t waste any time growing.

5 Veggies You Can Grow From Kitchen Scraps - Scallions

#5 – Garlic

Ok, so this isn’t exactly using kitchen scraps, since you’re taking the entire unused clove and sticking it into the ground.

Maybe it’s more like a garden tithing. 🙂

I took a few small cloves of garlic and planted them in the dirt next to the tomato slice. They were in the dirt about 3 days and I’m starting to see some green on the tops of a few of the cloves.

I’m guessing they could have also had the base of the garlic sitting in a little puddle of water to get it to start growing but I tried sticking it directly in the ground and that seemed to work like a charm.

5 Veggies You Can Grow From Kitchen Scraps - Scallions

Caring For Your Kitchen Scrap Garden

It’s pretty straight-forward to care for it. Place them in an area that is bright but doesn’t have direct sun. For the scraps that are in water make sure to swap out the water every day or other day and for the scraps in dirt make sure their dirt stays moist – without over watering.

Before you know it you’ll start seeing new growth and your kitchen scrap garden will by off to the races! 🙂

Once the kitchen plants turn more into plants (either they grow roots are start growing new leaves) I’ll transplant them into grow bags.

Tip: When cutting the vegetable it seems to help to leave a bit of “meat” along with it. The lettuce and onions that I cut short didn’t seem to grow as fast or well compared to the ones where I left some more “meat”.


That’s My Kitchen Scrap Garden List

There are probably dozens of other veggies you can try this with, these are just the ones I’ve started with. I’m sure I’ll be adding other scraps to the list as I come across new ones.

Once the veggies grow a bit I’ll be transferring them to grow bags.

What did you think? I know I personally will never look at kitchen scraps the same way again. 🙂

Have you ever tried recycling your kitchen scraps? If so what veggies did you try? Did it work for you?

Lemme know in the comments below.

Enjoy this post? Pin it and share it with others!
5 Veggies You Can Grow From Kitchen Scraps

3 Time Saving Tips For DIY Plank Plywood Floors

3 Time Saving Tips For DIY Plank Plywood Floors

Now that we have two DIY plank plywood floors projects (the dining room and the living room) under our belts, we’ve learned a bunch of things – things to do and things not to do. We’re going to cover 3 Time Saving Tips For DIY Wide Plank Plywood Floors.

If you’re planning on making your own wide plank flooring made from plywood, then make sure to take a look at this list – it will save you tons of time… and sanity :).

We wrote detailed articles for each of those projects (see below for links) but we also wanted to write a short article highlighting the biggest time saving tips we have.

Here are the 3 things you need to know for making your own wide plank plywood floors. Following these tips will make your project go smoothly and you’ll end up with better-looking plywood floors.

Disclosure: Some of the links below are affiliate links. If you decide to purchase any of these products, we earn a small commission at no additional cost to you. We recommend these products only because we have experience with them and use them for our own projects. As Amazon Associates, we earn from qualifying purchases.

DIY Plank Plywood Floors Tips

A Bonus Tip First – Cut The Boards Yourself

Yeah, it’s a little different to get the bonus tip first, but a few of the tips piggy back on this one. So it makes sense to share this first.

And I know that cutting the boards yourself sounds like the opposite of a time saver, but let me explain.

There are a few posts out there that recommend having the person at Lowes or Home Depot cut the plywood into planks for you.

I know that sounds like it would save you tons of time, because you’re offloading the cutting on them, but I wouldn’t recommend doing that.

We’ve had home improvement stores cut the plywood for us on other projects in the past.

Although it does save you time – we don’t think it’s worth it. Their cuts are not very accurate, like really inaccurate.

That may be perfectly find for certain projects, but with this project consistent cuts are important.

Having boards that are all about the same width allows your project to go smoother, easier and the end result will look much nicer.

#1 Make A Jig

OMG – If I didn’t use a jig I don’t know if I would have ever finished this project. The jig gives you consistent cuts and also allows you to easily rip through the pile of plywood.

The next best tool to use would have been the table saw, but it’s a super distant second to using a jig.

The jig wasn’t hard to make and it didn’t take very much time.

Take a look at the jig details in the dining room flooring article.

There you’ll find out how to make one and how how to attach it to the circular saw.

DIY Wide Plank Plywood Flooring - Secure The Jig To The Circular Saw Using Screws

#2 Don’t Use A Plywood Blade

This deserves another OMG. I tried using a plywood blade to cut the plywood into planks initially (cause you know, it’s plywood) but that was a BIG MISTAKE!

Ignore the plywood blades – instead, use the cross-cut blades.

Like I said in the dining room flooring article, the plywood blade didn’t even make it through two sheets of plywood.

When I used the cross-cut blade, a single blade did the rest of the plywood for the dining room and also the living room!!

If you’re keeping score, the plywood blade barely ripped 2 sheets of plywood into planks and the cross-cut blade did 19 sheets – and it can still do more.

This is hands down the best blade for cutting plywood planks. It cut through the plywood like butter, and also didn’t splinter the wood at all.

(Click the picture to order the same blade we used on Amazon)


The best blade to cut your plywood planks is a cross cut balde

#3 Skip Sanding Between Polyurethane Coats

When we did the dining room floor, we lightly sanded the bumps out of the coat of polyurethane with 120 grit sandpaper.

It’s what I’ve always thought you needed to do between coats and it’s also what I read in other plywood flooring blog posts.

With the living room floors, we figured that the bumps would even out a little after multiple coats of the poly were applied.

diy plywood floors

Besides, the bumps would add a bit more texture making the floors less slippery.

The only concern we had was how it would feel walking barefoot on the floor with more texture. When we ran our hands on the planks we could clearly feel the additional texture, so we were a bit nervous.

Well, it turns out, the additional texture was barely noticeable when walking on the floor barefoot. Phew, that was a relief!

There You Have It

Those are our time saving tips for DIY wide plank plywood floors. These few simple tips will save you HOURS and HOURS of time. Without them, our project would have taken A LOT longer and would have been harder to do.

The first two tips alone will save you from pulling your hair out!

We hope they will help you with your own wide plank plywood flooring.

Let us know what you think!

Enjoy this post? Pin it and share it with others!

3 Time Saving Tips for DIY Plank Plywood Floors