Installieren eines End Grain Flooring Inlay
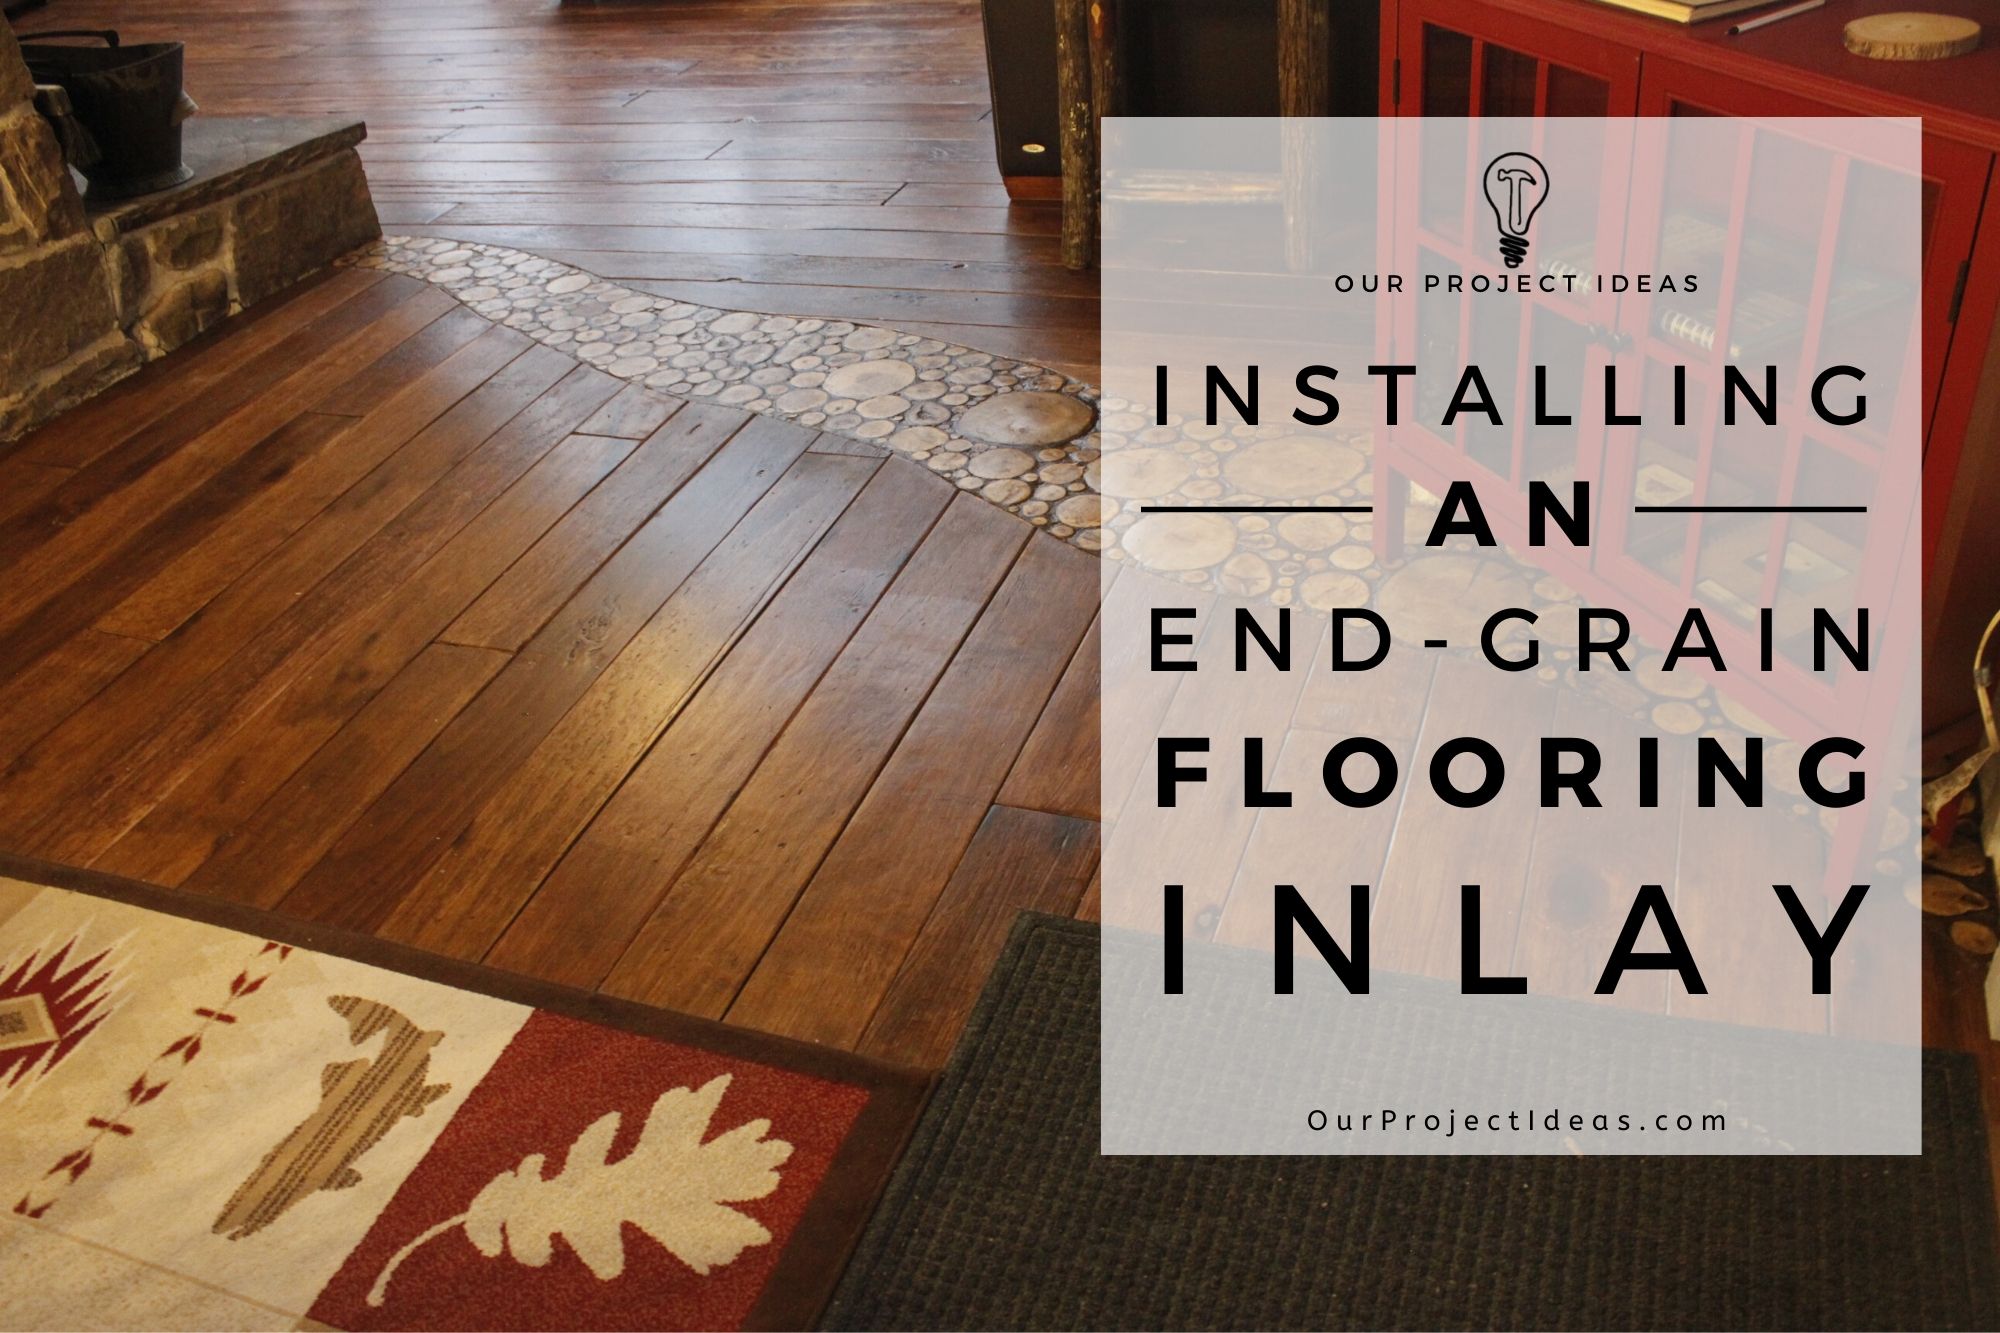
Ich freute mich schon seit Monaten darauf, ein Endkornboden-Inlay zu erstellen. Wir Im Esszimmer und in der Küche wurden breite Sperrholzdielenböden verlegt Anfang dieses Jahres stand als nächstes das Wohnzimmer auf der Liste. Hier ist ein Beitrag mit Details dazu Wir haben es mit dem Wohnzimmerboden gemacht.
Der Fußboden im Speisesaal und Wohnzimmer gingen in verschiedene Richtungen und eine regelmäßige Schwelle die beiden Räume trennt gelegt werden würde sein – auch ziemlich langweilig.
Während dabei zunächst meine Pinterest Forschung auf dem Fußboden, Ich kam über Stifte mit unterschiedlicher Bodengestaltung mit Holz Scheiben erstellt.
Das gab mir die Idee, ein Ende Kornboden als Einlage zu tun. Es war die perfekte Lösung!
Ich konnte dieses Projekt nicht warten, um zu versuchen,.
Bekanntgabe: Einige der Links unten sind Affiliate-Links. Wenn Sie sich entscheiden, eines dieser Produkte zu kaufen, Wir verdienen eine kleine Provision ohne zusätzliche Kosten für Sie. Wir empfehlen diese Produkte nur, weil wir haben Erfahrung mit ihnen und sie für unsere eigenen Projekte. Als Amazon Associates, Wir verdienen mit qualifizierten Einkäufen.
Inhaltsverzeichnis
Die Einkaufsliste
Werkzeuge Liste
Hier ist eine Liste der Werkzeuge, die wir für dieses Projekt verwendet.
Affiliate-Links unten auf ähnliche Elemente sein kann, wenn genaue Einzelteile nicht online gefunden werden können.
Supplies Liste
Dies sind die Vorräte an diesem Projekt verwendet.
Affiliate-Links unten auf ähnliche Elemente sein kann, wenn genaue Einzelteile nicht online gefunden werden können.
Ölmodifiziertes Polyurethan auf Wasserbasis – Wir haben 1 Gallone verbraucht
4. April″ Synthetische Polyesterbürste – 4 Pinsel zum Auftragen der Poly
flüssige Nägel
Aktualisieren: Die Hirnholzeinlage ist schön gealtert. Wenn Sie es versuchen, Der Teil, den wir am meisten betonen würden, ist das Versiegeln der Holzscheiben vor dem Verfugen und das Auftragen von reichlich Polyurethan auf die fertige Einlage. Dadurch bleibt die Sägemehlfuge und das Hirnholz dauerhaft schön.
Was ist End Grain Flooring?
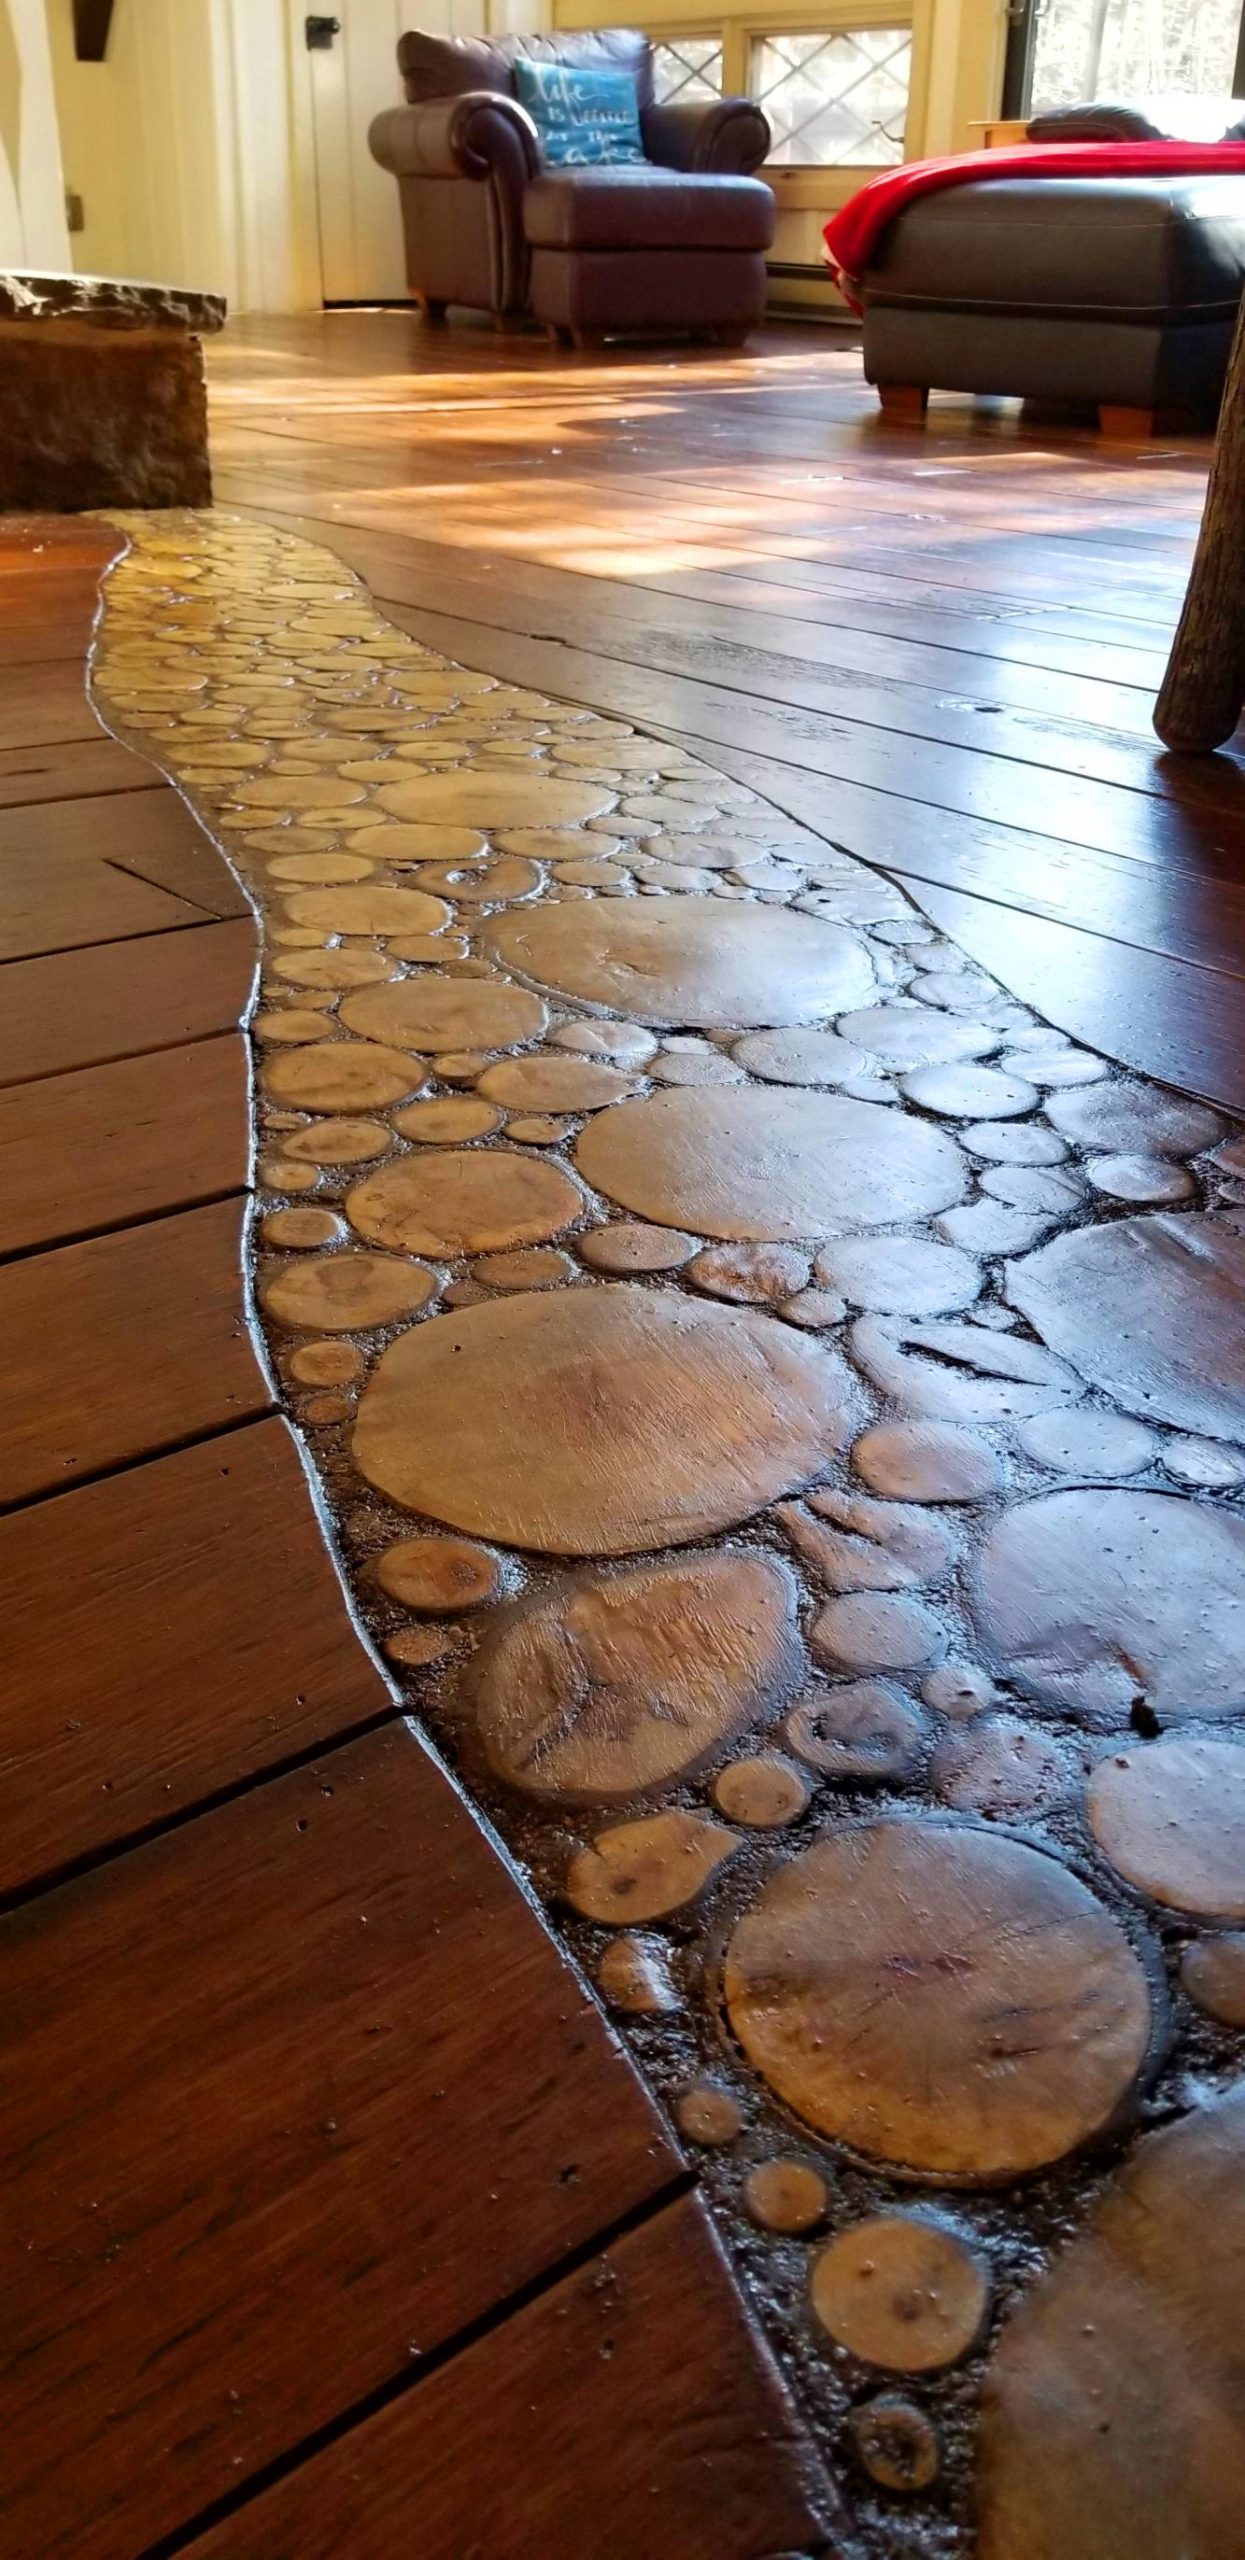
Hirnholzböden bestehen im Wesentlichen aus in Scheiben geschnittenen Ästen und Baumstämmen, dann in einem Muster platziert, in unserem Fall, Es hat die Form eines Flusses. Die Scheiben werden festgeklebt und mit Fugenmörtel versehen, um die Zwischenräume zwischen den Scheiben auszufüllen. Anschließend wird ein Schutzanstrich aufgetragen und Sie haben einen Hirnholzboden!
Ich nenne es einen Waldfluss, aber ich habe gesehen, dass es viele verschiedene Namen gab. Bodenbelag aus Holzscheiben, Ende Kornboden, Bodenbelag am Blockende, Cordholzböden und sogar quergeschnittene Baumscheibenböden, um nur einige zu nennen.
Herausfinden des Layouts der Hirnholz-Bodeneinlage
Das Schöne an einer Bodeneinlage ist, dass Ihnen bei der Gestaltung keine Grenzen gesetzt sind. Es kann so einfach oder verzierten sein, wie Sie wollen.
Da unser Haus in der Poconos, in einer Wildnis, wir dachten, ein aus Holz Fluss mit dem Haus und seiner umgebenden Natur gehen.
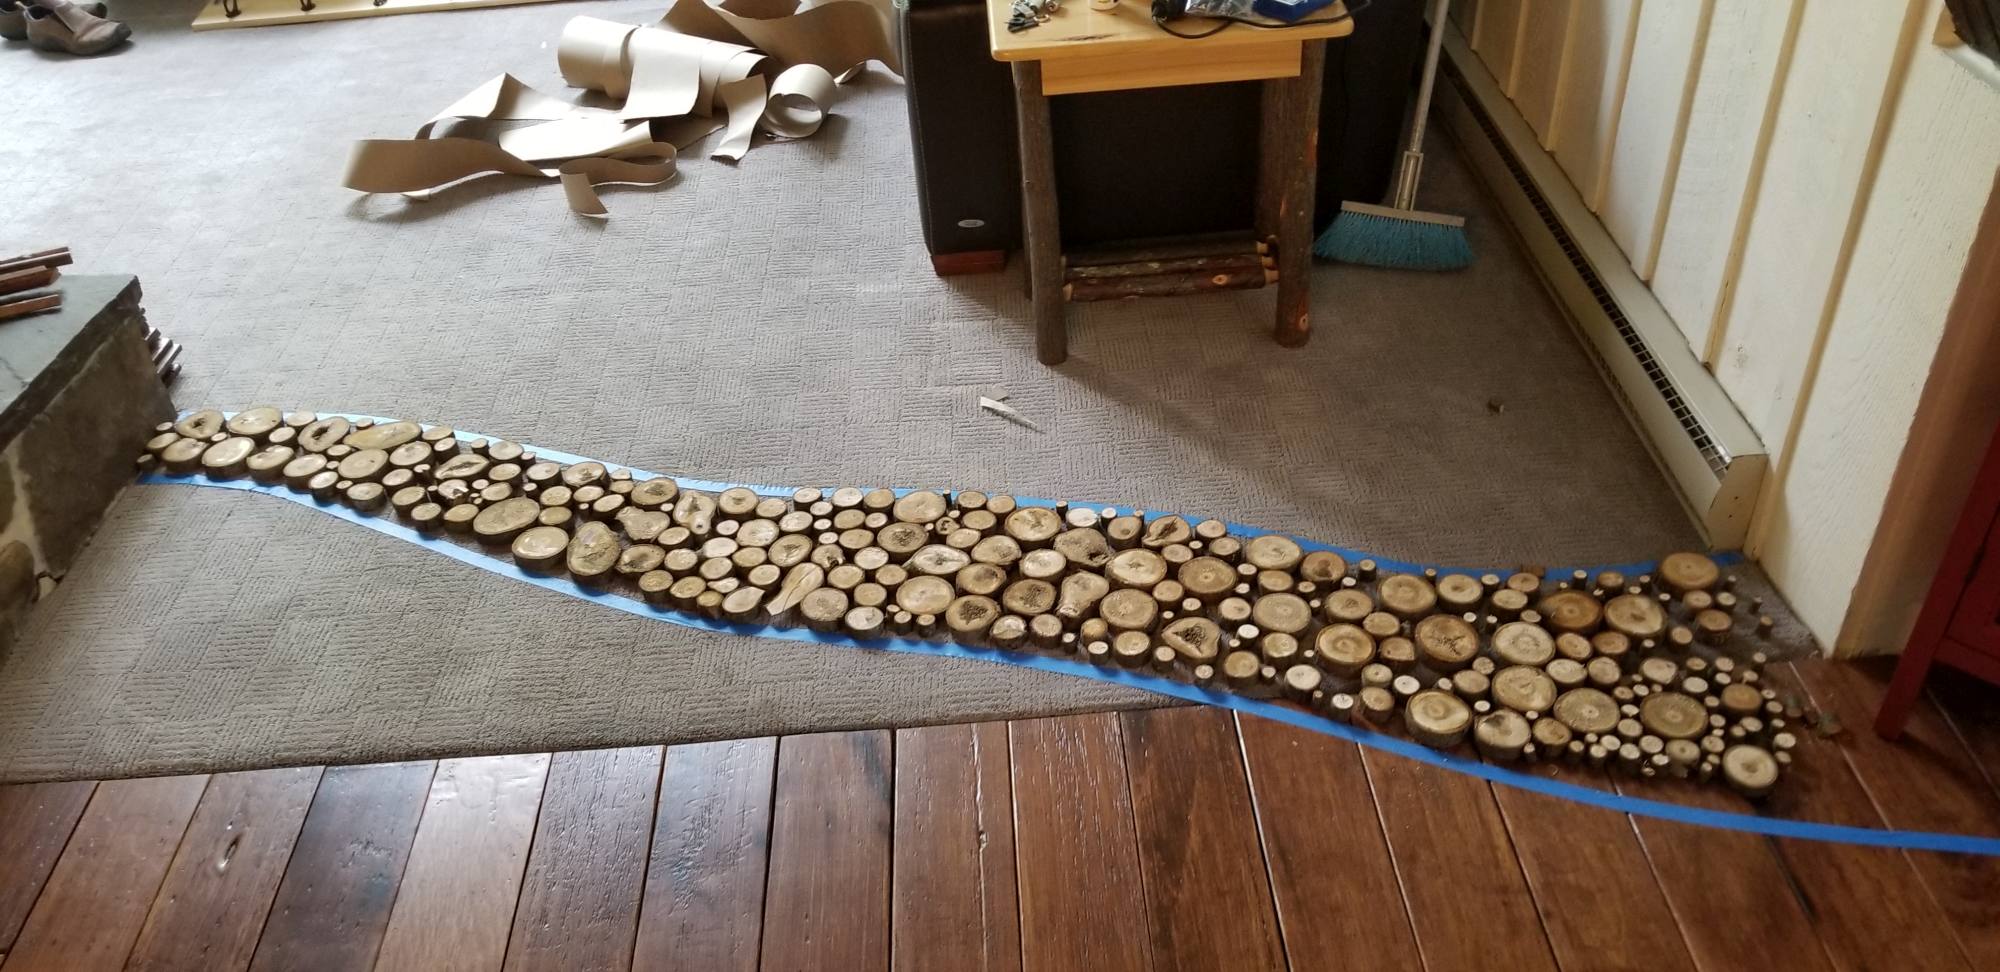
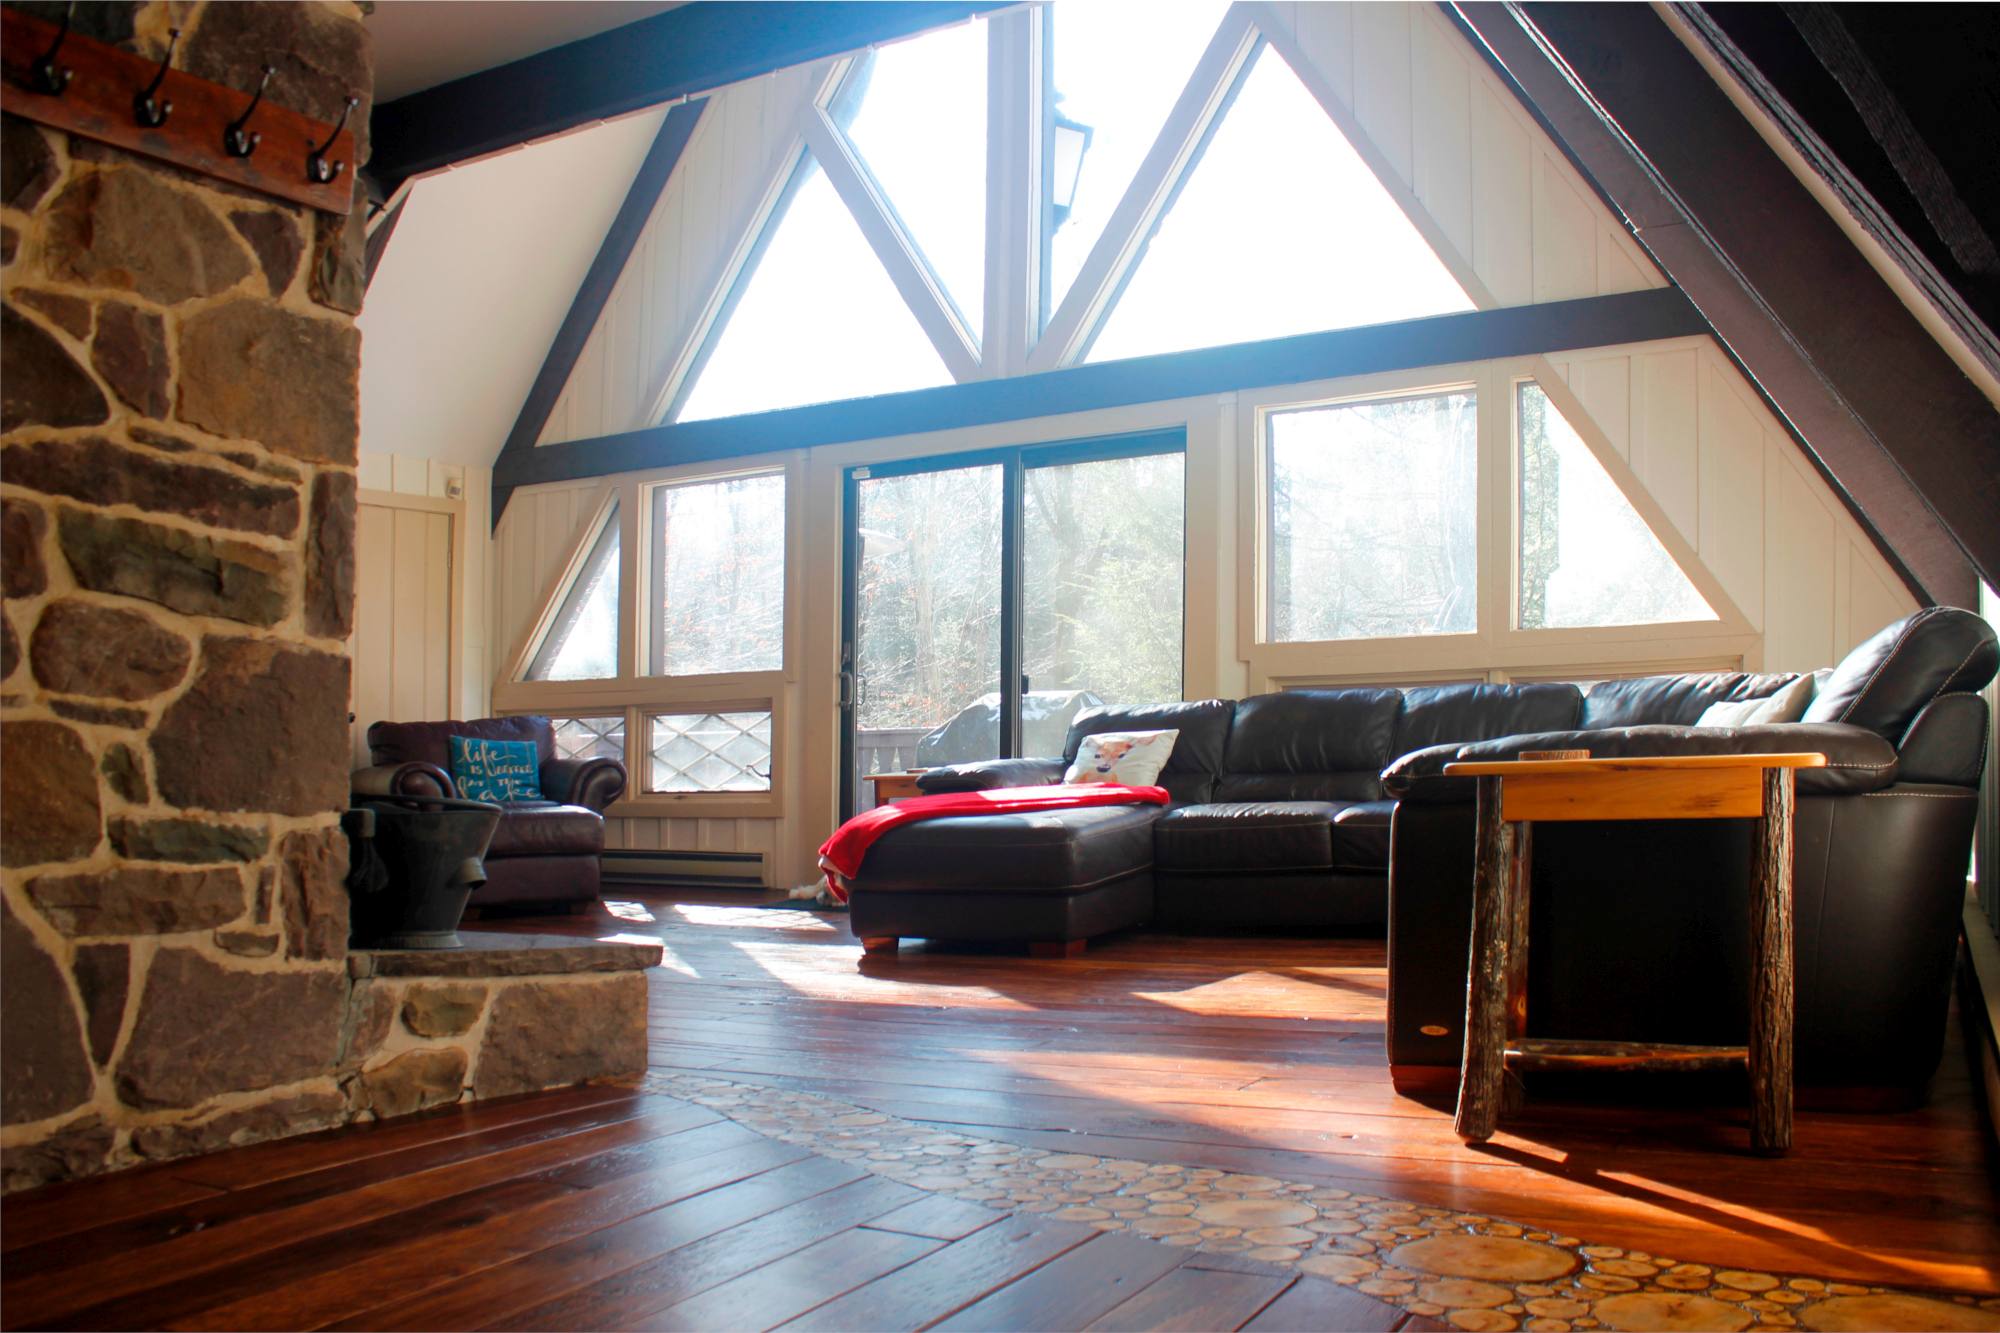
Das Ende Kornboden Inlay würde das Esszimmer vom Wohnzimmer getrennt. Beginnend in der Ecke des Speisesaals und es Weg in die Ecke des Wohnzimmers Kamin machen.
Wir wollten den Bodenbelag Inlay auf einer Seite breiter beginnen und ihn durch den Raum seinen Weg sanft geschwungenen.
Wir hatten die Idee, als wir das Esszimmer früher im Jahr tat, und das ist auch als ich anfing, für den Fluss der Holzscheiben schneiden und die Form des Bodenbelags Akzent Holzscheibe vorgezeichnet.
Wir wollten die Wohnzimmer Böden und die Einlage ein paar Monate später tun, so dass die Holzscheiben Zeit zum Trocknen ergab.

Schneidet die Holz-Scheiben
Nun, da die allgemeine Form des Ende Kornboden Inlay war an Ort und Stelle, der nächste Schritt war es in mit Holzscheiben zu füllen. Ich habe ein paar Zweige, die auf unserem Grundstück und begann gefallen waren sie auf die Breite schneiden Ich dachte, ich brauchte… auf, dass mehr später.
Ich schnitt genug Stücke Holz zu füllen im Inlay, mit einem Bündel verschiedener Dicken Zweig. Ich schnitt sich im Mai auf sie ein paar Monate trocknen müssen, bevor sie im Herbst Installation.
Der Boden war 1/2″ Da das Holz dick ist und die Böden uneben sind, schneide ich es etwas dicker… zumindest dachte ich das….das war ein großer Fehler. Es ist wichtig, sie von Anfang an auf die richtige Größe zuzuschneiden.
Zum Schneiden der Scheiben habe ich eine Gehrungssäge verwendet, Es ging ziemlich schnell, wenn man bedenkt, wie viele Scheiben benötigt wurden.
Wichtiger Tipp: Versuchen Sie beim Schneiden der Holzstücke, diese so genau wie möglich auf die endgültige Dicke zu schneiden.
Das habe ich bei diesem Projekt nicht gemacht und es hat Tage gedauert, bis ich die Scheiben auf die richtige Größe gebracht hatte.
Ich habe die Scheiben zu 3/4 geschnitten″ und die meisten Holzscheiben mussten etwa 1/2 groß sein″… ein großer Fehler.
Das zusätzliche 1/4″ war mühsam zu entfernen.

Trocknen Das Holz Scheiben
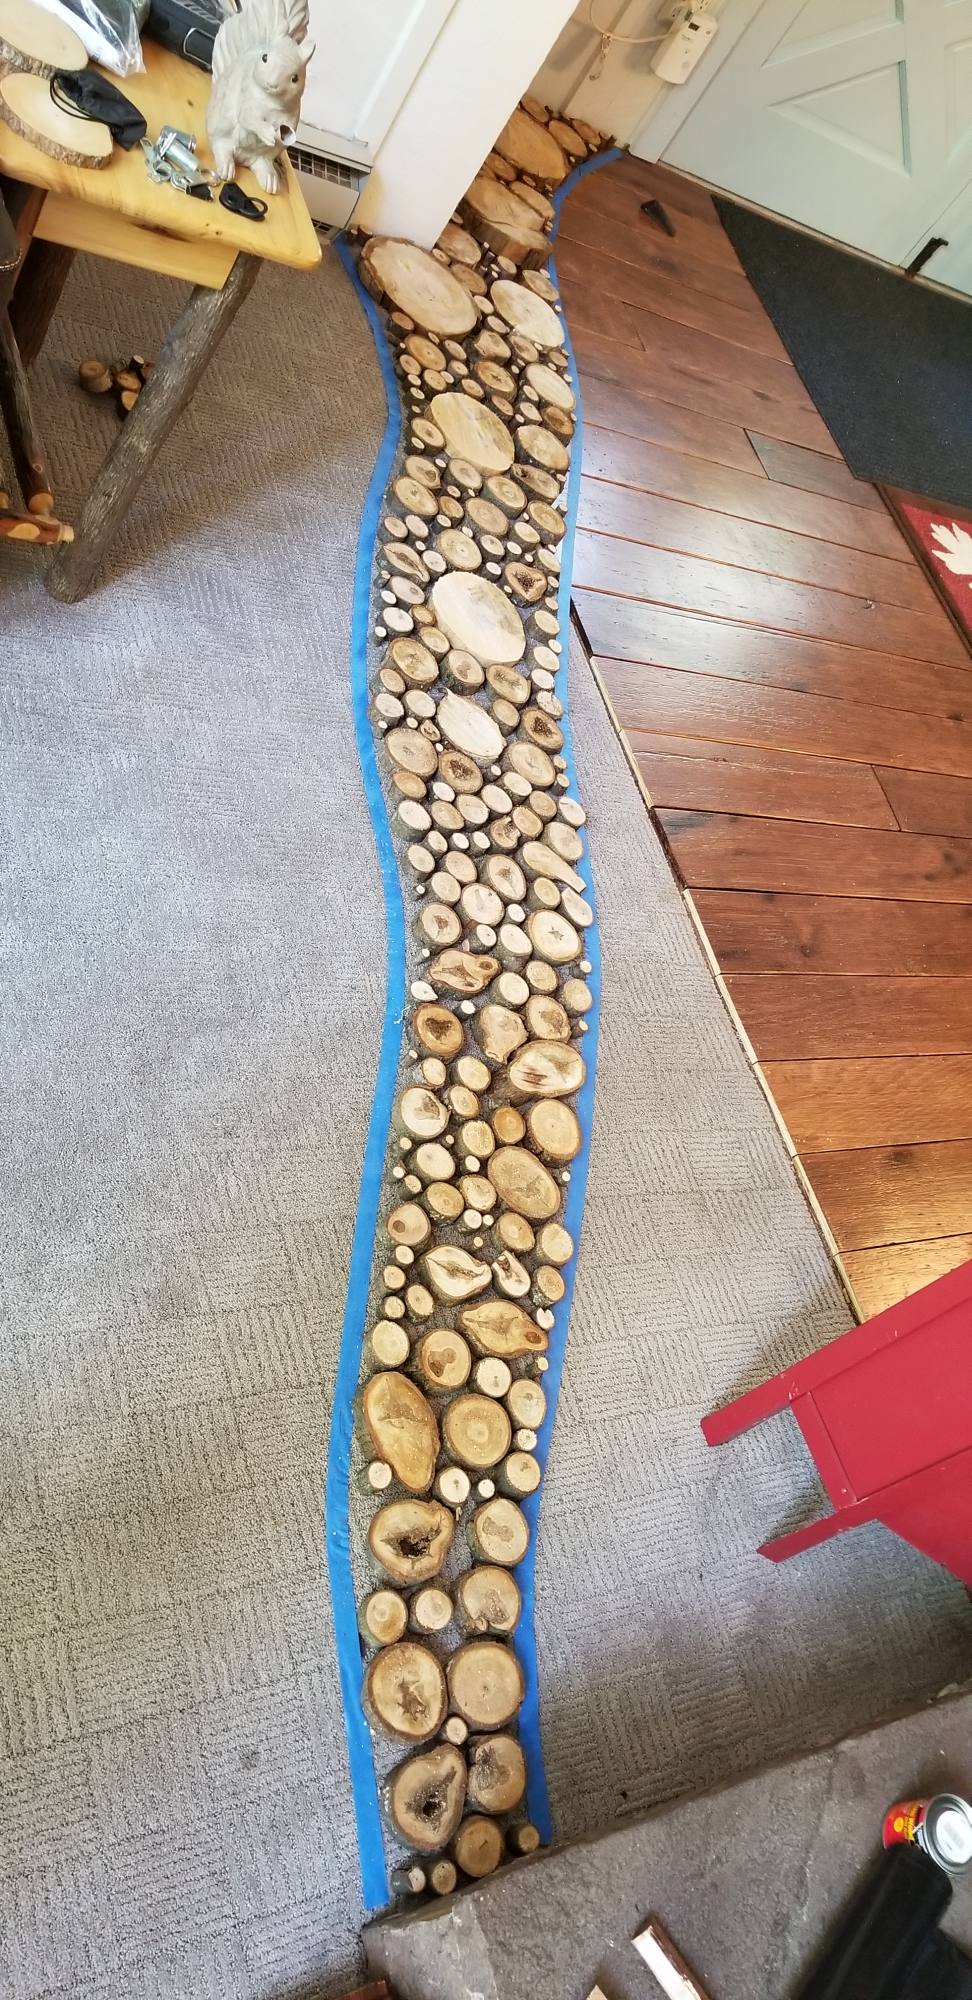
Ich hatte vor den meisten der Holzscheiben Monate so geschnitten, dass diejenigen trocken waren, als ich bereit war, sie zu installieren.
Aber ich glaube, ich war in der Lage die Holzscheiben enger zusammen zu bekommen, als ich tatsächlich war das Projekt zu tun… so brauchte ich mehr Holzscheiben.
Ich habe diesen Artikel auf die Holzscheiben Trocknen.
http://theplywood.com/drying-wood-in-oven
Den Ofen bei schwacher Hitze verwenden (200 F), Die Holzscheiben waren in ein paar Stunden trocken, also hat es wirklich gut funktioniert.
Schneiden der Hirnholzbodeneinlage in die Dielen
Ursprünglich war geplant, jedes Dielenbrett einzeln mit einem Rotozip zuzuschneiden. Ich wollte sie draußen schneiden, da der Rotozip viel Staub verursacht.
Stattdessen, Am Ende habe ich die Dielen mit dem oszillierenden Multifunktionswerkzeug an Ort und Stelle zugeschnitten. Das hat wirklich gut funktioniert und es hat nicht viel Staub verursacht.
Nachdem die Platten geschnitten wurden, ging ich den Schnitt mit dem Bandschleifer über die Kurven und runden Ränder der Platten zu erweichen. Auf diese Weise gibt es keine Splitter. 🙂


Platzieren der Holzscheiben im Inlay
Beim Platzieren der Scheiben Inlay, Sicherstellen, dass die verschiedenen Größen mischen. So sieht es eher organisch und natürlich.
Ich die Holzstücke an ihrem Platz gesichert mit Flüssigkeit Nägel. Es dauert nur ein Klecks auf der Rückseite jedes Stück und ein wenig Druck ausgeübt wird, um es zu Set.

Siegel der Holzscheiben vor dem Auftragen die Grout
Ich habe die Holzscheiben vor dem Auftragen des Fugenmörtels versiegelt, indem ich eine Schicht Polyurethan aufgetragen habe. Andernfalls verdunkelt der Fugenmörtel die Holzscheiben. Sie werden später alles abschleifen, aber wenn Sie die Scheiben versiegeln, ist es einfacher, ihnen wieder die hellere Farbe zu verleihen.
Mischen des Sägemehlmörtels
Ich habe einen Artikel von Bob Villa gefunden, in dem es um den Fugenmörtel geht, der mit den Holzscheiben verwendet werden kann. Es heißt Sägemehlmörtel.
https://www.bobvila.com/articles/quick-tip-sawdust-grout/
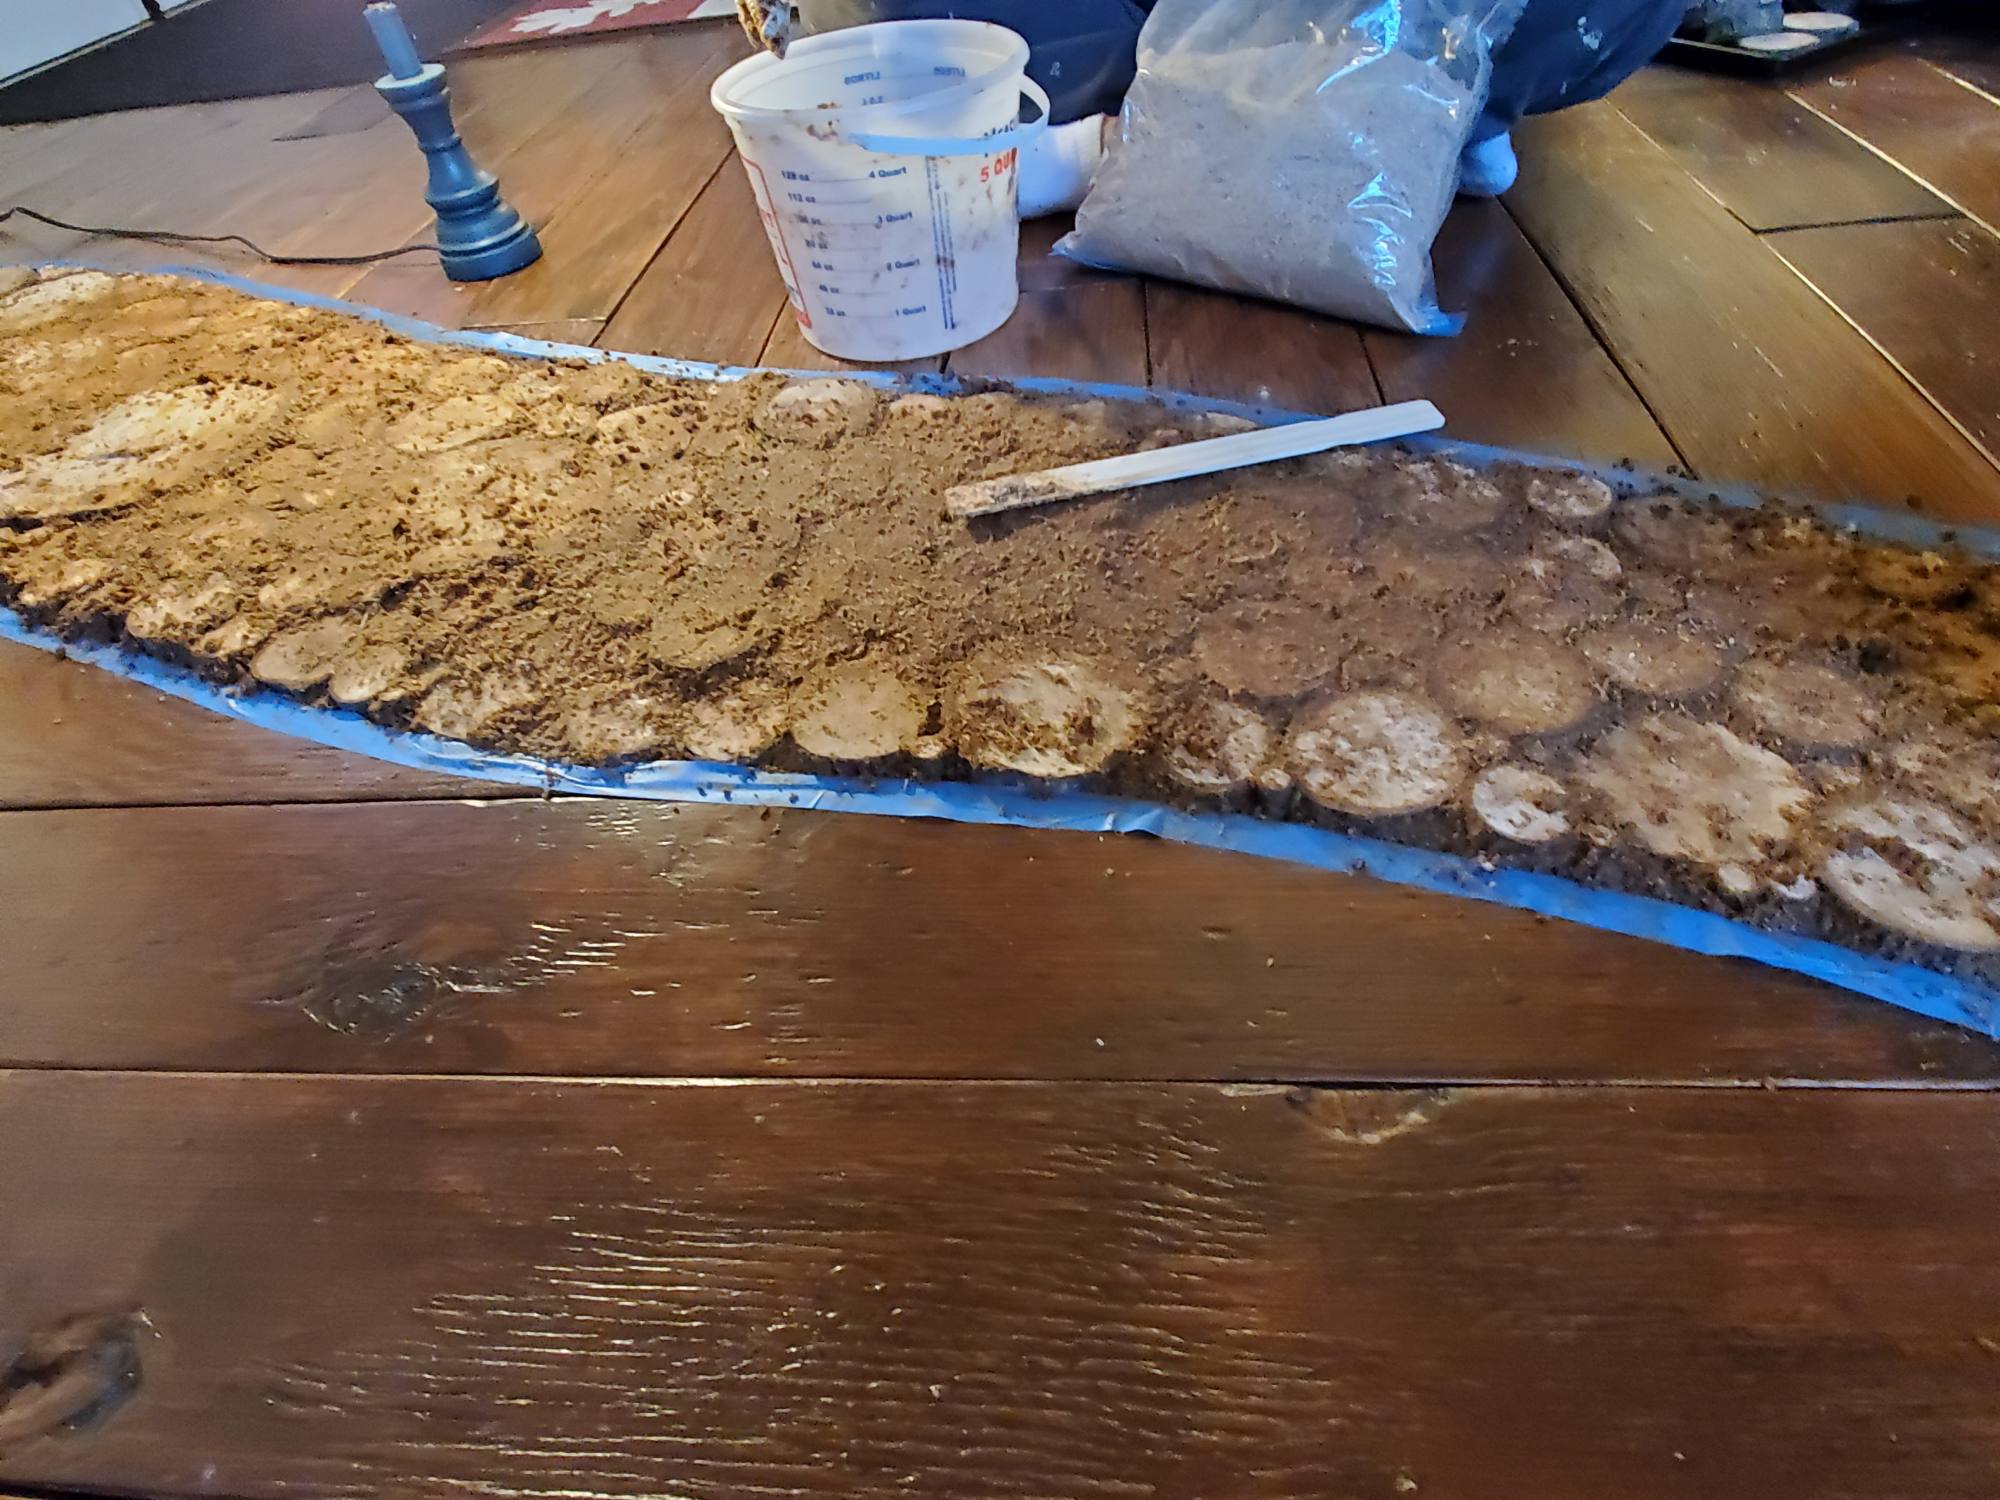
Sägemehlmörtel ist eine Kombination aus 2 Teilen Sägemehl und 1 Teil Polyurethan.
Ich habe ein wasserbasiertes Mittel verwendet, Ölmodifiziertes, schnell trocknendes Polyurethan für die Sägemehl-Mörtelmischung und den Endanstrich.
Das Polyurethan trocknet schnell und ist ordnungslos.
Es ist das gleiche, das wir für die breiten Sperrholzdielen im Wohn-, Esszimmer und in der Küche verwendet haben.

Auftragen des Sägemehlmörtels
Nehmen Sie mit Latexhandschuhen einen kleinen Klumpen Fugenmörtel und drücken Sie ihn in die Zwischenräume zwischen den Holzscheiben.

Schleifen der Hirnholz-Bodeneinlage
Zum Abschleifen der Holzstücke habe ich einen Bandschleifer verwendet.
Natürlich, Das war erst, nachdem ich mein Problem behoben hatte großer Fehler dass man die Holzscheiben in die falsche Dicke schneidet.
Das Schleifpapier, das ich verwendet habe, war Körnung 36. Ich wollte etwas, das den Holzstücken eine raue Textur verleiht, damit sie nicht rutschig sind.
Denn Schleifen ist eine ziemlich schmutzige Aufgabe, Ich zeltete abseits des Geländes, Auf diese Weise verteilte sich der Staub nicht im ganzen Haus.


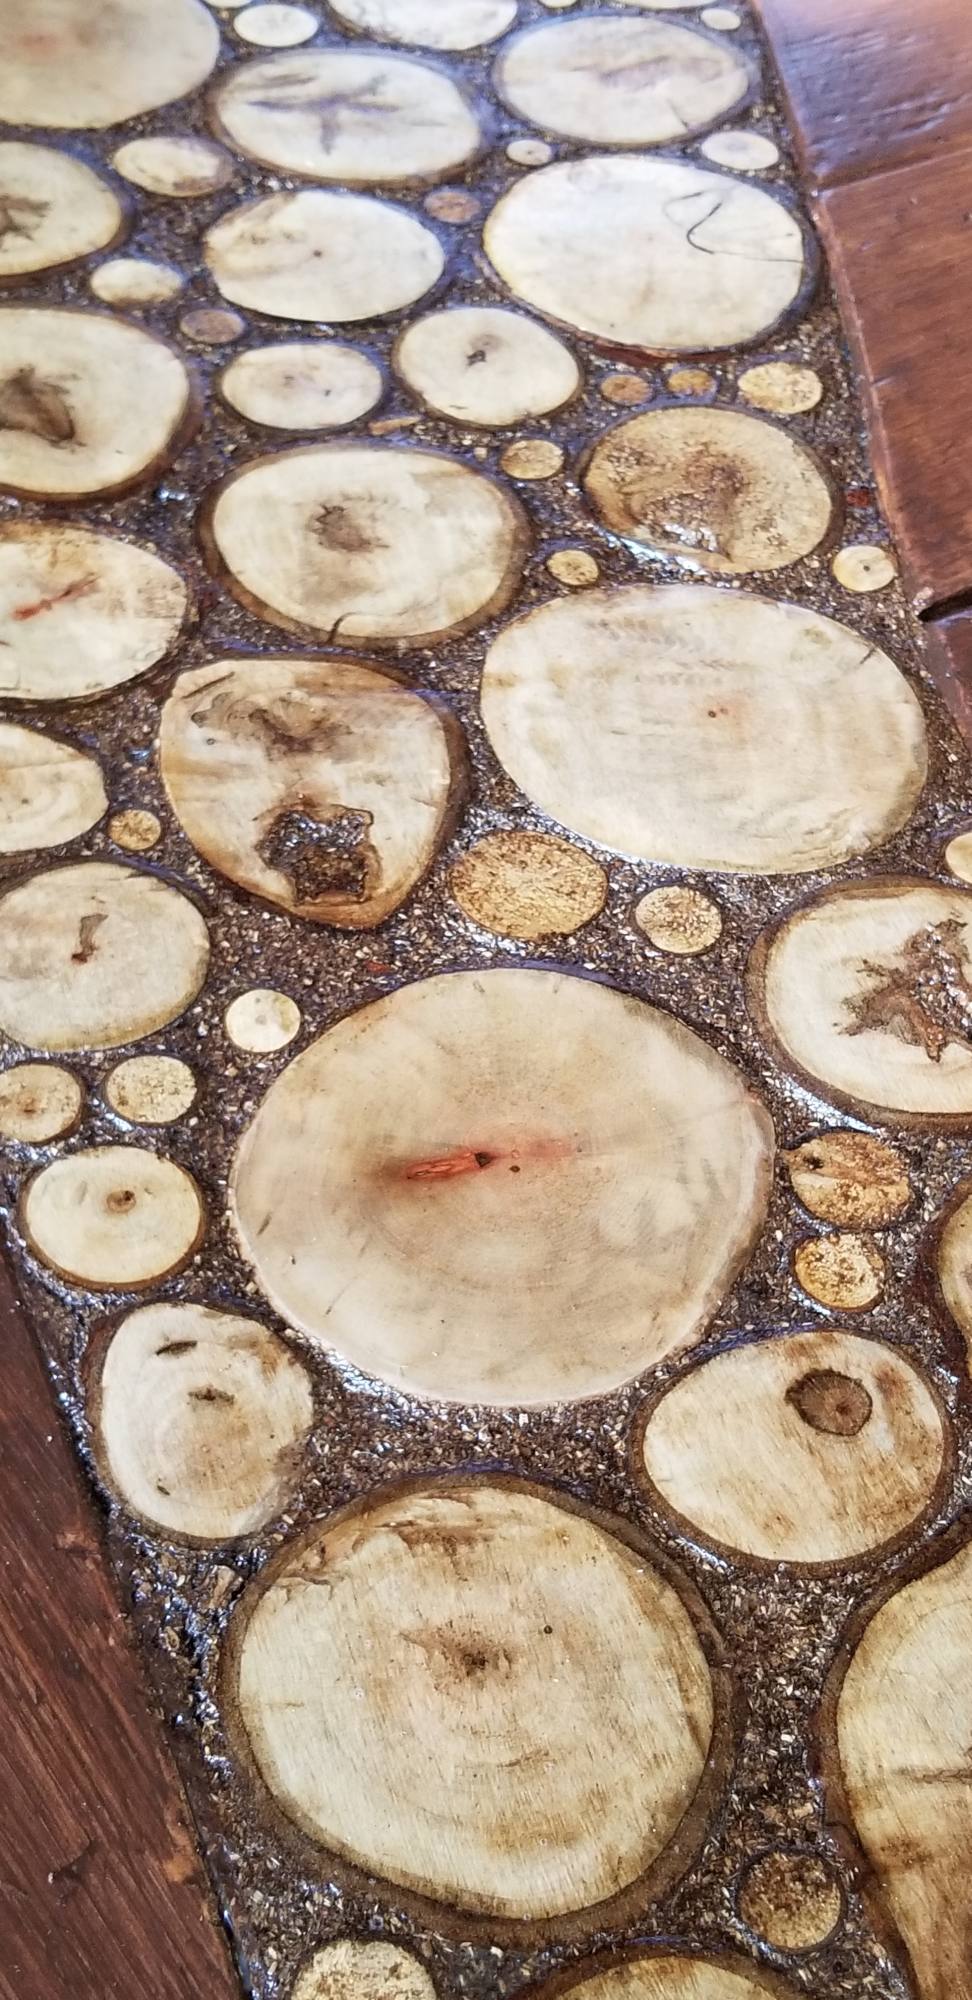
So sahen die Holzscheiben und die Sägemehlfuge nach dem Schleifen aus.
Ich habe die Holzscheibeneinlage auf beiden Seiten auf die Höhe des Bodenbelags geschliffen. Ich habe auch die Kanten der einzelnen Holzscheiben mit der Schleifmaschine abgeschlagen, Entfernen Sie alle harten Kanten, auf denen Sie möglicherweise unbequem laufen.

Hinzufügen des Polyurethan-Finishs
Das Polyurethan war das gleiche, das ich für den Holzdielenboden und in der Sägemehl-Mörtelmischung verwendet habe.
Ich habe drei Schichten Decklack auf die Einlage des Hirnholzbodens aufgetragen.
Obwohl das Poly farblos ist, Es gab den Holzscheiben einen leichten Gelbstich.
Der Fugenmörtel aus Sägemehl wurde auch ziemlich dunkel, als ich die Folie darauf auftrug.
[et_bloom_inline optin_id=”optin_7″]
Weitere Bilder der Hirnholz-Bodeneinlage



Was denken Sie?
Wir lieben die Art und Weise, wie die Hirnholz-Bodeneinlage gelungen ist. Es hat so viel mehr Charakter, als eine einfache Schwelle gegeben hätte.
Was denken Sie? Gefällt dir, wie es geworden ist?? Was würden Sie anders machen? Wir würden uns über Ihr Feedback freuen.
Viel Spaß mit diesem Beitrag? Pin es und teile es mit anderen!