Auswählen eines NAS-Ersatz – Welches das Beste ist

Auswählen eines NAS-Ersatz – Welches das Beste ist

Synology DS218+ NAS - Choosing A Replacement NAS


Die Wahl eines NAS-Ersatz

Das Thema der Wahl eines NAS-Ersatz ist ein wenig anders, als ich erwartet auf sein Posting OurProjectIdeas.mit. Aber es ist ein Projekt, dass ich vor kurzem ging durch, und ich habe viel gelernt – so dass ich dachte, ich würde Aktie. 🙂

Ich denke, bevor sie gehen in ich erklären sollte, was ein NAS. NAS ist ein Akronym, das für Network Attached steht Lager. It’s basically a drive (oder mehr Laufwerke) dass eine Verbindung zu Ihrem Netzwerk Ihnen einen Platz zum Speichern und gemeinsamen Nutzung von Dateien mit anderen Geräten im Netzwerk geben. Wenn Sie mehrere Laufwerke in dem NAS-Gerät hinzufügen können, haben Sie die Möglichkeit, die Spiegelung, wo ein Laufwerk ist eine exakte Kopie der anderen. Das hilft Ihnen gegen Plattenausfall zu schützen. Es ist ein idealer Ort, um Ihre wichtigen elektronischen Dateien zu speichern, Dinge wie Dokumente und Bilder sind für sie perfekt.

I’ve been using a simple NAS device for about 10 years, es hat super funktioniert die ganze Zeit… until recently. Starting a few months ago, jedes Mal einer Weile das NAS würde es die Netzwerkverbindung verlieren und würde nicht wieder, bis es neu gestartet wurde.

Die Neustarts wurde immer häufiger, to the point where we needed a replacement. It turned out to be perfect timing, da wir auf diesem NAS Platz laufen jede mögliche Weise wurden ausgehend.

Bekanntgabe: Einige der Links unten sind Affiliate-Links. Wenn Sie sich entscheiden, eines dieser Produkte zu kaufen, Wir verdienen eine kleine Provision ohne zusätzliche Kosten für Sie. Wir empfehlen diese Produkte nur, weil wir haben Erfahrung mit ihnen und sie für unsere eigenen Projekte. Als Amazon Associates, Wir verdienen mit qualifizierten Einkäufen.

Die Wahl eines NAS-Gerät

Nun, da wir waren auf dem Markt für ein neues NAS-Gerät Ich war für eine Suche, das mich für die Synchronisierung der Lage wäre, zu einem anderen Remote-NAS.

Wir hatten nicht diese Möglichkeit mit unserer alten NAS, aber das war immer auf unserer Wunschliste. So begann ich mit, dass die Suche meiner NAS Ersatzes im Auge.

Nach ein paar Recherchen stieß ich auf ein Synology Diskstation DS218 +. It was about the same footprint as our current NAS, tat Spiegelung (die unsere aktuellen NAS bereits getan) und es war in der Lage zu synchronisieren einen Remote-NAS… perfekt!

Ich hatte festgestellt, den richtigen NAS Ersatz für uns, jetzt beginnt für Laufwerke der Suche in unserem neuen NAS-Gerät zu setzen.

Die Wahl NAS-Laufwerke

It’s funny because I thought the hard part of this project would be choosing the NAS device. Stellt sich unsere herauszufinden, welche Laufwerke zu bekommen viel mehr war schwieriger als erwartet.

There are basically only three drive manufacturers to choose from, Seagate, Western Digital and Toshiba.

Each of the manufacturers make all kinds of different drives, even drives that are made specifically for NAS devices.

So I knew I was looking for a NAS drive and I also knew I wanted a drive that was 8 TB.

Since the drives I was currently using were 1 TB and they were almost full, 8 TB seemed like a good next step up.

Easy peasyuntil I looked at the reviews.


When I look at reviews I focus on the bad reviews. That way I get an idea what the worst things I can expect areholy cow what mistake. LOL

Bad reviews for one manufacturer would tell you to use the other manufacturer’s drives.

Ultimately all the bad reviews did was make you feel like there are no good drives out there. There were complaints about drive failures, really noisy drives and horribly slow drivesall very frightening.

One complaint I saw over and over again was the write cache on the NAS drives being disabled when used with a Synology NAS. As a result those people complained that their Synology NAS was dog slow. YIKES!!

I decided to change my approach.


A Change In Approach

I already knew what size drive I wanted, and that I wanted it to be a NAS drivenow it was a matter of finding one that was supported in the Synology DS218+.

I felt the best thing to do was to look at Synology’s drive compatibility list.

Here’s a link to the Synology drive compatibility list:

Schlussendlich, the drives I chose were the Seagate IronWolf 8 TB NAS. A 7200 RPM drive with 256 MB of cache, model number ST8000VN0022.

One thing that I was really nervous about is the write cache not being enabled on the drives.

Even though it was on the compatibility list I was still nervous about it.

To my relief, when I look in Storage Manager on the Synology I see that the write cache is enabled, Yippee!


Synology DS218+ - Choosing A Replacement NAS - Write Cache Is Enabled for The Drives

How Is The NAS Replacement Performance

Let me first say I’m not very picky with anything. As long as it does what I expect it to do I am a happy camper. However, this NAS replacement has gone so far beyond my expectation it’s just amazing. The Synology DS218+ (and the drives that I put in it) is super fast. I mean night and day fast compared to the previous NAS.

Setup was super easy. The GUI guides you through the entire process. Synology has done a great job making the setup seamless. I didn’t even have to configure it to mirror, it saw I had two drives and configured itself for mirror.. super simple.

What I Like About The Synology DS 218+ NAS (Besides the basics like drive mirroring)


The only features that I was initially looking for in a NAS replacement was for something to do what the old NAS did and have the ability to sync itself to another remote NAS.

Little did I know how many new features I was going to get with this new NAS. The Synology NAS DS218+ is a completely different way of doing things.

It’s actually way more than a NAS, it’s a beefy Unix server with drives attached. Whatever a Unix server does it can do.

The Synology NAS can just about anything, even a mail server or a wordpress server.

Something that I LOVE with Synology is the Apps that allow you to do what a lot of websites like google do for you, the difference is that the data stays in your NAS. It’s something I’ve always wished existed, but never thought there would be something out there that could do it.

Here’s a list of the features or Apps that I love

Recycling Bin

Most NAS devices in our days probably do this but my old one didn’t, and I love this feature.

Moments

This is a Google Photos replacement. The interface is very similar to Google Photos and it does facial recognition, location detection and subjects (categories like cat, Hund, garden, sky, beach, etc…)

The facial recognition isn’t as accurate as Google’s but it is pretty good. It’s definitely WAY better than not having it.

Es gibt auch eine Moments App, dass Sie auf Ihrem Smartphone installieren, die Ihre Bilder automatisch auf Ihr NAS Download für Sie. Wie heiß ist, dass!

Oh, und Sie können auch Alben erstellen, die Sie mit anderen teilen können. Sie einen Link und sie können Ihr Album ansehen.

universal Search

Dies ist ein großartiges Feature! Es schafft im Grunde einen Volltextindex aller Ihre Sachen, einschließlich der Inhalte von PDFs, Dokumente und Tabellen und gibt Ihnen die Möglichkeit zu suchen,. Heilige Kuh ist dies ein großartiges Feature, wenn es etwas, das Sie suchen, sondern für das Leben von euch kann mich nicht erinnern, wo zum Teufel ist es.

Plaudern

Chat tut genau das, was Sie denken, es tut, und Ihre Chats bleiben auf dem NAS. Sie haben eine mobile App für Handys sowie eine App für die Desktops.

Anmerkungen

Dies ist ähnlich wie One Note. Ich habe gerade angefangen mit. Ich denke, es wieder toll ist, weil es auf dem NAS bleibt.

Büro

Dies ist vergleichbar mit einem anderen Google-ähnlichen Produkt Google Text & Tabellen. Dies gibt Ihnen die Möglichkeit, zu bearbeiten Büro docs without having Microsoft Büro and the security of not storing your precious documents on Google.

Drive

This is like DropBox, but having your files stored on your NAS. There’s an app that you install on your Phone or your Desktop that will sync the folder you designate with a folder on your NAS. This gives you automatic backups of folders on your Desktops and/or mobile phone.

Lager Analyzer

This app tells you how you are using your storage. Things like what percentage of your data is pictures, video, documents, etc. The thing I really like about this app is that it reports on duplicate files. It makes it really easy to clean-up your files

There are a bunch of other Apps available for use on the Synology DS218+ NAS that I have yet to play with, the ones above are currently my favorites.

Audio Server

This app lets you stream the audio files from your NAS to your mobile devices, remotely.

And A Ton More Apps

There are a bunch of other Apps available for use on the Synology DS218+ NAS that I have yet to play with, the ones above are currently my favorites.

Some of the other apps that I’m planning on trying out are Plex Media Server and the Logitech Media Server.

Absichern der NAS-Ersatzgerät

Eine Sache im Auge zu behalten, wenn die Einrichtung Ihres Synology NAS ist die Sicherheit. Nun, da der NAS mit Geräten außerhalb Ihres internen Netzwerks kommunizieren können, müssen Sie sicherstellen, dass Sie sich vor Hackern schützen.

Hier sind ein paar Fäden, die ich stieß auf und verwendet, um mein NAS-Gerät zu sichern. Wenn Sie mit etwas außerhalb Ihres internen Netzwerks Ihr NAS zu kommunizieren haben, dass Sie bitte den Artikel Blick durch Sie und Ihre Geräte Sicherheit verhärten.

This was a great article on creating a super-duper secure password that you can remember:

https://theintercept.com/2015/03/26/passphrases-can-memorize-attackers-cant-guess/

This goes into detail about what settings need to be changed on your Synology NAS to make it more secure

https://www.reddit.com/r/synology/comments/cdleki/suggested_precautions_when_exposing_your_synology/?ref=share&ref_source=embed&utm_content=title&utm_medium=post_embed&utm_name=cd0e1a92f1f343daa1f9670406a9f4fb&utm_source=embedly&utm_term=cdleki


That Wraps It Up

That concludes the raving about my new NAS replacement. Whether you’re looking for your first NAS or a NAS replacement, the Synology DS218+ is definitely one you should take a look at.

I first set out to find a replacement NAS.

Not only did I get that but I also got:

  • a recycling bin
  • Photo backup from our mobile devices to the NAS
  • Photo Album sharing
  • Automatic facial recognition and filing of photos
  • Full Text Search For All My files
  • my own chat server
  • Automatic backup of folders on desktops and mobile devices

In total it cost a little over $700 between the two 8 TB drives and the Synology DS218+. It was a good amount of money but I feel I got a lot of value out of it.

I hope the info in this post helps you on your quest for a NAS replacement. I’d love to hear about your thoughts, kommentiere unten!
How To Make A Sperrholz Ausschnitt

How To Make A Sperrholz Ausschnitt

Adding a Pool Filler-It's an Easy Install


Warum wollte ich Sperrholz Ausschnitt To Make

Ich beschloss, eine Sperrholz Ausschnitt zu machen, wenn ich etwas nicht finden konnte ich kaufen könnte.
Wir machten Updates in dem Poconos Ferienhaus (Es fühlt sich an wie der Himmel). Ich wollte etwas über dem Fernseher an der Wand Akzent im Bären Raum hinzufügenja nennen wir die Schlafzimmer. 🙂
Da es im Bär Zimmer vorging, was besser zusätzlich dann ein Bär an der Wand.
Ich habe einige Recherchen auf meinem unterwegs - Pinterest. Ich fand eine Menge Ideen für alle Dinge Bär.

Schauen Sie sich die gefühlte Himmel Pinterest Board hier einen Blick darauf werfen, was Pins gefunden.

Bär Zimmer Ideen Brett auf Pinterest

Es gab viele nette Ideen für sicher, aber sie waren nicht genau das, was ich suchte.
Dann hatte ich die Idee, warum nicht ein Bild eines Bären finde ich wie,Drucke es aus,Übertragung auf Sperrholz und schneiden Sie es aus.
Ich fand keine Anweisungen, wie das zu tun, so dass ich dachte ich einige machen würde.

🙂

Bekanntgabe: Einige der Links unten sind Affiliate-Links. Wenn Sie sich entscheiden, eines dieser Produkte zu kaufen, Wir verdienen eine kleine Provision ohne zusätzliche Kosten für Sie. Wir empfehlen diese Produkte nur, weil wir haben Erfahrung mit ihnen und sie für unsere eigenen Projekte. Als Amazon Associates, Wir verdienen mit qualifizierten Einkäufen.

Die Einkaufsliste für die Herstellung eines Sperrholz-Ausschnitts

Werkzeuge Liste

Wir haben nicht zu viele Werkzeuge an diesem Projekt verwenden, Hier ist eine Liste von denen, die wir nicht genutzt haben.

Säbelsäge

Bandschleifer

Supplies Liste

Dies sind die Vorräte an diesem Projekt verwendet

Reststück 3/4″ Sperrholz

Farbe

Lack-Pinsel

Dies war ein Straight-Forward-Projekt. Es dauerte nur ein paar Stunden in Anspruch nehmen, da mein Ausschnitt eine einfache Bärenform war. Wenn Sie etwas komplexer dann Ausschnitt wählen kann länger dauern, bis Ende.

Finden des rechten Bild

Das Stück, das ich suchte, war ein ruhiger Bär, entweder zu Fuß, stehend oder zur Festlegung.
Ich habe eine Menge der Suchanfragen und schließlich beschlossen, dieses Bild als meine Vorlage zu verwenden.
Ihr Bild ist kein Schwarz-Weiß-Bild sein müssen, es kann jedes Bild sein und es kann beliebig groß sein.
Im Folgenden werde ich Sie zeigen, wie es um die Größe auszudrucken benötigen Sie.

Plywood Bear Cut Out - The Picture I Chose For The Cutout

Ermitteln, wie viele Seiten Sie brauchen

This is definitely not an exact science. I wanted my bear cutout to be about 36″ wide – vielleicht ein wenig größer. Da wollte ich auf Letter-Format Papier drucken, that would translate to about 3 or 4 pages wide.

Drucken Sie Ihr Bild Größe

Öffnen Sie das Bild mit dem Microsoft Paint-Programm. Öffnen Microsoft Paint Drücken Sie die Fenster-Taste auf der Tastatur geben Sie dann in Farbe.
Einmal im Programm öffnen Sie das Bild, das Sie drucken möchten aus.

Hinweis: Ich bin ein PC-Benutzer, so dass diese Anleitung für PCs.

Ich bin sicher, können Sie die gleichen Ergebnisse erzielen mit einem Mac… Ich weiß nur nicht, wie.

Eine Google-Suche “drucken Bild auf mehreren Seiten auf mac” wird wahrscheinlich Sie in die richtige Richtung lenken.

Plywood Bear Cut Out - Open Microsoft Paint

Ändern der Seite einrichten

Dies ist, wo die Magie passiert. Mit Ihrem Bild open in Microsoft Paint, gehen in Seite einrichten, es zu sagen, wie viele Seiten, die Sie in Ihrem Ausdruck verwenden möchten.

  • Klicken Sie auf den Pfeil nach unten auf der linken oberen Menü
  • Klicken Sie auf den Pfeil nach rechts neben der Option Drucken
  • Klicken Sie auf Seite einrichten
  • Im Dialogfeld Seite einrichten Wählen “fit zu:” im Skalierungsabschnitt (das untere rechte Feld)

For our bear cut out I chose 4 pages wide by 3 pages high

in der Landschafts, Jede Seite ist 11″ breit und 8,5″ hoch und der Drucker über 0,5″ Margen (die Box oberhalb dem Scaling Box in dem Dialog) so druckt der Bär aus etwa 40 wäre″ breit, 4 sheets x 10″ von bedruckbares Papier (11″ Papier – .5″ linker Rand – .5″ rechten Rand).

Now that you changed your page setup, go ahead and Drucken Sie Ihre Template Out


Plywood Bear Cut Out - Microsoft Paint Menu
Plywood Bear Cut Out - Change The Page Setup


Kleben Sie die Seiten zusammen

Jetzt haben Sie Ihre Seiten gedruckt, es ist Zeit, sie Stück zusammen die Papiervorlage erstellen.

Kleben Sie die Seiten zusammen, Extra Band setzen, wo immer das scheint für die Vorlage treffen.

Spitze: Cut the margins off of the pages using scissors, um es ihnen zu Band leichter zusammen.

Plywood Bear Cut Out - Tape The Paper Template Together
Mit der Vorlage zusammengebaut eine Schere verwenden (oder ein exacto Messer) Ihre Papier-Vorlage zum Ausschneiden.

Jetzt haben Sie Ihre Papier-Vorlage

Nun, da es ausgeschnitten, die Schablone auf Ihrem Sperrholz und Spuren es aus.

Zuerst habe ich einen Bleistift es zu verfolgen, dann ging ich ein Sharpie mit dem Bleistiftstrich über.

Die Sharpie ist leichter zu sehen, wenn das Sperrholz Schneiden.

Plywood Bear Cut Out - Trace It Out On The Plywood

Schneiden Sie das Sperrholz-Form

Sorry, ich habe nicht alle Bilder des Sperrholz zu schneid. 🙁

Ich benutzte eine Säbelsäge meinen Bären Form zu schneiden, da ich für eine grobe Oberfläche suchen. Wenn Sie eine saubere Finish dann eine Stichsäge oder ein Roto-zip wollen meine besser sein Werkzeug benutzen.

Wir haben jetzt unseren Sperrholz Ausschnitt!

Sand und Farbe und Du bist Fertig

Mit der Form ausgeschnitten, Sie können nun rund um die Kanten unter Verwendung einer Schleifmaschine. Für meinen Ausschnitt ich ein bisschen ein unfertiges Aussehen wollte so wollte ich nicht abgerundeten Kanten.

Ich geschliffen, die Kanten genug, um die Möglichkeit, sich Splitter zu entfernen.

einmal geschliffen, ein paar Farbanstriche hinzufügen und Sie sind ausgeschnitten ist alles Set.

Here’s my finished bear cutout. When I first painted it, Ich entschied mich für eine helle Farbe hinzufügen Kontrast zwischen ihm und der Wand – aber es sah zu sehr wie ein Eisbär… nicht das, was ich wollte.

Ich malte es dann eine dunkelbraune Farbe, es sieht eher wie ein schwarzer Bär als ein Eisbär jetzt. 🙂

Plywood Bear Cut Out - All Finished

[et_bloom_inline optin_id=”optin_7″]


Was hast du gedacht?

Was ich über dieses Projekt gefallen hat, ist die damit verbundenen Möglichkeiten eröffnet. Sie können jede beliebige Form tun, irgendeine Größe jedes Material unter Verwendung von.

Ich bin nicht sicher, was mein nächster Ausschnitt wird, aber ich bin sicher, dass der Bär war nicht mein letzter!

Ich hoffe, dass dieser Artikel etwas Licht auf die Möglichkeiten und hat Ihre kreativen Ideen gehen. Magst du das? Was werden Sie eine Sperrholz Ausschnitt machen von? Was würden Sie anders machen?
Sagen Sie Ihre Meinung in den Kommentaren unten!

Adding a Pool Water Auto Filler

Adding a Pool Water Auto Filler

Warum brauchen Sie einen Pool-Wasser-Autofiller installierten

Gut für mich, the main reason I wanted to install a pool water autofiller was to prevent my pool pump from dying.

The house is a vacation rental in Kissimmee, und während der Trockenzeit (November – Juni) der Pool-Ebene manchmal würde niedriger als der Skimmer und unsere Pool-Pumpe trocken läuft wäre.

Das tötet die Pool-Pumpe und stoppt auch das Wasser aus dem zirkulierenden – das ist nicht gut für den Pool.

Another problem we had was with the hose. Sometimes the pool people wouldn’t put it back where it belonged.

Often times the hose would be within mowing distance, meaning the landscapers could accidentally run over the hose with the mower.

We heard stories where that happened to others and the outside faucet got ripped out of the wall when the mower snagged the hose – YIKES!

Shameless Stecker

Wenn Sie ein großes Haus suchen in Kissimmes zu mieten, Villa am Schloss kann die perfekte Passform für Sie, it’s just 5 minutes from Disney World!

Villa By The Castle - A Top Rated 6 Bedroom Kissimmee Vacation Rental in Windsor Hills

Ich sah für alle Arten von Lösungen, und es gibt einige da draußen – meiner Meinung nach sah sie entweder nicht schön, Sie haben zu viel Arbeit zu installieren oder haben dauerhaft genug, um nicht für eine Ferienwohnung suchen.

Wenn eine andere Ferienwohnung Besuch kam ich auf diese Lösung. Das ist richtig, Jerry! Ich spreche von Ihrer Ferienwohnung.

Es erkennt nicht, wenn das Wasser niedrig ist, aber es hat den Pool füllt mit Hilfe eines Timers, ohne die Notwendigkeit, den Schlauch ziehen oder den Schlauch weggeräumt.

Hinweis: Es erkennt immer noch nicht, wann der Wasserstand niedrig ist, aber mit der neuen Ergänzung des B-Hyve können wir das Wasser über den Timer aus der Ferne einschalten. Wir haben den B-Hyve auch an unsere Automatisierung angeschlossen, sodass er das Wasser eine Stunde lang einschaltet, wenn es seit fünf Tagen nicht geregnet hat.

Bekanntgabe: Einige der Links unten sind Affiliate-Links. Wenn Sie sich entscheiden, eines dieser Produkte zu kaufen, Wir verdienen eine kleine Provision ohne zusätzliche Kosten für Sie. Wir empfehlen diese Produkte nur, weil wir haben Erfahrung mit ihnen und sie für unsere eigenen Projekte. Als Amazon Associates, Wir verdienen mit qualifizierten Einkäufen.

Die Einkaufsliste

Werkzeuge Liste

Wir haben nicht zu viele Werkzeuge an diesem Projekt verwenden, hier ist eine Liste der Werkzeuge, die wir für dieses Projekt verwendet

Gehrungssäge

Supplies Liste

Dies sind die Vorräte an diesem Projekt verwendet

3/4″ Zoll PVC-Rohr

3/4″ 90-Grad-Anschlüsse

3/4″ Kuppler

Timer

Schlauch PVC-Adapter

PVC-Kleber

PVC-Reiniger

Das ist ein ziemlich einfaches Projekt, es dauerte vielleicht ein paar Stunden in Anspruch nehmen – es hat das Leben viel einfacher für uns gemacht und uns hat Ruhe gegeben. Hoffentlich wird es das gleiche für Sie tun.

Herauszufinden, wo an das Rohr Put

Es hängt alles davon, wo Ihr nächster Outdoor-Wasserhahn ist und wo auf dem Pooldeck wollen Sie das PVC-Rohr platzieren.

Sie sollten einen Ort wählen, der nicht zu auffällig oder unansehnlich ist.

Wir hatten einen Außenwasserhahn der Nähe des Pools Heizung und platziert das Rohr PVC rechts in der Ecke, in der Whirlpool über dem Pool steigt.

Das war so unauffällig, wie wir es bekommen konnten.

Installing A Pool Auto Filler

Wie viel PVC Sie braucht

Sobald Sie den nächsten Außenwasserhahn und herausgefunden, wo auf dem Pooldeck Ihre PVC kommen in identifiziert haben, jetzt ist es nur eine Frage der Mess.

Das PVC ist in Längen von 8 Fuß erhältlich, so mit einem Maßband locker messen, wie viele Meter es aus dem Wasserhahn ist auf den Bereich, den Sie für die Rohrleitung gewählt – Teilen Sie diese Zahl durch 8 und Sie erhalten so viele Rohrleitungsstücke. Zur Sicherheit bekomme ich immer ein Extra.

Für jede Windung Ihrer Rohrleitungen benötigen Sie eine 90-Grad-Kupplung und eine gerade Kupplung, mit der Sie zwei PVC-Stücke miteinander verbinden.

Für unser Projekt haben wir:

  • 11 Stück PVC
  • 5 90-Grad-Paare
  • 8 gerade Kupplungen

Legen Sie Ihre Piping

Ich mag zur Festlegung der PVC-Rohrleitungen auf dem Weg, dass ich werde die PVC zu Installation in, es macht es für mich leichter sichtbar zu machen und sicherstellen, dass ich alles, was ich brauche haben.

So weit wie das Rohr Vergraben, Wir haben rund um das Haus mulchen, so dass wir nur eine Mini-Graben im Mulch und einmal alle Rohrleitungen installiert wurden gemacht begraben wir die Rohrleitung in der Mulch.

Der Timer und Splitter

Es gibt alle Arten von Sprinkler-Timer, wir am Ende geht einfach und mit einem, Batterien nicht braucht – auf diese Weise ist es immer funktioniert. 🙂

Sie können den Timer überall auf der Rohrleitung installieren, die Sie sinnvoll ist. Für uns war die Installation neben dem Wasserhahn die beste Wahl.

Von Zeit zu Zeit mussten wir immer noch einen Schlauch an diesem Wasserhahn verwenden, also schlossen wir einen Schlauchverteiler daran an.

Eine Seite des Verteilers wird an den Poolfüller und die andere Seite an den Schlauch angeschlossen.

Pool Auto Filler - Timer

Aktualisieren: Wir haben den Bewässerungstimer geändert

Wir haben kürzlich den Bewässerungstimer auf einen umgestellt, der entweder lokal oder aus der Ferne gesteuert werden kann. Es ist der Orbit 24516 B-hyve XD.

Es war leicht auszutauschen, Schrauben Sie einfach die alte manuelle Zeitschaltuhr ab und schrauben Sie die neue ein.

Es gibt eine App, die Sie auf Ihrem Telefon installieren können, um es zu steuern, und wir verwenden Home Assistant für die Hausautomation in unseren Ferienwohnungen und es ist mit B-hyve verbunden, So kann es auch mit dem Home Assistant gesteuert werden.

Mit Home Assistant überprüfe ich, wie viel Regen in der letzten Woche gefallen ist und ob kein Regen gefallen ist, Schalten Sie den Timer für eine Stunde ein.

Wenn Sie interessiert sind, Ich werde anfangen, Blogbeiträge über die Automatisierung für Ferienwohnungen auf unserer anderen Blogseite zu schreiben, die speziell für Ferienwohnungen gedacht ist, you can check out that site by clicking the button below.

[et_bloom_inline optin_id=”optin_7″]

Das ist es

Leider habe ich nicht mehr Bilder als dieses – but this was done before I was going to start the blog so I didn’t think of documenting everything. 🙂

I’ll take some more pictures of the finished project and where I ran the piping etc the next time I’m at the house.

Was hast du gedacht? Is it something you could do for your pool? Lass es mich in den Kommentaren unten wissen!


DIY rustikaler breiter Planken-Sperrholzboden

DIY rustikaler breiter Planken-Sperrholzboden

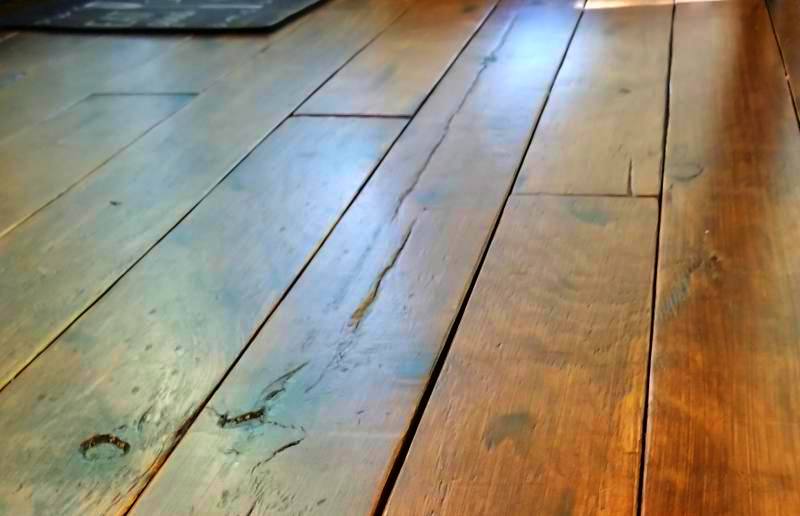
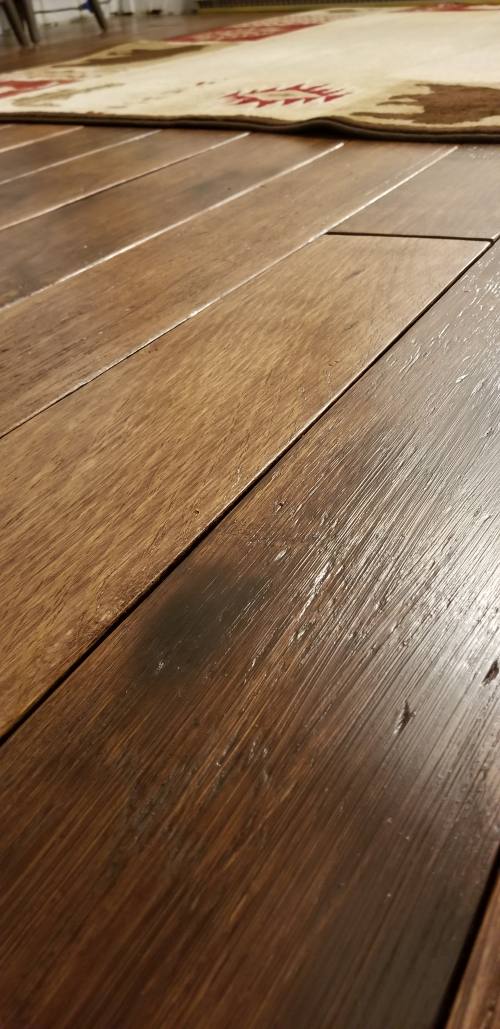
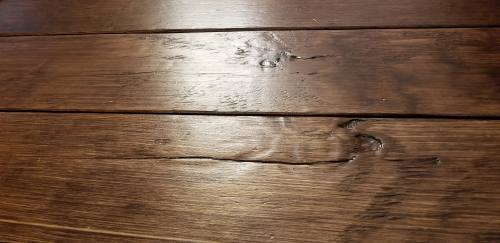
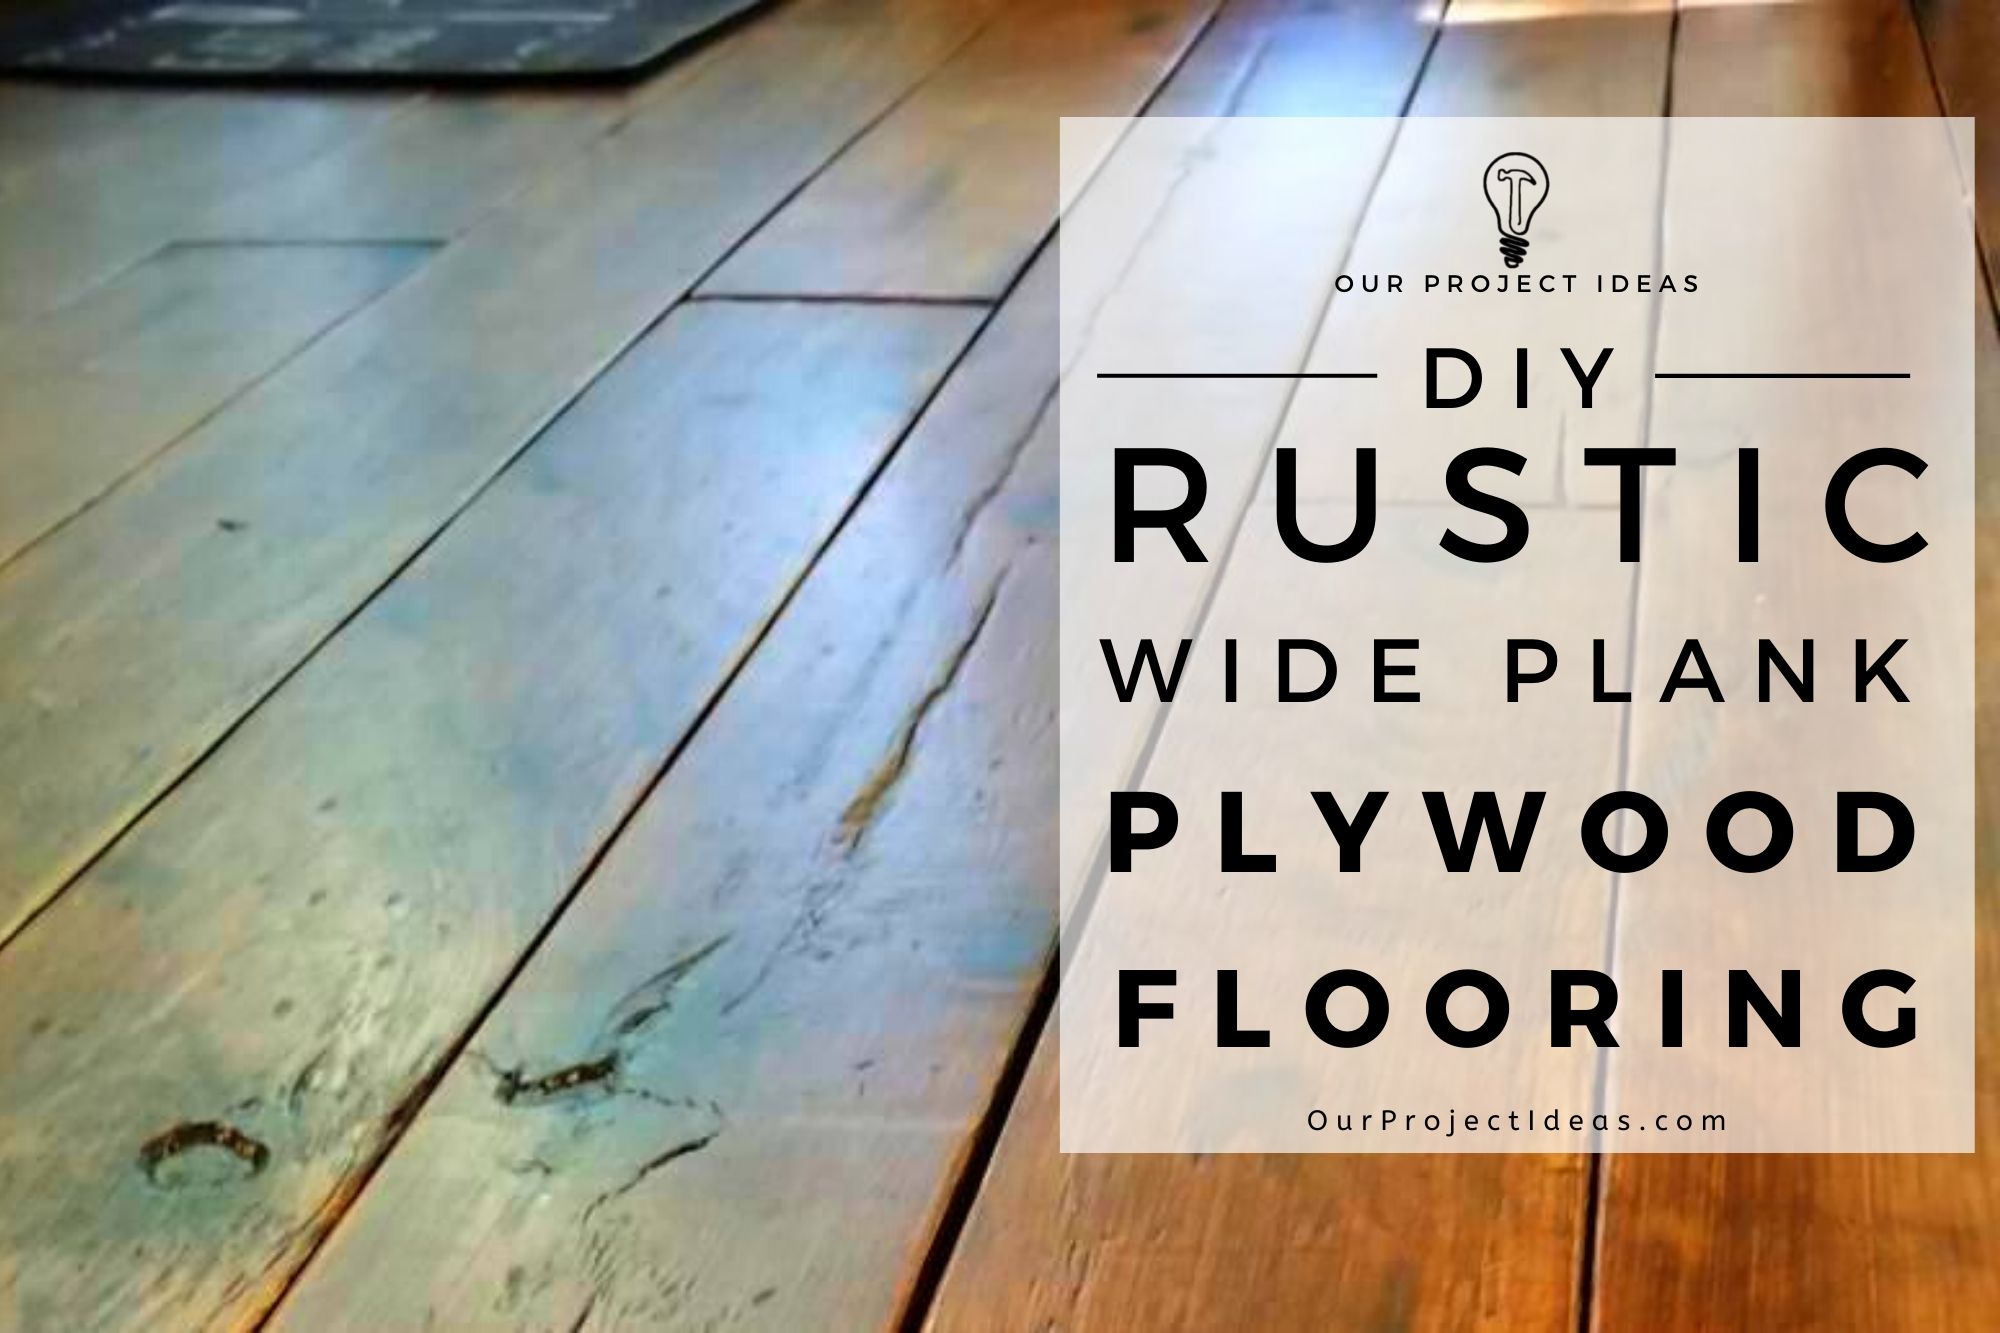
DIY Rustic Farmhouse Wide Plank Plywood Flooring - a great plywood flooring idea - a closeup of the distressing and Knots


As you’d expect, DIY Rustic Wide Plank Plywood Flooring takes much longer to finish than just installing pre-made planks.

This project was the truest sense of DIY. Everything from cutting the plywood into wide plank boards, to sanding, staining, finishing and installing the plywood planks downall of it DIY.

All things considered, the entire project, from start to finish didn’t take that long.

From cutting the planks out of plywood, to finally installing the floors in both the dining room and kitchentook about a week.

If you’re willing to put in the time and sweat, it is absolutely worth it!

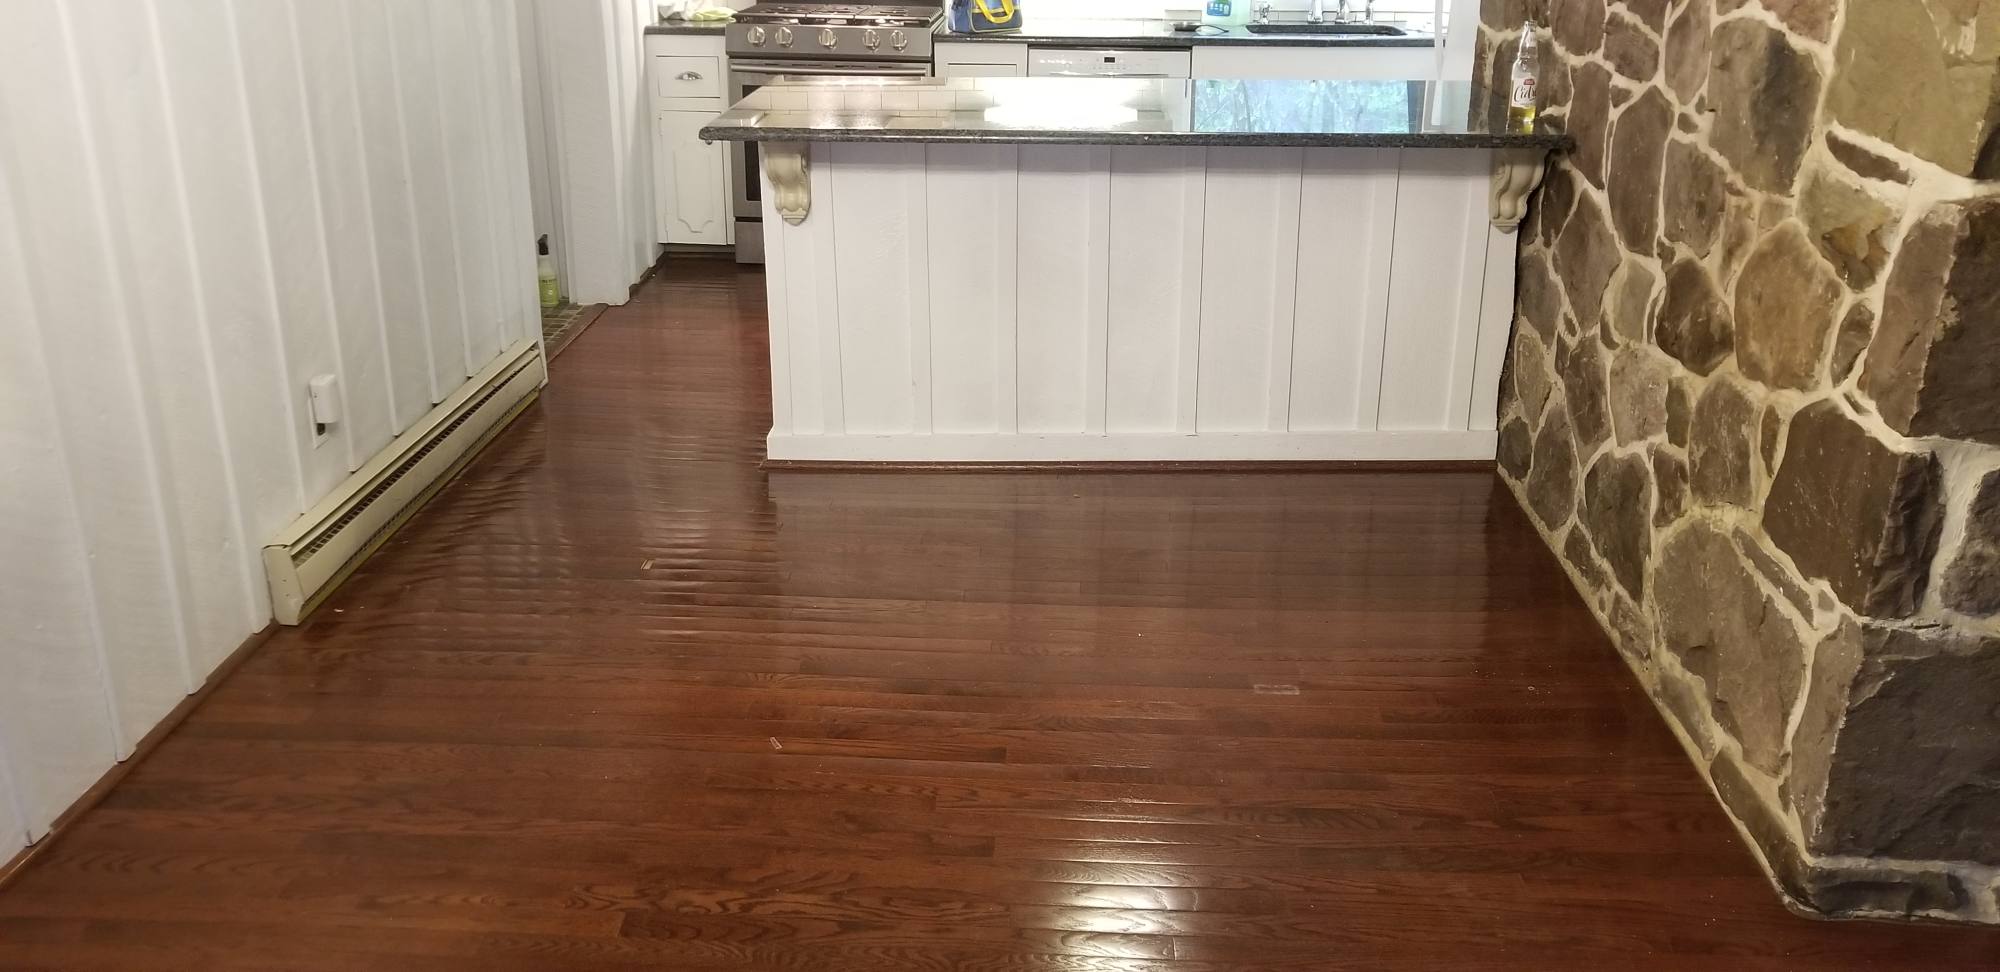
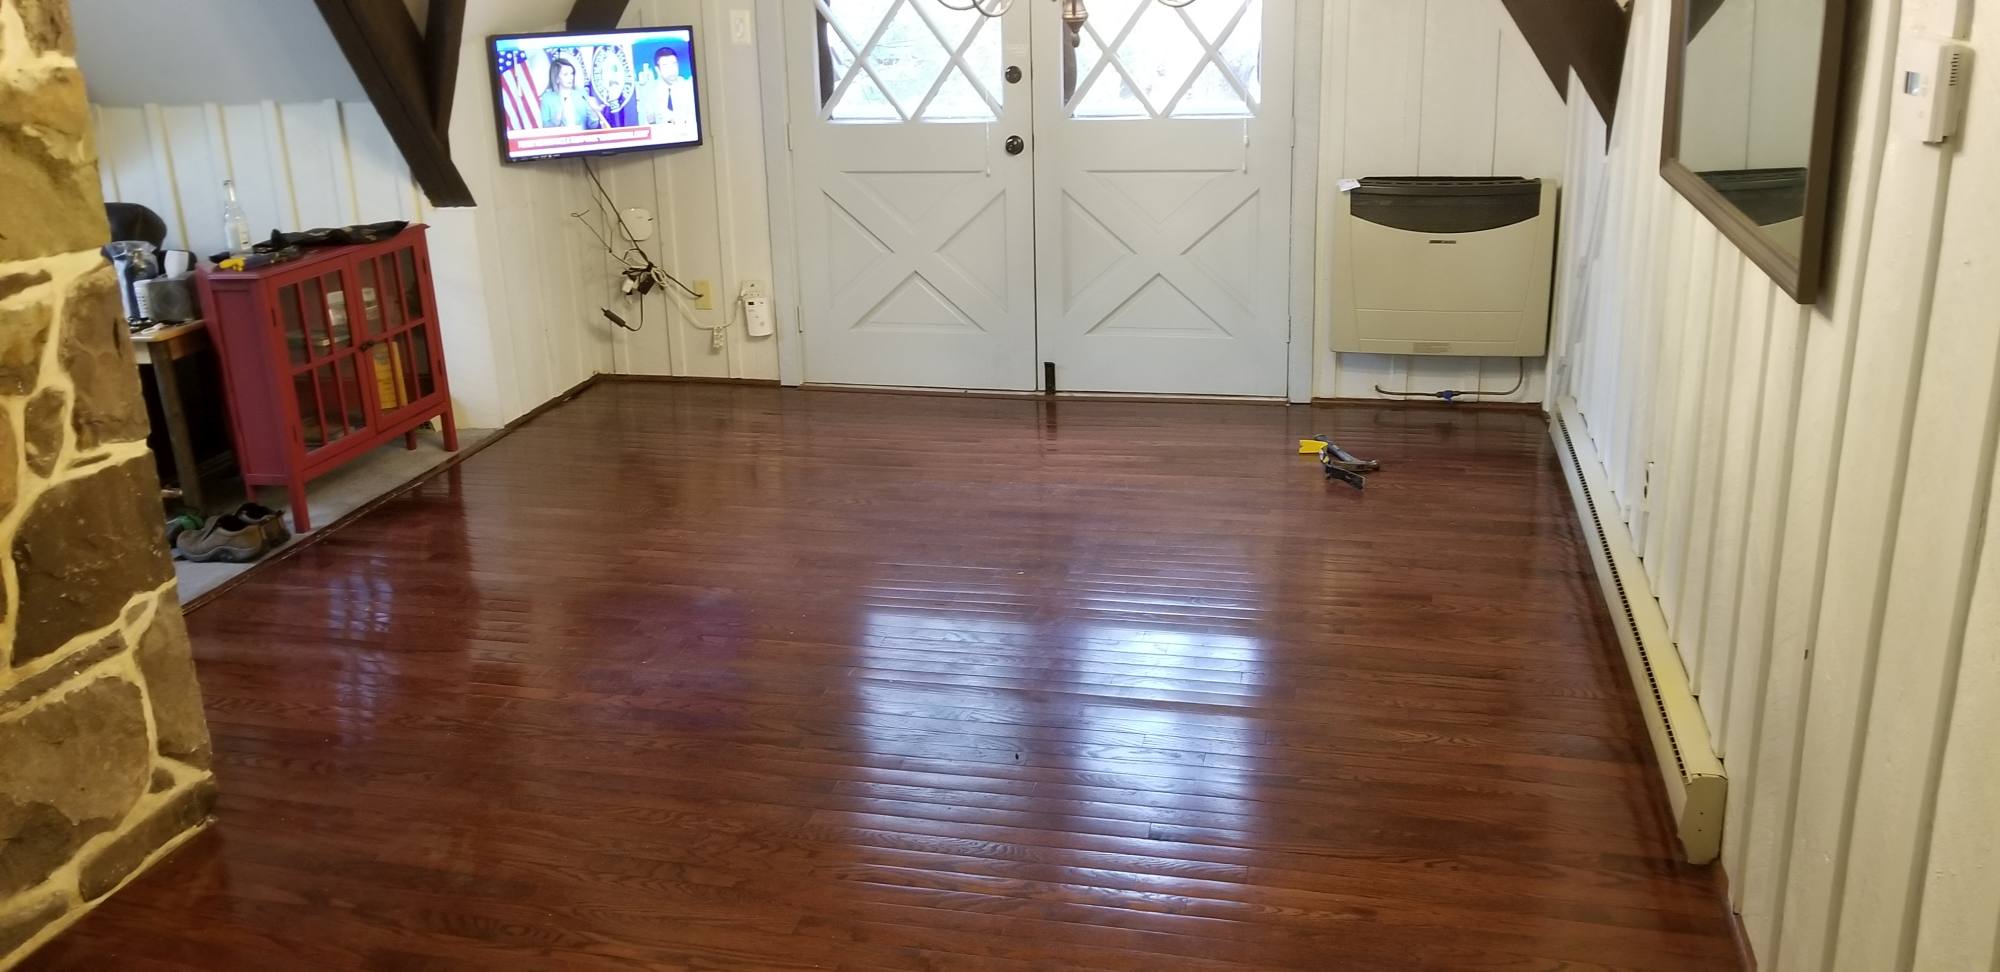
The floors look gorgeous (the pictures don’t do it justice) and you really would not know that they are stained plywood floors.

Read on to see what it took to make and install our rustic wide plank plywood floors and how you can install your own unique plywood flooring.

Bekanntgabe: Einige der Links unten sind Affiliate-Links. Wenn Sie sich entscheiden, eines dieser Produkte zu kaufen, Wir verdienen eine kleine Provision ohne zusätzliche Kosten für Sie. Wir empfehlen diese Produkte nur, weil wir haben Erfahrung mit ihnen und sie für unsere eigenen Projekte. Als Amazon Associates, Wir verdienen mit qualifizierten Einkäufen.

Why We Chose Wide Plank Plywood Flooring

Some of the flooring in our Poconos vacation rental needed replacing. Namely, the floating hardwood floor in the dining room and kitchen and the carpet in the living room.

Our goal was to have new floors that look old, warm, and worn – like they had always been there. Grundsätzlich gilt, the more it looked like farmhouse flooring or barn wood the better it was for us.

We looked into tile, stone, and hardwood floors. The problem with all of them was that they all needed a level sub-floor and ours was unevenlike really uneven.

Since the entire house is made of rough-cut oak, the flooring is not even close to being level.

That makes tile, stone and even hardwood flooring very difficult to install. The extra difficulty also translates to very expensive installation costs.

It was time to get creative, DIY floors were in our future. To get more flooring ideas we turned to Pinterest. After a lot of scrolling, we came across rustic farmhouse wide plank plywood flooring!

On Pinterest, there was a gazillion (well maybe not quite that many) plywood flooring ideas, but the one that was the best fit for us was the wide plank flooring.

The pictures of the wide plank plywood flooring projects others had posted were incrediblethis was it! This was the perfect flooring for uneven floors.

We were sold on the idea.

When In DoubtWabi-Sabi

There’s a concept I came across on Pinterest which was instrumental in my choice of plywood over other flooring types.

It’s called wabi-sabi.

It’s a Japanese tradition that is the art of making broken things better than brand new.

The idea is to hi-light the imperfections – make them perfectly imperfect.

With this new perspective, I was looking for imperfections to show offinstead of avoiding them.

If (or when) the floors get a new scuff mark or scratch, it will add to the floor’s character. It’s a very freeing concept that I am really glad I came across.

Click on the picture to see the Pinterest pin that inspired me, I hope it does the same for you.

DIY Rustic Farmhouse Wide Plank Plywood Flooring - wabi sabi - broken is beautiful pinterest pin

Why Use Plywood Flooring? It’s Affordable.

Most people decide to install plywood plank flooring because of it’s affordability.

It’s much cheaper to install a plywood floor than traditional hardwood or even a laminate, heck it’s even cheaper than doing vinyl.

For our plywood farmhouse floors, the cost wasn’t much of a factor in our decision-making process.

Versteh mich nicht falsch, it’s always nice to save some doughit was just lower on our list.

Higher on our list was flooring that was sturdy, looked like it has always been there, fit with the style of the house and would be easy to install on an uneven floor.

Between the option of making wider planks and the spacing between each onewide plank plywood flooring was a perfect fit for this house.

The spacing between each board makes it more forgiving in scenarios like ours where the floor isn’t level.

On top of that, the Japanese concept I came across helped me realize that any blemishes the floor will gain as it ages will only add to the floor’s beauty.

So it didn’t need to be as sturdy as hardwood, we’ll just embrace the imperfections that come along with it! 🙂


Another Reason To Use Plywood Floor Planks? The Versatility

Another huge benefit to plywood floor planks is the design versatility.

I love how my plywood plank floors turned out. There really is nothing I would change, but one thing that’s great about plywood planks is that there is no limit to what you can do.

I LOVE the way the rustic plywood floor planks came out, but the plywood planks could have looked just as good with a modern look.

Take a look at plywood floor planks on Pinterest. You’ll see there is no limit to the style, Farbe, shape, size, or texture. It’s all just a matter of preferencehow cool is that?

The Cost Of Our DIY Plywood Flooring

We knew that we saved quite a bit of money by choosing plywood faux plank flooring but we didn’t realize how much until someone asked for a breakdown in the comments.

We saved a ton!!

Natürlich, what you save in dollars you lose in time. We didn’t look at it as a lose of time though, it saw it as a great way to get our creative juices flowing and gave us a flooring that is completely uniqueand it saved us a bunch of money to boot! Winwinwin!

Gesamtkosten
22 Sperrholzplatten zu 32 $/Blatt = 704 $
17 quarts of stain @16.30/quart = $276
5 gallons of Poly @ $12/gallon = $60
TOTAL = $1040

Quadratfuß
22 Sheets * 32 sq. ft./sheet = 704 sq. ft.

1040 $ / 704 m². ft. = $1.47 per sq. ft.

The Down-side to Plywood Flooring

The only negative I saw with plywood floor planks was the durability. It’s not a hardwood so it would scratch easier than an oak flooring would.

Now with my new wabi-sabi perspective, I’m actually looking forward to the scratches and dents.

The blemishes will only add to the floor’s beauty. If there’s a scratch that is really ugly, I can add something creative to give it beauty.

Perfectly imperfect.

Die Einkaufsliste

Werkzeuge Liste

Hier ist eine Liste der Werkzeuge, die wir für dieses Projekt verwendet.

Affiliate-Links unten auf ähnliche Elemente sein kann, wenn genaue Einzelteile nicht online gefunden werden können.

Schnurlos-Finish-Nagler

Extra-Batterie für Fertig-Nagler

Bandschleifer

Palm Sander

Gehrungssäge

Kreissäge

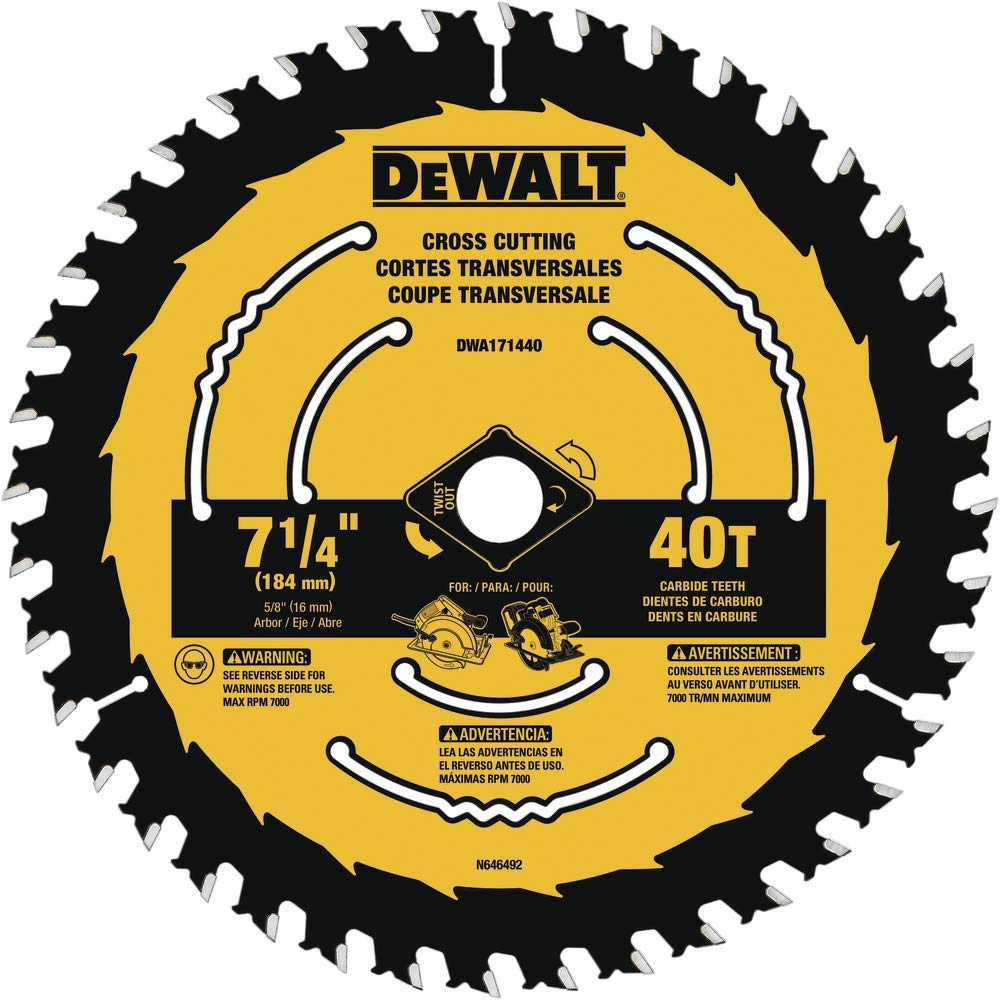
Cross Cut Sägeblatt

Oszillierende Multi-Tool

Gehörschutz Ear Muffs


Supplies Liste

Dies sind die Vorräte an diesem Projekt verwendet.

Affiliate-Links unten auf ähnliche Elemente sein kann, wenn genaue Einzelteile nicht online gefunden werden können.

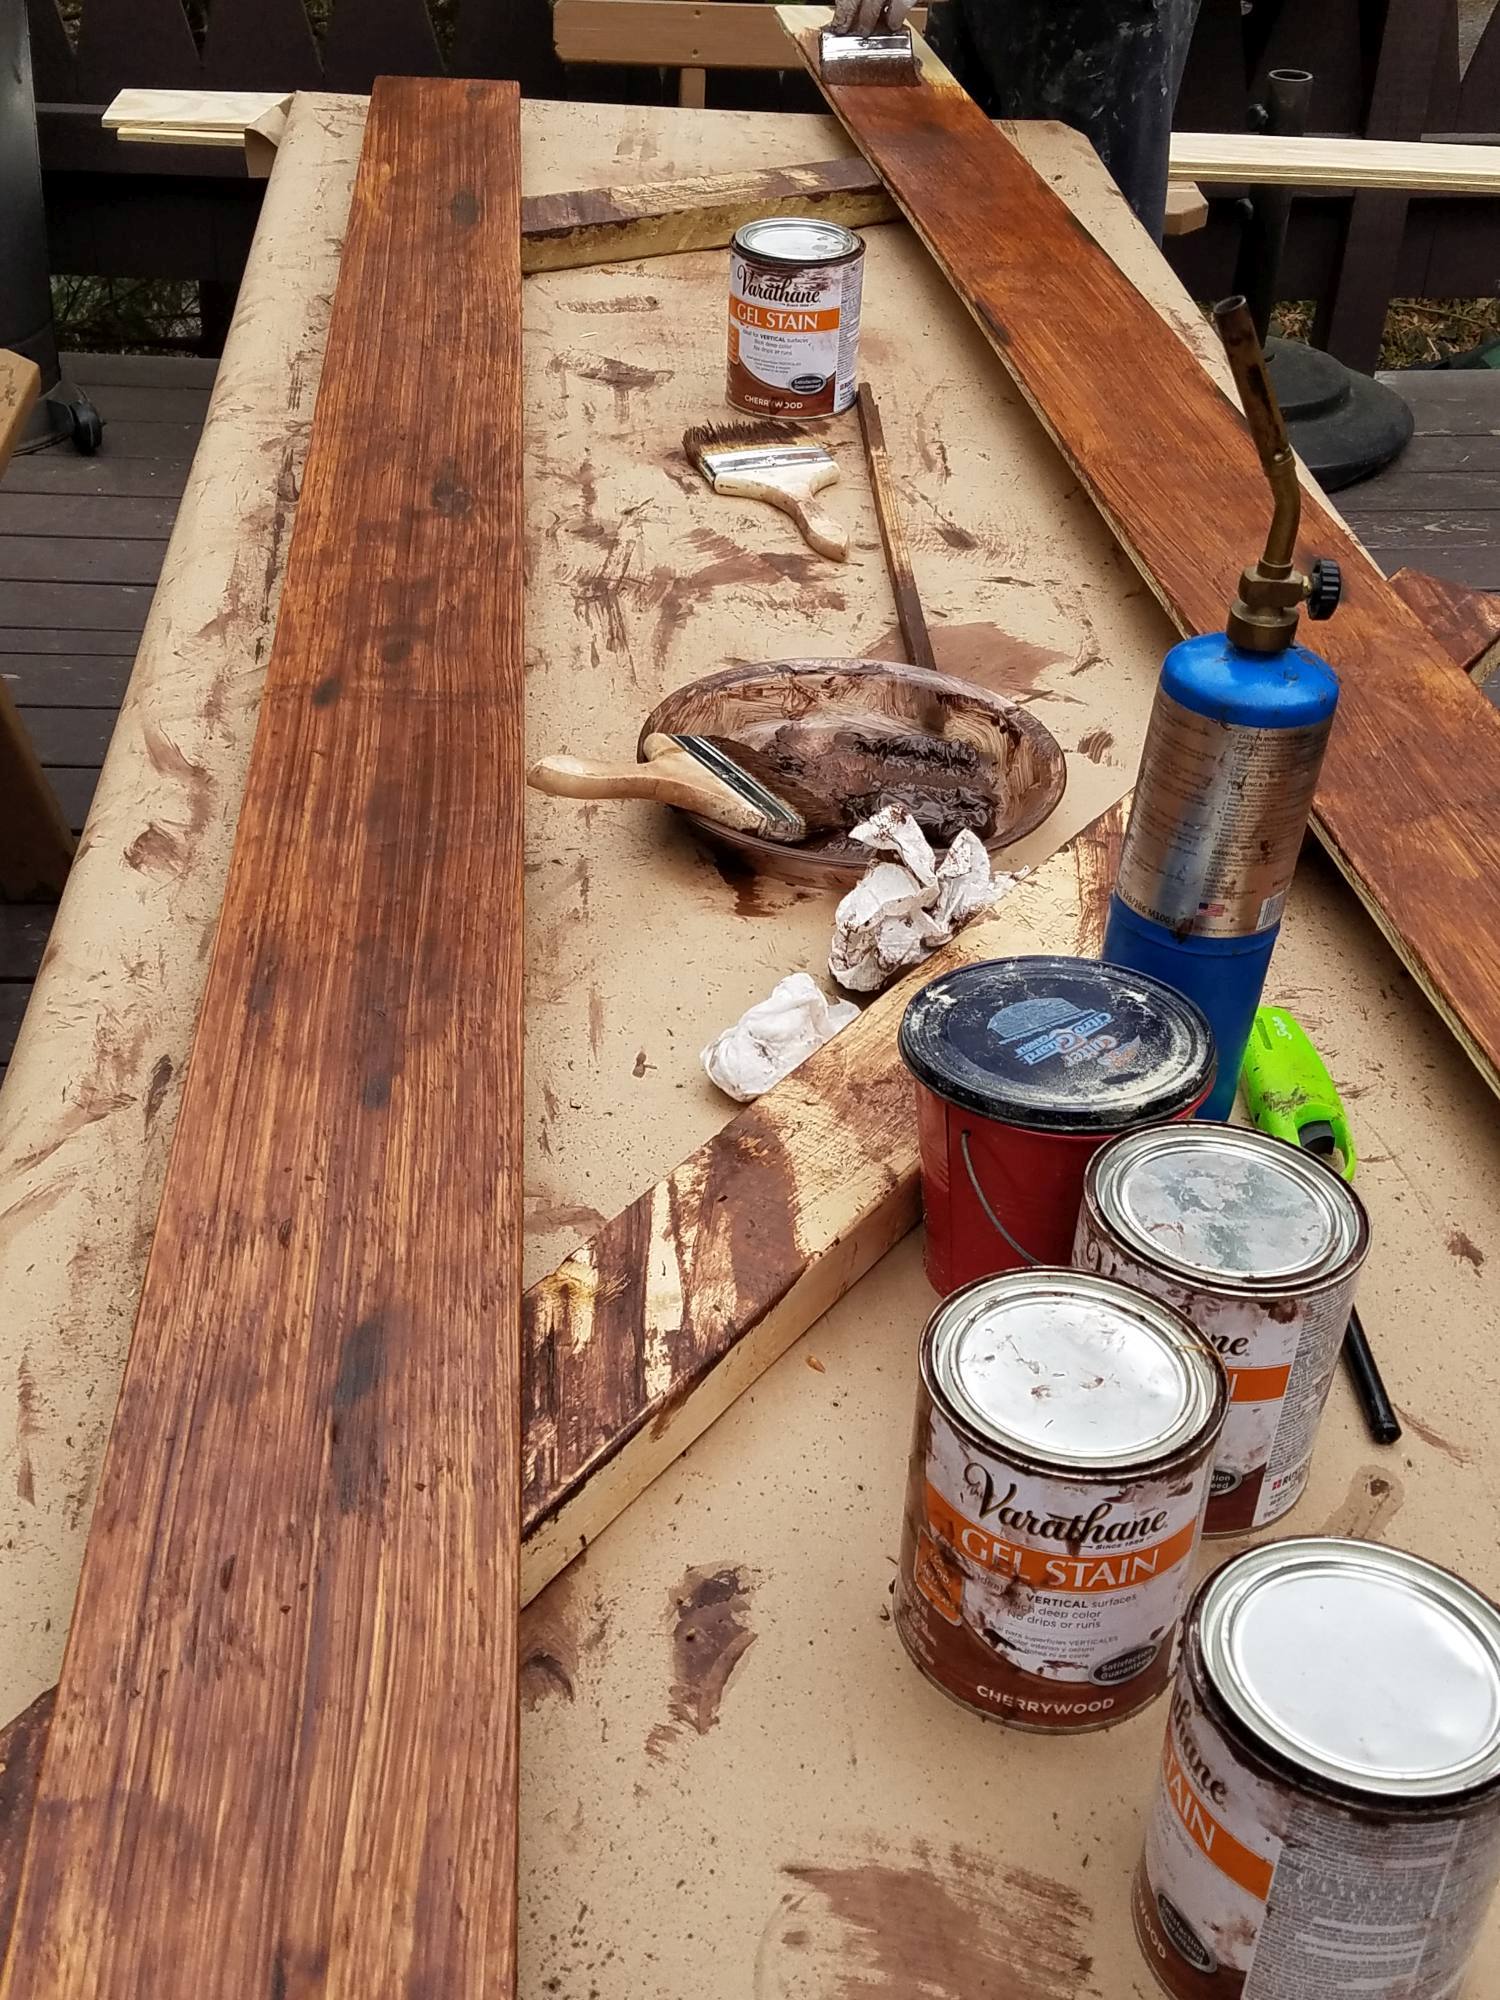
Varathane Kirschbaum Gel Stain – Wir haben etwa 7 Liter verbraucht

Ölmodifiziertes Polyurethan auf Wasserbasis – Wir haben 2 Gallonen verbraucht

3″ Bürste mit Naturborsten – 6 Pinsel zum Auftragen der Beize

4. April″ Synthetische Polyesterbürste – 4 Pinsel zum Auftragen der Poly

Abdeckpapier – Wir haben das Abdeckpapier verwendet, um das Deck beim Auftragen der Beize und des Polystyrols zu schützen

6 Gauge 1 1/2″ Nägel fertigstellen

The Plywood Plank Flooring Thickness

The plywood plank flooring thickness we used is 1/2″ thick. If our floors weren’t so uneven we could have used 3/4″, but the flexibility that a 1/2″ plywood has was perfect to conform to our uneven sub-floor’s contours.

I think an added benefit to the 1/2″ plywood is that the spaces in between the planks doesn’t hold dirt as easily.

It may sound like that’s a bit of a stretch but I think if it was 3/4″ plywood, the extra 1/4″ of plywood thickness may make it harder for a vacuum to suck out things that get stuck in the spaces.

We weren’t sure how the spaces were going to fair with dust and things falling in them but so far so good – nothing a good vacuuming can’t fix. 🙂

Other than things possibly getting stuck in the spaces between the planks, I don’t see any reason you can’t use 3/4thick plywood for your plank flooring. Davon abgesehen, I also don’t really see a benefit to using it over 1/2″ Sperrholz.

The Plywood Plank Width

We wanted the farmhouse or country kind of look, so a wide plank is what we went with.

We also wanted to reduce the amount of wasted plywood, so the width we came up with was 5 7/8″ for each board. That gives us 8 planks per sheet and a tiny strip leftover at the end.

We’ve seen other plywood floors where they went for 8 inch or even 12 inch boards. We didn’t want to make them that wide because we felt it made it obvious that it was a plywood floor.

And a wide board would have shown the dreaded plywood zebra pattern that I don’t care for (more on the plywood zebra pattern later).

The Type Of Plywood We Used

There were a couple of questions in the comments about the type of plywood that was used for the plywood planks.

The plywood is regular 3-ply, cheapy weepy, plain Jane, rough finished 1/2pine plywood.

The exact name from Lowes is:

Plytanium 15/32CAT PS1-09 Square Structural Plywood Pine

Grundsätzlich gilt, the cheapest plywood we could get.

Since we wanted a rustic look the knots and imperfections weren’t a problem.

The plywood is a regular rough finish plywood

Some Before Pics

Here are some before pics of the space with the original floor.

We loved the color of the original floors, but the flooring never really went with the style of the house. It was a 3/8floating floor and the wood strips were fairly thin. Because it was floating and a pretty thin floor, it always sounded a bit hollow when you walked on it.

The real problem with the old flooring was buckling in some spots, probably because of the way it was installed.

That buckling was one of the reasons we felt the wide plank flooring made of plywood would be perfect for this space.

The wide plank flooring has spacing around each board, that spacing would prevent the new floor from buckling.


DIY Farmhouse Wide Plank Floor Made From Plywood - The Dining Room Subfloor With Staples Removed

How Much Plywood Do You Need

The measurements don’t need to be super precise. Rounding up the measurements and adding an extra plywood sheet to the total should give you enough wiggle room.

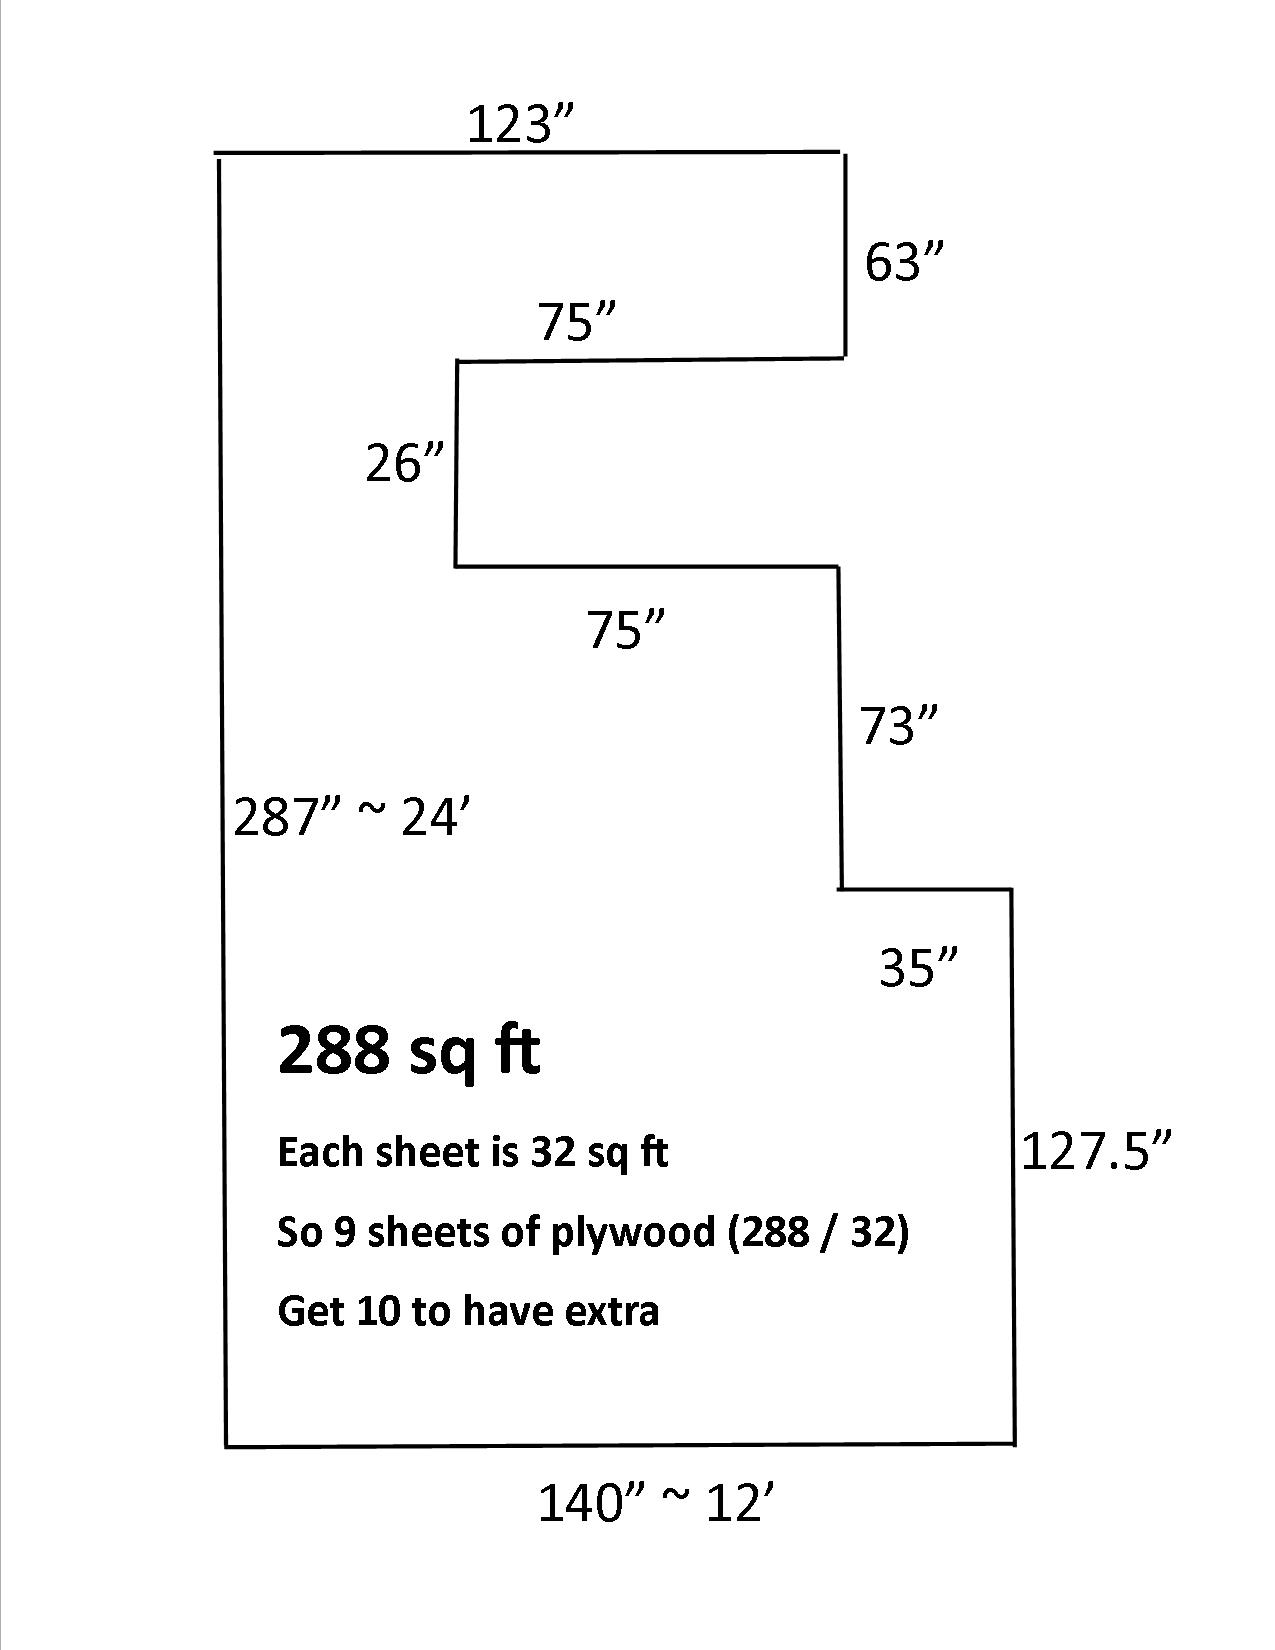
For our space, I treated it like a big rectangle. The length was 287″ (rounded up to 24′) and the width was 140″ (rounded up to 12′).

24 x 12 is 288 sq feet.

Each sheet of plywood is 4′ x 8′ so that gives you 32 square feet per sheet.

When I divided the total sq feet (288) by the sq feet per sheet (32) it told me I needed 9 sheets of plywood.

Then I added an extra sheet as a buffer.

DIY Rustic Farmhouse Wide Plank Plywood Flooring - Dining Room And Kitchen Measurements Floor Plan

The Final Numbers

We bought 10 sheets of 1/2″ plywood for our project and once completed, we had about 1 sheet left over.

Prepping the Subfloor

Total Time: 2 people about 2 hours

The original floor was a 3/8hardwood floor that was installed with a lot of staples…. like a lot of staples.

Zunaechst, it felt like the staple removal was taking FOREVER.

Once we got into a rhythm though it really only took a couple of hours for us to get just about all of them out.

DIY Farmhouse Wide Plank Floor Made From Plywood - The Dining Room Subfloor With Staples Removed

Subfloor Painting

Total Time: 1 person about an hour

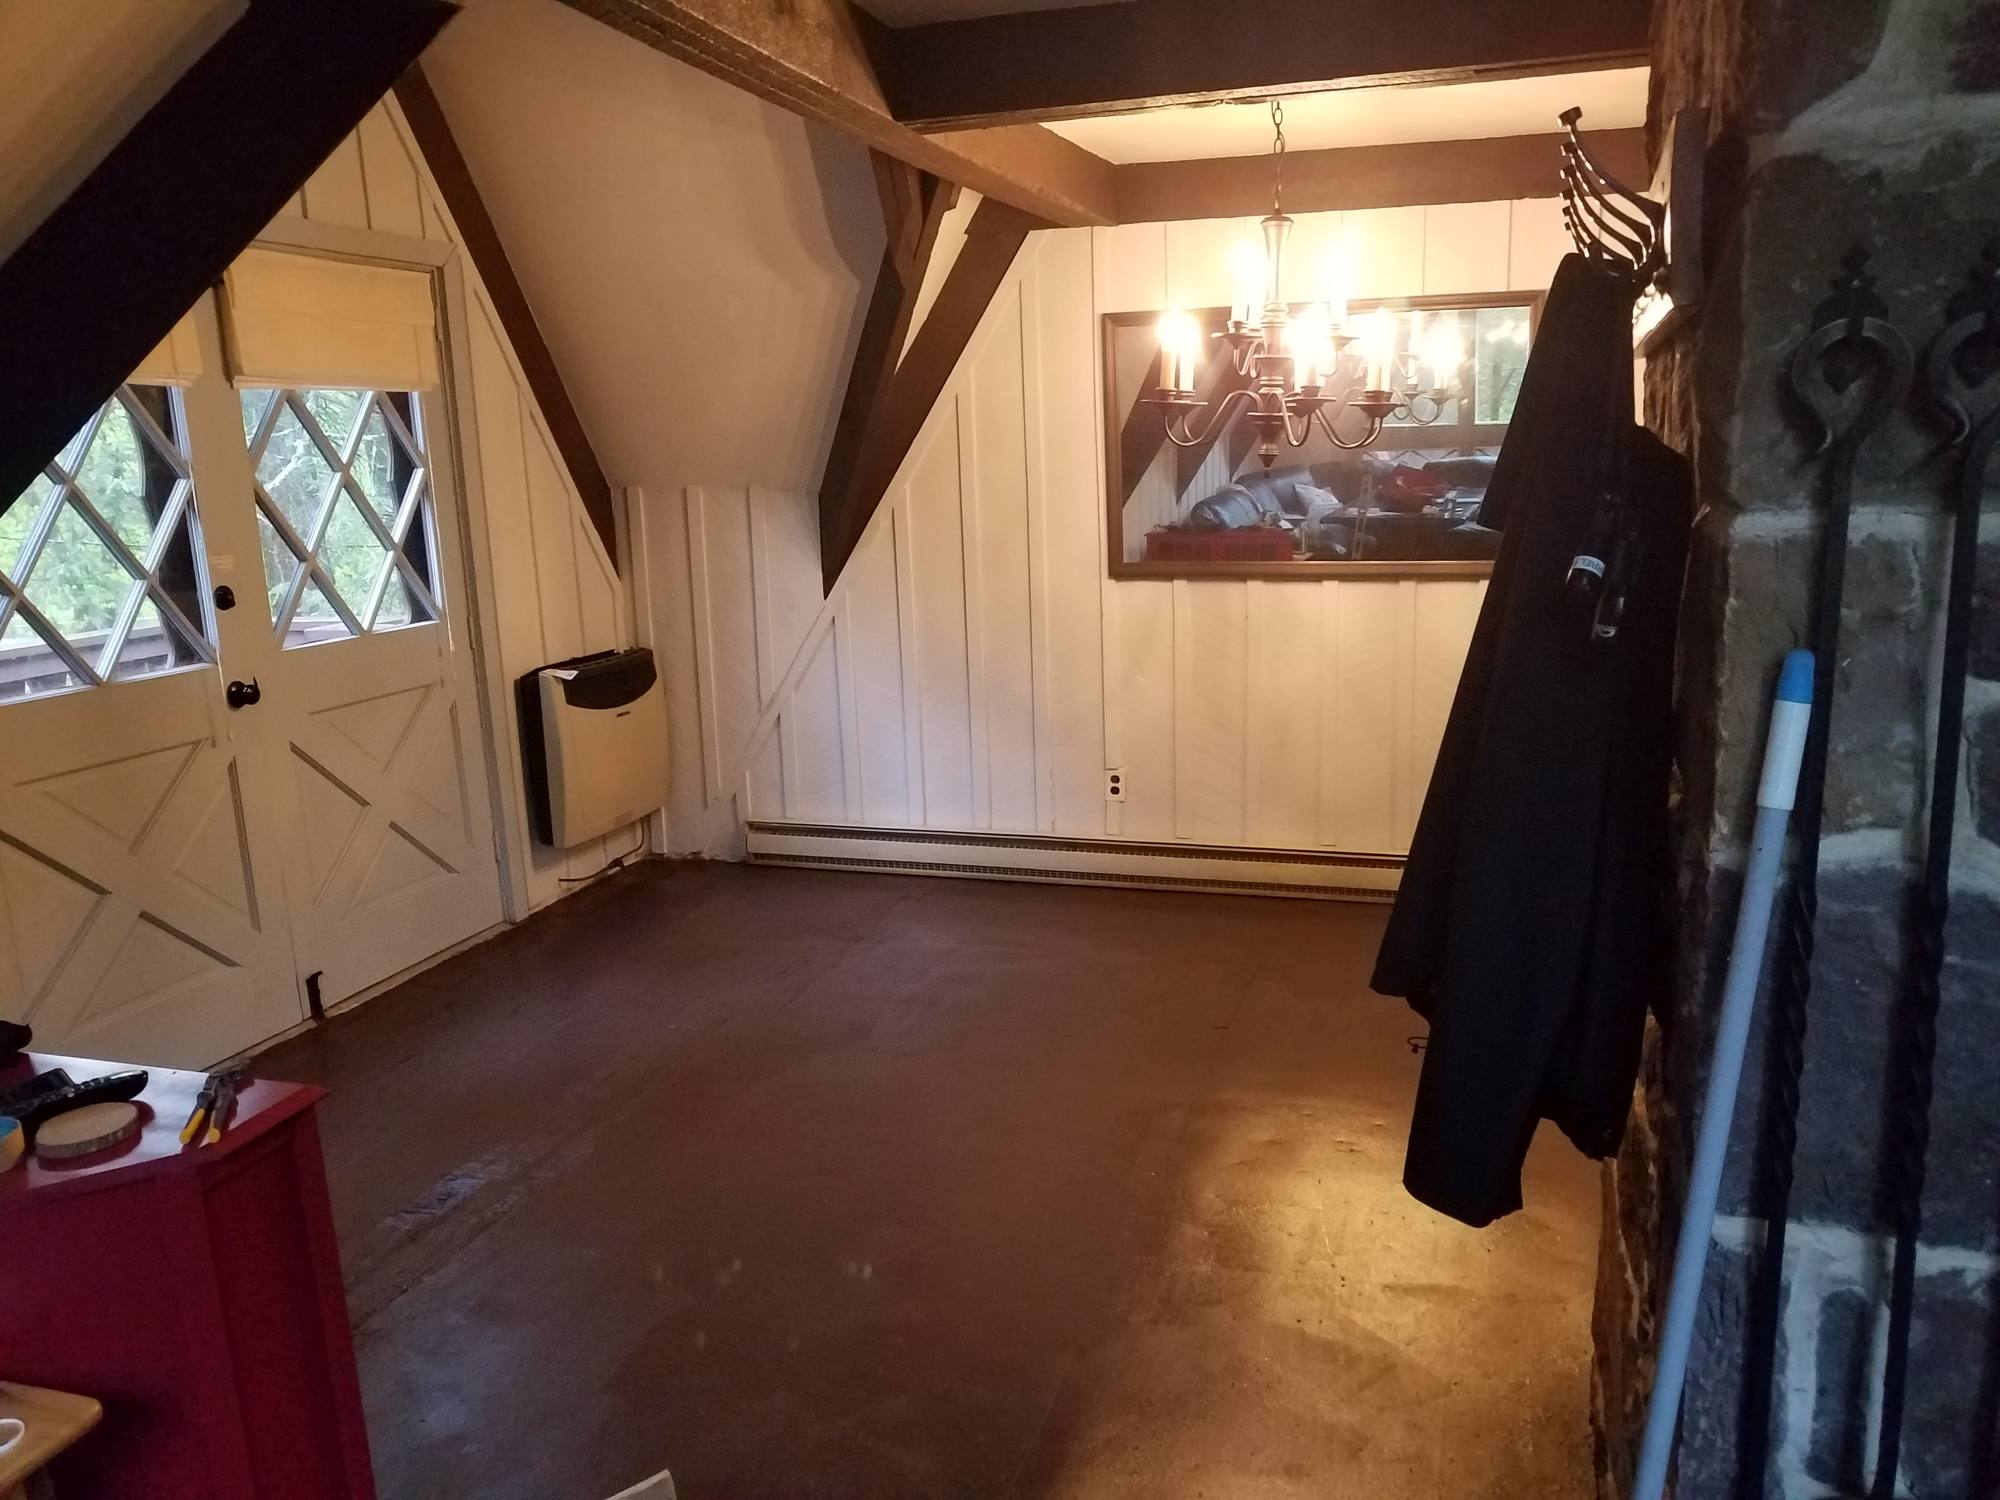
The subfloor we had was unpainted plywood.

If we installed the wide plank plywood flooring without first painting the lighter colored subfloor, it would have shown through the spaces in between the planks.

To prevent that from happening, we painted the subfloor a very dark brown color, using paint that we already had.

Any dark paint color would do the jobjust stick to a paint that is an eggshell or satin.

You don’t want a shiny subfloor showing through the spaces between the boards.

DIY Farmhouse Wide Plank Floor Made From Plywood – How To Install Plywood Flooring - The Dining Room Subfloor Painted Dark Brown

Cutting The Plywood Into Planks

Total Time: With the right blade this would take less than 2 hours for 10 sheets

I keep calling them planks or boards but basically, this step is where I took the sheets of plywood and cut them into long strips.

A lot of the Pinterest posts I came across said they had a person from Lowes or Zuhause Depot cut the sheets for them.

It’s definitely an option. I’ve used their cutting services in the past when the cuts didn’t need to be very precise.

In diesem Fall, I wanted more precise cuts, so I opted to do it myself.

It takes A LOT longer but I thought having consistently sized plywood planks was worth the extra time.

Dieser Weg, I was sure each piece was going to be about the same width.

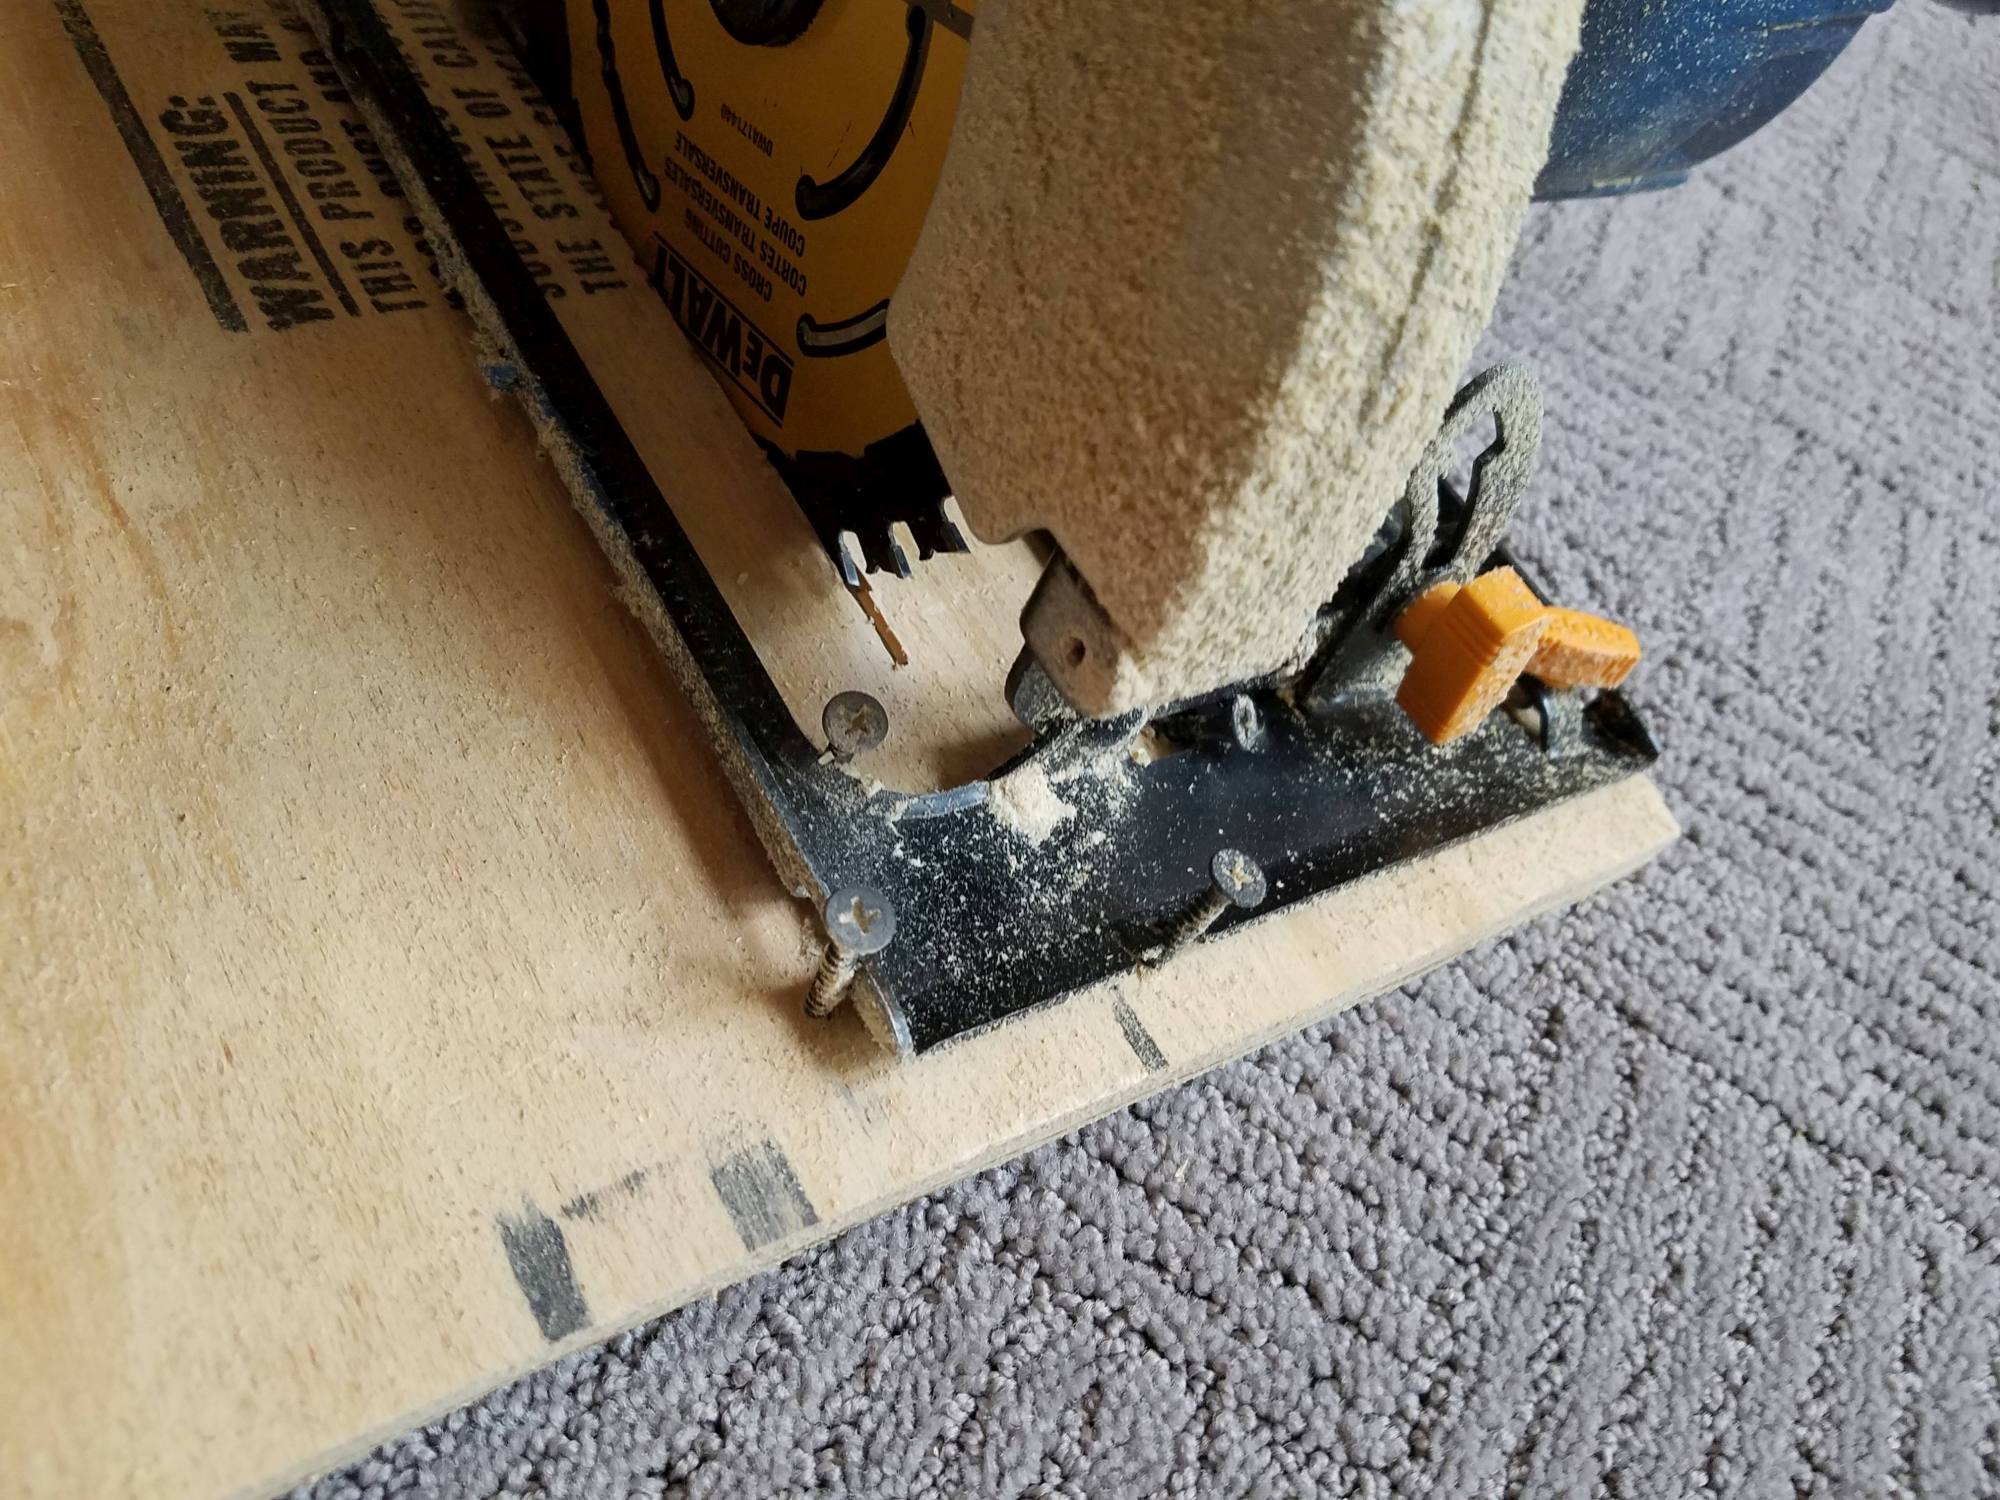
To make cutting the pieces MUCH easier and to keep them the same width I made a jig.

They say hind site is 20/20, well looking back on it I would still cut the plywood strips for flooring myself.

I recently used the cutting services for another project where I didn’t care about the width they cut it an man o man, I don’t think there were two cuts that were the same width.


DIY Rustic Farmhouse Wide Plank Plywood Flooring - Cutting plywood flooring into wide planks - A Sheet of Plywood Ripped Into Planks

The Best Saw Blade To Use

We had 10 sheets of plywood to cut into wide plywood planks. I figured that a plywood blade would be the best. I thought anything else would leave a really rough edge on the wood.

Gut, I was very, very wrong.

Do Not Use A Plywood BladeUse a Cross Cut Blade instead

The plywood blade didn’t last very long and took a lot of effort to go through the plywood. It started smoking and having a lot more difficulty cutting barely halfway into the second sheet of plywood.

I ended up having to go out and buy another blade. This time I tried a cross cut blade, OMG what a difference.

The cross cut blade went through the plywood like butter and left an even better cut than the plywood blade did. I was able to do the rest of the plywood using just that one cross cut blade.

If you want to get the same cross cut blade I used, just click the picture below.

DIY Farmhouse Wide Plank Floor Made From Plywood - Choosing the right blade to cut your floor boards is key - this is the best blade for ripping the plywood into planks

The Jig

A jig is fancy talk for a template. It really made a tedious and time-consuming task super easy.

It was basically a 1/2piece of scrap plywood I had with a scrap piece of 1 x 4 screwed to it.

The space between the saw blade and the piece of 1 x 4 was 5 7/8″, the thickness we wanted our plywood flooring planks to be.

To make the jig I put the blade of the saw all the way up, secured the saw to the plywood with screws all around the saw, wedging it in place.

Then I slowly lowered the saw into the plywood and measured 5 7/8from the inside of the plunge cut and that’s where I screwed in the 1 x 4.

DIY Rustic Wide Plank Plywood Flooring - Secure The Jig To The Circular Saw Using Screws
DIY Rustic Wide Plank Flooring Made From Plywood - cutting the sheet into floor boards - the jig used to rip the plywood into planks - top view
DIY Rustic Wide Plank Flooring Made From Plywood - bottom view - this jig made ripping the plywood so much easier

For more info on the jig and some extra tips on cutting the planks check out this post, 3 zeitsparende Tipps für DIY-Dielensperrholzböden.

Spitze: If you’re cutting your own boards you need to make a jig. When making your jig, extend the 1 x 4 way in front and way behind the saw, like it is in the pictures.

That lets you line up the saw way before the blade comes in contact with the plywood. It also gives more stability, ending up with a straighter cut.

Sanding Each Plank

Total Time: 2 people about a day and a half

This part took a while, but it’s important to put the time into it.

We sanded the face of the plywood to remove any splinters and the text that’s sometimes stamped on the plywood.

We also used the sander to round the edges all around the face of each plank.

The rounded edge gives it a really nice finished look and helps in cases like ours, where the floors aren’t very level.

Rounded edges give a soft transition between two planks when they don’t quite line up.

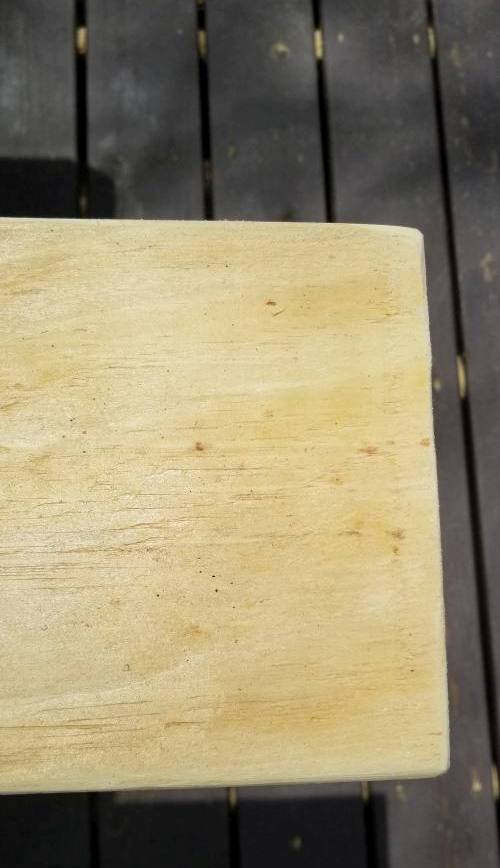
This is also where you choose which side of the plywood will be the face, the pretty side or the ugly side.

When we were choosing sides, I’d say we chose the ugly side 80% of the time.

It went against what I would normally do, but now I kinda wish I went with the ugly side more.

We used a belt sander to do most of the sanding. You could use a palm sander if you’re not doing too much flooring but in our case, the belt sander was much faster.

The sandpaper we used was 120 grit, it was perfect for the belt sander.

DIY Rustic Farmhouse Wide Plank Plywood Flooring - round off all the edges

During this part of the project, you’ll have your doubts about using the gnarly part of the plywood.

BUT TRUST ME – once you put the stain on the plywood you will be blown away at how good it looks.

Schlussendlich, the most beautiful planks were the ones with imperfections.

Spitze:

If a plank has a knot or crack in it, don’t put it to the side or use it in an area you can’t see.

Stattdessen, make it more noticeable. Dig into the knot or crack with the sander to emphasis the crack or knot more. It’ll help remove splinters that are around the knot or crack and also add character.

DIY Farmhouse Wide Plank Floor Made From Plywood - do not be afraid of imperfections

Distressing The Plywood Plank Flooring

Total Time: We did this at the same time as sanding so it’s included in the day and a half spent sanding

This is the distressing part of the distressed plywood floors.

There were three weapons of choice for applying the plywood’s character (a.k.a. distressing), ein Hammer, a big pair of pliers and a propane torch.

Out of the three I used the pliers the most and the hammer the least.

Using pliers, I’d repeatedly hit the face of the plywood with the back corner of the pliers.

With the hammer, I used the side of the hammer, and the claw to make indentations in the plywood.

If you look at the floor right above the hammer in the picture you’ll see the indentations the back of the pliers left.

I also used a utility knife to open up any cracks in the wood, to make them more pronounced.

I did it by putting the knife at an angle and cutting along the crack, opening up the crack, similar to what is done to cracks in concrete when you want to fill a crack.

The distressing (a.k.a character building) is a key step for distressed rustic plywood floors.

The where and tear makes the planks look authentic, the more distressing the better.

DIY Wide Plank Floor Made From Plywood - meet the character builders

Adding Even More CharacterBurning The Plywood Boards

The propane torch was by far my favorite character builderand it wasn’t because it spoke to my inner pyro…. well maybe a little because of my inner pyro lol.

Burning the plywood gives an instant amazing aged look.

This is another part of the process where I hesitated a lot.

But once the stain goes on, the plywood planks instantly transform into a beautifully aged floorboard!

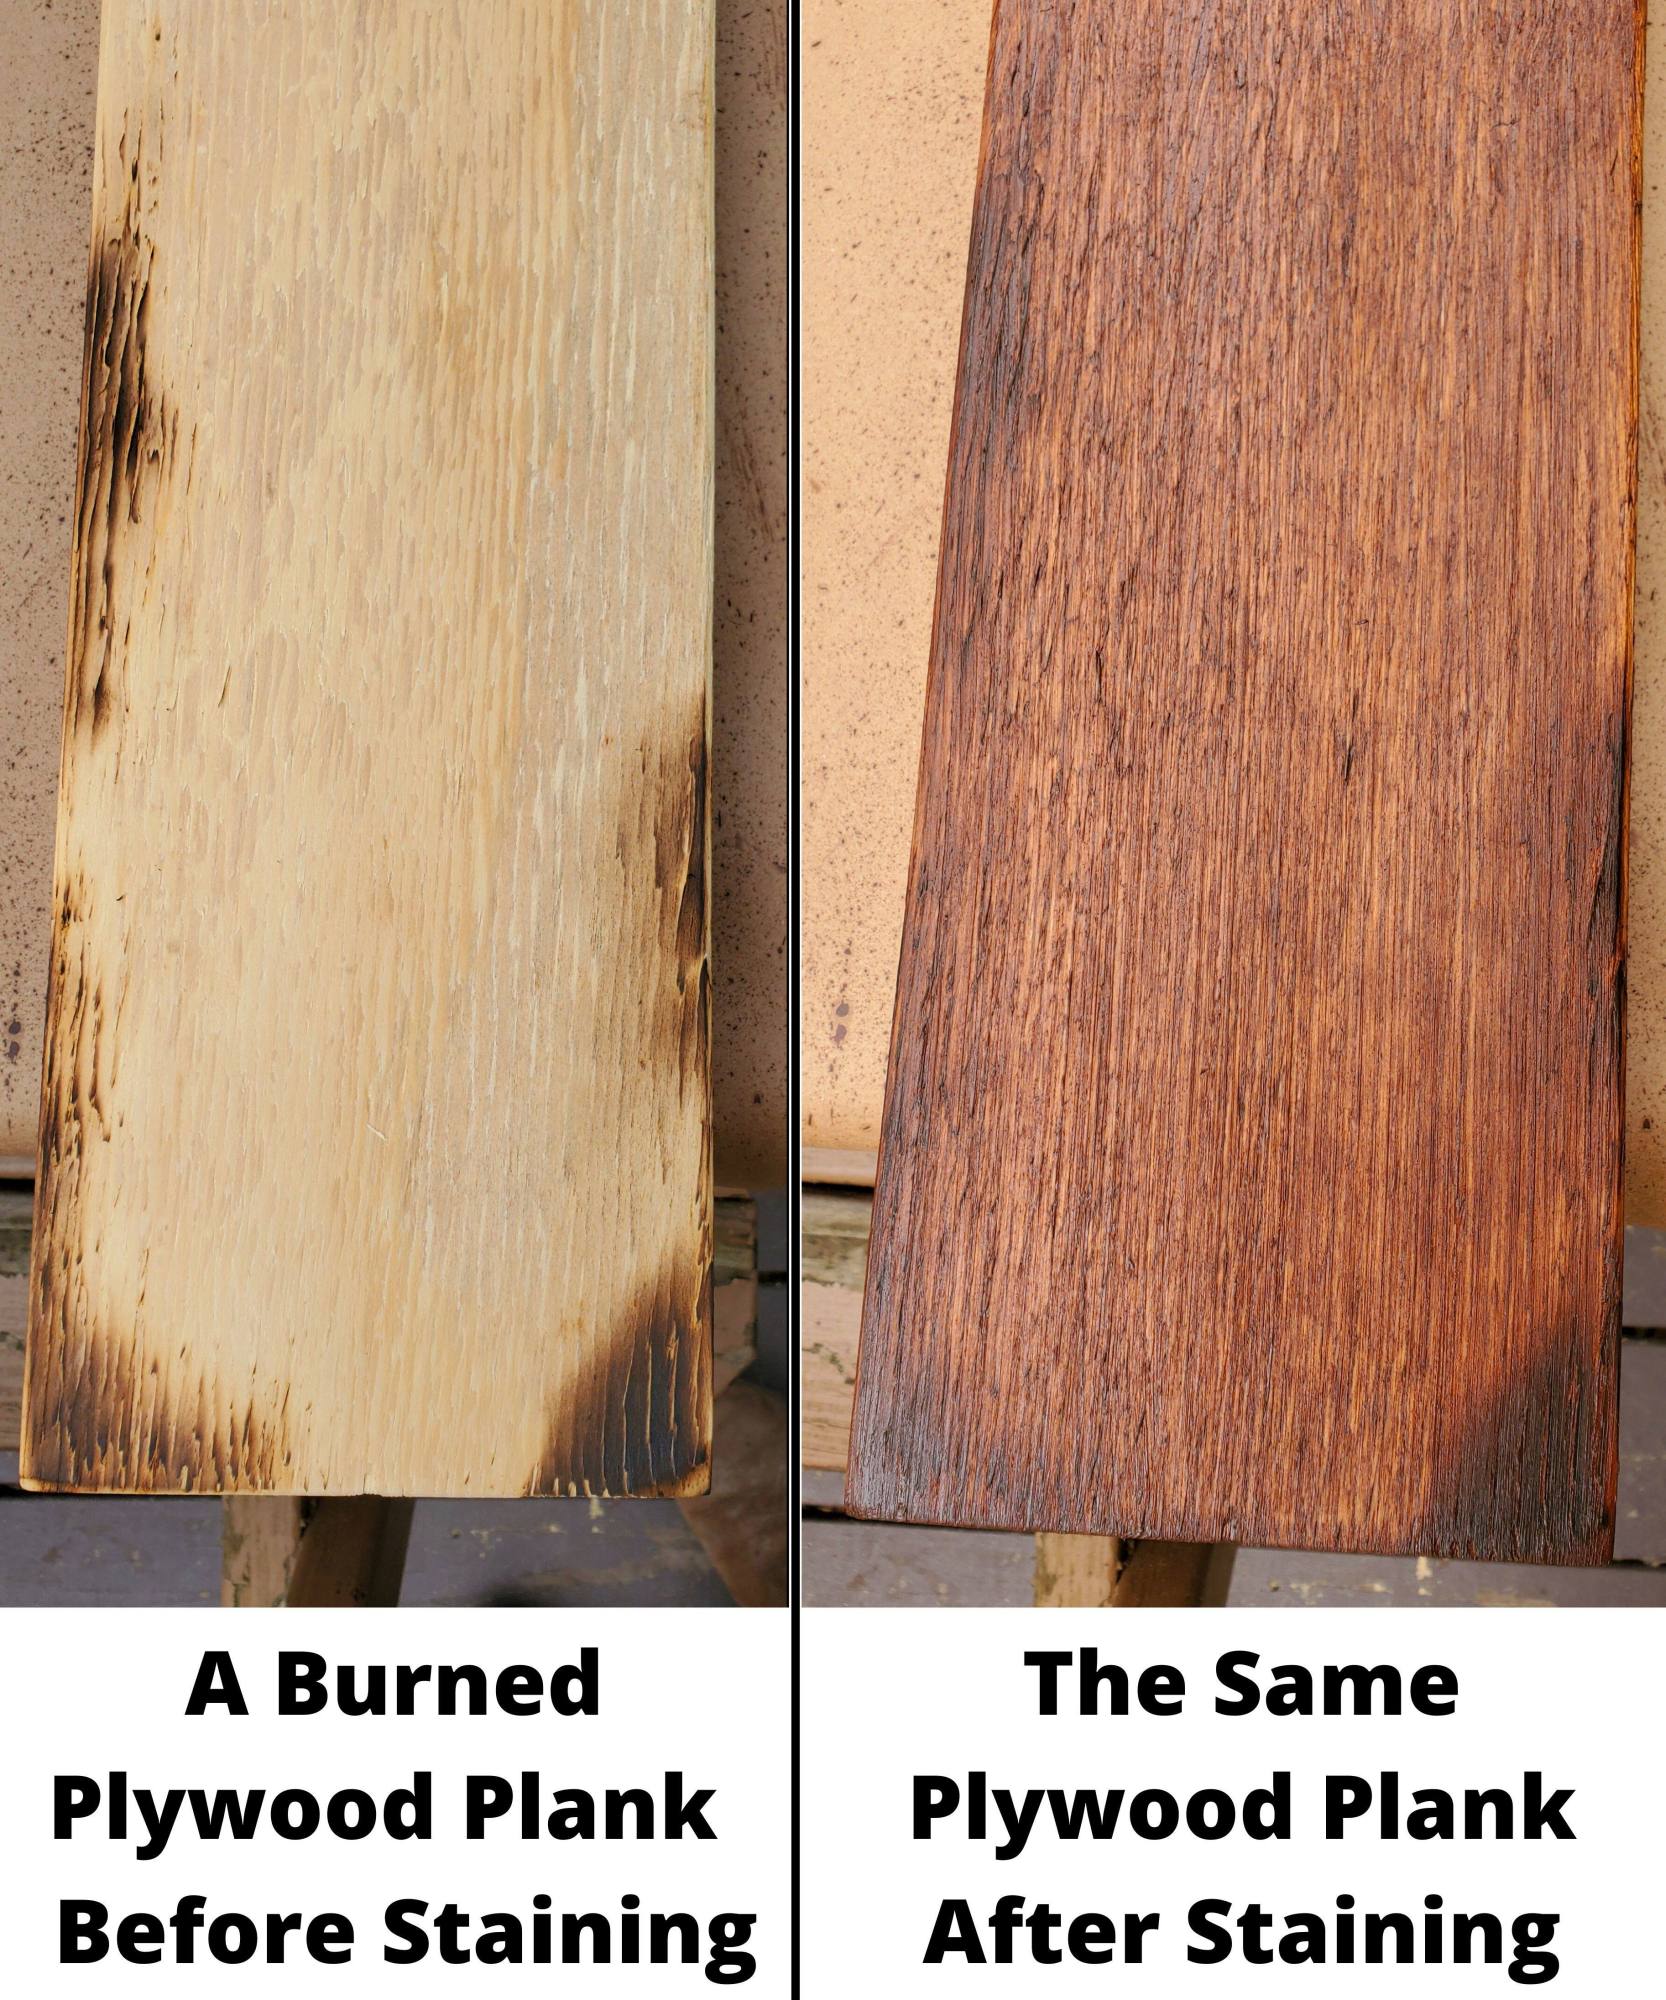
Take a look at the before and after picture of the burned plywood plank.

When burning the wood there are definitely thoughts of Oh My God! This is too much!

Aber, as soon as the stain goes on, it blends the darkness of the burn the the rest of the plywood colors beautifully.

Whenever we came across a plank that looked a little boring, we burned some character into it to liven things up. 🙂

Take a look at the arrows in the picture, each one of those dark marks is the work of the propane torch.


Spitze: When burning the plywood, the lighter parts of the wood burn much easier than the darker parts.

Since I was avoiding that plywood zebra pattern, I didn’t burn the wood where there was a heavy pattern.

Burning that area would only emphasize the patternand I didn’t want that.

If the part of the wood was either only dark or only light then it was eligible for burning.

DIY Farmhouse Wide Plank Floor Made From Plywood - burned plywood floors from the propane torch
DIY Wide Plank Plywood Flooring - .a Burned Plywood Plank Before And After Staining

Here’s a video of how we burned the rustic wide plank plywood flooring.

We Chose Gel Stain, This is Why

The process started with trying out a bunch of different stains on scrap pieces of plywood first, and this was by far our favorite!

We went with a gel stain instead of a regular stain because it does a really good job of covering up that plywood zebra pattern that we didn’t want.

It’s totally a personal preference, but I don’t like the pattern you get from regular stain on plywood floors.

Take a look at this picture I copied from Pinterest, for an example of what I’m talking about.

Regular stain is more liquid and gets absorbed by the plywood at different rates. Softer parts of the wood absorb the stain faster than the denser parts of the wood.

A workaround would also be to use a wood conditioner before applying regular stain.

Stattdessen, we used the gel stain.

Because we used the gel, we were able to skip the wood conditioner.

Plus, the gel stain added a nice wood grain pattern on the surface of the board, making it look less like plywood.BONUS!

DIY Rustic Farmhouse Wide Plank Plywood Flooring - zebra plywood pattern I wanted to avoid

The Gel Stain We Chose

The gel stain we used had a dark color and created a lighter stain on the wood. The result was a cherry colored wood with a dark grain pattern on top, exactly what we were looking for.

The thicker you applied the stain the darker the board would be.

Auch, the longer you waited before brushing the excess stain off the darker the plank will be.

If a plank had a heavy zebra pattern on it, we put the stain on thick and waited a bit more before dry brushing it.

That did a pretty good job of minimizing the zebra pattern.

The brush we used for the stain was a cheap wide (about 4″) real bristle brush.

The stain has a strong polyurethane smell to it, so we did the staining out on the deck and also let the boards dry out there.

If you’re going to do the same, make sure to first check the weather forecast!

We used about 7 quarts of stain to do our project.

Staining Plywood Floors

Total Time: 2 people about a day

When we stained the plywood floors, we did one coat of stain using the dry brush technique.

Grundsätzlich gilt, first we applied the stain with the wet brush, then used a dry brush to brush off the excess stain.

With every pass of the dry brush, we would wipe off the dry brush on a paper towel to remove the majority of the stain from it.

We chose the dry brush method because it leaves a nice dark wood pattern.

When applying the stain and dry brushing, we were able to play with the texture that the stain leaves on the plywood.

Mixing it up and using wavy brush strokes to simulate a grain or brushing around a knot in the wood added uniqueness to each board.

Merken, the longer the stain is left on and the longer it dries before using the dry brush, the darker the board will be.

We typically applied the stain and waited a couple of minutes before using the dry brush.

If we came across a board with lot of that zebra pattern on it we applied a thicker coat and let it sit a little longer.

The thicker coat and longer wait time did a better job of masking the zebra pattern.

Once the stain was applied we waited 24 hours before applying the polyurathane.

DIY Farmhouse Wide Plank Floor Made From Plywood - stained plywood flooring - Stain Plywood Floors - applying the gel stain and leaving brush strokes that look like wood grain
DIY Farmhouse Wide Plank Flooring Made From Plywood - Applying Gel Stain and distressing to the wide plank plywood floor boards

Applying The Finish

Total Time: 2 people about a day and a half

For the finish we used a clear satin, water based, oil-modified polyurethane.

This product was perfect for our project because it didn’t change the color of the stain, dried quickly and best of all it’s oderless!

If you’ve ever done any sort of polyurethane project. you know that the smell from polyurathane is no jokeand it lingers for days and days. This has no smell at all!

We went with a satin finish because we wanted an aged look and a glossy floor would be the opposite of that.

Three thin coats of poly were applied on all the boards, including the sides of the boards. Between each coat, we waited about 2 hours before applying the next coat.

We then waited 24 hours after the last coat before installing the boards.

We didn’t sand between the first and second coats but did do a light hand sanding with 120 grit sandpaper before applying the final coat.

The brush we used for the poly was a cheap wide (about 6″) synthetic brush.

We used 2 gallons of polyurethane for our project.

Click her to buy the same polyurethane I used

Spitze: When applying any polyurethane, bubbles are something you want to avoid.

That’s because the bubbles don’t pop. Stattdessen, they dry into polyand that’s not a good look. lol

To prevent bubbles, mix the poly using a mixing stick using smooth circular motions.

No shaking the can here!

Aktualisieren: When we originally did the dining room floor we did a light sanding before the final coat of poly.

Recently we did the living room floor and for that flooring, we skipped the sanding before the poly.

We figured not sanding would give the planks a bit more texture and save us a boatload of time.

It worked out really well! From now on, we won’t be sanding before the final poly coat.

It’s All About That Space

The spaces between each plank were perfect for the style we were looking for.

The spacing would give it more of that farmhouse feel and prevent the buckling that the previous floor suffered from.

A few of the posts on Pinterest mentioned using quarters as spacers, so that’s what we used.

Our breites Brettsperrholzboden has small variations in the spacing, mostly because of the uneven floorsbut that’s okwabi-sabi. 😉

Where To Start Laying The Plywood Planks

I used a tip I came across on one of the Pinterest posts, starting on the side of the room where the floor is the most visible.

For our space the most visible part of the floor was by the front door so that’s where we started.

When we reached the opposite end of the space we ended up with the last row of planks needing to be ripped in half.

DIY Wide Plank Floor Made From Plywood - Starting The Wide Plank Plywood Floor Install

Make Sure To Space Out The Seams

Each plank was 8 feet long and the room was a little over 12 feet wide, so there weren’t too many seams to work with.

The rule of thumb is to not have two consecutive rows with seems less than a foot apart from each other.

DIY Wide Plank Floor Made From Plywood - make sure to space out the seams - This is the plywood flooring in the kitchen

Cutting The Plywood Boards To Length

I used a miter saw to cut the boards to length. Pretty straight forward. One tip is to make sure the blade reaches full speed before you start cutting into the plywood. That’ll give you a clean, smooth cut.

Spitze: Every once and a while making a cut would create a thin line of bare wood at the very edge of the cut. When that happened I used a dark colored sharpie to color that bare wood and that blended it right in.

I used a black sharpie but a brown sharpie would work just as well.

I actually used the sharpie a lot with the length-wise cuts.

Securing The Rustic Wide Plank Plywood Flooring In Place

Total Time: 1 person a solid day
On Pinterest, I found different methods of securing the planks. Some suggested glue or liquid nails, others said nails, and a few did both.
The glue or liquid nails sounded too permanent to me. If I ever want to change the flooring in the future, nailing it down would be the best approach.
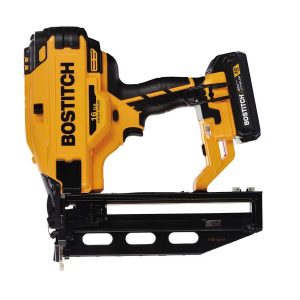
I opted for face-nailing the planks using a nail gun. I bought a battery-powered Bostitch nail gun, it was perfect for the job.
This nail gun has a rapid-fire feature. If you press and hold the trigger it shoots nails in rapid successionlike it’s air-powered cousin.
That feature makes quick work of installing these floors.
The nails I used were 16 gauge 1 1/2″ straight nails.
I put a nail in about every 6 – 12″ all the way around the board.
The nail heads are super tiny and the nailgun did a good job of countersinking them into the planks so they are barely noticeable.
We used about 4 packs of nails for the project

Spitze: If you end up buying the same nail gun I’d recommend also buying an extra battery. It already comes with one battery, buying the extra battery will help keep your project moving along.


One More Note

The plywood flooring we installed is 1/2″ thick and the previous flooring was 3/8″ thick.

The 1/8difference meant any spaces where the previous flooring used to fit – the new flooring no longer did.

That difference meant a lot of undercutting. Not only the door moldings but all the furring strips that cover the seams of the oak boards on the walls.

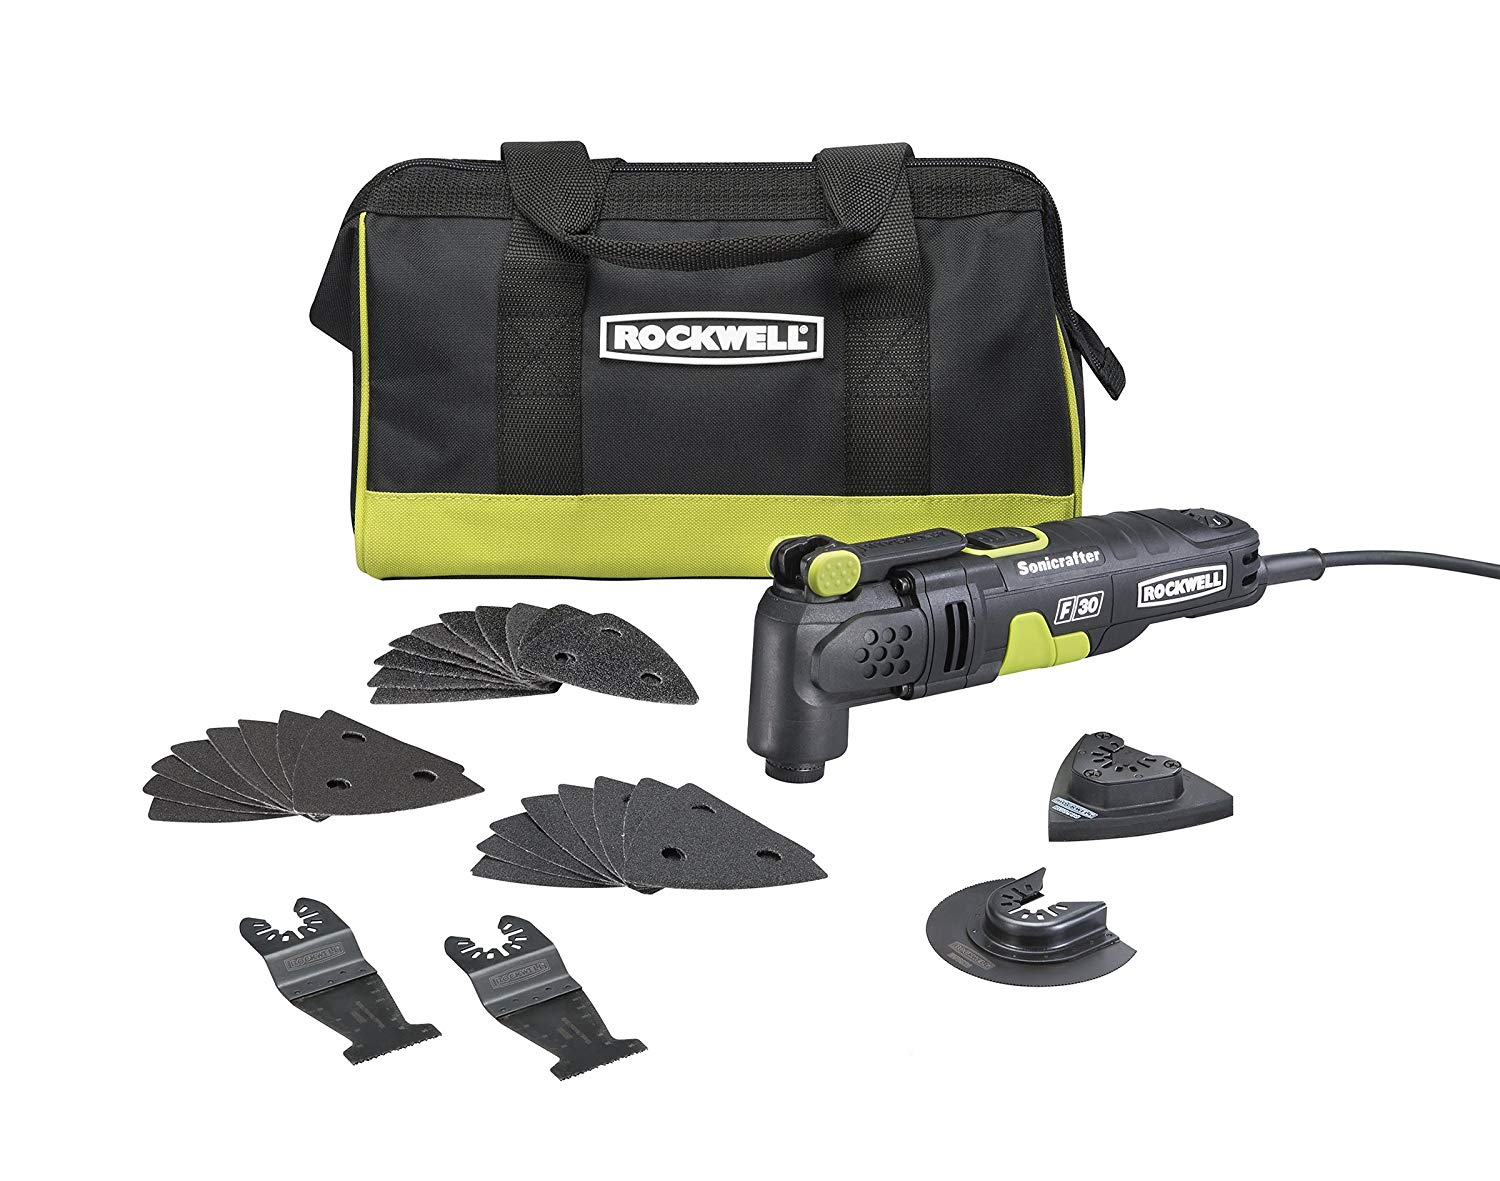
I could have done it with a dovetail saw, but since I had quite a few cuts to do, I bought an oscillating tool. It worked perfectly!

The tool comes with a bunch of different attachments. I haven’t used it for anything else yet but I can think of a few different uses for it in the future.

plywood flooring install - the nail gun

All Done – Das ist es!

Also, all told, it took roughly a week to do the plywood plank floorsfrom complete start to complete finish. Including the old floor removal, subfloor painted, 10 sheets of plywood cut into strips, geschliffen, betrübt, stained, polyied and installed.

This was a good sized project with a lot of effort put into it, but it was well worth it. We now have a completely unique floor that fits perfectly with the house, and looks fantastic!!

In the fall, we’re going to install the same rustic wide plank plywood flooring in the living room, and I’m really looking forward to it.

We’re also going to do a unique transition between the living room and dining room floorscan’t wait.


Aktualisieren: Gut, we redid the living floors recently and we also installed the wood slice accent flooring. Everything turned out perfect!

We wrote about those experiences also, check out those posts here:

Wood Slice Accent Flooring

Breiter Landhausdielenboden


[et_bloom_inline optin_id=”optin_7″]

Some Pictures

Here’s some more pics of the work in progress and the finished plywood plank flooring.

Lass mich wissen was du denkst, dort etwas hätten Sie getan haben unterschiedliche?

Sagen Sie Ihre Meinung in den Kommentaren unten!
DIY Rustic Wide Plank Plywood Flooring - Close up pictures Of The Distressed, burned and stained plywood floors
DIY Rustic Wide Plank Flooring Made From Plywood - a closeup of the distressing
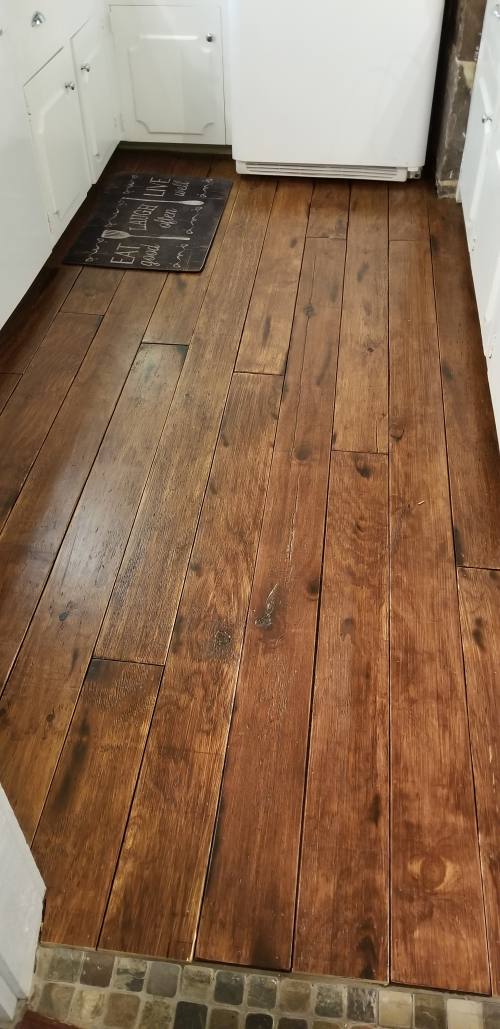
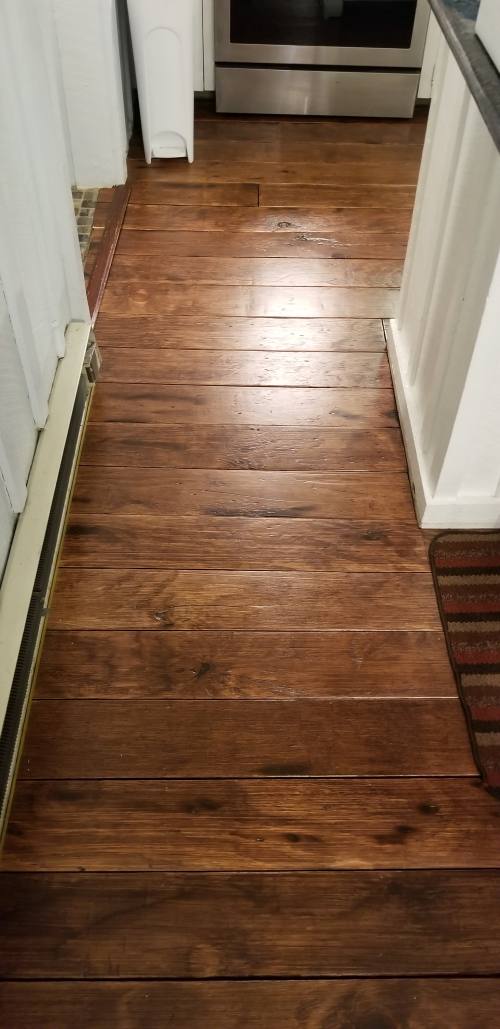
DIY Wide Plank Floor Made From Plywood - The Plywood Plank Flooring In The Kitchen
DIY Farmhouse Wide Plank Floor Made From Plywood - Distressed Floor - The stained plywood floors are perfect for that farmhouse look
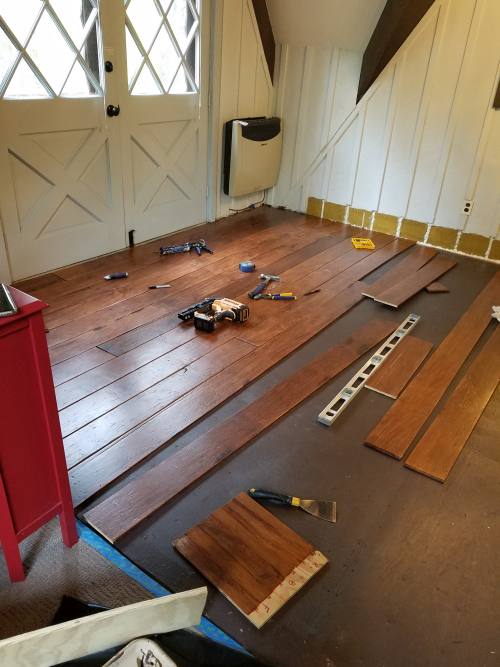
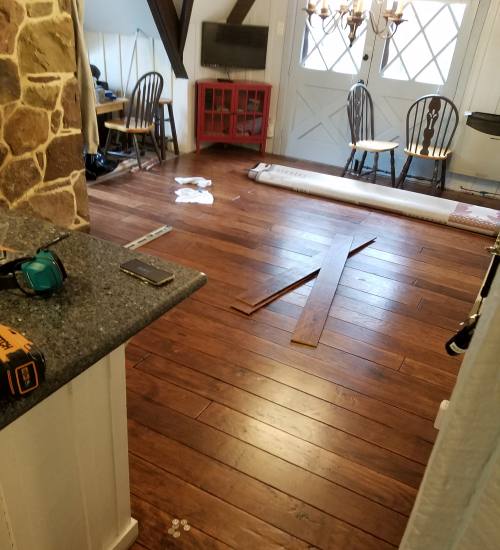
DIY Farmhouse Wide Plank Floor Made From Plywood - In the middle of installing the plywood plank flooring in the Dining Room
DIY Rustic Farmhouse Wide Plank Plywood Flooring - a closeup of the distressing on the barn board plywood flooring in the kitchen
DIY Rustic Wide Plank Plywood Flooring - The Plywood Plank Flooring In The Dining Room
DIY Rustic Wide Plank Plywood Flooring - the finished product - The stained plywood floors are perfect for that farmhouse look
DIY Farmhouse Wide Plank Flooring Made From Plywood - The Floor Boards Drying Outside After Polyurethane Was Applied

Viel Spaß mit diesem Beitrag? Pin es und teile es mit anderen!

DIY Rustic Wide Plank Plywood Flooring - a closeup of the distressing and Knots