DIY Bauernhof breite Planke Bodenbelag aus Sperrholz

DIY Bauernhof breite Planke Bodenbelag aus Sperrholz

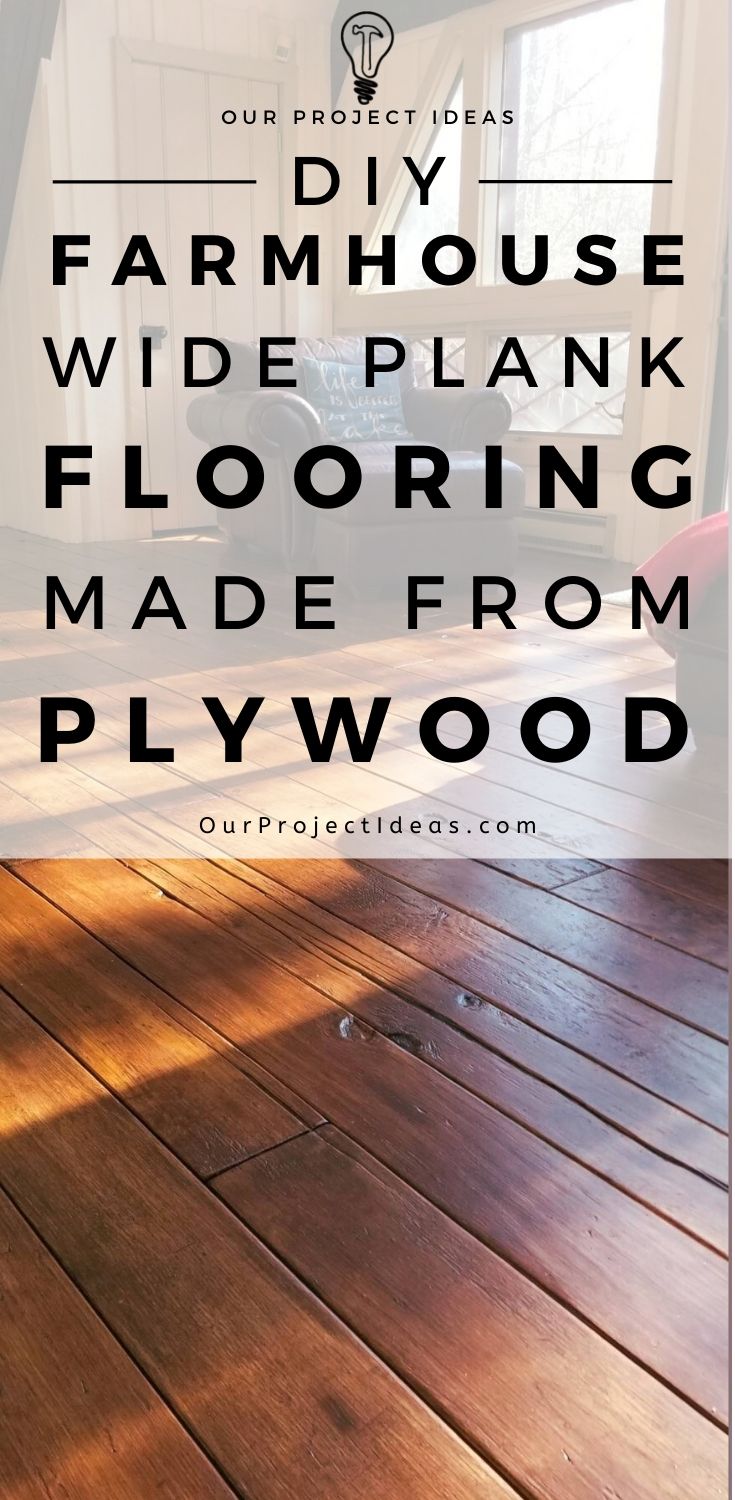
Das erste Projekt, das wir mit einem breiten Dielenboden aus Sperrholz für ein Bauernhaus durchgeführt haben, befand sich Anfang des Jahres im Esszimmer.

Gut, es hat uns so gut gefallen, dass wir im Wohnzimmer den gleichen breiten Dielenboden verlegt haben.

Hauptsächlich, sowohl die Böden wurden auf die gleiche Art und Weise getan, mit ein paar Ausnahmen. In diesem Artikel, Wir gehen auf die Unterschiede zwischen den beiden Etagen ein.

Besuche die Artikel für Esszimmer-Sperrholzböden um weitere Schritt-für-Schritt-Details zu sehen.

Soweit die Zeit reicht, Die Fertigstellung des breiten Dielenbodens im Esszimmer dauerte etwa eine Woche, im Wohnzimmer dauerte es viel länger.

Das Wohnzimmer ist etwas größer, Aber was dem Projekt wirklich Zeit verschaffte, waren das Unterlegen und das Hirnholzbodeneinlage.

Vom Start zum Ziel, es dauerte etwas mehr als zwei Wochen, um den Boden des Wohnzimmers zu beenden.

Bekanntgabe: Einige der Links unten sind Affiliate-Links. Wenn Sie sich entscheiden, eines dieser Produkte zu kaufen, Wir verdienen eine kleine Provision ohne zusätzliche Kosten für Sie. Wir empfehlen diese Produkte nur, weil wir haben Erfahrung mit ihnen und sie für unsere eigenen Projekte. Als Amazon Associates, Wir verdienen mit qualifizierten Einkäufen.

Was taten wir anders mit diesem Bauernhof Breite Plank Flooring

Die Methoden, die wir dafür verwendet haben Boden im Esszimmer und das Wohnzimmer waren ziemlich gleich.

Im Wohnzimmer, wir zogen den alten Teppich nach oben, entfernte Heftklammern, Den Unterboden dunkel gestrichen und den Boden auf die gleiche Weise verlegt wie im Esszimmer.

Die Breite, Länge und Dicke der Sperrholzplanken war die gleiche, und wir schneiden, geschliffen, betrübt, gebeizt und den Bodenbelag mit drei Schichten Polyurethan versehen fast in der gleichen Weise.

Wir haben einige kleine Änderungen vorgenommen, die uns ein wenig Zeit gespart haben und unserem DIY-Sperrholzdielenboden möglicherweise etwas mehr Charakter verliehen haben.

Hier sind die Dinge, die wir dieses Jahr etwas anders gemacht haben.

Wir haben nicht Sand zwischen Polyurethan Coats

Als wir dann das Esszimmer Etage, Wir haben die Unebenheiten mit Schleifpapier der Körnung 120 leicht aus der Polyurethanschicht herausgeschliffen.

Mit den Wohnzimmerböden, Wir gingen davon aus, dass sich die Unebenheiten auf den Sperrholzbrettern ein wenig ausgleichen würden, nachdem mehrere Schichten Poly aufgetragen wurden.

Außerdem, die Erhebungen ein bisschen mehr Struktur machen die Böden weniger rutschig würde hinzufügen. Nicht, dass die Böden im Esszimmer rutschig wären – Es war nur eine Möglichkeit, es in meinem Kopf zu rechtfertigen. 😉

Die einzige Sorge, die ich hatte, war, wie es auf dem Boden barfuß mit mehr Textur fühlen würde,.

Es stellte sich heraus, trotz deutlich die zusätzliche Textur Gefühl, wenn Sie Ihre Hand auf dem Brett laufen, es war kaum spürbar, wenn Sie barfuß auf sich zu Fuß.

Die Einkaufsliste

Werkzeuge Liste
Hier ist eine Liste der Werkzeuge, die wir für dieses Projekt verwendet, es ist im Grunde die gleiche Liste von Werkzeugen aus dem Bodenbelag Projekt Esszimmern.

Affiliate-Links unten auf ähnliche Elemente sein kann, wenn genaue Einzelteile nicht online gefunden werden können.

Schnurlos-Finish-Nagler

Extra-Batterie für Fertig-Nagler

Bandschleifer

Palm Sander

Gehrungssäge

Kreissäge

Cross Cut Sägeblatt

Oszillierende Multi-Tool

Gehörschutz Ear Muffs

Tischsäge


Supplies Liste

Dies sind die Vorräte an diesem Projekt verwendet.

Affiliate-Links unten auf ähnliche Elemente sein kann, wenn genaue Einzelteile nicht online gefunden werden können.

Varathane Kirschbaum Gel Stain – Wir haben etwa 7 Liter verbraucht

Ölmodifiziertes Polyurethan auf Wasserbasis – Wir haben 2 Gallonen verbraucht

3″ Bürste mit Naturborsten – 6 Pinsel zum Auftragen der Beize

4. April″ Synthetische Polyesterbürste – 4 Pinsel zum Auftragen der Poly

Abdeckpapier – Wir haben das Abdeckpapier verwendet, um das Deck beim Auftragen der Beize und des Polystyrols zu schützen

6 Gauge 1 1/2″ Nägel fertigstellen

Es wurde ein neuer Charakter-Builder verwendet

Für die Sperrholzbretter im Wohnzimmer wurde die gleiche Originalbesetzung von Charakterbildnern verwendet. Ein Hammer, Zange, und ein Propanbrenner… und dieses Mal haben wir dem Arsenal ein Allzweckmesser hinzugefügt.

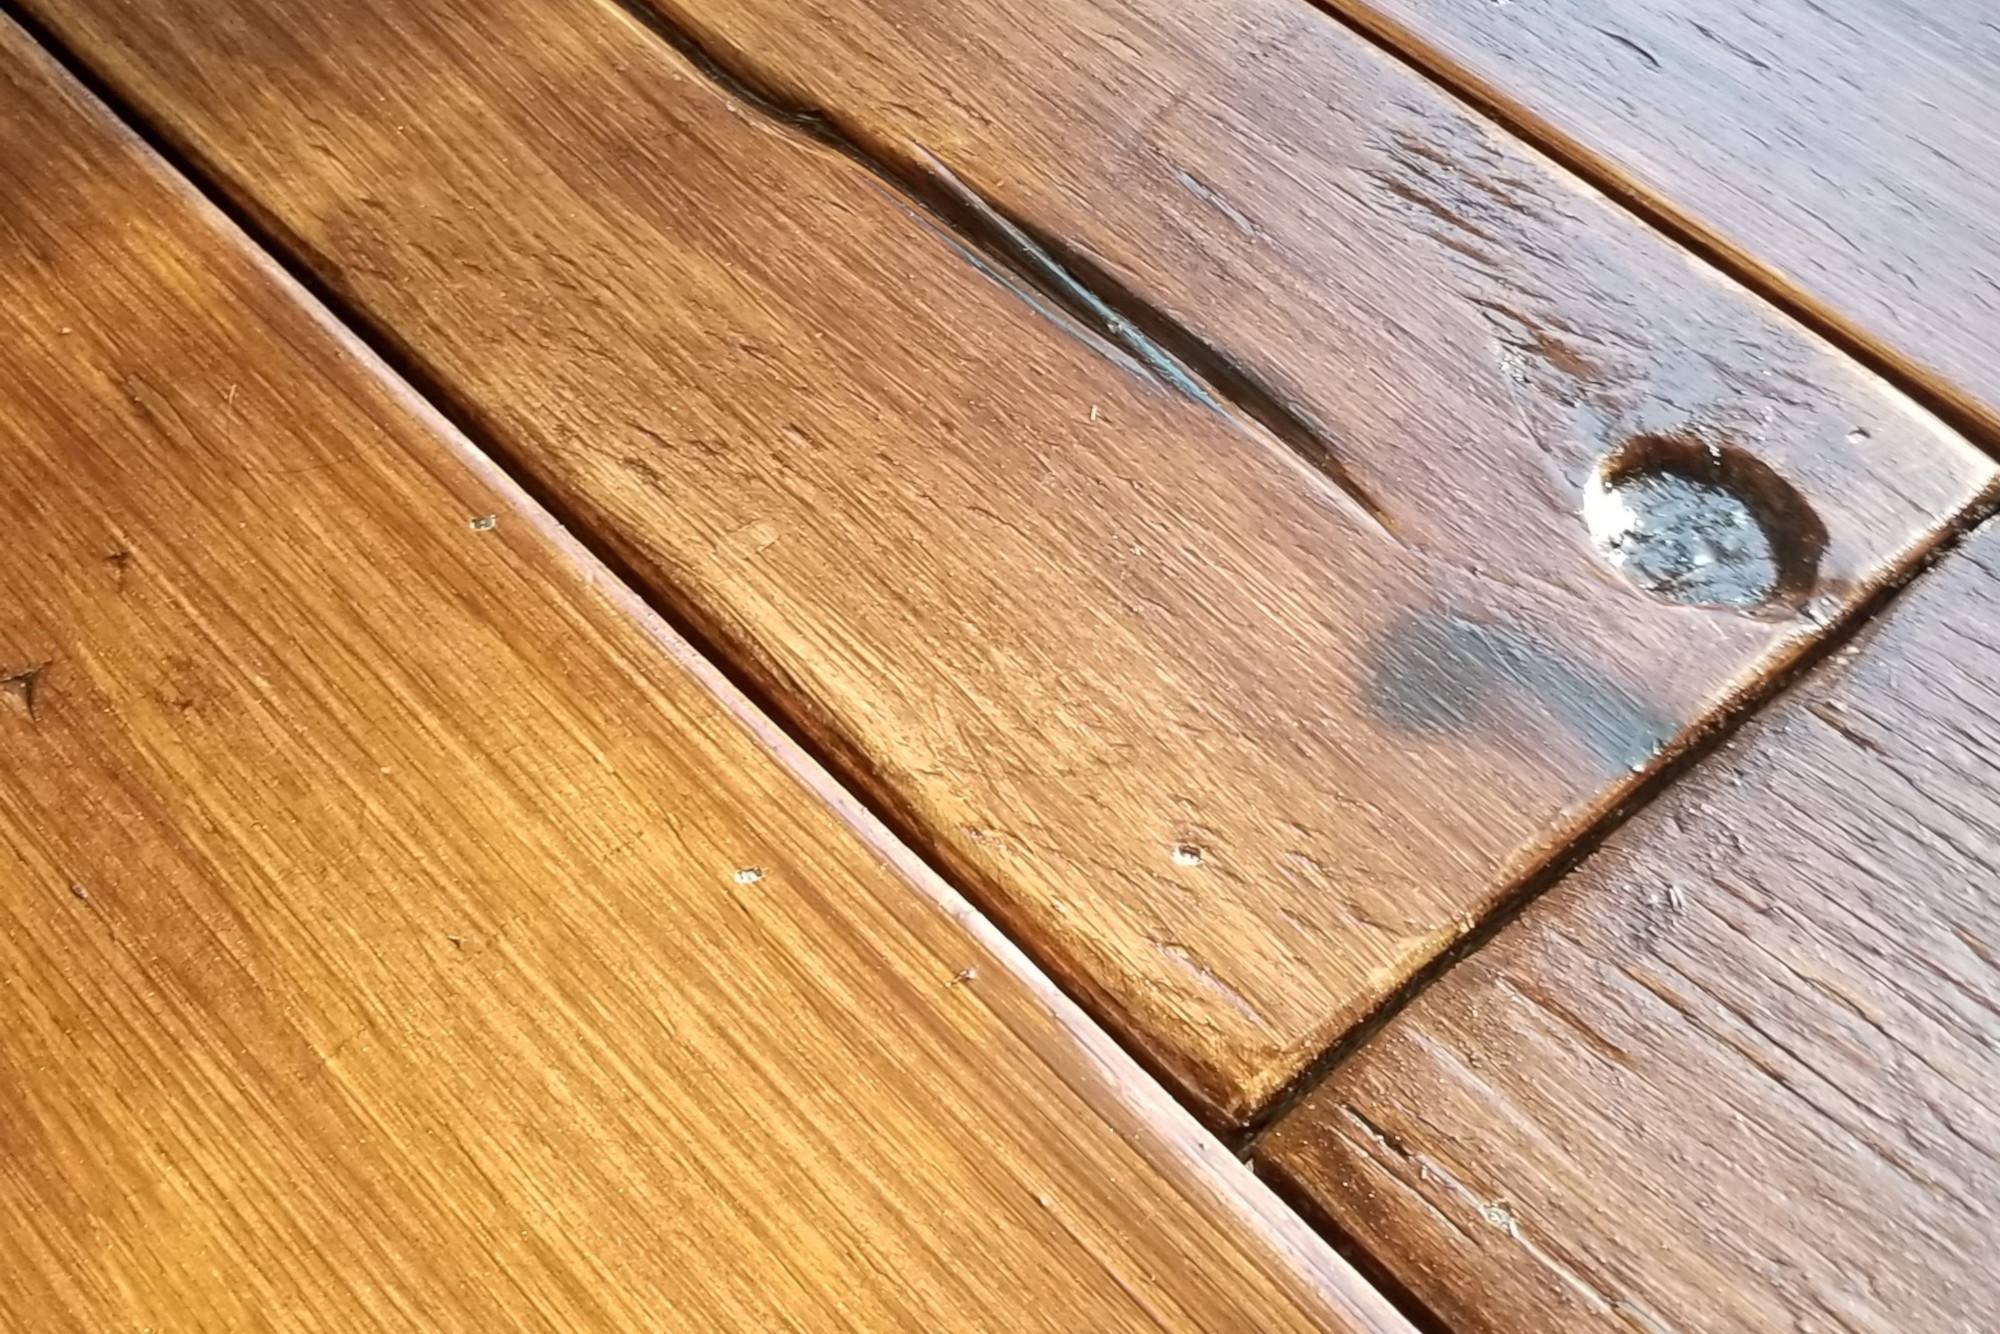
Für das Esszimmer, Wir gruben mit den Schleifmaschinen in die Risse im Holz, um die Risse zu öffnen und die Kanten weicher zu machen.

Diesmal verwendeten wir ein Universalmesser, um die Risse im Holz zu verlängern und zu verbreitern.

Anschließend haben wir die Ränder der Risse mit dem Schleifer aufgeweicht.

Das Ergebnis war sogar noch besser als wir es uns vorgestellt.

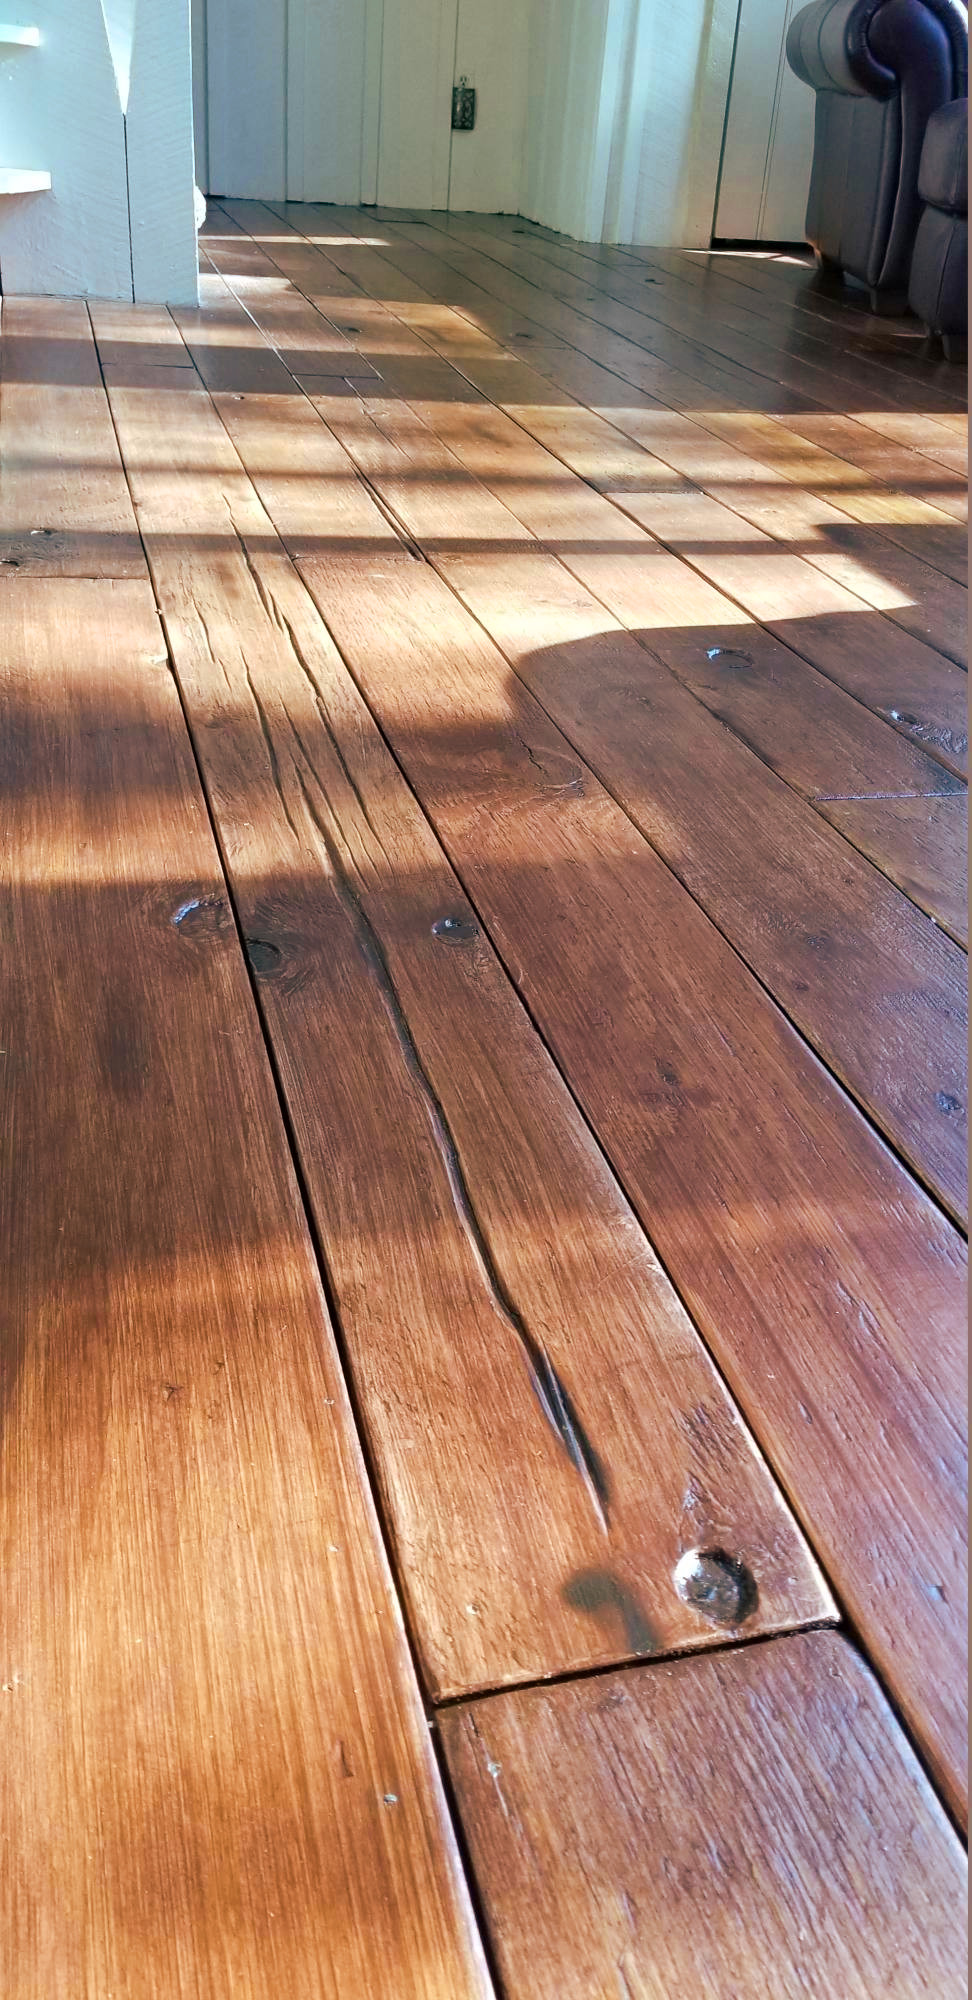
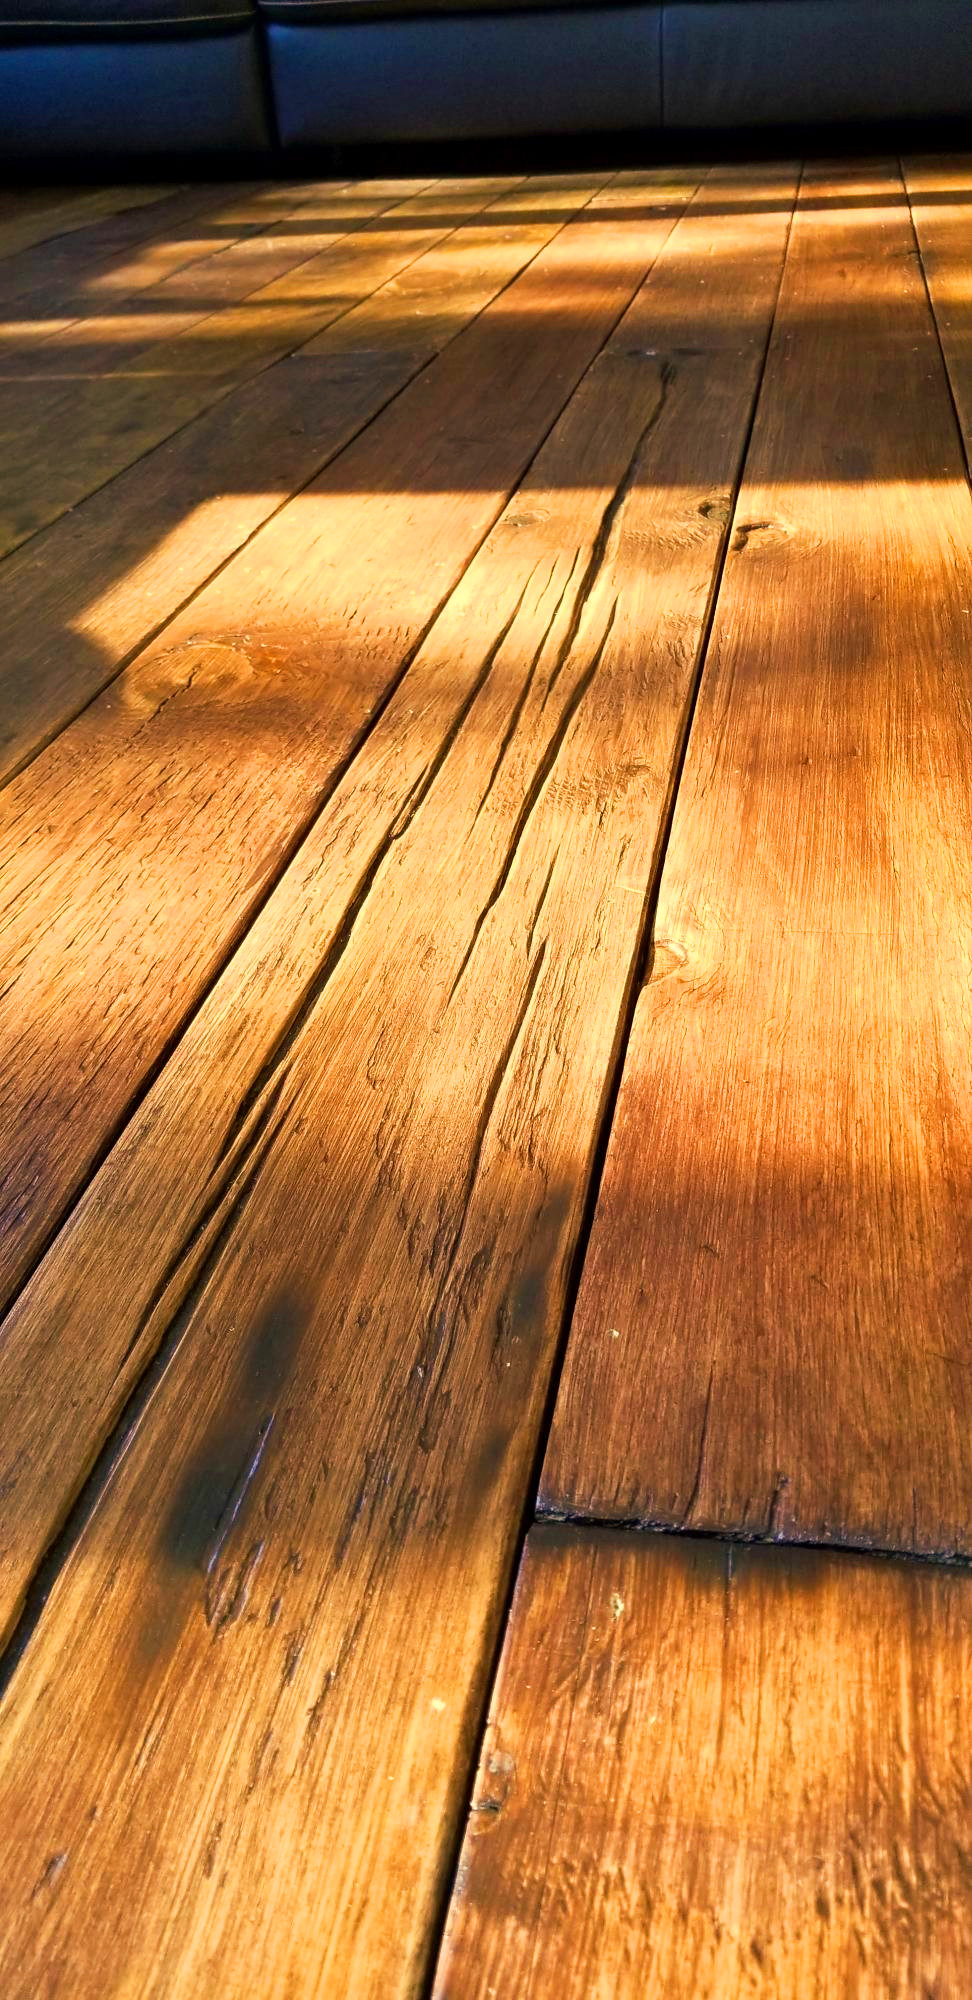
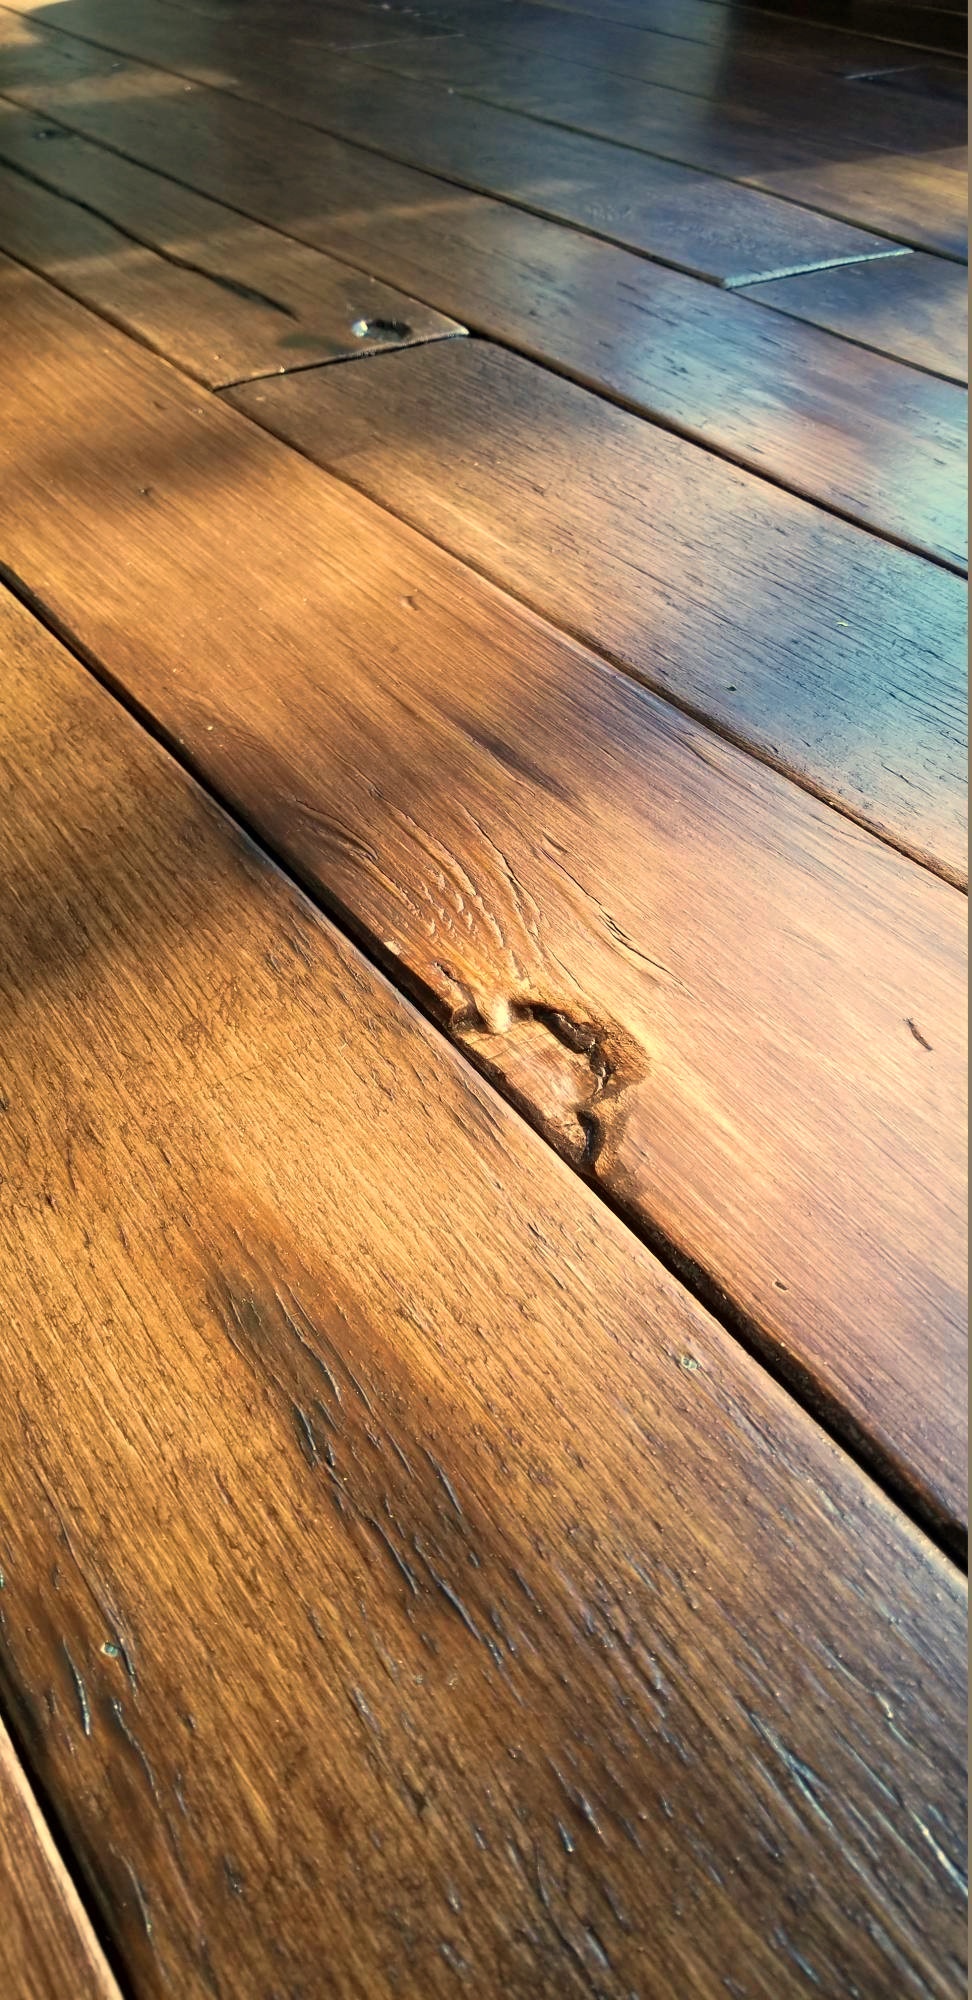
Die tiefen Risse, die wir mit dem Universalmesser gemacht haben, haben uns das Alter beschert, Bauernhaus breite Dielenböden Schauen Sie, was wir wollten.

Sie würden nicht einmal vermuten, dass es Sperrholz war.

DIY Farmhouse Wide Plank Flooring Made From Plywood - The Plywood Floor Finished - Close up of the Distressing Done With A Utility Knife

Shameless Stecker

Wenn Sie ein großes Haus suchen in den Poconos zu mieten, Feels Like Heaven kann die perfekte Passform für Sie!

Feels Like Heaven - A Premium 5 Bedroom Vacation Rental in The Poconos, PA

Wir fügten Shims

Die Böden im Wohnzimmer waren viel unebener als die Böden im Esszimmer.

Bis zu dem Punkt, wo wir gebraucht Beilagen in den niedrigen Stellen hinzuzufügen, um zu versuchen und Ebene der Dinge aus einem kleinen.

Ich ging um den Boden mit einer geraden Kante, und wo immer war es ein Bad, Ich habe Unterlegscheiben hinzugefügt.

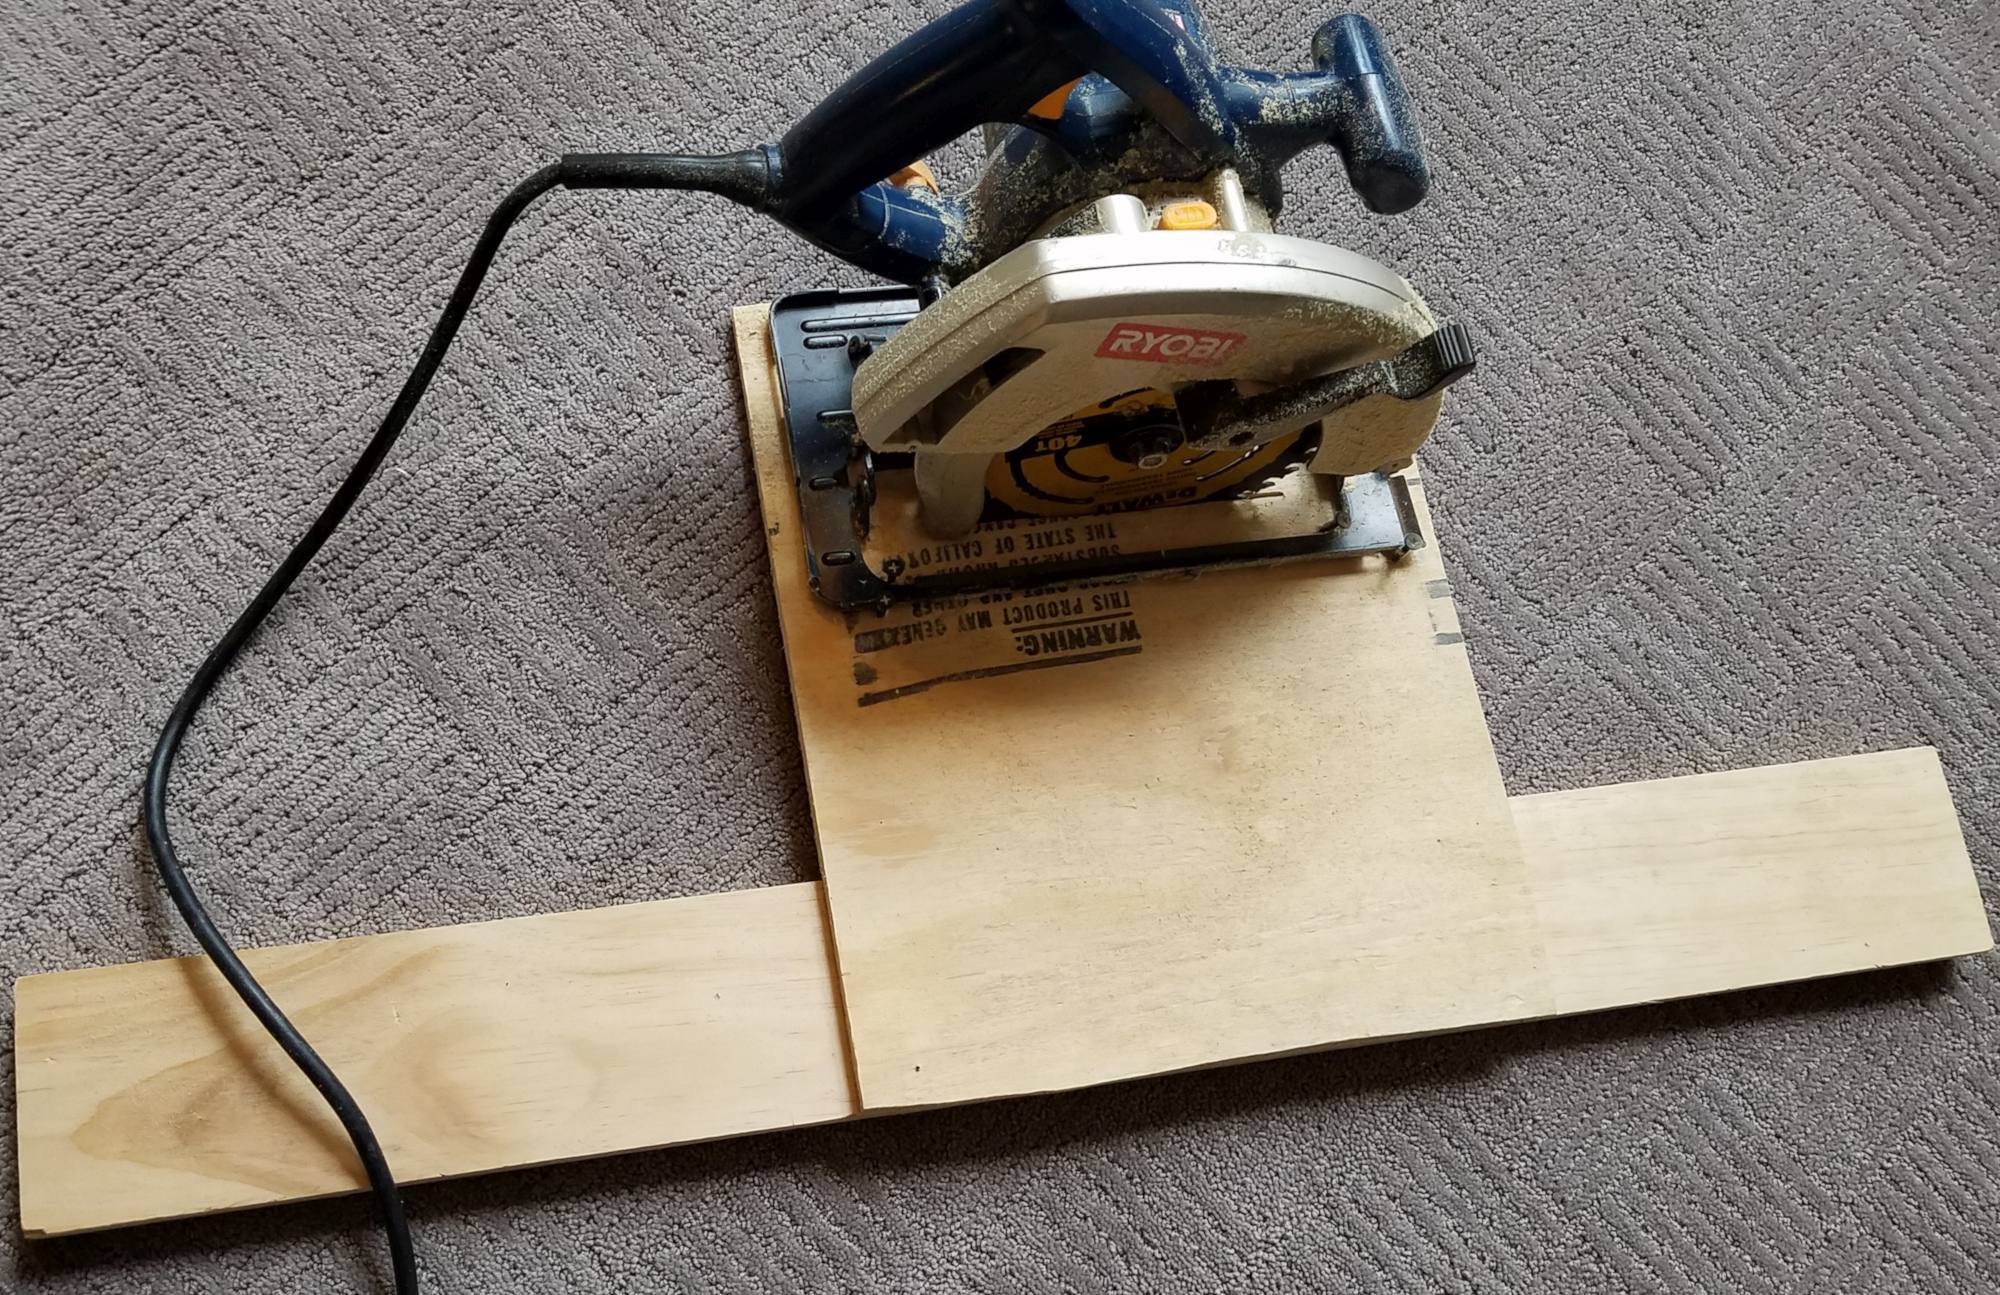
Da ich wusste, ich brauchte eine gute Menge an Unterlegscheiben, Ich habe sie aus einem Blatt 1/4″ Sperrholz. Ich habe das Blatt in 1 gerissen″ Streifen mit der Tischkreissäge.

Einmal wurde der Boden gespachtelt, Wir haben den Boden dunkelbraun gestrichen, genau wie wir es im Esszimmer getan haben.

DIY Farmhouse Wide Plank Flooring Made From Plywood - The Plywood Floor Finished - Wood Strips Used To Fill The Low Spots
DIY Farmhouse Wide Plank Flooring Made From Plywood - The Plywood Floor Finished - Starting The Plywood Flooring Install

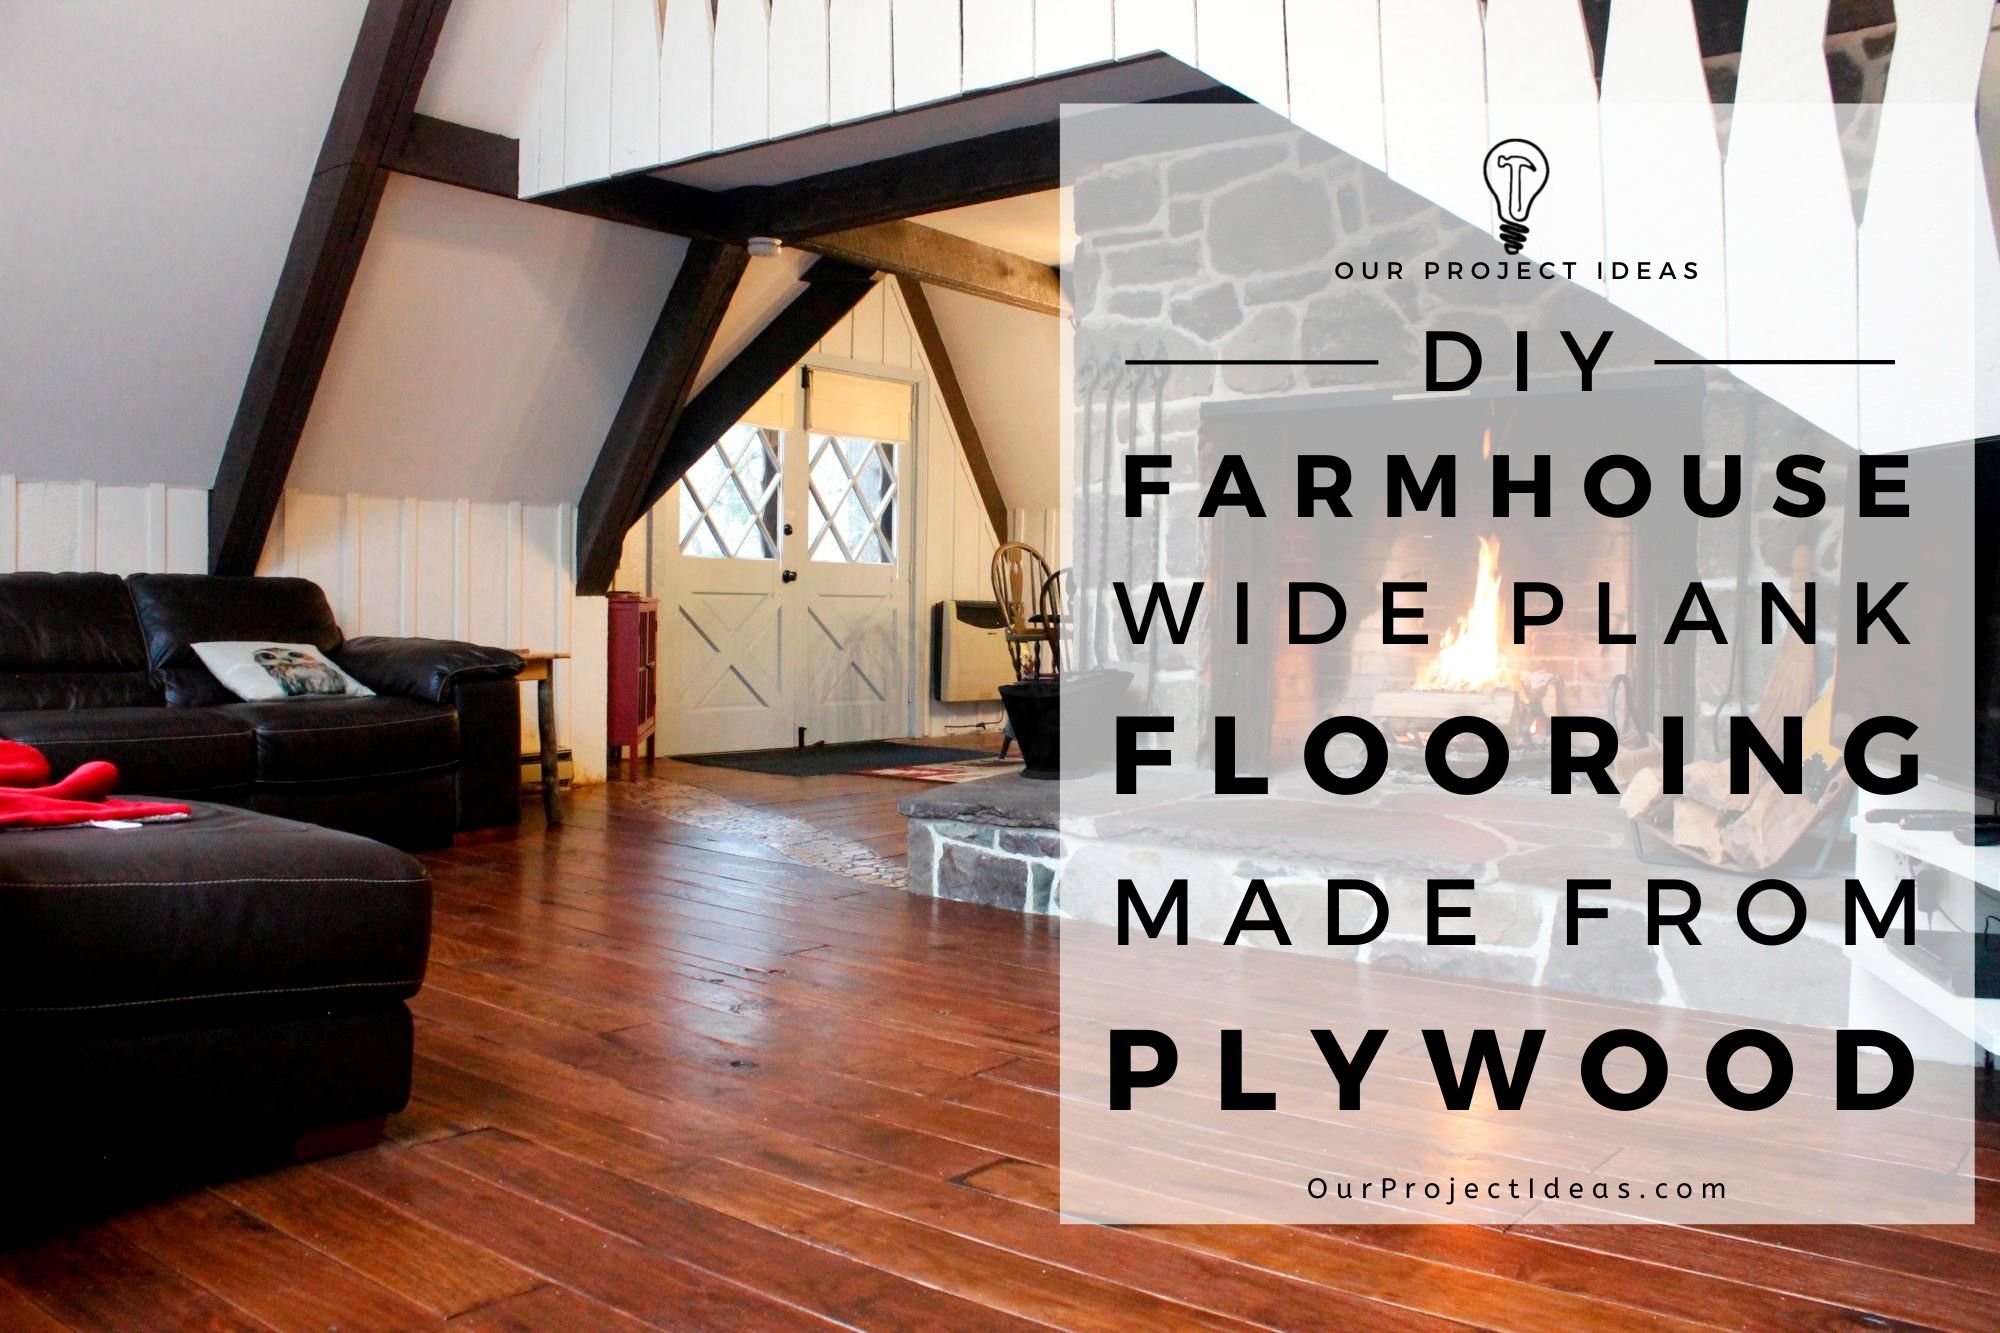
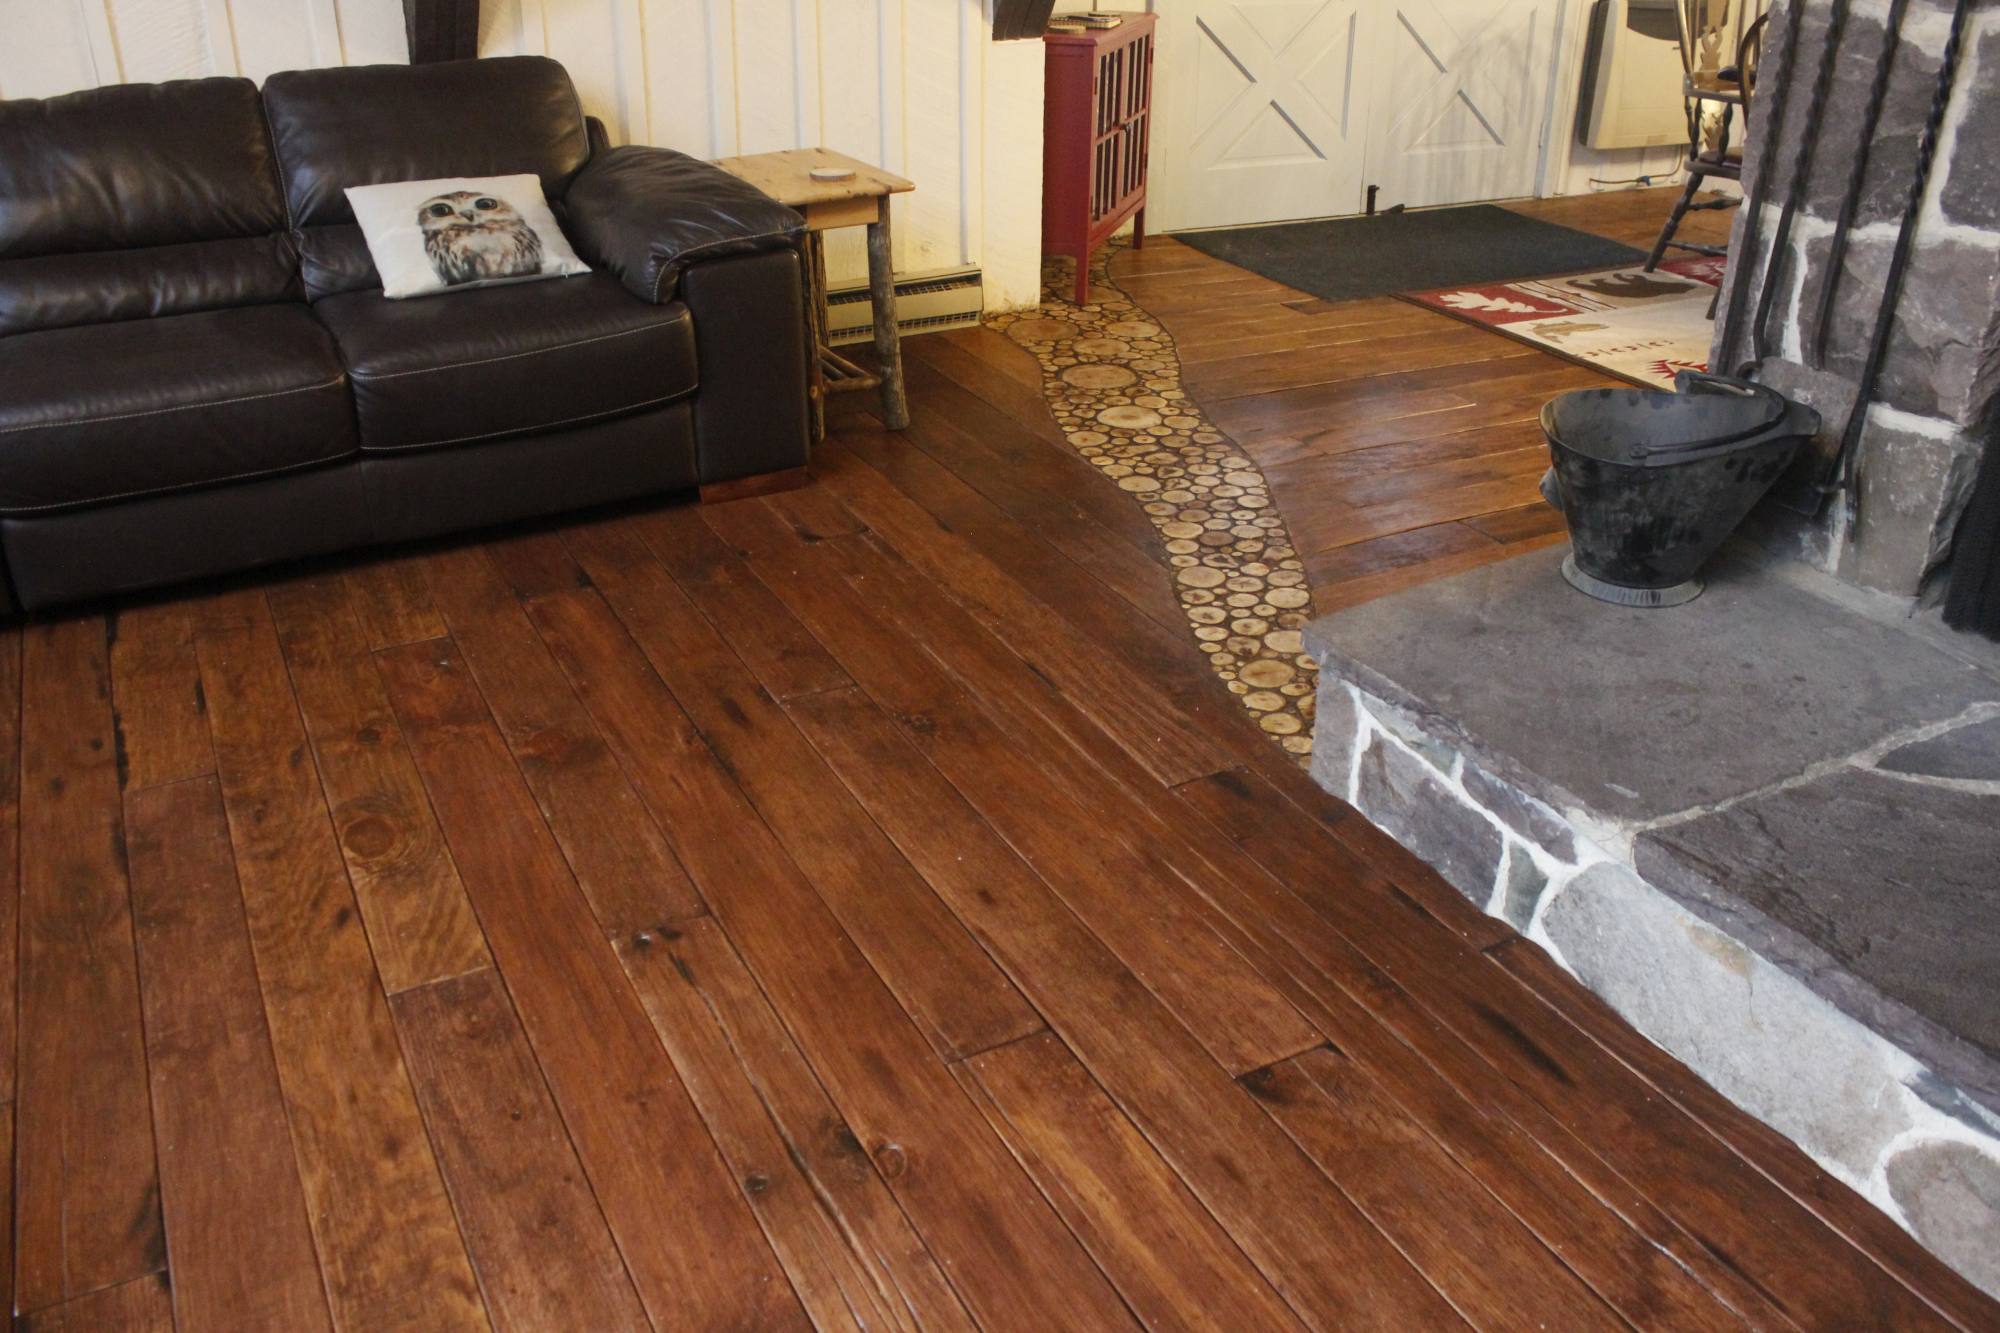
Das Wohnzimmer Sperrholz Boden ist fertig!

Wie ich sagte, Das Wohnzimmer Boden nahm viel zu tun, mehr als das Esszimmer Boden tat. Es dauerte ein wenig mehr als zwei Wochen bis zum Ende, hatte ich nicht mit dem Holz Scheibe Akzent Boden verkorkste, Wir wären in etwa 2 Wochen fertig gewesen.

Besuche die Hier finden Sie ein Holzscheiben-Akzentbodenprojekt

Wir lieben den breiten Landhausdielenboden sowohl im Esszimmer als auch im Wohnzimmer. Dieser Stil passte perfekt zu diesem Haus, Wir hätten uns keine bessere Lösung vorstellen können.

Zwischen den beiden Etagen, Ich würde sagen, dass ich mich an die Stufen auf dem Wohnzimmerboden halten würde.

Das Schleifen zwischen den Polyschichten schien unnötig gewesen zu sein, Und die Verwendung des Universalmessers, um die Risse im Holz auszudehnen, verlieh dem Wohnzimmerboden so viel mehr Charakter – Ich LIEBE ES!

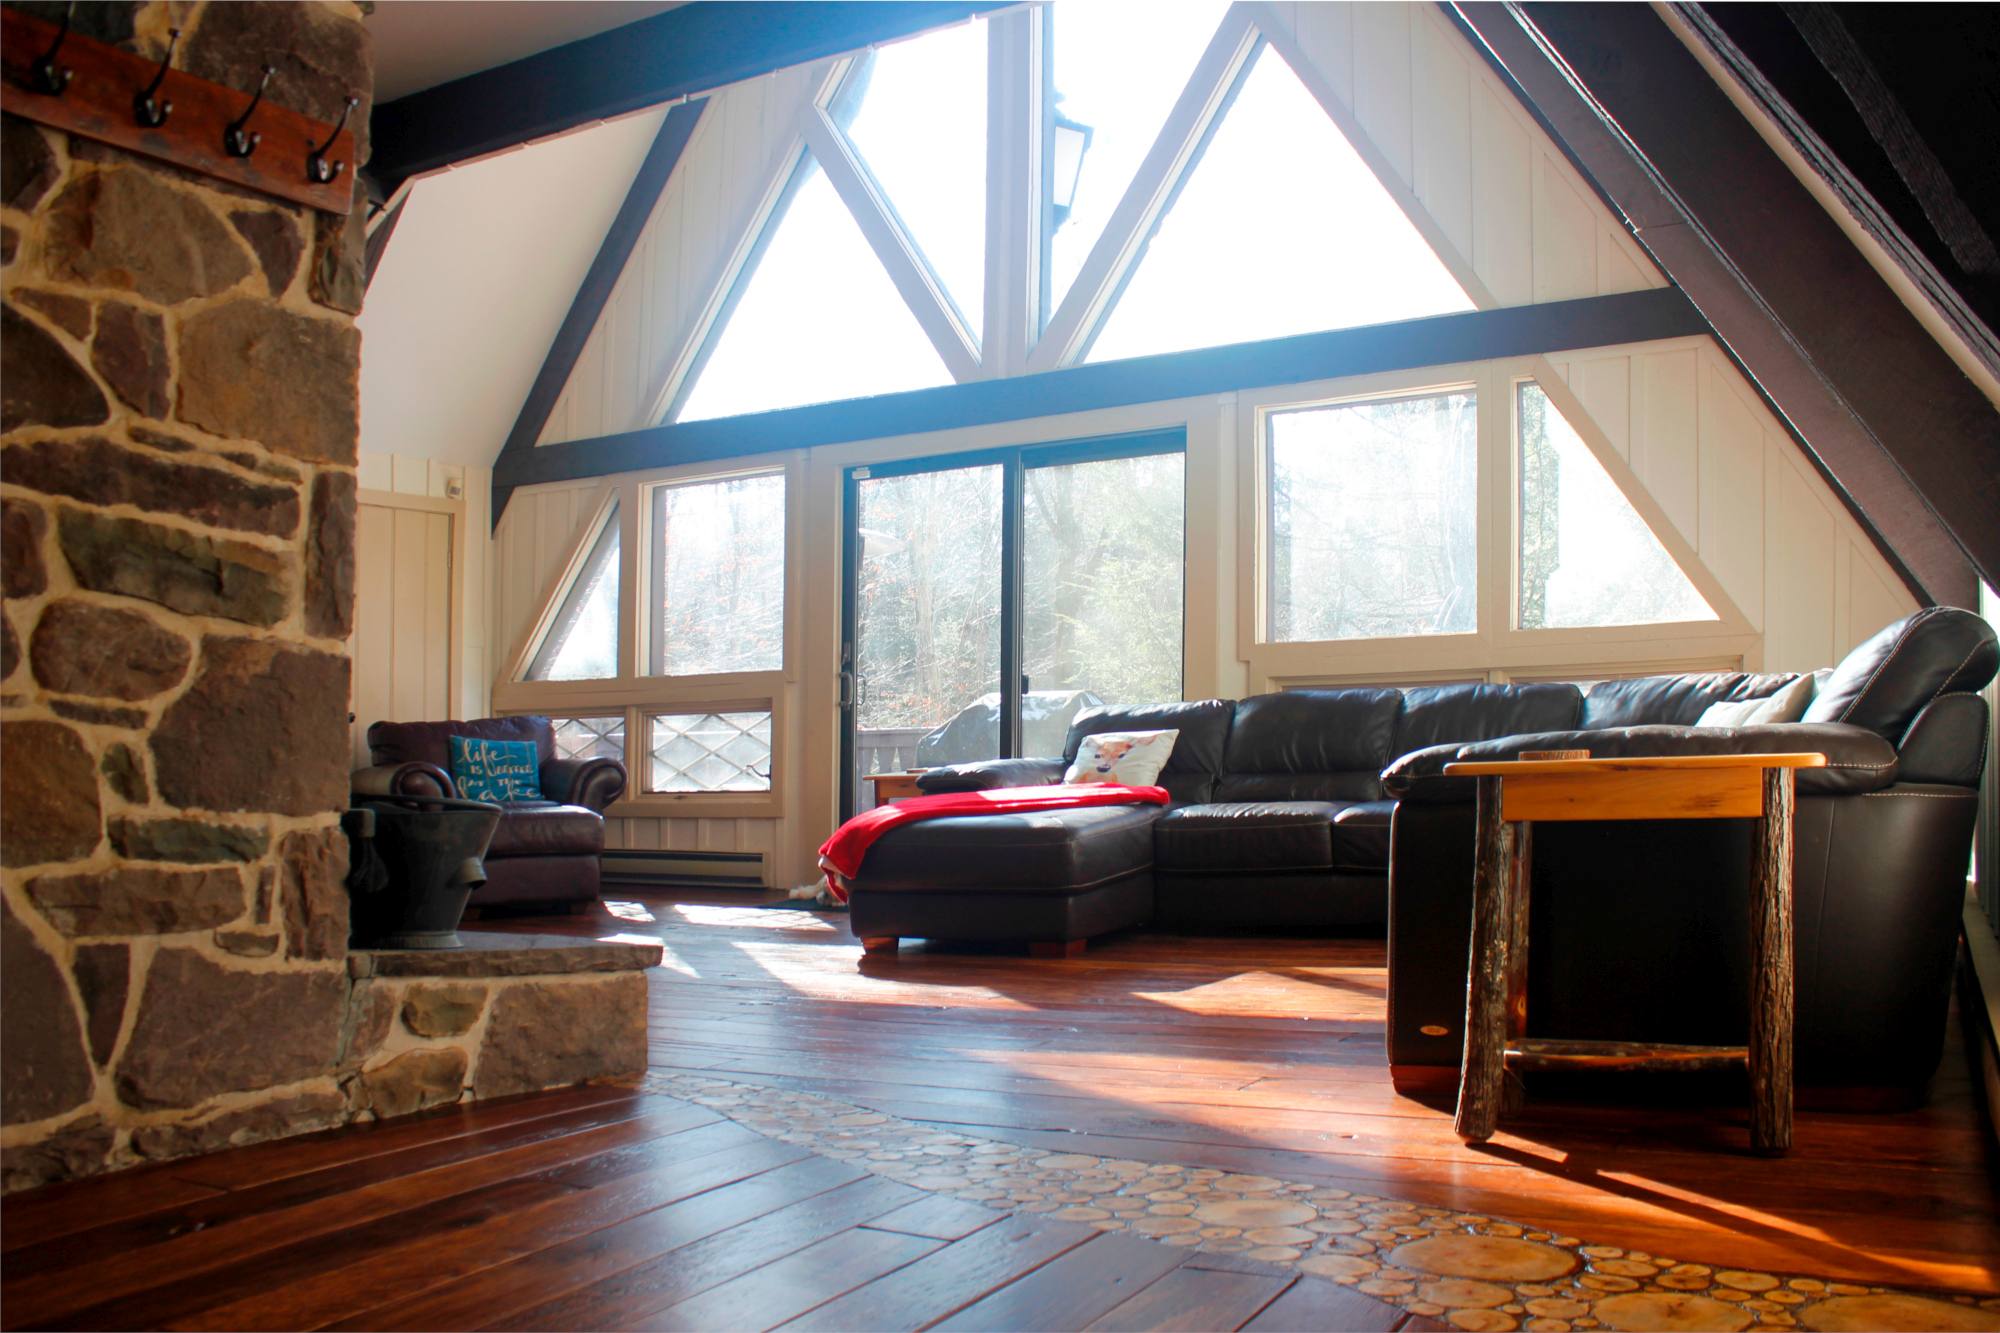
Hier sind noch ein paar Bilder der gebeizten Sperrholzböden auf dem Wohnzimmerboden.

Lass mich wissen was du denkst, Gibt es etwas, das Sie anders gemacht hätten?? Denken Sie darüber nach, selbst Sperrholzböden in Ihrem Zuhause zu verlegen??

Sagen Sie Ihre Meinung in den Kommentaren unten!


DIY Farmhouse Wide Plank Flooring Made From Plywood - The Plywood Floor Finished - Close up of the Distressing
DIY Farmhouse Wide Plank Flooring Made From Plywood - Close up of The Plywood Floor In The Living Room By The Wood Accent
DIY Farmhouse Wide Plank Flooring Made From Plywood - The Plywood Floor Finished - Finished Plywood Floor Seen From The Stairs
DIY Farmhouse Wide Plank Flooring Made From Plywood - The Plywood Floor In The Living Room By The Wood Accent
DIY Farmhouse Wide Plank Flooring Made From Plywood - The Plywood Floor Finished
DIY Wide Plank Plywood Flooring
DIY Farmhouse Wide Plank Flooring Made From Plywood - The Plywood Floor Finished - Another Close up of the Distressing
DIY Farmhouse Wide Plank Flooring Made From Plywood - The Plywood Floor Finished - Seen From The Corner Of The Fireplace
DIY Farmhouse Wide Plank Flooring Made From Plywood - The Plywood Floor Finished By The Fireplace
DIY Plywood Plank Flooring

Viel Spaß mit diesem Beitrag? Pin es und teile es mit anderen!

DIY Farmhouse Wide Plank Flooring Made From Plywood
DIY-Bauernhaus-Breitdielenboden aus Sperrholzkamin - Porträt
DIY-Bauernhof-Breitdielenboden aus Sperrholz in Nahaufnahme - Porträt
DIY-Bauernhaus-Breitdielen-Breitdielen-Sperrholzboden

Installieren eines End Grain Flooring Inlay

Installieren eines End Grain Flooring Inlay

Installing An End Grain Flooring Inlay


Creating an end grain flooring inlay was something I was looking forward to for months. We installed plywood wide plank flooring in the dining room and kitchen earlier this year and the living room was next on the list. Here’s a post with details on what we did with the living room floor.

The flooring in the dining room and living room were going to be laid in different directions and a regular threshold separating the two spaces was going to be – well pretty boring.

While initially doing my Pinterest research on flooring, I came across pins with different floor designs created using wood slices.

That gave me the idea of doing an end grain flooring as an inlay. It was the perfect solution!

I couldn’t wait to try this project.


Disclosure: Some of the links below are affiliate links. If you decide to purchase any of these products, we earn a small commission at no additional cost to you. We recommend these products only because we have experience with them and use them for our own projects. As Amazon Associates, we earn from qualifying purchases.

The Shopping List

Tools List

Here’s a list of the tools we used on this project.

Affiliate links below may be to similar items when exact items couldn’t be found online.

Belt Sander

Palm Sander

Miter Saw

Oscillating Multi-Tool

RotoZip

Hearing Protection Ear Muffs


Supplies List

These are the supplies used on this project.

Affiliate links below may be to similar items when exact items couldn’t be found online.

Water Based Oil-Modified Poluyrathane – we used 1 gallon

4″ Polyester Synthetic Brush – 4 brushes to apply the poly

Liquid Nails

What Is End Grain Flooring?

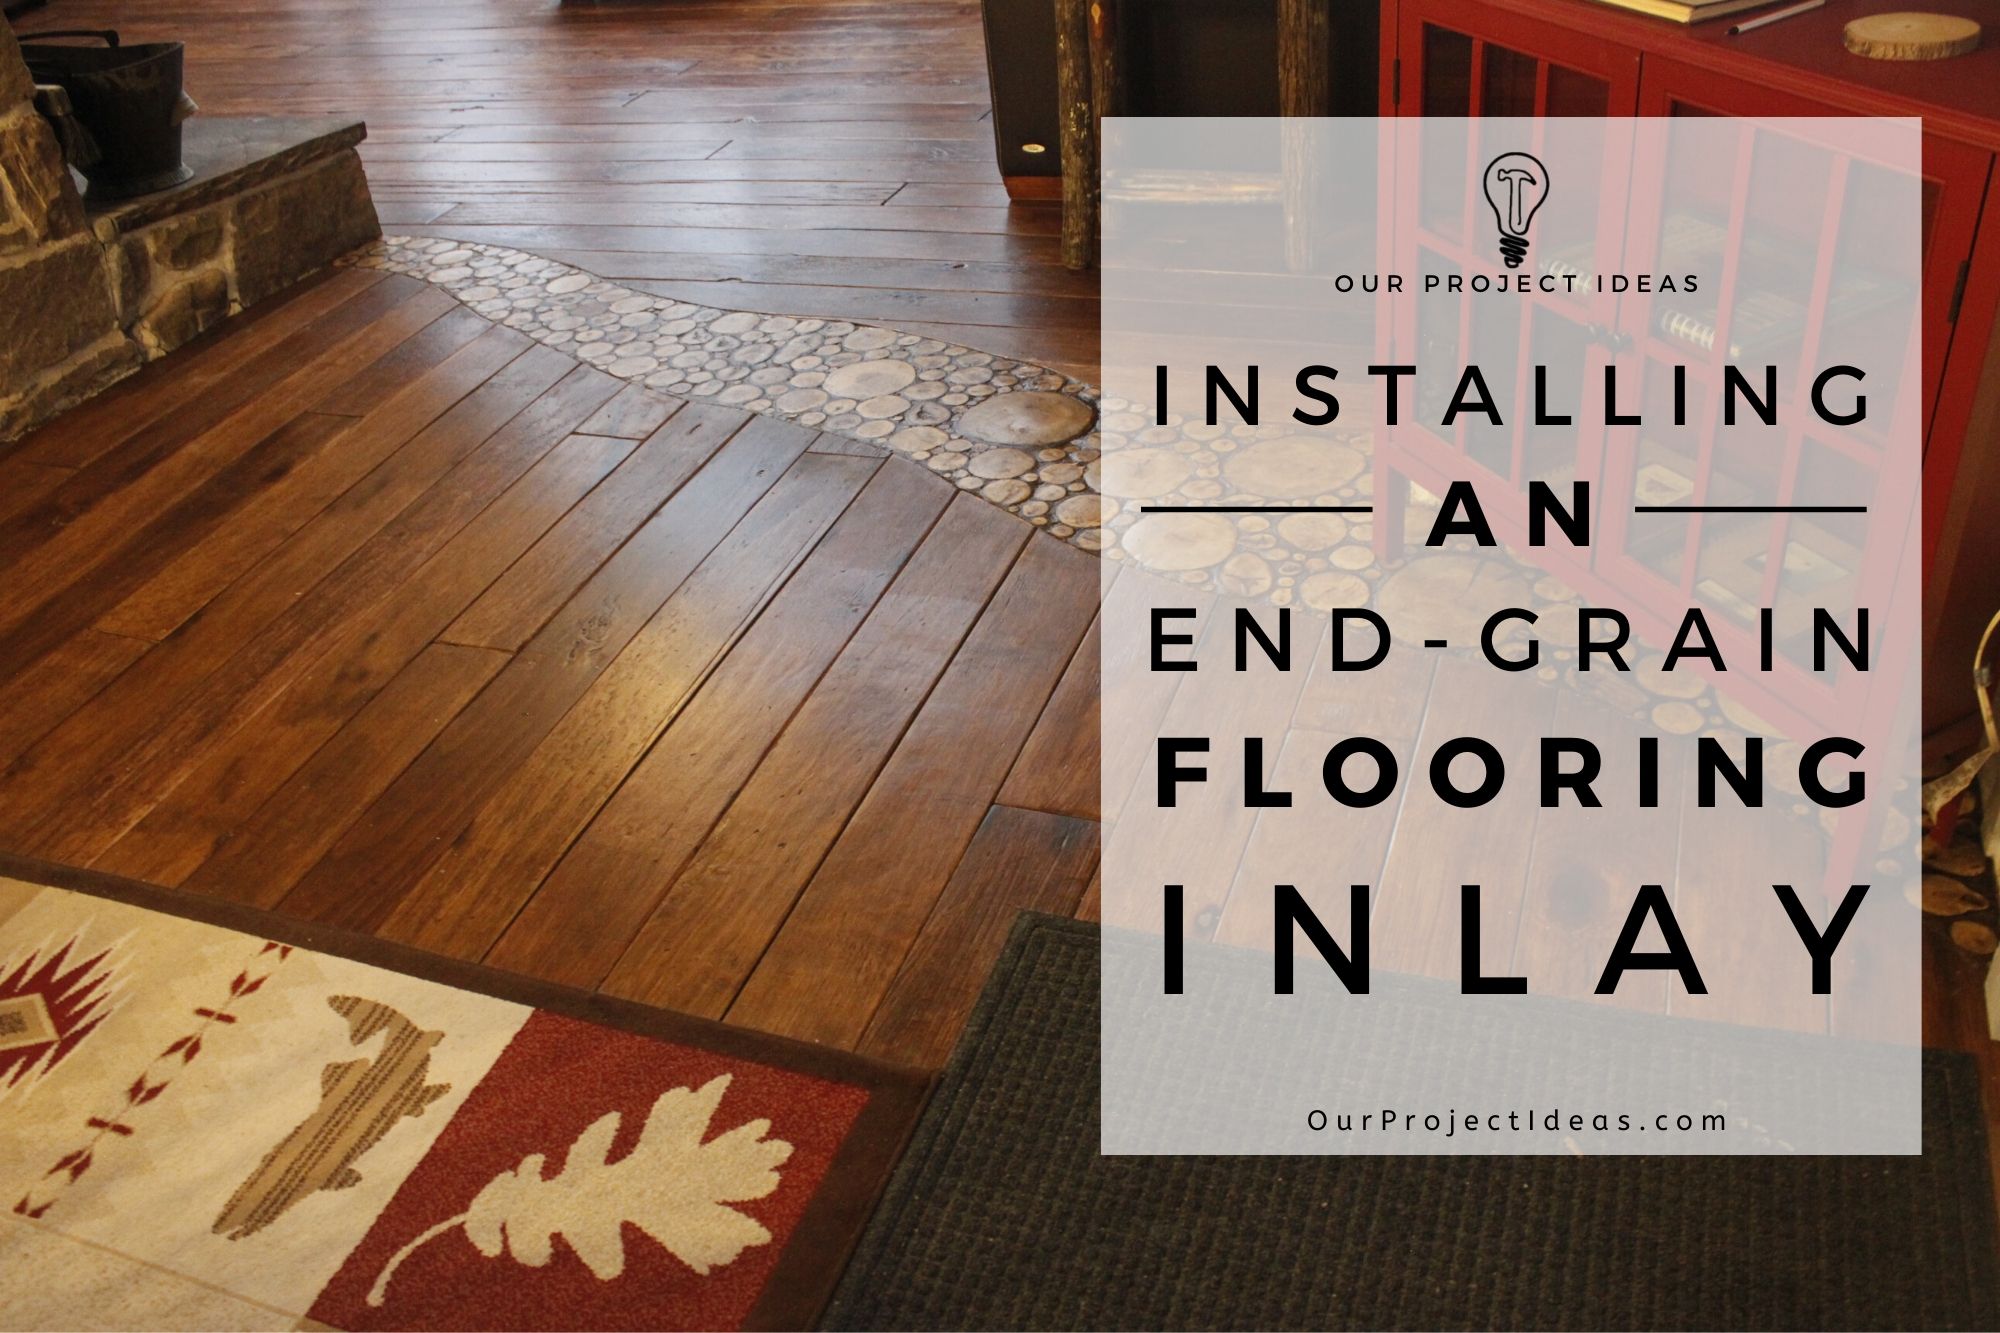
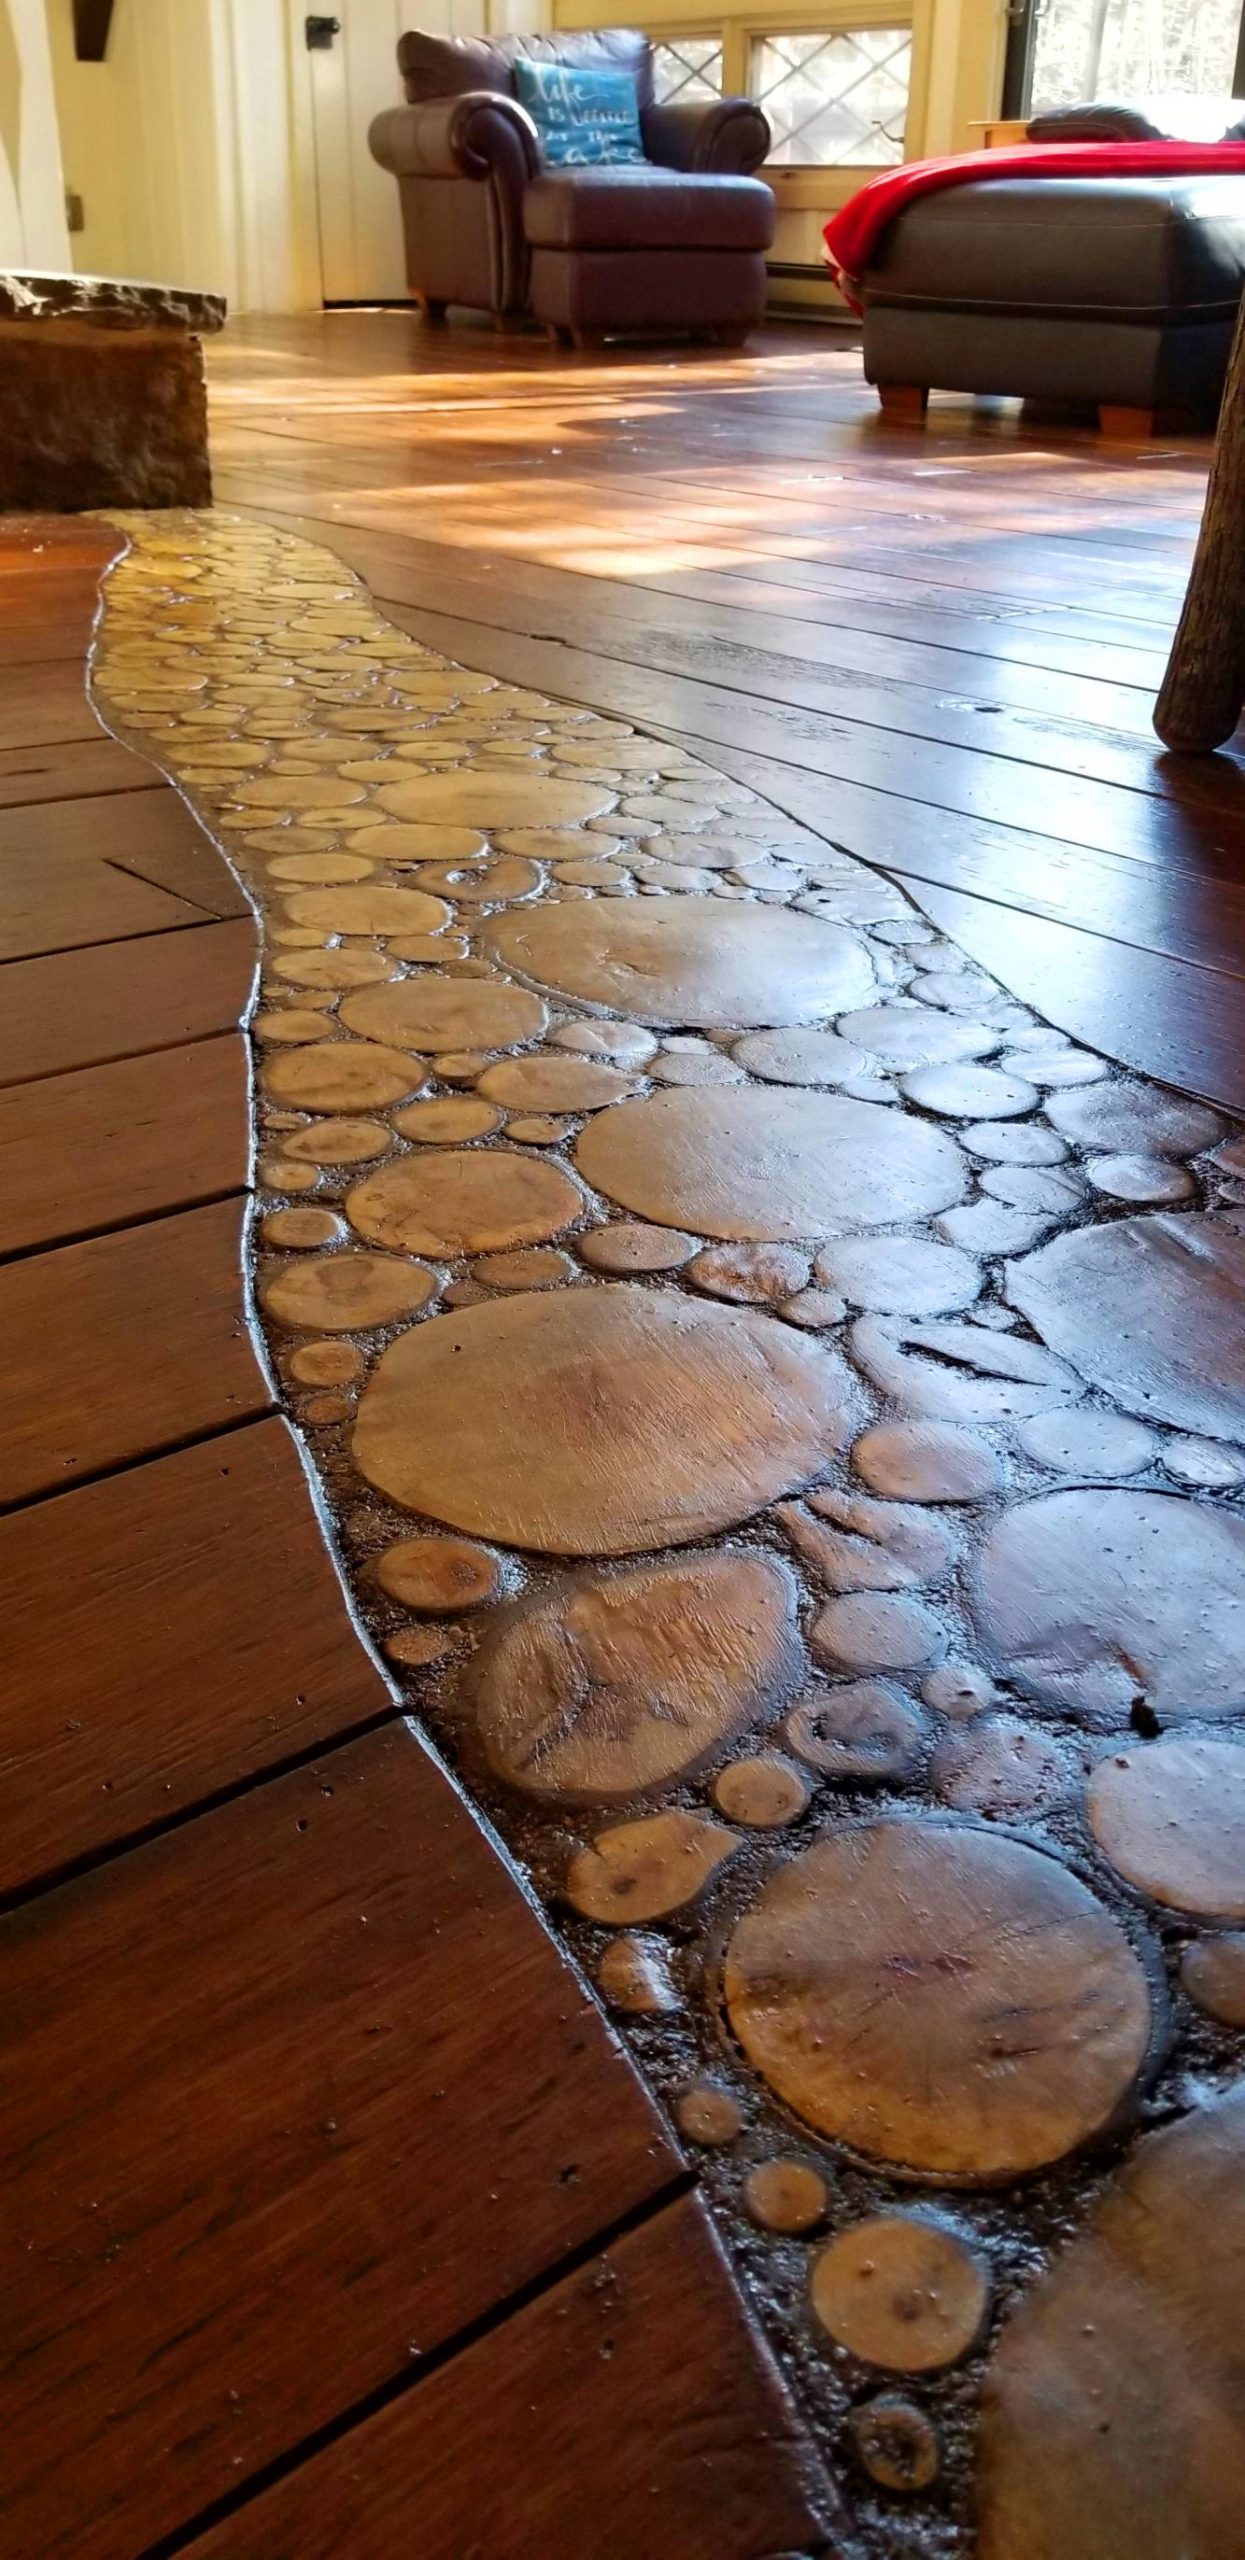
End grain flooring is basically branches and logs cut into slices, then placed in a pattern, in our case, it’s the shape of a river. The slices are glued into place and grout is applied to fill in the spaces between the slices. Then a protective finish is applied and you have yourself an end grain floor!

I call it a wood river, but I’ve seen it called a bunch of different names. Wood slice flooring, end grain flooring, log end flooring, cordwood floor and even cross-cut tree slice flooring to name a few.

Figuring Out The End Grain Flooring Inlay Layout

The beauty of doing a floor inlay is that there is no limit to the design you make. It can be as simple or ornate as you want.

Since our house is in the Poconos, in a wilderness setting, we figured a river made of wood would go with the house and its surrounding nature.

The end grain flooring inlay would separate the dining room from the living room. Starting in the corner of the dining room and making it’s way to the corner of the living room fireplace.

We wanted the flooring inlay to start off wider on one side and have it gently curving its way across the space.

We had the idea when we did the dining room earlier in the year and that’s also when I started cutting the wood slices for the river and traced out the shape of the wood slice flooring accent.

We were going to do the living room floors and the inlay a few months later, so that gave the wood slices time to dry.

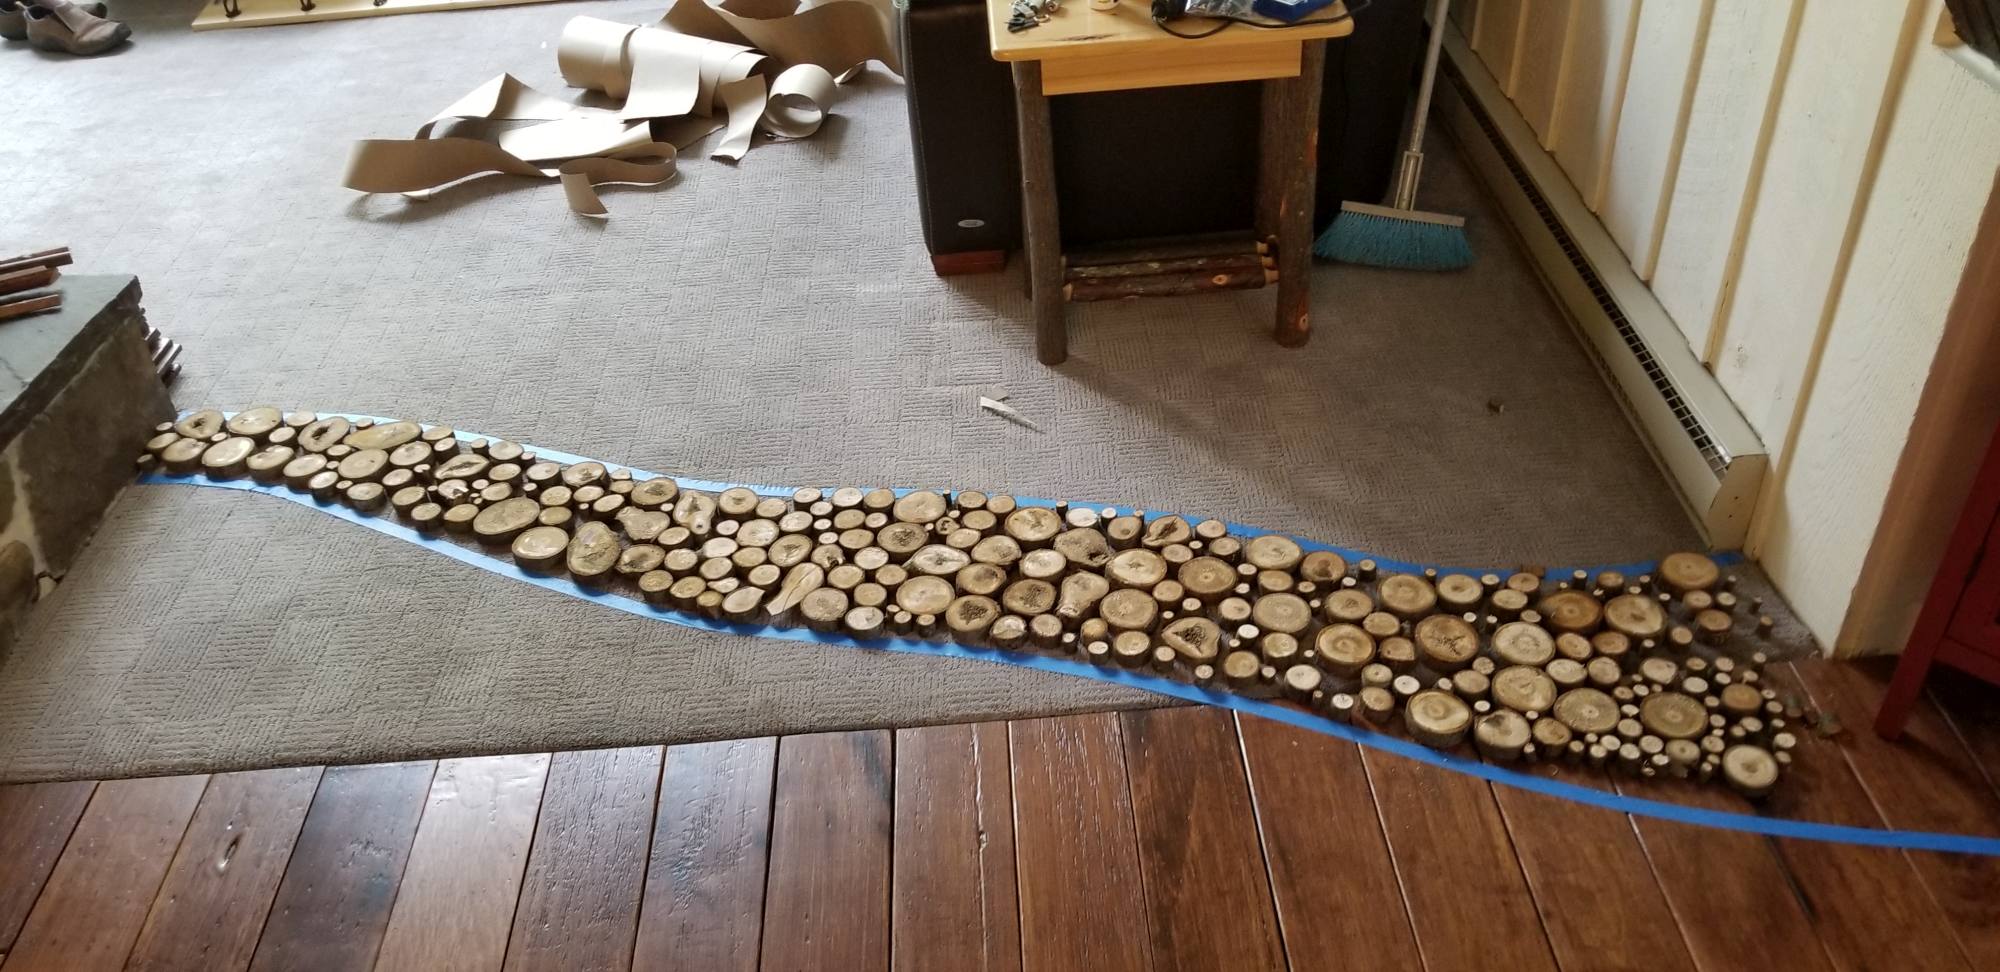
Installing An End Grain Flooring Inlay - The Inlay Traced Out Using Tape and Filled in With Wood Slices - Seen From The Dining Room
Installing An End Grain Flooring Inlay - The Inlay Traced Out Using Tape

Shameless Plug

If you are looking for a great house to rent in the Poconos, Feels Like Heaven may be the perfect fit for you!

Feels Like Heaven - A Premium 5 Bedroom Vacation Rental in The Poconos, PA

Cutting The Wood Slices

Now that the general shape of the end grain flooring inlay was in place, the next step was to fill it in with wood slices. I got a bunch of branches that had fallen on our property and started cutting them to the width I thought I needed… more on that later.

I cut enough pieces of wood to fill in the inlay, with a bunch of various branch thicknesses. I cut them in May to have them dry up a few months before installing them in the fall.

The flooring was 1/2″ thick and the floors are uneven so I cut the wood slices a bit thicker… at least that’s what I thought….that was a big mistake. It’s important to cut them to the right size right off the bat.

I used a miter saw to cut the slices, it went pretty quick considering how many slices were needed.

Important Tip: When cutting the wood pieces try to cut them as close to the final thickness as possible.

I didn’t do that with this project and it took me days to get the slices down to the right size.

I cut the slices 3/4″ and most of the wood slices needed to be about 1/2″… a big mistake.

That extra 1/4″ was a struggle to remove.

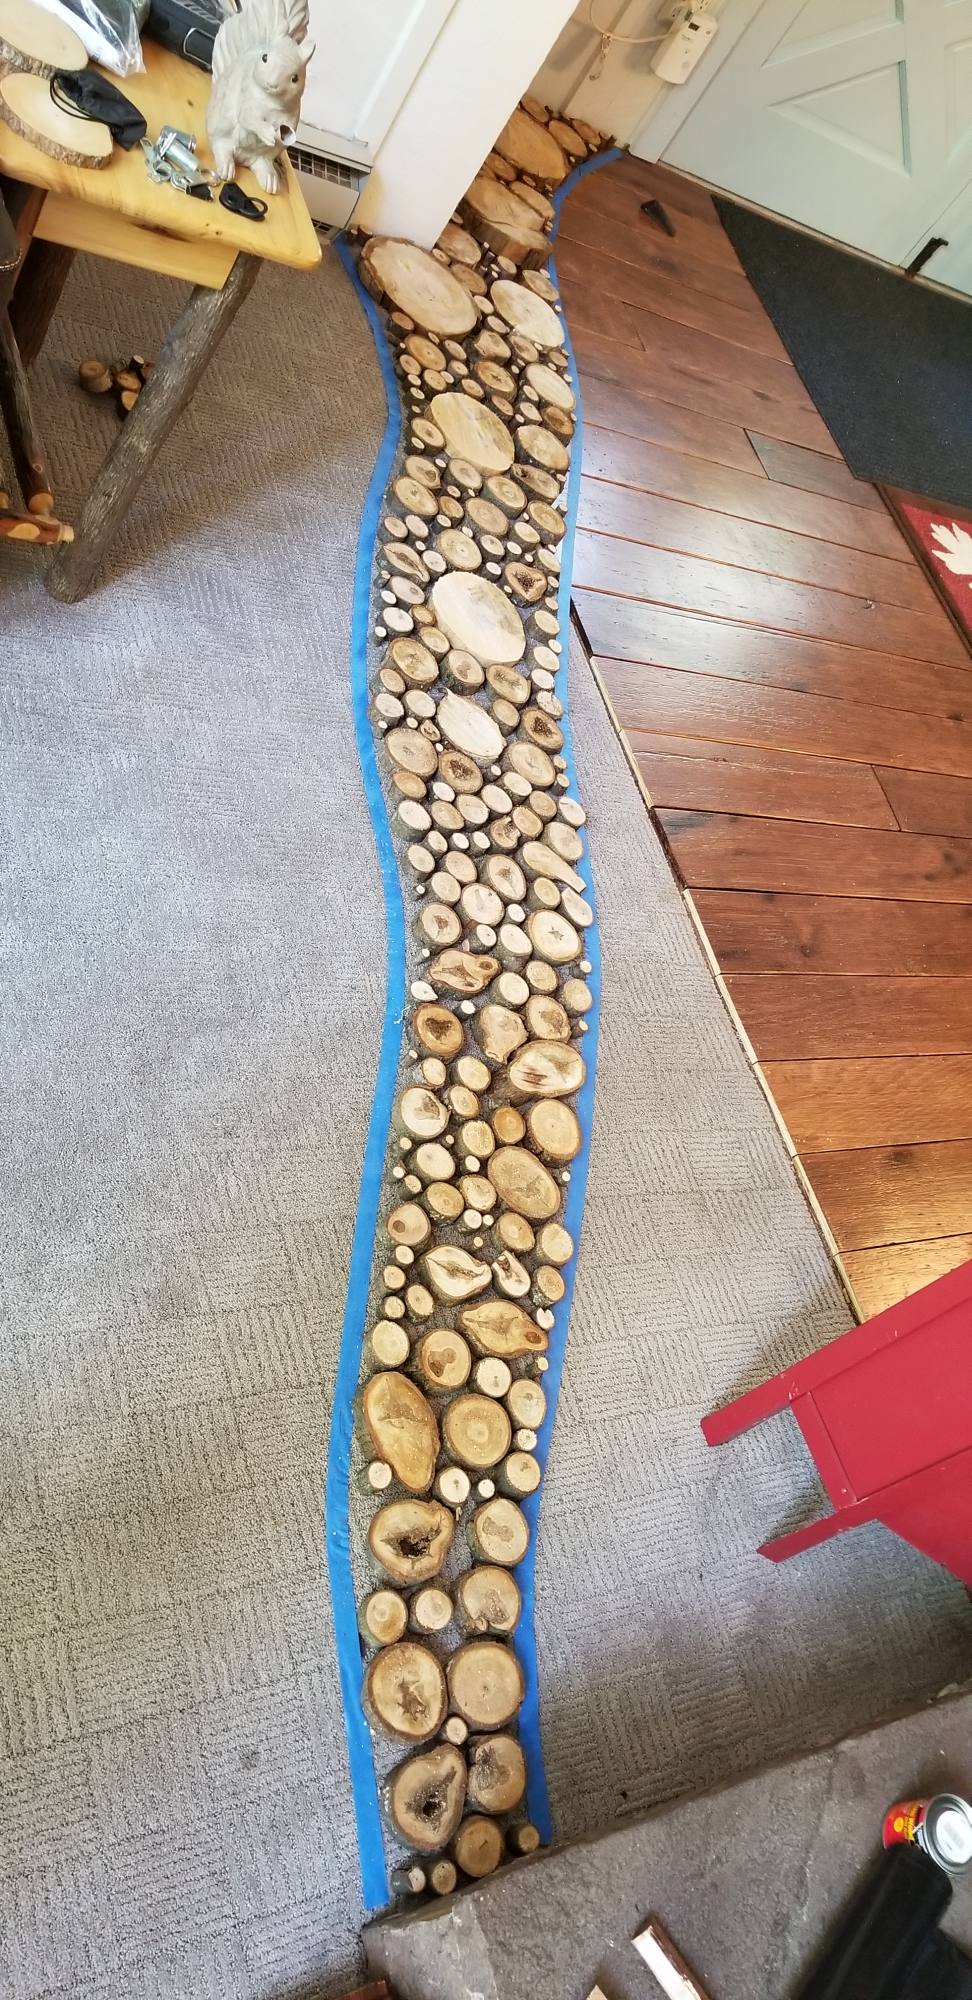
Installing An End Grain Flooring Inlay - The Inlay Traced Out Using Tape - Seen From The Living Room

Drying The Wood Slices

I had cut most of the wood slices months ago so those were dry when I was ready to install them.

But I guess I was able to get the wood slices tighter together when I was actually doing the project… so I needed more wood slices.

I found this article on drying the wood slices.

http://theplywood.com/drying-wood-in-oven

Using the oven on low heat (200 F), the wood slices were dry in a couple of hours so it worked really well.

Cutting The End Grain Flooring Inlay Into The Floor Boards

The original plan was to cut each floorboard individually using a rotozip. I was going to cut them outside since the rotozip causes a lot of dust.

Instead, I ended up cutting the floorboards in place using the Oscillating Multi-Tool. That worked really well and it didn’t make very much dust.

After the boards were cut I went over the cut with the belt sander to soften the curves and round off the edge of the boards. That way there aren’t splinters. 🙂


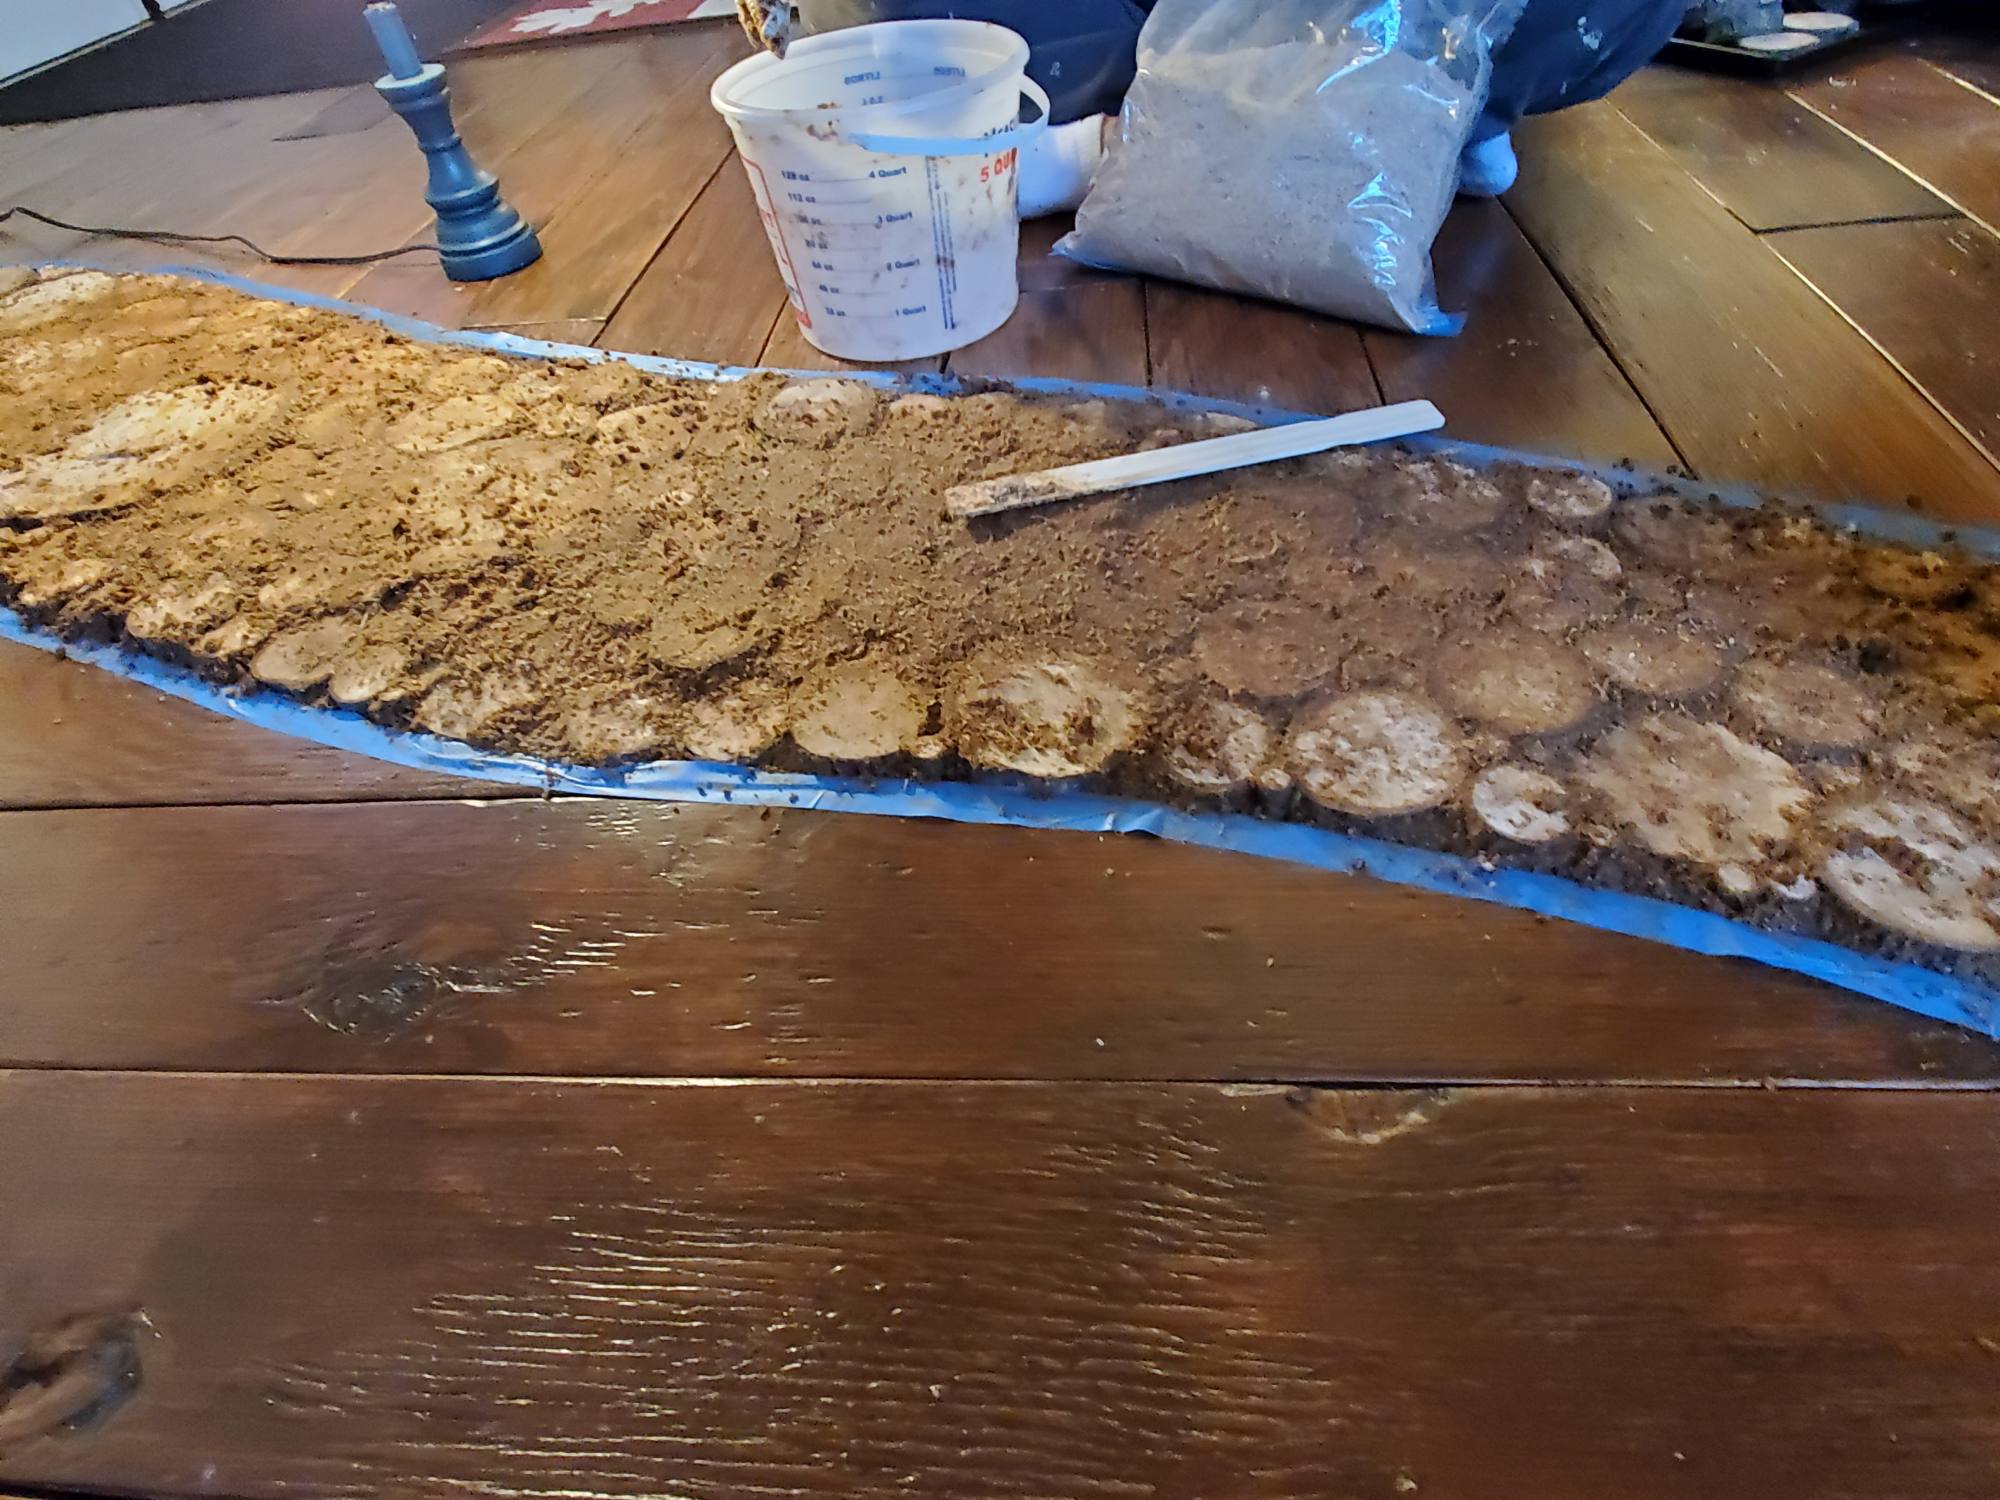
Installing An End Grain Flooring Inlay - Where The Inlay Will Go
Installing An End Grain Flooring Inlay - Floor Boards Are All Cut
Installing An End Grain Flooring Inlay - Figuring Out What Floor Boards To Use Next To The Inlay
Installing An End Grain Flooring Inlay - The Inlay Cut Into The Floor Boards and Wood Slices In Place - Seen From Fireplace

Placing The Wood Slices In The Inlay

When placing the slices inlay, make sure to mix up the different sizes. That way it looks more organic and natural.

I secured the wood pieces in place with liquid nails. It just takes a dollop on the back of each piece and applying a little pressure to get it to set.

Installing An End Grain Flooring Inlay - The Inlay Cut Into The Floor Boards and Wood Slices In Place - The Inlay Cut Into The Floor Boards and Wood Slices In Place

Seal The Wood Slices Before Applying The Grout

I sealed the wood slices before applying the grout by applying a coat of the polyurethane. Otherwise the grout will darken the wood slices. You’ll be sanding everything down later but sealing the slices makes it easier to get them back to the lighter color.

Mixing The Sawdust Grout

I found an article from Bob Villa that talks about the grout that can be used with the wood slices. It’s called sawdust grout.

https://www.bobvila.com/articles/quick-tip-sawdust-grout/

Sawdust grout is a combination of 2 parts sawdust to 1 part polyurethane.

I used a water based, oil-modified fast drying polyurethane for the sawdust grout mix and the finish.

The polyurethane dries quickly and it’s orderless.

It’s the same one we used on the plywood wide plank floor boards in the living dining room and kitchen.

Applying The Sawdust Grout

The Grout is a pretty dry paste that can be pushed into all the nooks and crannies between each wood slice.

Using latex gloves grab a small glob of Grout and push it into the spaces between the wood slices.

Installing An End Grain Flooring Inlay - The wood slices are in place and the sawdust grout is being applied

Sanding The End Grain Flooring Inlay

I used a belt sander to sand down the wood pieces.

Of course, that was only after I fixed my huge mistake of cutting the wood slices the wrong thickness.

The sand paper I used was 36 grit. I wanted something that gave the wood pieces a rough texture so they wouldn’t be slippery.

Because sanding is a pretty messy task, I tented off the area, that way the dust didn’t go all over the house.


Installing An End Grain Flooring Inlay - The Inlay Tented Off To Reduce The Dust Around The House While Sanding

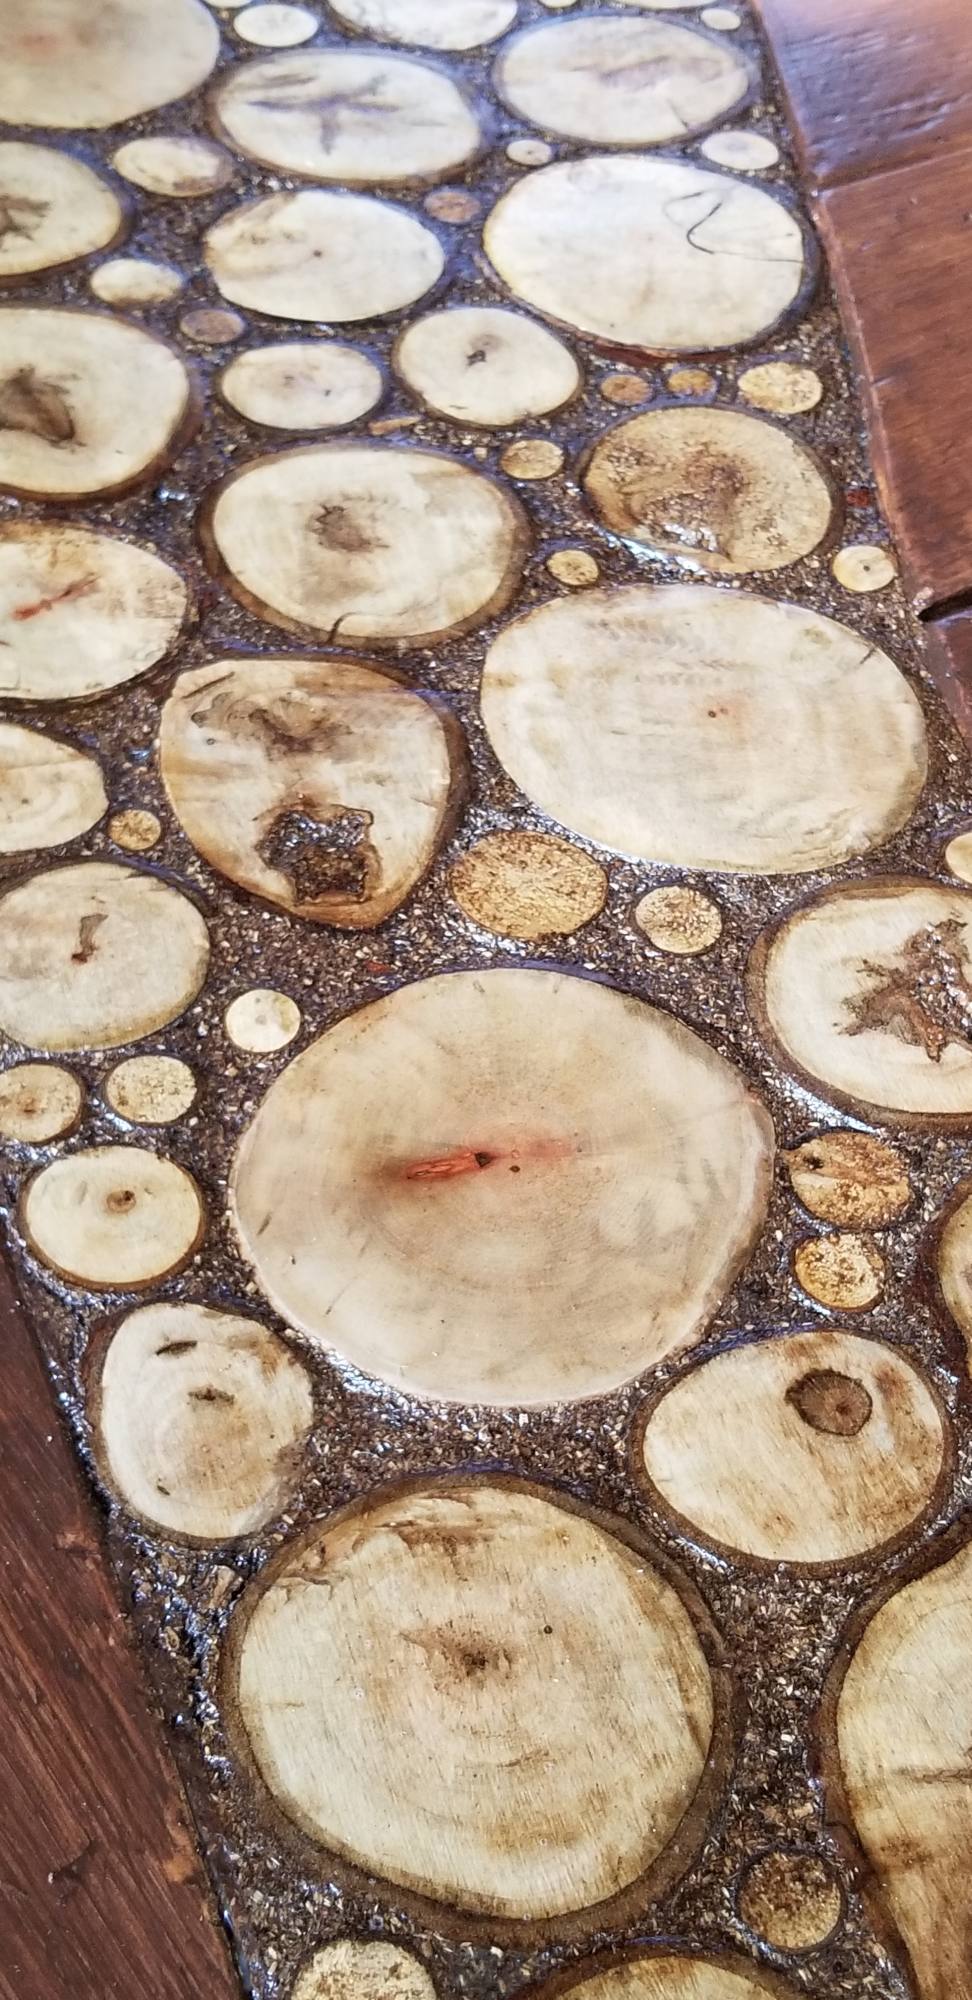
This is what the wood slices and the sawdust grout looked like after the sanding was done.

I sanded the wood slice inlay to the height of the flooring on either side of it. I also used the sander to knock off the edges of each of the wood slices, removing any hard edges that may be uncomfortable to walk on.

Installing An End Grain Flooring Inlay - The Inlay After Grout Dried And Sanded Before Poly Finish

Adding The Polyurathane Finish

The polyurethane was the same one I used on the wood board flooring and in the sawdust grout mix.

I put three coats of finish on the end grain flooring inlay.

Although the poly is colorless, it did give the wood slices a little bit of a yellow tint.

The sawdust grout also darken quite a bit when I applied the poly on top of it.


Installing An End Grain Flooring Inlay - The Inlay After Grout Dried And Sanded After Poly Finish

More Pics Of The End Grain Flooring Inlay

Installing An End Grain Flooring Inlay - cross cut flooring inlay from the dining room
Installing An End Grain Flooring Inlay - The End Grain Flooring Inlay Finished
Installing An End Grain Flooring Inlay - End Grain flooring Inlay from the fireplace
Installing An End Grain Flooring Inlay - Finished - Seen From The Dining Room
End Grain Flooring Inlay Finished - Log End Wood Floor Inlay Closeup
Installing An End Grain Flooring Inlay - End Grain flooring Inlay toward the fireplace

What Do You Think?

We love the way the end grain flooring inlay turned out. It’s so much more character than a simple threshold would have given.

What do you think? Do you like the way it turned out? What would you do differently? We’d love to hear your feedback.

Enjoy this post? Pin it and share it with others!

Installing An End Grain Flooring Inlay - A closeup of the End Grain Flooring Inlay Finished
Wood River Finished - Wood slices flooring accent closeup

Home Theater Design – Home Theater Remote Control

Home Theater Design – Home Theater Remote Control

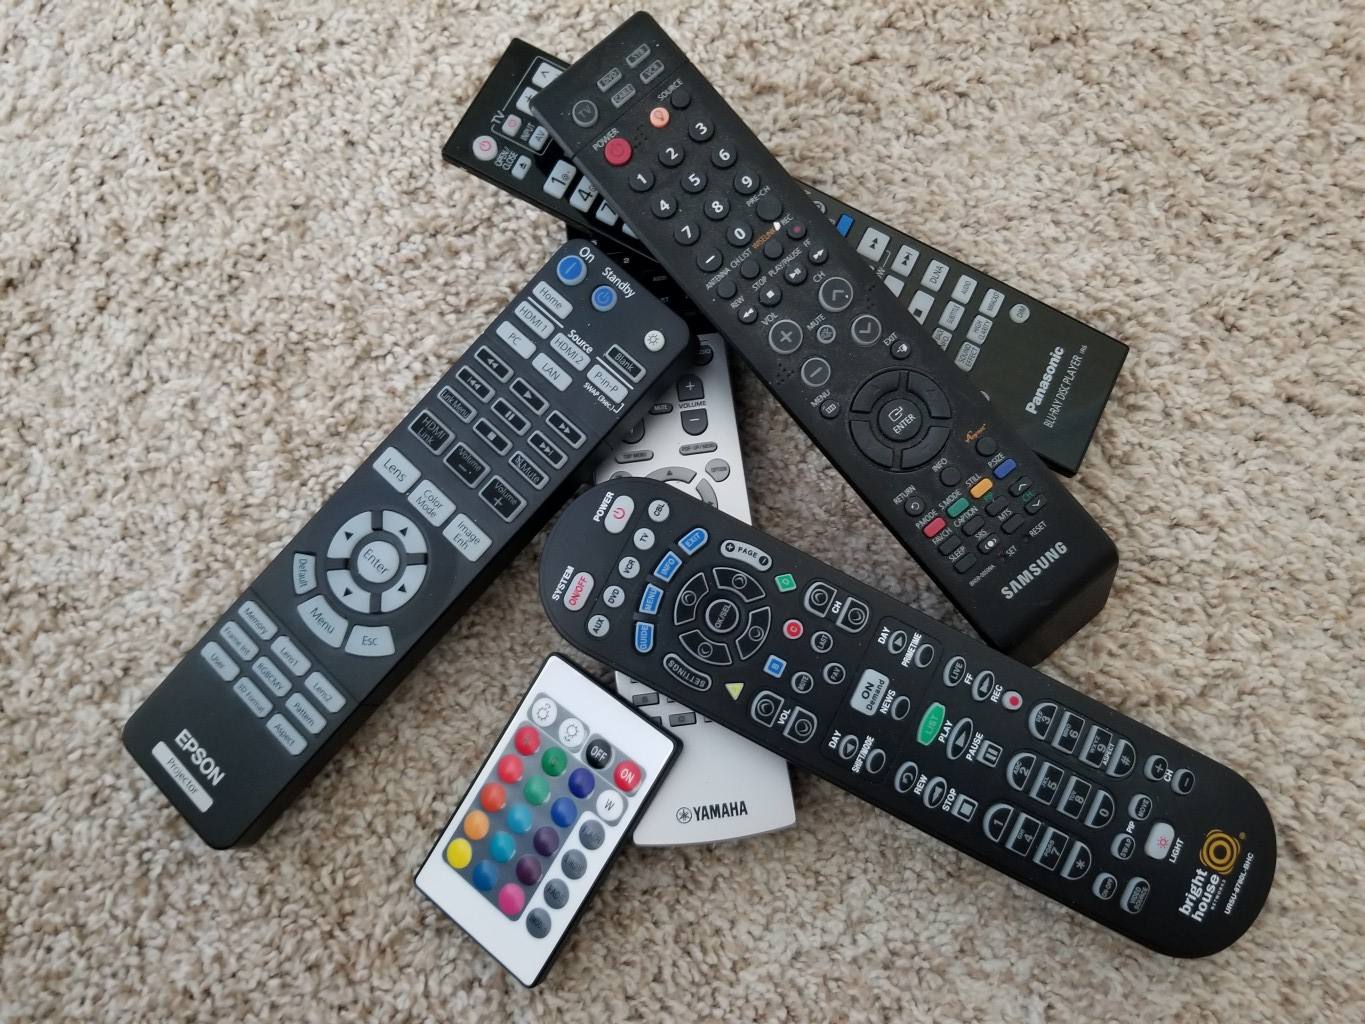
Designing a Home Theater - Home Theater Remote - Choosing The Right Remote


What To Look For In A Home Theater Remote Control

Although it may not have been in your Home Theater Design, you will need a home theater remote control.

Setting up a home theater buries you in remotes pretty quick. It becomes a 3 or 4 remote task to do anything unless you get a home theater remote.

There are a few different calibers of remote controls. If you only want to reduce the number of remote controls you have, then a basic universal remote would do the trick.

But, if you want a remote control that does more than control the A/V equipment, your choices will be slim.

Features like controlling lights and/or blinds. Or setting up macros/scenes which turn on and off various devices depending on the activity.

In this article, I’ll go over what I looked at when choosing my remote and how I set it up.

Disclosure: Some of the links below are affiliate links. If you decide to purchase any of these products, we earn a small commission at no additional cost to you. We recommend these products only because we have experience with them and use them for our own projects. As Amazon Associates, we earn from qualifying purchases.

Why Not Just Use The Remotes You Have

Choosing the right remote control will completely change your home theater experience. A typical home theater will have at least 3 remotes (for the TV/Projector, surround sound, Cable box or DVD Player).

Fumbling between all the remote becomes a pain pretty quickly. Many of the remotes that come with home theater equipment do try to be universal-ish. But they still fall short with home theater scenarios.

The Remote Criteria

The remote I was searching for would control:

  • the projector
  • The surround sound amplifier
  • 4K BluRay DVD player
  • The Cable Box
  • Some way of controlling Insteon lights
A Home Theater Remote that can control all that is pretty sophisticated. And the more features a remote has, the more expensive it gets.

On the low end, they are about $100. These remotes will have a low limit on the devices that can it can control and no macros. On the super fancy high end, there is a complete home automation system. That system can control just about any electronic device, but of course, it’s at a cost. The Savant is one of those systems and runs about $1000 a room.

For my scenario, I already have a home automation system so Savant wasn’t something I had any interest in.

My home automation system is an Insteon based system. A Universal Devices ISY controller (Model ISY 994i/IR Pro) that controls everything. Things like the door lock, the thermostats, lights, and door sensors.

Logitech Harmony Ultimate Home

After some research, it became clear the Harmony family of remotes is the best value for the features. They’ve been in the remote control business for a very long time and they have excelled over the years.

Which a Harmony remote, you base your choice on how many devices you plan on controlling. The Harmony remote I chose was the Ultimate Home. It can control up to 15 devices with up to 15 activities. The activities are basically macros. Press one of the macro buttons, and it’ll turn on all the devices you need turned on for that activity.

Update: The remote that I chose is now discontinued. The Logitech Harmony Elite Remote is the latest home theater remote from Logitech. It looks a little different but the specs are very similar.

An added bonus is that the Harmony Elite Remote also works with Alexa!


Designing a Home Theater - Home Theater Remote - Logitech Harmony Elite Remote

Logitech Harmony Elite

Logitech Harmony Elite Remote Control, Hub and App, works with Alexa

Logitech Harmony Home Ultimate Features

The Harmony Home Ultimate (and the Harmony Elite) is a feature-rich remote control.

  • The Harmony App On your Droid or iPhone lets you control your devices using the app
  • Configure macros or activities to set up all your devices with a click of a button
  • Control up to 15 Devices
  • Control devices using infrared, IP and Bluetooth
  • It Syncs the cable providers channel line up with your remote. When the cable provider changes channels around your remote will update itself
  • Save your favorite channels as favorites, which show up as icons in the remote’s screen
  • a digital screen on the remote allows you to customize buttons and activities
  • The hard buttons are all back-lit (very important when you are sitting in a dark theater)

The Parts To The Home Theater Remote Control Setup

There are three physical parts to the remote control. The remote control itself, a Hub and infrared blaster cables.

The hub is the brains of it all, and the remote control communicates to the hub using RF (radio). It’s great for home theater setups like mine, where the AV equipment is in a closet out of sight.

The hub should go where the majority of your electronics are since it’s the one doing most of the controlling.

The AV Equipment

In this setup, there’s a total of 6 devices listed in the MyHarmony app:

  • Universal Devices ISY-994i/IR (Home Automation)
  • Yamaha TSR-7810 (Amplifier)
  • Epson PowerLite Home Cinema 5040UB (Projector)
  • Arris DCX3600M (Cable/DVR)
  • Panasonic DMP-UB900 (4K BluRay Player)
  • Windows Computer

Setting Up The Remote For Your Home Theater

Harmony has done a great job with their remote controls. The basic initial setup was pretty straight forward.

You’ll need to install their MyHarmony software and run the setup. You can either install it on your PC or on your phone and it will guide you through the setup process.

During setup, the hub was able to automatically detect the Yamaha amplifier on the WiFi. For the other devices (cable box, DVD player and projector) I needed to supply the make an model. Based on the make an model, it knew the full set of remote codes for them.

Much easier than the old days where you had to teach your universal remote the codes for each function.


A Home Theater Gotcha

If you have a theater like mine, you have AV equipment tucked away in a closet close by but out of sight.

The Harmony Hub goes in the closet along with all the AV equipment, but one gotcha is the projector.

Initially, I wasn’t sure if I’d have to run one of the infrared blasters into the theater to get it to turn on/off the projector.

Well, luckily Harmony had already thought of that. In the MyHarmony App, you determine what controls the device, either the remote or the hub.

That’s done here:

  • Go to the MyHarmony App and click settings
  • Click More >>
  • Remote and Hub Assignments

Problem solved.

Update: The solution above worked great, but it would only work if you were in the room to turn on the projector. I sometimes use the MyHarmony app on my phone to turn the theater equipment on or off from outside the room.

Since the remote controlled the projector, the projector didn’t turn on. In
the end, I ran one of the IR blasters from the Harmony hub to the theater, and that worked like a charm.

Getting Harmony To Talk To Insteon

Like I said earlier, my home automation is Insteon based. When I was setting up my home theater I expected to one day be able to control the lights. And maybe even the curtains using my home theater remote control.

Insteon has a user-friendly device called InsteonHub, which Harmony can communicate with natively.

My setup uses a Universal Devices controller, which is more flexible but not as user-friendly. Initially, it didn’t seem obvious how I could get Harmony and Insteon to talk to each other.

At first, I thought I’d have to use some sort of Rest based commands to control the lights using the Harmony remote.

During my googling, I did see something using a Raspberry PI and something called ISY Helper to do just that.

From what I understand, the ISY Helper is the go-between for the Harmony and your ISY.

For my setup, it sounded like way too many moving parts.

Luckily the ISY I purchased had infrared, I think you can also buy the add-on module for the ISY if your ISY doesn’t have IR.

What Insteon Devices Can You Control With Harmony

With the Insteon Hub, I think you can only control the lights. With the infrared module in the ISY, you can control everything that the ISY can control.

On the ISY you would create a program with the things you want the ISY to do. Then assign that program to an IR code.

Let’s say you want to set the temp at a certain level, dim the lights in the theater and lock the front door for the evening.

Create a program with those steps and assign it to an IR code. Now create an activity on your remote that sends that IR code, you’re all set!

Pretty cool! And you have no limit to the possibilities.

Actually, you only have 40 IR codes to play with. But each of those codes can be configured to do a whole lot on the ISY side.

Add ISY To The Remote

Adding the ISY to the remote was straight forward. Add a new device in the Harmony app. And use Universal Devices as the manufacturer and ISY994i/IR as the model number.

As soon as you do that it will add the 40 infrared codes that the ISY uses into the remote.

Setup On The ISY

To add the IR codes on the ISY side was just as easy. Go into the admin console, click the IR tab and click the ‘Import Default IR Codes’ button. That adds the same 40 infrared codes into the ISY.

Using You ISY From The Remote

I wanted to be able to turn off/on Insteon lights using the remote control. Both within Harmony activities and independent of the activities.
To add your ISY IR commands on the remotes menus click the buttons option in the MyHarmony app.
Under ‘Screen Options’ select your ISY device, in my case, I called it Lights. and click Go.
Here you can add soft buttons for each IR command you would like to control directly from the remote.
Here’s a list of my configured soft buttons under Lights:
  • High Hat On
  • High Hat Off
  • Screen Light On
  • Screen Light Off
  • Stair Light On
  • Stair Light Off
  • Loft Dim/Off

The ISY Listed as a device on the remote

Designing a Home Theater - The Fixed Projector Screen - The Edgeless Screen
Designing a Home Theater - Home Theater Remote - Logitech Harmony Elite Remote - The Digital Screen with the ISY Commands Listed As Soft Buttons

High Hat Off Program In ISY Admin Console

Designing a Home Theater - Home Theater Remote - Logitech Harmony Elite Remote - ISY Program To Turn Off The High Hats

Setting Up Harmony Activities

This is where the really cool functions of the remote control start to shine.
With the Harmony remote you can set up activities. Activities are basically macros with functions for any of your configured devices.
An example of an activity that I have set up is “Watch TV”. When I press the button for that activity it does the following:
  • Powers on the projector
  • Sets the projector input to HDMI1
  • Powers on the amplifier
  • Sets the amplifier input to HDMI2
  • Powers on the Cable/DVR
  • Turns of the lights in the Movie Theater

When you are done watching TV and want to turn everything off, just press the button next to the activity again and it’ll turn everything off.

Now if you have a home theater and don’t yet have a remote control with macros, I think you can appreciate how this remote can have everything on, set and ready to go with the press of one button.

No more fumbling with every remote control you have to get things set up just to watch TV.

Before Harmony these were my steps:

  • Get the projector remote, press the power button
  • Get the amplifier remote, press the power button and set it to HDMI2
  • Get the Cable remote, press the power button
  • If the lights were on, get up and press the button to turn them off

A big difference in user experience.

In a way, the remote control is the mortar in the electronic building blocks of your home theater. It changes your experience completely.

Tweaking The Harmony Activities

MyHarmony has a GUI that helps you create activities in a pretty intuitive way. To set up a basic activity is not very difficult, it’s just a matter of following the prompts.
Once the activity has been created the software will ask you to test the activity. I’d say the majority of what it sets up works pretty nicely.
Activities need tweaking with devices that take a long time to turn on or if it uses cursor commands. An example would be clicking left once then up then enter.
No matter how complex the activity, after a bit of tweaking things will work pretty reliably.
Below are my activities along with their settings.

My Activities List

Here are all my configured activities and settings. The “Lights – IR004” entry triggers the “Turning off the Movie Theater lights” program on the ISY.

The Watch Amazon activity is an example of an activity using cursor movements. The DVD Player has no built-in button for Amazon so I used cursor movements to select the AmazonApp.

I also added mute at the beginning and the volume down at the end because of an annoying ding sound the DVD player made. Every time the cursor in the interface moved there was a ding, and I didn’t like hearing it.

Designing a Home Theater - Home Theater Remote - Logitech Harmony Elite Remote - The Digital Screen with the Activities List

Watch TV

  1. Projector – Power On
  2. Projector – Input HDMI 1
  3. Amplifier – Power On
  4. Amplifier- Input HDMI 2
  5. Cable DVR – Power On
  6. Lights – IR004

Watch A Movie

  1. Projector – Power On
  2. Projector – Input HDMI 1
  3. Amplifier – Power On
  4. Amplifier- Input HDMI 2
  5. Cable DVR – Power On
  6. Lights – IR004

Watch Netflix

  1. Blu-Ray Player – Power On
  2. Amplifier – Power On
  3. Amplifier – Input: HDMI 1
  4. Projector – Power On
  5. Projector – Input: HDMI 1
  6. Wait 10 sec
  7. Blu-ray Player – Netflix
  8. Lights – IR004

Watch Amazon

  1. Amplifier – Power On
  2. Amplifier – Input: HDMI 1
  3. Blu-Ray Player – Power On
  4. Projector – Power On
  5. Projector – Input: HDMI 1
  6. Wait 15 sec
  7. Amplifier – Mute
  8. Blu-ray Player – Internet
  9. Wait 14 sec
  10. Blu-ray Player – DirectionLeft
  11. Wait 2 sec
  12. Blu-ray Player – DirectionDown
  13. Wait 2 sec
  14. Blu-ray Player – OK
  15. Amplifier – VolumeDown
  16. Lights – IR004

Summing It All Up

Having a Harmony Home theater remote control is way better than trying to manage 6 remotes…. but I had no idea how much better the experience was going to be.

The remote control makes it a real pleasure to turn on and off your devices. If you have a home theater getting a Harmony remote control is a must!

The simplicity of use that a remote like this gives you is amazing.

In my opinion, a home theater design is incomplete if it doesn’t include a home theater remote control.

Home Theater Design – The Video Projector

Home Theater Design – The Video Projector

DIY Home Theater Design Choosing The Right Projector


What I Was Looking For In A Video Projector

One of the main choices when designing a movie theater (and potentially the most expensive) is the video projector.

I was expecting to spend a good amount of money, to get a good projector. And hoping to get a 4K projector with internet apps (like Netflix), 3D would be nice, multiple HDMI inputs and an image that wasn’t washed out. Because my movie theater has a couple of windows, I wanted something that would still be watchable with the sun coming into the room.

Since I had never looked into projectors before, I was really shocked to see how high prices for projectors go. A lot of the higher-priced stuff is in the $25,000 – $30,000 range.

I was not looking to spend anywhere near that amount, but I did want a really nice projector. After seeing those initial prices, I kind of felt like maybe I wasn’t going to be able to spring for a nice projector after all. Realistically I was expecting to spend around $2,000 maybe up to $3,000.

Luckily there are a few projectors out there that give you great value without breaking the bank.

I wrote this article hoping to help others not feel as overwhelmed as I did when doing projector research for their movie theater.

Disclosure: Some of the links below are affiliate links. If you decide to purchase any of these products, we earn a small commission at no additional cost to you. We recommend these products only because we have experience with them and use them for our own projects. As Amazon Associates, we earn from qualifying purchases.

What I Learned About Video Projectors

So in doing my research, I learned a bunch. It’s hard to remember every aha moment, but I’m gonna give it a whirl, here are some of my aha moments.

The Projector Doesn’t Need Multiple HDMI Inputs

Originally I thought the video projector I was looking for needed multiple HDMI ports. I was looking for about 4. One for the cable box, DVD player, gaming console and PC.

Turns out if you’re designing a home theater, chances are you will be installing a surround sound system.

When using a home theater system, it has plenty of HDMI inputs and you use the home theater system to control the inputs.

In my scenario, it made things much easier. I only needed to run one 20 foot HDMI cable from the surround sound system to the projector, all the other HDMI devices were in the same closet as the surround sound system so I could use regular length HDMI cables.

Designing a Home Theater - The Video Projector - The HDMI Cable Layout

Video Projectors Are Not “Smart”

One of my initial requirements was that the project had internet apps. What I found out was that projectors are not really like smart TVs, they’re more like computer monitors… that project the image on the wall.

All the projectors I looked at did not have any “smart” capabilities. So to get NetFlix, Hulu, Amazon etc you need to plug something into the projector that has “Smart” features.

How To Get 4K Content On Your Projector

In my setup, I purchased an Ultra-HD Blu-ray player that had internet apps. The Blu-ray Player is a Samsung UBD-K8500 Ultra HD Blu-ray Player that does 4K and has built-in WiFi.

Update: In trying to figure out a problem I was having with 3D content, I purchased a Pioneer UB900 Ultra HD Blu-ray Player. The Blu-ray Player didn’t fix my 3D problem (my problem was a defective projector – which Epson quickly fixed). But the difference in sound between the two players was big enough that I decided to keep the Pioneer UB900.

The Ultra-HD is vital if you want 4K content from Netflix. If you upgrade your subscription and you are watching Netflix on a 4K capable device, Netflix will have an addition 4K category.

How To Get HDR Content On Your Video Projector

Here’s something I was not aware of. I figured if it were a Blu-ray DVD, it would play in HDR. That was not correct at all.

To have HDR content play on your projector, first, all the equipment that is playing the DVD will need to be HDR compatible (projector, DVD player, Amplifier).

And second, you’ll need a DVD that is Ultra-HD, not just Blu-ray.

It’s easy to figure out if the DVD is Ultra-HD. On the top of the face of the DVD case it’ll say 4K UltraHD – usually in silver on a black background.

Here’s a link from Netflix with the details on how to get 4K content:

This article contains information about watching Netflix in Ultra HD on compatible devices.

Designing a Home Theater - The Video Projector - Epson Home Cinema 5040UB

Projector Picture Quality

Aside from the option of 1080p and 4K, there are two other things that contribute to the picture quality. The image brightness (measured in lumens) and the contrast ratio (the difference between the whitest white on the screen and the blackest blacks on the screen).

It’s All About The Lumens

The lumens was something that was a factor for me since I was going to have some ambient light in the room. I was also expecting that there would be times where I’d like to watch content with the lights in the room on.

Just about all the projectors I looked at were 1000 lumens or brighter which from what I had read was a pretty decent brightness.


The Contrast Ratio Is Where It’s At

My impression of projectors has always been that the picture was always washed out. I wanted to have something that would do a good a job as possible in minimizing the washed-out image.

What I found out was that the biggest factor in preventing the washed-out image is the contrast ratio.

As far as contrast ratio goes, it seemed like those were all over the map.

My Updated Video Projector Criteria

After doing a bunch of research on the different factors that make a good projector and finding out some of my original criteria were no longer criteria at all. I now knew what I had to focus on.

My Updated Criteria

  • at least one HDMI input
  • no longer needed to be “smart”
  • it needed to at least be 1080p (native 4K looked way out of my price range)
  • Finally, the primary focus was a projector with as high a contrast ratio as possible (to prevent that washed out image)

Choosing The Best Projector For The Money

I looked at a lot of projectors. Ranging from around $700 all the way up to $27,000 (some are even 4 times that price but 27k was a crazy enough price for me).

For $700 you get a projector that is small and portable with a very small foot-print.

For $27,000 you could get a top of the line Sony 4k projector.

I wanted to get the biggest projector screen that I could fit on my wall. Since it was going to be a good-sized screen, I wanted to make sure the projector was at least HD (1080p).

4K would have been fantastic, but $27,000 was way, way, way out of my budget.

Once I narrowed down what I was looking for the best choice for me started to float to the top.

Now I was confirming that there was no other projector that was better than what I found for the money…. and there wasn’t!

Designing a Home Theater - The Video Projector - Epson Home Cinema 5040UB 3LCD Home Theater Projector with 4K Enhancement

My Video Projector – Epson Home Cinema 5040UB

Epson Home Cinema 5040UBe WirelessHD 3LCD Home Theater Projector with 4K Enhancement, HDR10, 100% Balanced Color and White Brightness, Ultra Wide DCI-P3 Color Gamut and UltraBlack Contrast

The Projector That I Chose – Hands Down The Best For The Price

After a lot of searching, there was one projector that stood out of the crowd. The Epson Home Cinema 5040UB is the projector that I went with.

It had fantastic reviews, does 1080p, 3D, HDR with a 1,000,000:1 contrast ratio and it even does 4K emulation – all for $2,499! The 4K emulation means it supports 4K input and will do some fancy stuff to project it in 4K-ish quality.

When I first started my search, I thought I’d have to stick to 1080p, since 4K was way out of my budget. Although the projector doesn’t do true 4K, 4K emulation made it way better than any other projector – even at twice the price.

The 1,000,000:1 contrast ratio and 4K emulation were the two determining factors for me. The other of course was the oodles and oodles of positive reviews for it.

It’s been about a month that I have owned one and I can tell you that the picture is absolutely astounding.

I would love to see what a native 4K projector picture quality looks like. It’s hard for me to imagine that there can be a better picture than what the Epson 5040ub produces.

I find myself often forgetting that it’s a projected image, it really just feels like a 135″ TV screen!

The Epson 5040UB or Epson 5040UBe

There are two models of this projector, the one I purchased is the Epson Home Cinema 5040UB.

The other model is the Epson Home Cinema 5040UBe, which has a wireless ethernet adapter for wireless HD, allowing you to have content streamed wirelessly to the projector.

I didn’t go for the wireless option since it was $300 more, and since I was going into the attic to run speaker wires anyways running an extra HDMI cable wasn’t a big deal.

3D On The Epson Projector – The Problem

3D wasn’t a terribly important criteria for me in my projector choices, but since the Epson projector supported 3D, it was a nice perk. 🙂

The projector doesn’t come with 3D glasses so when you’re ready for 3D, you’ll need to buy the glasses separately.

I’ll write up a separate article on my 3D glasses research later, this part though is crucial if you bought your projector around the same time I did – April 2017.

I’ll just cut to the chase and spare you the details but 3D wasn’t working correctly. After trying different glasses, DVD players and cables – the problem ended up being the projector.

I had to look through tons of forum posts to find a new thread where others had a similar problem. They suggested to contact Epson, and they would take care of it. I did just that, and they sent me a brand new projector the very next day.

If you have an Epson projector and the 3D images don’t knock your socks off, contact Epson. Chances are you have a defective projector, and their customer service is fantastic and responsive.

If you are in the US, then you can send an email to [email protected], that’s where I sent my email, and they responded by the end of the day and I had a brand new projector the day after that.

More Picture Quality Samples

Designing a Home Theater - The Video Projector - Epson Home Cinema 5040UB Picture Quality No Lights  The picture quality without lights on in the room and some ambient light still coming in. The image is from a Netflix 4K nature show.

The Video Projector Mount

I’m not sure if there are differences in projector mounts. I just made sure the one I bought was compatible with the Epson 5040UB.

The projector mount I chose was the Universal Projector Mount Bracket.

I have a feeling that most mounts would work with most projectors, but I wanted to make sure I wasn’t going to have a problem with it.

This mount definitely works, although if I had to do it again, I probably would have gotten on that was a bit more sturdy.

Don’t get me wrong; If your projector is going to be out of reach of most people, then this mount will work out perfectly.

In my case, since I have the raised platforms, the projector does stand a chance of getting bumped by someone who is tall and not paying attention to where they’re going. 🙂

The projector won’t fall or anything, but if it’s a substantial bump, it may shift a little requiring a readjustment of the projector image on the screen.


Designing a Home Theater - The Video Projector - The Video Projector Mount

The Video Projector Mount

Projection Screen LED KIT 2018 Version (135-inch Diagonal Screen, 16:9 Aspect Ratio)

Was That Helpful?

I hope this article will help you choose the right projector for you. This was my first projector purchase so there is nothing else I can compare it to, but I can tell you that I am incredibly happy with choosing the Epson Home Cinema 5040UB.

Are you thinking of getting an Epson? What other projector are you thinking of getting? Let me know in the comments below!

Enjoy this post? Pin it and share it with others!
DIY Home Theater Design - Choosing The Right Projector

Home Theater Design – The Fixed Projector Screen

Home Theater Design – The Fixed Projector Screen

Designing a Home Theater - Home Theater System - Choosing A Fixed Projector Screen


Selecting a fixed projection screen should be the next choice after which projector to buy. When designing a home theater, there is a whole lot of research and many choices that needed to be made. Not the least of which is which fixed projector screen to buy.

Here I’ll go over what options there are in projector screens and why I went with a fixed projector screen.

Disclosure: Some of the links below are affiliate links. If you decide to purchase any of these products, we earn a small commission at no additional cost to you. We recommend these products only because we have experience with them and use them for our own projects. As Amazon Associates, we earn from qualifying purchases.

What I Was Looking For In A Fixed Projector Screen

Honestly, When I first started my research I didn’t think the type of projector screen would matter that much.

After doing a little research I soon realized that the projector screen has a lot to do with how crisp the picture is going to be.

Like I mentioned in the article about the projector, the crispness is something I was really looking for.

My impression of projectors has always been a very washed out image that was hard to see unless the room was completely dark.

I really wanted to minimize that effect as much as possible with my setup.

Since my movie theater has windows ambient light was going to be some sort of factor, and I expected that I would sometimes want to watch TV with the lights on.

Little did I know that choosing the right projector screen would have a big inpact on the image crispness.

The Different Types Of Projector Screens

If you’ve done any sort of research in projector screens, then you know there are a ton of choices.

Projector Screen Aspect Ratio

There are two basic aspect ratios for screens 4:3 and 16:9. The easy way to think about it is that 4:3 is an old TV format (more like a square) and 16:9 is the new flat screen TV format (a long rectangular shape).

No brainer for me, I wanted 16:9 since that is kind of the new standard in our days.

Designing a Home Theater - Home Theater System - Screen Aspect Ratios

Retractable or Fixed Frame

Retractable projector screens are the ones you can pull down, similar to what you find in school. The other option is a fixed frame projector screen.

In my case the room is a dedicated movie theater, so there was no need for my screen to retract.

They say the picture quality is better on a fixed frame because there is much less movement.

Designing a Home Theater - The Fixed Projector Screen - A Retractable Screen
Designing a Home Theater - The Fixed Projector Screen - Elite Screens - A Fixed Projector Screen

The Screen Color – White, Gray Or Black

This was something I never thought of or heard about. I’ve always seen Projector screens in white, apparently they come in gray and black too.

I didn’t understand the differences at first but after a little research it made perfect sense.

the projector can not project black, so having a darker screen essentially increases the contrast ratio (the difference between the whitest whites and the blackest blacks on the screen).

A black screen will give you the best contrast ratio while a white would be the worst. Black screens are also much more expensive. I went with grey, it’s the middle ground for both contrast ratio and price.

Front Lit Or Back Lit Screens

If you have the space you can have a back lit screen, meaning that the projector is behind the screen.

In my case I wanted to use all the real estate I had for the movie theater so I stuck to a front lit screen.

Edged or Edgeless

There are screens with a border around it giving it a more traditional look, or there are screens that are edgeless – meaning the picture can go all the way to the edge of the screen.

When I started looking at screens this wasn’t much of a concern for me. There were both, edged and edgeless screens that looked great.


Acoustic Projection Screen or Not?

Now this is something I may have chosen if I had more space to put speakers behind the screen.

The acoustic screen allows sound to pass through it, that way the center speaker and left and right surround sound speakers can be placed behind the screen.

It would have made for a really nice look, but since ambient light was more of a concern for me than placing the speakers behind the screen I decided to focus on a screen that would work will with ambient light.

Figuring Out The Screen Size

This was a bit of a tough one. I wanted the biggest screen I could fit on my wall.

The biggest screen I could get was going to be the width of the wall minus the width of the left and right surround sound speakers.

The height was limited by the height of the wall minus space on top for the infrared repeater, minus the height required to see the bottom of the screen from the back row.

Since I had already figured out what my projector was going to be I could figure out the screen size using this amazingly helpful calculation tool.

Use The Screen Size Calculator

Click this button to go to the site I used to determine what screen size to use in the room.

It bases it on the video projector along with the projector placement in the room.

Since I knew the model projector it helped not only determine the size of my screen, it also helped me figure out where on the ceiling my projector should be mounted.

Using the tool I was able to decide on the 135″ screen and that the projector was going to be 178″ away from the screen wall.

The Best Looking Fixed Projector Screen

The first non-white screen I came across was the Black Diamond screens. Holy cow it looked sexy!

Basically when the projector is off you have a black screen on your wall, like a huge flat screen. This is definitely the screen I would have gone with if price was no object – for me though it was.

The black diamond screen would have cost me more than the Epson 5040UB. Way too much for me to spend.

Now I Looked For The Best Value For My Money

Since the black diamond did not fit into my budget at all, I needed to find something close to it that fit into my budget.

I really didn’t want to spend more than $1000 for my screen, so that was the limit I set for myself.

I came across the Elite screens and it seemed to be a reputable screen manufacturer. They screens they had also fit my budget.

Now that I knew Elite screens was the brand I was going to buy I looked at the different screens they offered to see which was best for me.

The screen I ended up choosing was the Aeon 135″ 16:9 ambient light rejecting ALR Fixed Frame Edge Free Projection screen, model # AR135DHD3

The Fixed Projector Screen I Chose

Click To Get The Same Home Theater System - Yamaha TS-R7810

The Projector Screen I Chose

Elite Screens Aeon CineGrey 3D Series, 135-inch 16:9, Ambient Light Rejecting Fixed Frame Edge Free Projection Projector Screen, AR135DHD3

The Edgeless Fixed Projection Screen

The back bevel on this fixed projection screen gives it a clean, snazzy feel.

The picture on the right shows how the screen with an image projected on it. I love how the image goes all the way to the edge.

Designing a Home Theater - The Fixed Projector Screen - The Edgeless Screen

Why I Chose This Screen

I chose this screen because it had great reviews and it was specifically designed for rooms with ambient light.

The specs also mentioned that it would work with 3D movies, which I was planning on using.

The screen is a edge-less screen which means you can project the image all the way to the edge of the screen for a really impressive display.

Having a edge-less screen gives it the feel off a gigantic flat screen TV.

If you prefer a frame around the screen, they also provide felt tape that you can put around the edge. Giving it more of a traditional TV feel.

I personally like having an image that takes the entirety of the screen.

Assembling The Screen

Assembling the screen was a little tricky.

I read reviews on it that said to be careful of the sharp metal edges on the frame, and I can see why.

It takes quite some doing to get the screen material to stretch to the point where it will cover the frame.

Once you work with the screen material a little you’ll realize that it does have a good amount of give… you just want to take your time with it.

We basically started from the short side first, connecting the screen to the very edge of the Velcro on the frame. That was the hardest part.

Once we had one small section connected on both ends it was a matter of working your way around the frame.

As you make your way around it gets easier and easier to get the Velcro to connect.

Optional Back-Light Kit

The Back-light is a nice touch…

The screen also has this Optional LED back-light kit, which made for an incredibly sexy look.

I purchased the kit straight from Elite screens since they didn’t have the 135″ model available on Amazon.

Installing The Optional LED Back-light Kit

The back-light kit model number for the 135″ screens is ZLED135H1.

Installing the back-light was pretty straight forward.

Start by figuring out where you want the power plug for the lights to be, that will be your starting point.

Put the screen face down on the floor, starting where you want the power plug to be remove the sticky tape covering and stick the lights to the angled back part of the screen.

You’ll have a little extra once you go around the screen, just cut the strip on the indicator lines they have every couple of inches.

One thing to be aware of is that the light strip is pretty sensitive to bending.

Be gentle and careful not to kink the strip and when doing the corners try to round the corner – avoid sharp angles.

The backlight was worth it, it gives a great finish to the screen. My favorite light setting is on low light with white light.


Designing a Home Theater - The Fixed Projector Screen - The LED Kit

The LED BackLight Kit

Projection Screen LED KIT 2018 Version (135-inch Diagonal Screen, 16:9 Aspect Ratio)

Enjoy this post? Pin it and share it with others!
DIY Home Theater Design The Fixed Projector Screen