DIY Wainscoting – Teil 1 – Design und Layout

DIY Wainscoting – Teil 1 – Design und Layout

Wenn Sie auf Pinterest nach Täfelungen suchen, finden Sie alle möglichen Stile und Versionen von Täfelungen, von supereinfach bis unglaublich kunstvoll.

Ich wollte ein Täfelungsdesign, das schick aussieht, aber nicht übertrieben wirkt, und ich wollte nicht, dass es zu schwierig zu installieren ist.

Ich denke, dass die Wahl, die wir getroffen haben, genau das bewirkt hat, Es hat eine Menge Stil und Charakter hinzugefügt und sieht großartig aus. Und es hat nicht viel Zeit gekostet.

Ich habe zuerst die Täfelung im Erdgeschoss gemacht, Dann, etwa ein Jahr später, beschloss ich, auch die Täfelung im Obergeschoss durchzuführen. Wenn ich die Zeit zwischen dem Ober- und dem Untergeschoss addiere, hat es für beide wahrscheinlich insgesamt etwa 2 Wochen gedauert… Aber bedenken Sie, dass es ziemlich große Räume sind.

Das Projekt wird in eine Reihe von Beiträgen unterteilt.

In diesem Beitrag konzentrieren wir uns auf das Design, das wir ausgewählt haben, und auf die Gründe, warum wir es ausgewählt haben, wie wir auf unsere Täfelungsgrößen gekommen sind, und wie man Täfelungen misst.

In zukünftigen Beiträgen werden wir uns dann mit dem Schneiden der Täfelung befassen, Ich werde die Täfelung anbringen und ich denke, ich werde noch eine weitere mit der Täfelung in der Treppe machen, (Spoiler Alarm, Es gibt noch mehr Mathe, lol).

Egal welchen Stil du wählst, Hier finden Sie Tipps, die Ihre Installation reibungsloser gestalten.

Ich denke, das Geheimnis bei der Installation von Täfelungen liegt in der Verwendung von Schablonen und Abstandshaltern. Da die meisten Teile der Täfelung die gleiche Größe haben, können Sie Schablonen anfertigen, um sie schneller zuzuschneiden, und Abstandshalter ermöglichen einen gleichmäßigen Abstand, ohne dass jeder Raum ausgemessen werden muss.

Die Verwendung von Schablonen und Abstandshaltern bei Ihrer DIY-Vertäfelung hat einen großen Einfluss auf die Länge Ihrer Installationszeit.

Bekanntgabe: Einige der Links unten sind Affiliate-Links. Wenn Sie sich entscheiden, eines dieser Produkte zu kaufen, Wir verdienen eine kleine Provision ohne zusätzliche Kosten für Sie. Wir empfehlen diese Produkte nur, weil wir haben Erfahrung mit ihnen und sie für unsere eigenen Projekte. Als Amazon Associates, Wir verdienen mit qualifizierten Einkäufen.

Entscheidung für einen Täfelungsstil

Wir haben uns viele Pinterest-Pins mit Täfelungen angeschaut, um eines zu finden, das zu dem Stil passt, den wir uns vorgestellt haben.

Ehrlich, wenn Sie nicht wissen, welchen Stil Sie möchten, Eine Suche auf Pinterest ist eine gute Möglichkeit, herauszufinden, welche Möglichkeiten Sie haben.

Natürlich, wenn Ihnen das gefällt Täfelung Layout und Formteile, die wir verwendet haben, Fühlen Sie sich frei, zu kopieren, was wir gemacht haben. 🙂

DIY-Täfelungsideen – Es gibt so viele Möglichkeiten

Es gibt so viele Ideen für Täfelungen, und sie sehen alle auf ihre Art großartig aus.

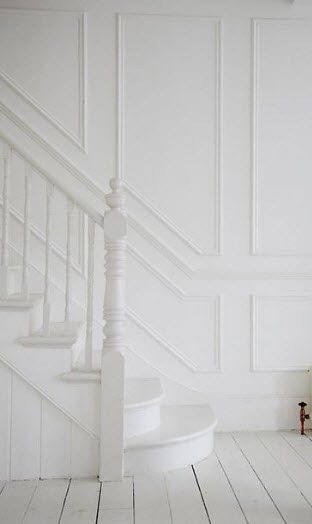
Werfen Sie einen Blick auf die verschiedenen Täfelungslayouts, die es auf Pinterest gibt, Machen Sie eine Suche und Sie werden unzählige Täfelungsdesigns finden. Wenn Sie nicht genau das finden, was Sie suchen, Überlegen Sie sich Ihren eigenen Täfelungsgeschmack, der eine Mischung aus einem oder zwei Designs ist, die Ihnen gefallen.

Hier sind ein paar Täfelungsdesigns das hat uns gefallen:

wainscoting paint colors

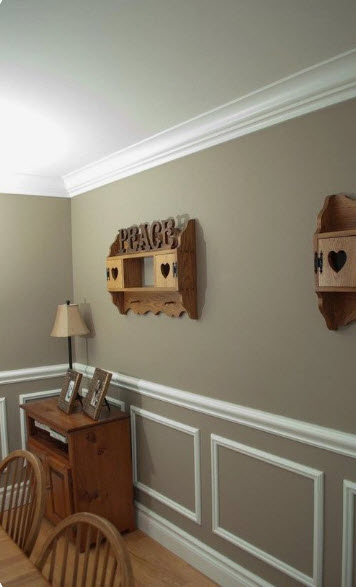
Der Pin, der uns inspiriert hat

Dies ist die Anstecknadel, die unsere Art des Täfelungsdesigns inspiriert hat. Uns gefiel das Aussehen und die zweite horizontale Leiste zwischen den Kästen oder Rahmen und der Stuhlleiste.

wainscoting paint colors

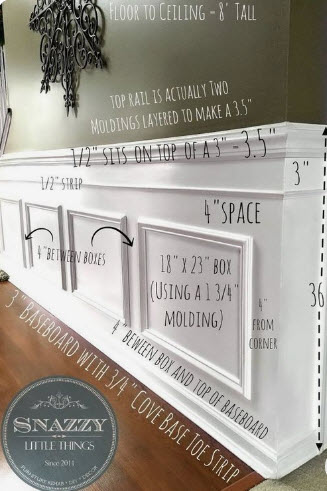
Das von uns verwendete Täfelungsdesign

Unser Täfelungsstil unterscheidet sich in einigen Punkten von der Nadel, die ihn inspiriert hat – aber ich denke, man kann die Ähnlichkeit erkennen.

Die Unterschiede:

  • Verwendet ein kräftigeres zweites horizontales Formteil (Es ist dasselbe, das wir für die Täfelungsrahmen verwendet haben)
  • Der Stuhl ist höher geformt (so dass es mit der Küchentheke unten und der halben Wand oben ausgerichtet war)
  • Verwenden Sie stehende Rechtecke anstelle der liegenden Quadrate oder Rechtecke (was ziemlich häufig vorkommt)
  • Unsere Räume um die Plätze herum sind 3 1/2 groß″ (die Breite eines 2er-Stücks×4. April)


wainscoting - molding the design we used

Der Style

Wir haben uns viele Pinterest-Pins mit Täfelungen angeschaut, um eines zu finden, das zu dem Stil passt, den wir uns vorgestellt haben.

Uns gefielen, dass die Täfelungsrahmen eher rechteckig als quadratisch und eher höher als breiter waren.

Anfänglich, Wir wollten nur die Stuhlleiste oben auf den Rahmen anbringen, Aber nachdem wir es ausprobiert hatten, wurde uns klar, dass es eine zusätzliche Kleinigkeit brauchte, Deshalb haben wir zwischen der Stuhlleiste und den Rahmen eine weitere horizontale Leiste eingefügt.

Das Wainscoting Höhe

Wie hoch soll Ihre Täfelung sein??

Ich bin auf einen Beitrag gestoßen, in dem die Höhe der Täfelung ausführlich besprochen wird. Ihr Tipp war, die Drittelregel anzuwenden, Das bedeutet, dass die Wandtäfelung nicht höher als ein Drittel der Wandhöhe sein sollte.

Hier ist der Link wenn Sie mehr erfahren möchten.

Ich bin erst auf den Artikel gestoßen, als ich angefangen habe, diesen Beitrag zu schreiben, aber selbst wenn ich es schon einmal gesehen hätte, Ich hätte mich wahrscheinlich immer noch nicht an die Drittelregel gehalten. Denn wir wollten, dass die Höhe der Täfelung für jede Etage mit etwas anderem im Raum übereinstimmt – und das entsprach nicht einem Drittel der Wandhöhe.

Im ersten Stock war es die Oberseite der Küchentheke und im zweiten Stock war es die halbe Wand im Dachgeschoss.

Wenn Sie versuchen, eine Höhe zu finden, die Sie verwenden können, Versuchen Sie die Drittelregel, oder richten Sie es mit etwas anderem im Raum aus, Oder wenn sich im Raum nichts befindet, an dem die Täfelung ausgerichtet werden soll, können Sie die Maße, die wir als Ausgangspunkt verwendet haben, verwenden und nach Bedarf anpassen. 🙂

Die Höhe (vom Boden bis zur Oberseite der Stuhlleiste) im 1. Stock war 41″ und die Höhe im 2. Stock betrug 41 1/2″.

Wainscoting Frames Install the whole space has picture frames

Ermitteln Sie die Rahmenbreite

Das war einer der größten Stolpersteine ​​für mich, als ich dieses Projekt startete. Wie sollte ich dafür sorgen, dass alle Rahmen die gleiche Breite haben??

Da alle Wände unterschiedlich groß sind es schien unmöglich, sie alle gleich breit zu machen… und ... nun ja – es ist.

Am Ende habe ich herausgefunden, dass nicht jeder Täfelungsrahmen die gleiche Breite oder gar die gleiche Höhe haben muss. Tatsächlich ist es unmöglich, dass sie die gleiche Breite haben, da die Wandgrößen alle unterschiedlich sein werden.

Ich wollte nicht, dass die Rahmen quadratisch sind, wenn ich das vermeiden konnte, und basierend auf der Höhe der Täfelung habe ich Rahmen mit einer Breite von etwa 18 Zoll angestrebt.

Ich habe ein Werkzeug erstellt, mit dem Sie die Breite der Bilderrahmen berechnen können, Schauen Sie es sich an, indem Sie auf die Schaltfläche unten klicken.

Die Täfelungsmaße

Ich wollte das betonen. Die Abmessungen der Täfelung sind für jede Wand unterschiedlich. Die Abmessungen des Täfelungsrahmens an derselben Wand bleiben gleich, Aber sie werden unterschiedlich sein, wenn sie an einer neuen Mauer ist, da wahrscheinlich die neue Mauer eine andere Breite sein wird.

Denn auch wenn die Rahmenhöhe gleich bleibt, Die Breite des Täfelungsrahmens ändert sich je nach Wandbreite und Anzahl der Täfelungsrahmen.

Der Raum um die Rahmen

Der Abstand zwischen den Rahmen ist DAS, was einheitlich sein muss. Halten Sie den Abstand gleich und Ihr Gehirn wird denken, dass alle Bildrahmen die gleiche Größe haben.

Solange der Abstand um die Rahmen herum gleich ist, wird alles fließen.

Für uns, Wir haben einen Abstand von 3 1/2 gewählt″ rund um jeden Rahmen, Auf diese Weise könnten wir 2er-Stücke verwenden×4 als Abstandshalter. 😉

Das Wainscoting Von uns verwendete Maße

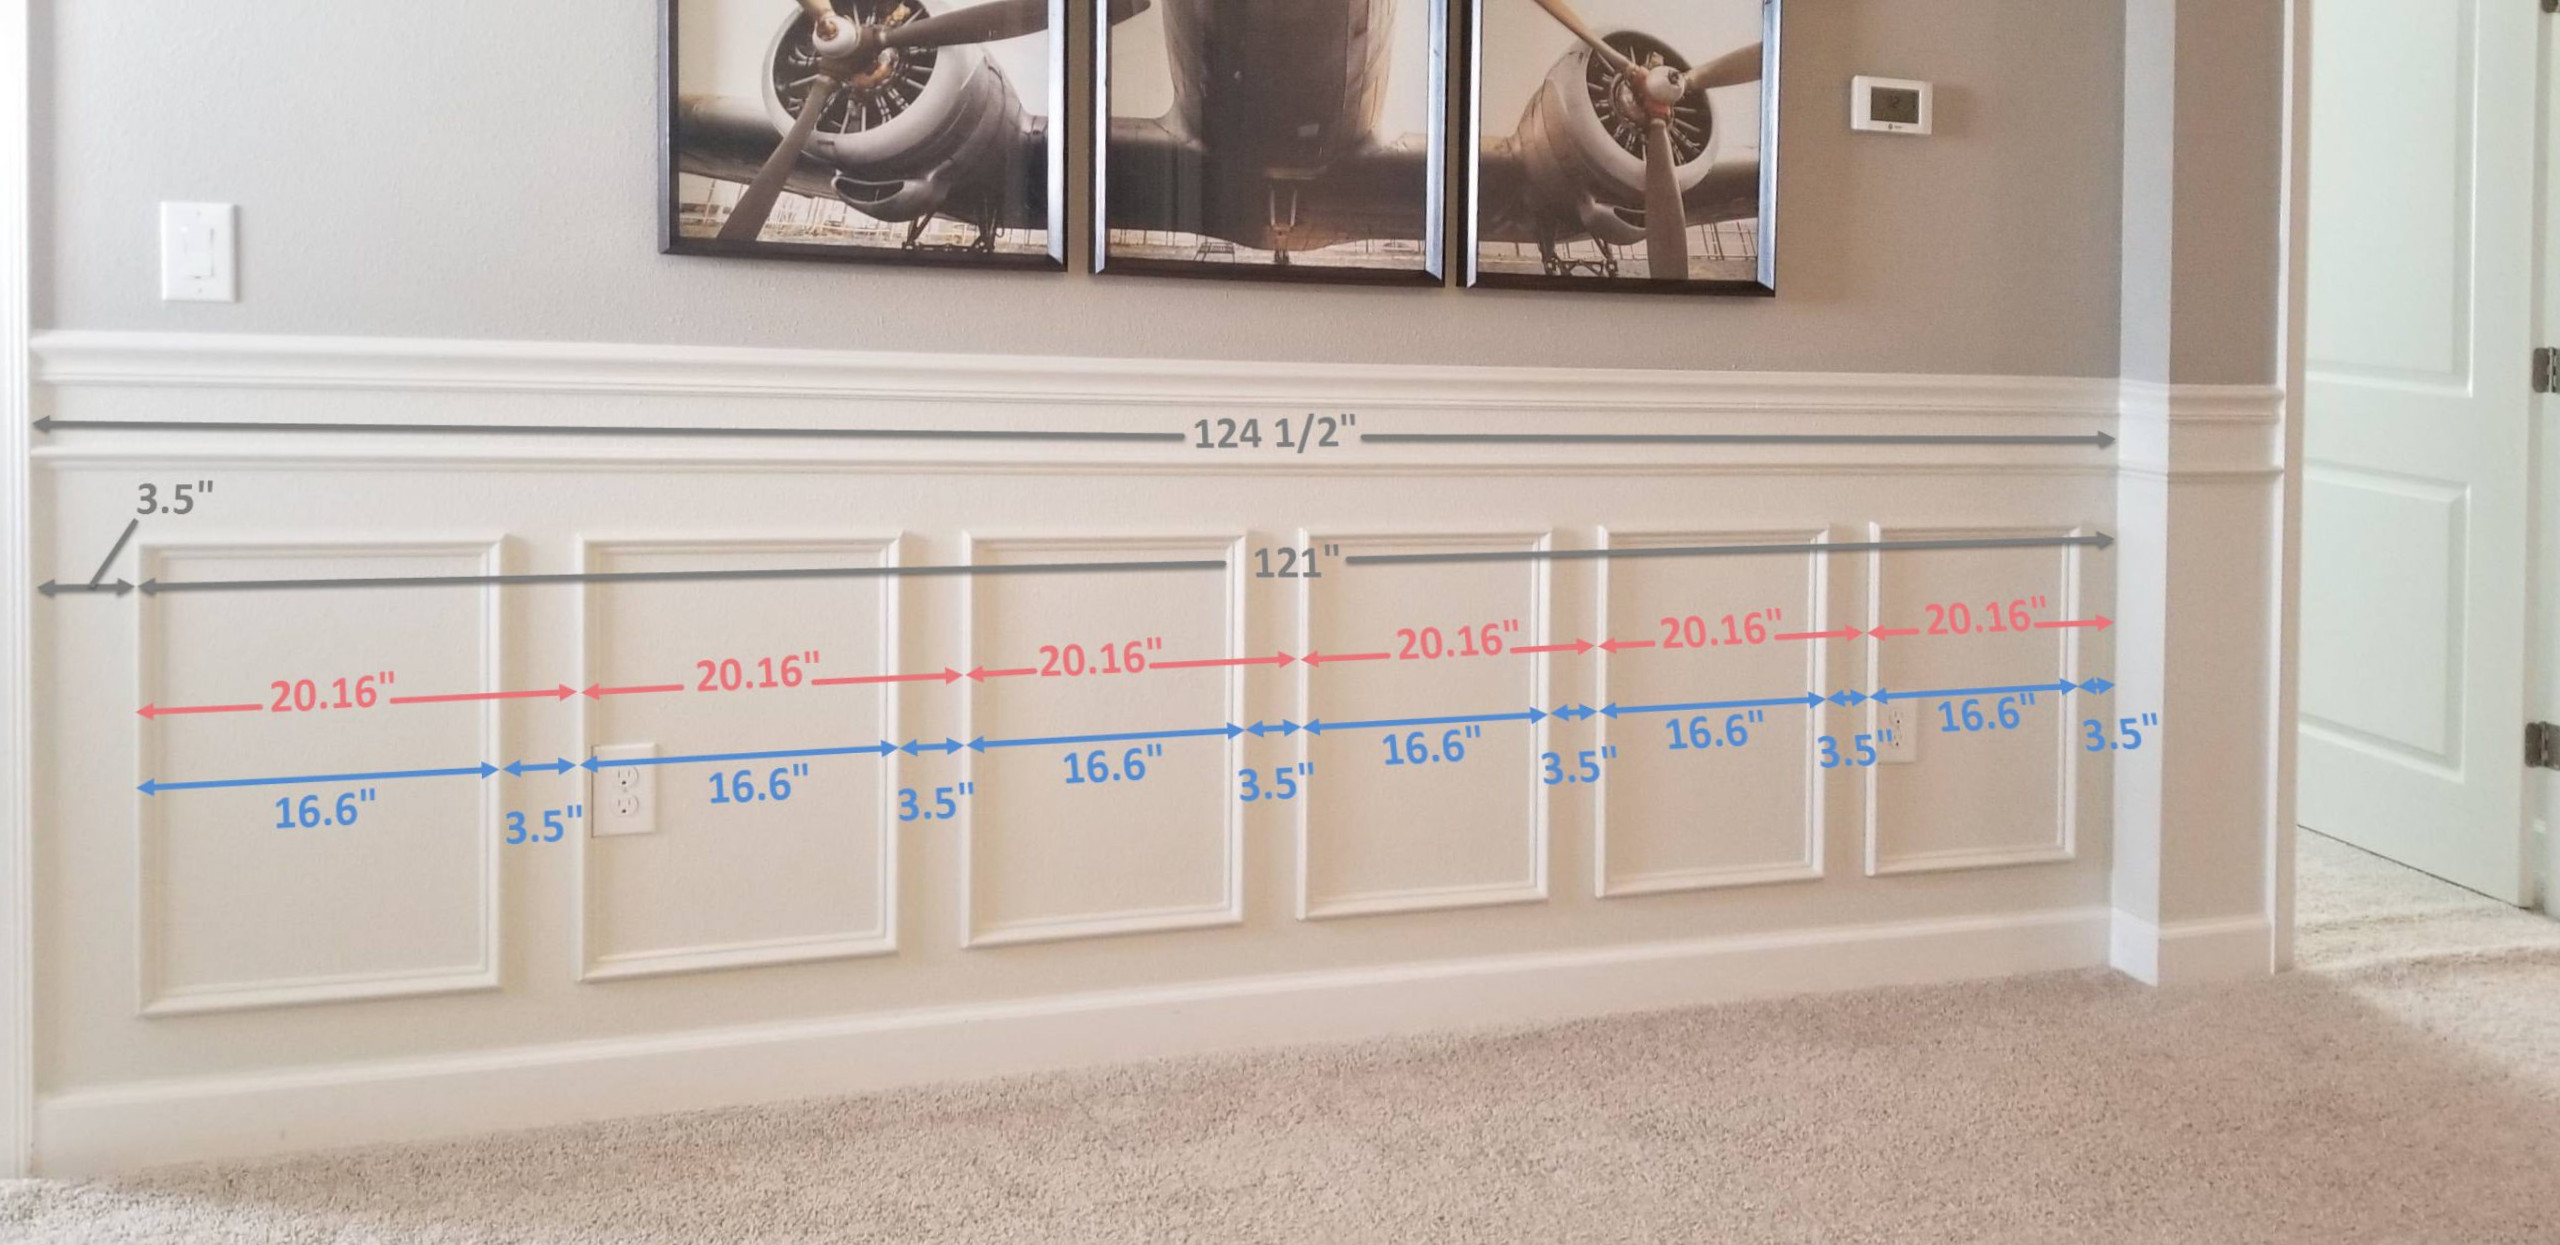
Das Bild zeigt alle von uns verwendeten Täfelungsmaße.

Denn jede Wand hat eine andere Breite, Die Die Wandtäfelungsmaße müssen für jede Wand unterschiedlich sein.

Alle Dimensionen von Die Täfelungsrahmen an derselben Wand sind gleich.

Alle Maße im Bild bleiben für jede Wand im Raum gleich, bis auf die Wainscoting -Rahmenbreite (16 5/8″ im Bild) Dies hängt von der Breite der Wand und der Anzahl der an der Wand verwendeten Rahmen ab.

Wir wussten, dass die Gesamthöhe der Täfelung 41 1/2 betrug″ (um sie an die Höhe der halben Wand im Raum anzupassen) Also haben wir von dieser Messung aus rückwärts gearbeitet.

Wir haben die Oberseite der Stuhlleiste bei 41 1/2 platziert″ und platzierten die kleinere horizontale Leiste darunter, um zu sehen, welcher Abstand zwischen ihr und der Stuhlleiste für uns funktionierte. Wir haben uns 3 ausgedacht″ (die Dicke unseres Niveaus).

Da ich auch wusste, dass ich 2 x 4 Stücke als Abstandshalter verwenden würde, konnte ich jetzt die Höhe der Täfelungsrahmen ermitteln.

So haben wir die Höhe der Täfelungsrahmen ermittelt:


Die Gesamthöhe der Täfelung 41 1/2″
Minus Die Dicke des Stuhlformteils – 2 3/4″
Abzüglich des Platzes unter der Stuhlleiste – 3″
Abzüglich der zweiten horizontalen Formteildicke – 1 1/4″
Minus Der Abstand über dem Rahmen – 3 1/2″
Minus Der Abstand unter dem Rahmen – 3 1/2″
Minus Die Dicke der Fußleiste – 4 1/2″
Entspricht der Wainscot Rahmen Höhe = 23″
Wainscoting Measurements

Ermitteln der Breite der Täfelungsrahmen

OK, Du hast den Stil herausgefunden, Formen, Höhe, Abstand und die Farben – Jetzt ist es Zeit für etwas Mathe!

Dieser Teil mag ein wenig einschüchternd wirken, aber glauben Sie mir, Es ist viel einfacher, als es scheint.

Wie jeder andere Aspekt dieses Projekts, Es gibt wahrscheinlich eine Million andere Möglichkeiten, dies herauszufinden, aber hier ist ein Beispiel dafür, wie ich es gemessen habe.

Nehmen wir als Beispiel die Wand im Bild, Die Wand war 124 1/2 groß″ und am Ende habe ich 6 Täfelungsrahmen verwendet.

Aktualisieren: Ich habe beschlossen, einen einfachen Täfelungsrechner zu erstellen, bei dem Sie die Wandbreite angeben, Die Breite der Abstände zwischen den Rahmen und die Anzahl der Rahmen geben Ihnen die Breite jedes Täfelungsrahmens.

Klicken Sie auf die Schaltfläche unten und Sie müssen die Mathematik nicht ausführen.

Wainscoting Box Measurements

Berechnung für die 6 Frames Gezeigt

Zuerst, Ich subtrahiere den linken Abstand von der Summe, was für mich 3 1/2 ist″ oder 3,5″, Werfen Sie einen Blick auf das Bild, um es visueller zu machen.

Das gibt mir 121″, Jetzt dividiere 121″ nach der Anzahl der Frames, die Ihrer Meinung nach passen würden. Im abgebildeten Beispiel habe ich 6 verwendet.

121″ / 6 = 20,16″

Jeder Frame + sein Abstand auf der rechten Seite würden also 20,16 betragen″ in der Breite (Die roten Pfeile).

Die Rahmengröße wäre also 20,16 minus dem Abstand rechts.

Die Rahmengröße wäre nun 20,16 – 3.5″ = 16,6″ (Die blauen Pfeile)

Da ich eine rechteckige Form wollte, 16.6″ gut gearbeitet. Grundsätzlich gilt, Ich versuche die gleiche Formel mit einem zusätzlichen Rahmen oder minus einem Rahmen, und finden Sie heraus, welches am besten aussieht.

Wainscoting Box Measurements

Nehmen wir an, wir haben mit 5 gerechnet Rahmen

Wenn ich 5 versucht hätte, es wäre 121″ / 5 = 24,2 Das bedeutet, dass jeder Frame + der Abstand rechts davon 24,2 betragen würde″. Die Rahmengröße wäre also 24,2″ – 3.5″ (die Abstandsgröße) das wäre 20,7″

Man sollte bedenken, dass es bei all dem kein Richtig oder Falsch gibt. Ich wollte, dass meine Rahmen eher rechteckig als quadratisch aussehen und eine Breite von 20,7 haben″ würde ziemlich nahe an der Höhe von 23 liegen″ Also habe ich mich statt für 5 Frames für 6 entschieden.

Dezimalzahlen in Brüche umwandeln

Jetzt wissen Sie also, dass die Frames 16,6 sein sollten″… Wie zum Teufel findet man das mit einem Maßband heraus??!

Mit einem Taschenrechner war es definitiv einfacher, die Zahlen herauszufinden, aber ich hatte ein Problem damit, die Dezimalzahl vom Taschenrechner wieder in einen Bruch umzuwandeln, den ich mit einem Maßband verwenden konnte.

Die Antwort war damals ein Widget, auf das ich gestoßen bin und das Dezimalzahlen in Brüche umwandelt, die mit einem Maßband verwendet werden können. Es war nicht 100 %, weil der Bruchteil, den ich erhielt, manchmal 231/356 betrug… was nicht hilft. lol

Jetzt, Ich habe einen Täfelungsrechner erstellt. Geben Sie die Maße in Bruchteilen ein, die Sie auf einem Maßband finden würden, und es ermittelt den Täfelungsrahmen und gibt Ihnen die Breite in Bruchteilen an, die Sie auf dem Maßband verwenden können. Keine Mathematik mehr und keine 231/356 mehr! lol

So behandeln Sie Fenster mit Wainscoting

Daran habe ich später gedacht. Wenn das Fenster unter die Höhe Ihrer Täfelung reicht, ist es am besten, die Wand abschnittsweise zu messen, mit dem Raum unter dem Fenster als eigenem Abschnitt.

Ich habe einige Bilder von Täfelungen gesehen, auf denen sie verwendet werden “L” geformte Rahmen, die sich an das Fenster anpassen… Ich glaube nicht, dass es so toll aussieht.

Ich denke, es sieht zusammengesetzter aus, wenn die Rahmen unter dem Fenster unterschiedliche Breiten und Höhen haben – Solange der Abstand um die Rahmen herum derselbe ist wie der Rest der Wand, passt alles zusammen.

Ich hatte nur ein Fenster, das mein Layout für die Ketten auswirkte, Und zum Glück hat es die Dinge nicht zu sehr beeinflusst. Sobald ich es tat, wurde mir klar.

Schauen Sie sich das Bild unten an, Das ist das Fenster, über das ich spreche. Es sieht nicht schlecht aus, Aber es war mehr als alles andere Glück. Ich ging von rechts nach links, als ich meine Wainscoting installierte, Am Fenster wurde erkannt, dass ich unter dem Fenster etwas anderes machen muss (Beachten Sie, dass die beiden Kisten unter dem Fenster nicht so breit sind wie die neben ihnen), übersprungen es später und nahm meine Bildrahmen auf der anderen Seite des Fensters wieder auf.

Wainscoting Picture Frames Around A Window

Stattdessen, Ich hätte es besser gewesen wären, wenn ich die Bildrahmen unter dem Fenster mit der Fensterbreite ausrichten und die Leerzeichen auf jeder Seite des Fensters als separate Wände behandelt und für jede Seite separat berechnet hätten.

What I should have done with wainscoting frames under windows

Ich habe das Bild bearbeitet, um zu zeigen, wie es ausgesehen hätte, wenn ich die Frames unter der Fenster mit den Kanten des Fensters ausgerichtet hätte. Entschuldigen Sie die grobe Bearbeitung, Aber ich denke, es gibt eine Vorstellung davon, wie es besser ausgesehen hätte.

Wieder, Das Fenster hat es zum Glück nicht zu sehr für mich zusammengeschlagen, Aber ich kann sehen, wo es wirklich hässlich werden könnte, wenn Sie das Fenster vorher nicht planen.

The frames under the window now line up with the window edges

Das von uns verwendete Formteil

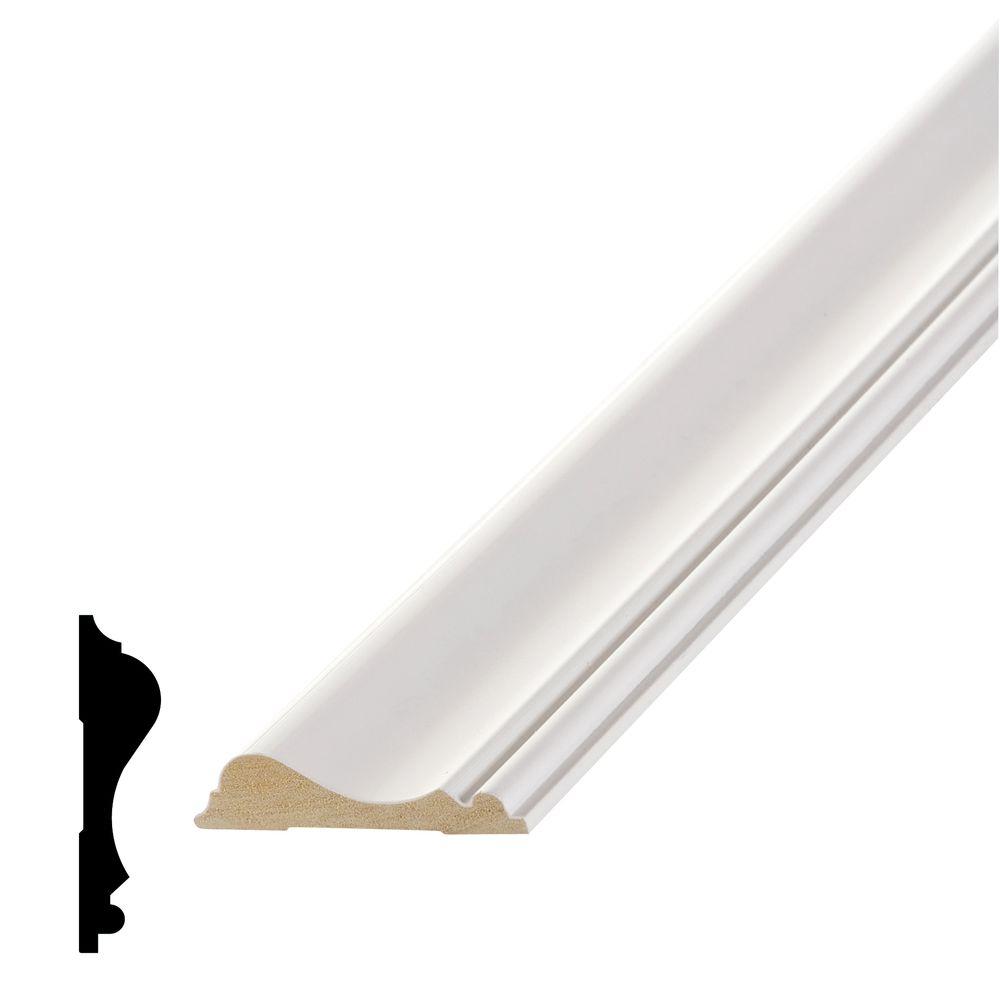
Für die Täfelung haben wir zwei verschiedene Formteile verwendet, eine für die Stuhlleiste und die andere für die Rahmen und die horizontale Leiste zwischen Stuhlleiste und Rahmen.

Wir haben beide bei Home Depot gekauft. Hier sind sie, Sie können auf das Bild klicken, wenn Sie das gleiche Formteil erhalten möchten.

Die Stuhlformung (Top-Formteil)

Das ist die Stuhlleiste. Es gab eine Polyversion dieser Leiste, die viel billiger ist, aber die Merkmale waren etwas übertriebener und uns gefiel das Aussehen der Holzversion besser.

Die Leiste für die Rahmen

Dies ist die Leiste, die wir für die Rahmen und als zweite horizontale Leiste verwendet haben (unterhalb der Stuhlleiste).

Da es sich um ein Polyformteil handelt, war es wirklich preiswert… Zum Glück haben wir VIEL davon gekauft. 🙂

Unsere Farben

Bei den Wandfarben haben wir uns für Greige-Farben entschieden (eine Mischung aus Grau und Beige).

Auf vielen Täfelungsbildern, auf die wir gestoßen sind, waren die Täfelungsrahmen weiß auf einer andersfarbigen Wand. Dadurch tritt der Täfelungsrahmen stärker hervor, Stattdessen haben wir uns dafür entschieden, die Rahmen in der gleichen Farbe wie die Wand zu streichen.

Wenn Sie die Täfelung in der gleichen Farbe wie die Wand streichen, wirkt sie wie ein Einbaustück, was uns gefallen hat.

Wenn Sie die gleichen Farben verwenden möchten, finden Sie hier die beiden Farben, die wir verwendet haben:


Farbe der unteren Farbe

Sherwin Williams

Ästhetisches Weiß (SW7035)

Vitrine

Innensatin

Top-Lackfarbe

Sherwin Williams

Erneut Grau (SW7030)

Vitrine

Innere Eierschale

wainscoting paint colors

Das ist es für das Wainingcoting -Design und das Layout

Das ist es, um die DIY mit dem Entwerfen und Auslegen Ihrer Wainscoting -DIY. Now that you figured out all the nitty gritty for your wainscoting it’s time to start cutting some molding! I’ll cover that in the next post!

Click on the button below to keep reading:

Some Pictures Of The Finished Wainscoting

Here’s some more pics of the wainscoting. I’m thinking of doing a post on the wainscoting in the stairs since that was a bit trickier. I haven’t used math like that since High school! lol

Lass mich wissen was du denkst, dort etwas hätten Sie getan haben unterschiedliche?

Sagen Sie Ihre Meinung in den Kommentaren unten!

wainscoting - in the stairs
wainscoting - in the stairs from the top to the bottom
wainscoting - in the stairs on the other side the top to the bottom
wainscoting - in the stairs the bottom section
Wainscoting shapes
wainscoting - in the stairs the bottom section

Viel Spaß mit diesem Beitrag? Pin es und teile es mit anderen!

Easy Way To Do Wainscoting - Designing and Layout

DIY Heimkino Final Reveal

DIY Heimkino Final Reveal

DIY Home Theater Design - The Final Reveal


It took quite a bit of research and effort to get the theater done and it is finished!

Actually, the theater was finished a while ago but I realized that we never had the reveal along with additional pics of the finished theater.

So here it is, the home theater final reveal!

Disclosure: Some of the links below are affiliate links. If you decide to purchase any of these products, we earn a small commission at no additional cost to you. We recommend these products only because we have experience with them and use them for our own projects. As Amazon Associates, we earn from qualifying purchases.

The Home Theater Final Reveal

This was a pretty big project, it took loads of research, calculations and choices to get to the final product. We decided to do all the work ourselves, which saved us a ton of money and also gives us a sense of accomplishment. 🙂

We love, love, love our theater and use it regularly. For the most part there isn’t much we would change.

There are a couple of things, which I’ll cover at the end of the post.

The Beginning (ish)

Unfortunately, we don’t have any before pics and very few during pics. 🙁

We started the home theater project before we had the idea of starting a blog, and apparently we didn’t do a good job of taking pictures.

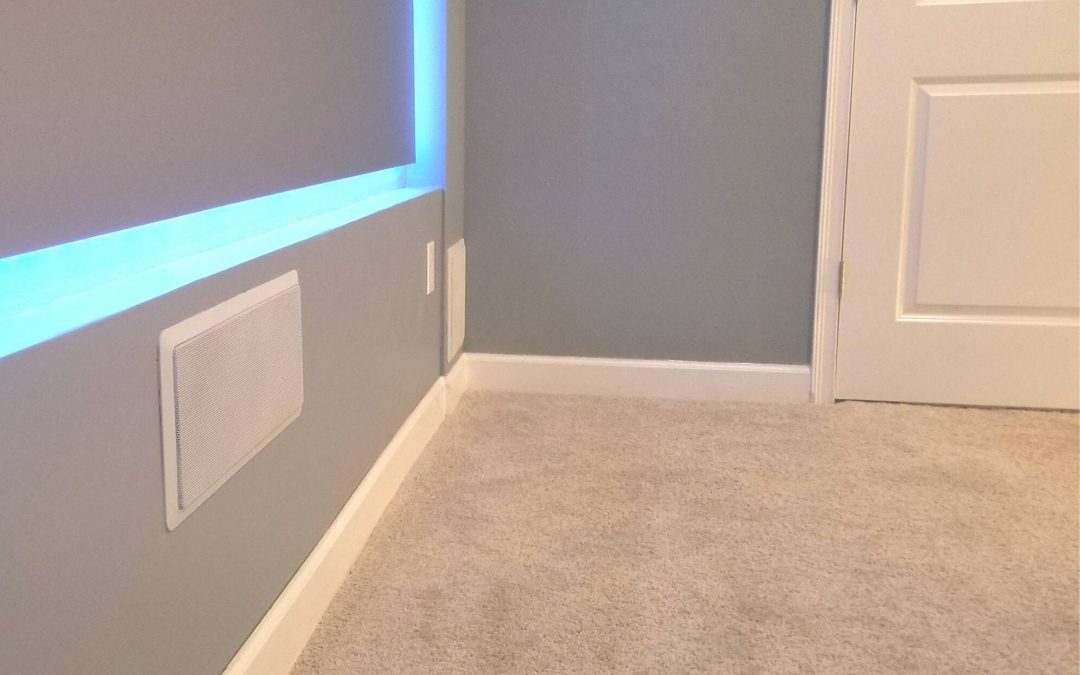
Anyhow, here are a few pics of the work in progress.

Laying Out The Home Theater Seating

Before the room was transformed into a home theater, it was a clean slate for us to work in. It was a regular rectangular room with no closets.

You can get an idea of what it was like before in the picture below.

We ordered the seating before we did anything else. There was a sale so we pulled the trigger.

We ordered the seating based on the measurements that they had online. Needless to say we were a bit nervous that the measurements would have been off… luckily everything worked out. 🙂

Once the layout was ironed out I started work on the theater room riser a.k.a. the home theater platform.

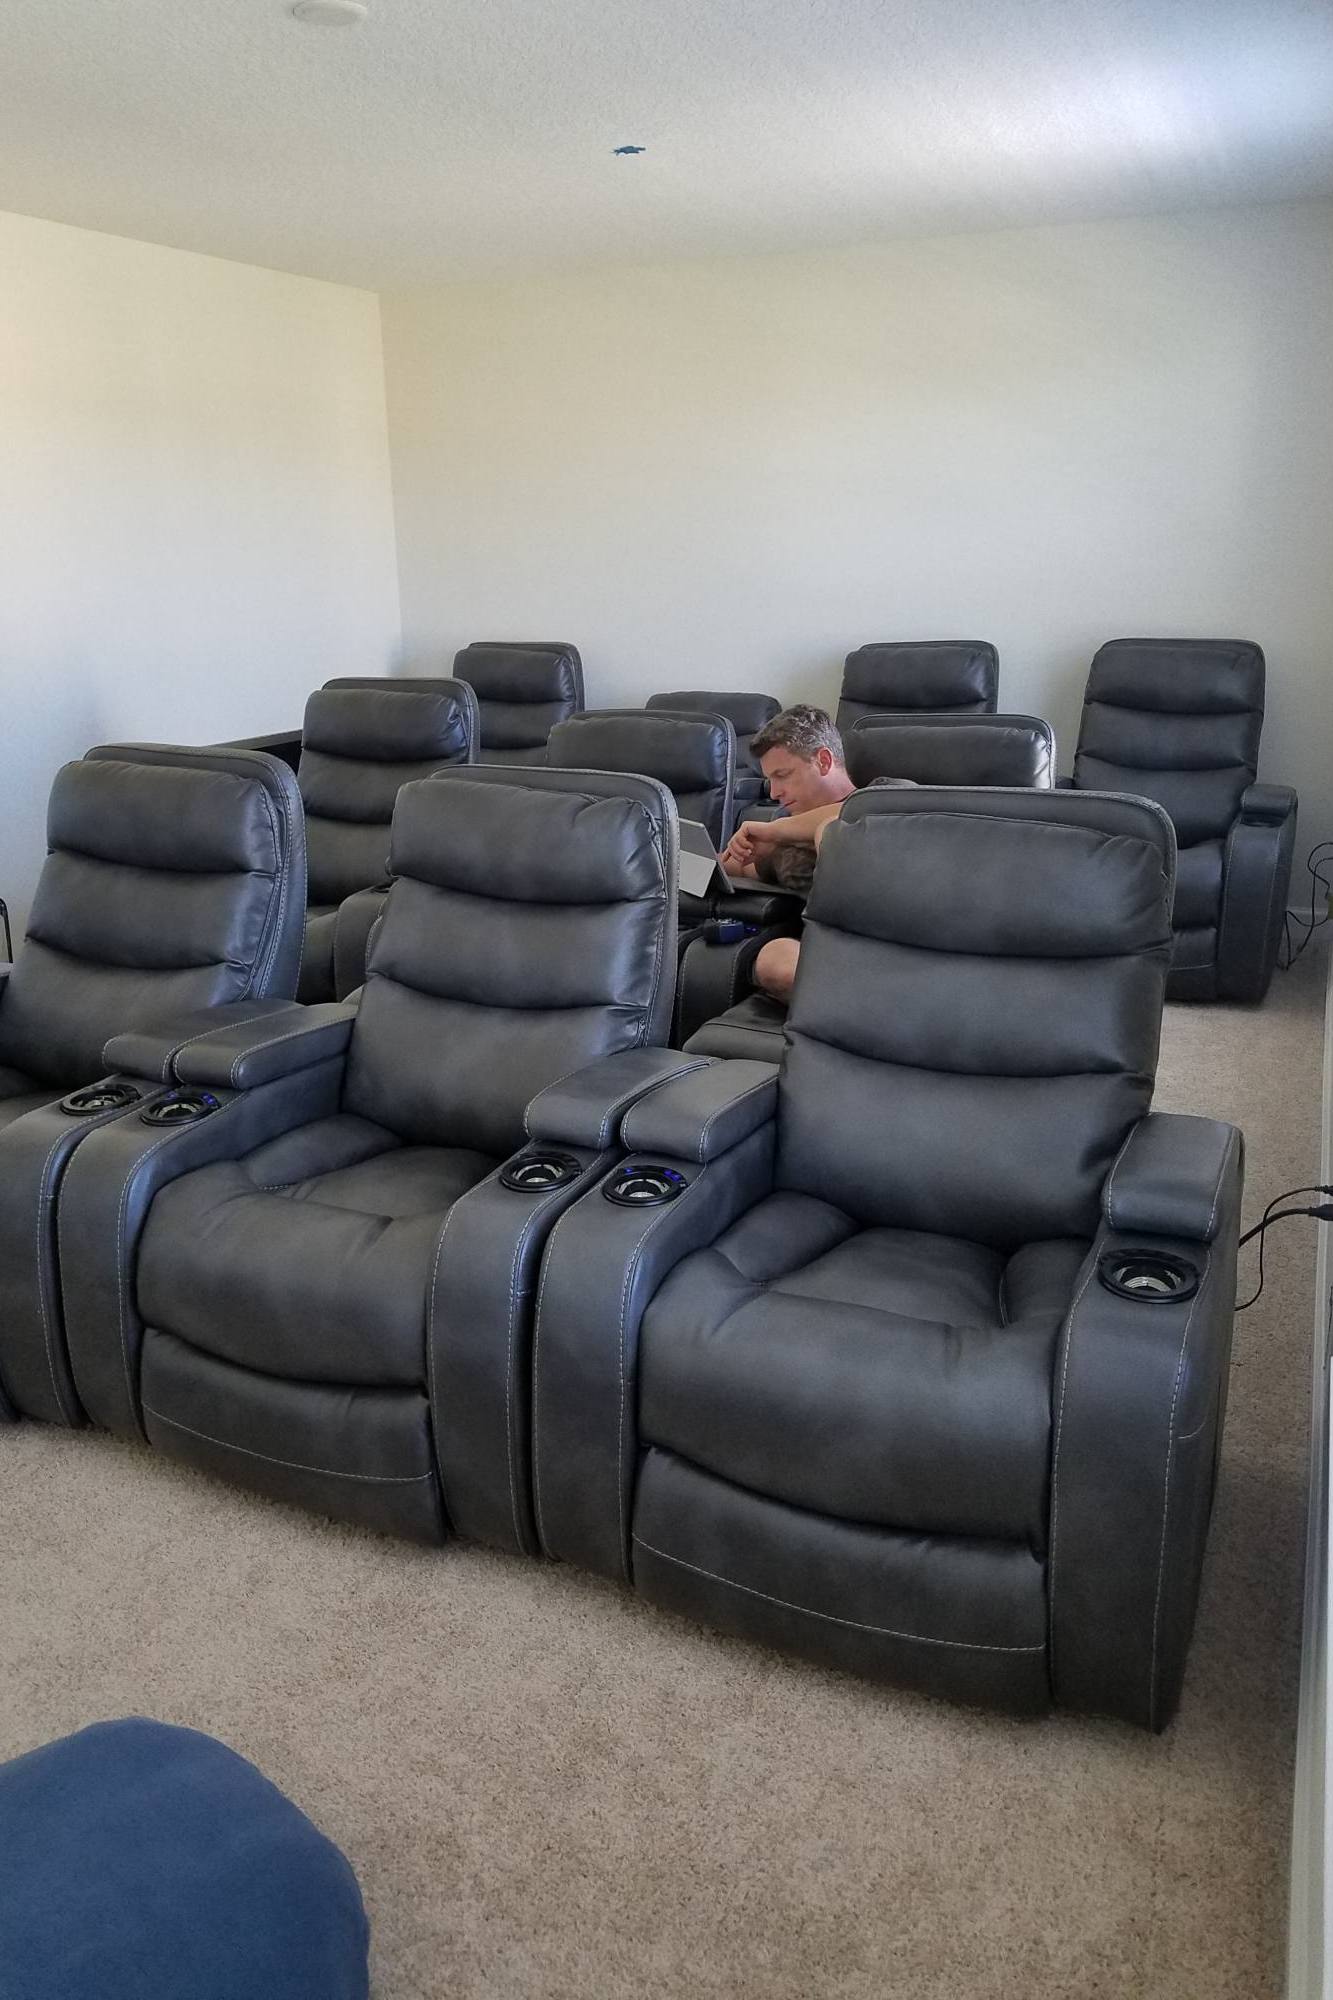
And before I got too far into the home theater seating risers construction I tested the height of the risers with the chairs to make sure things were still lining up the way I wanted it to.

That’s me in the last pic testing the home theater riser height with the chairs in place.

Laying Out The Home Theater Seating
Testing The Home Theater Seating Layout With The Height Of The Risers
Laying Out The Home Theater Seating

Working On The Theater Riser

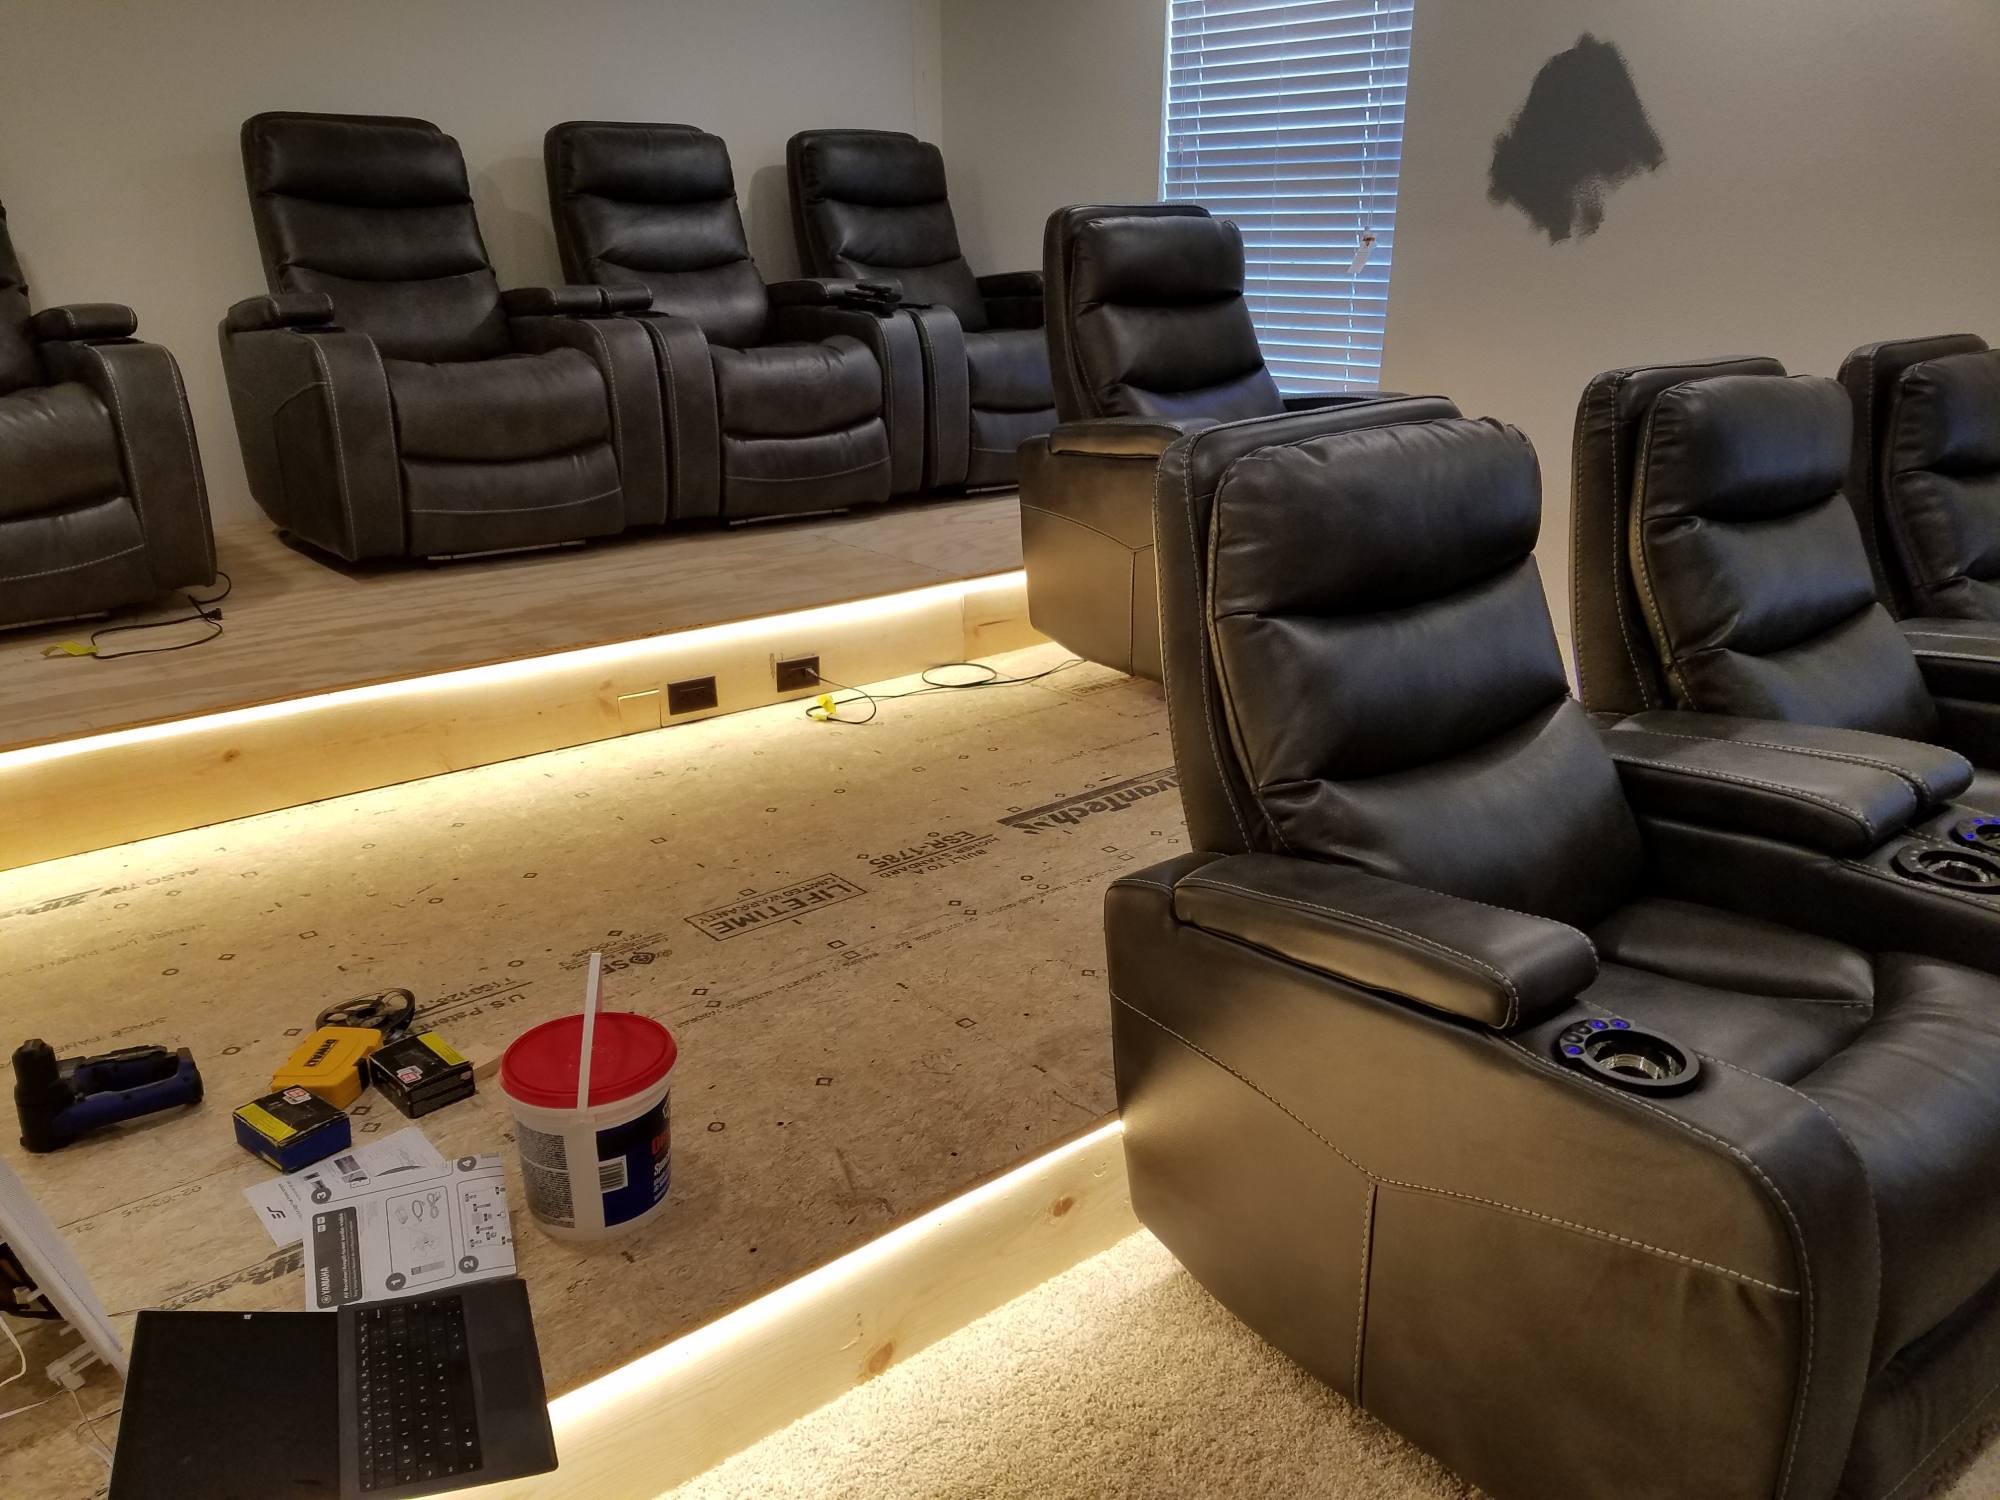
Now that the riser height was ironed out I could finish the riser.

Before I added the plywood flooring to the risers I needed to I relocate the cable line from this room out into the hallway closet, where all the theater equipment was going to live.

I also needed to add outlets to power the recliners and the LED light for the riser stairs.

I put two on the bottom of the back wall, and two in the center of each step.

Adding Lights In The Risers Steps Portrait
The Riser Flooring For The Home Theater Is Installed

Time For The Good Stuff – The Projector, Screen and Speakers

This part took a lot of research and calculating. Check out these posts for details on the projector, screen, remote, home theater system and speakers.

Once all the calculations were done I tried everything out before making any holes in the walls.

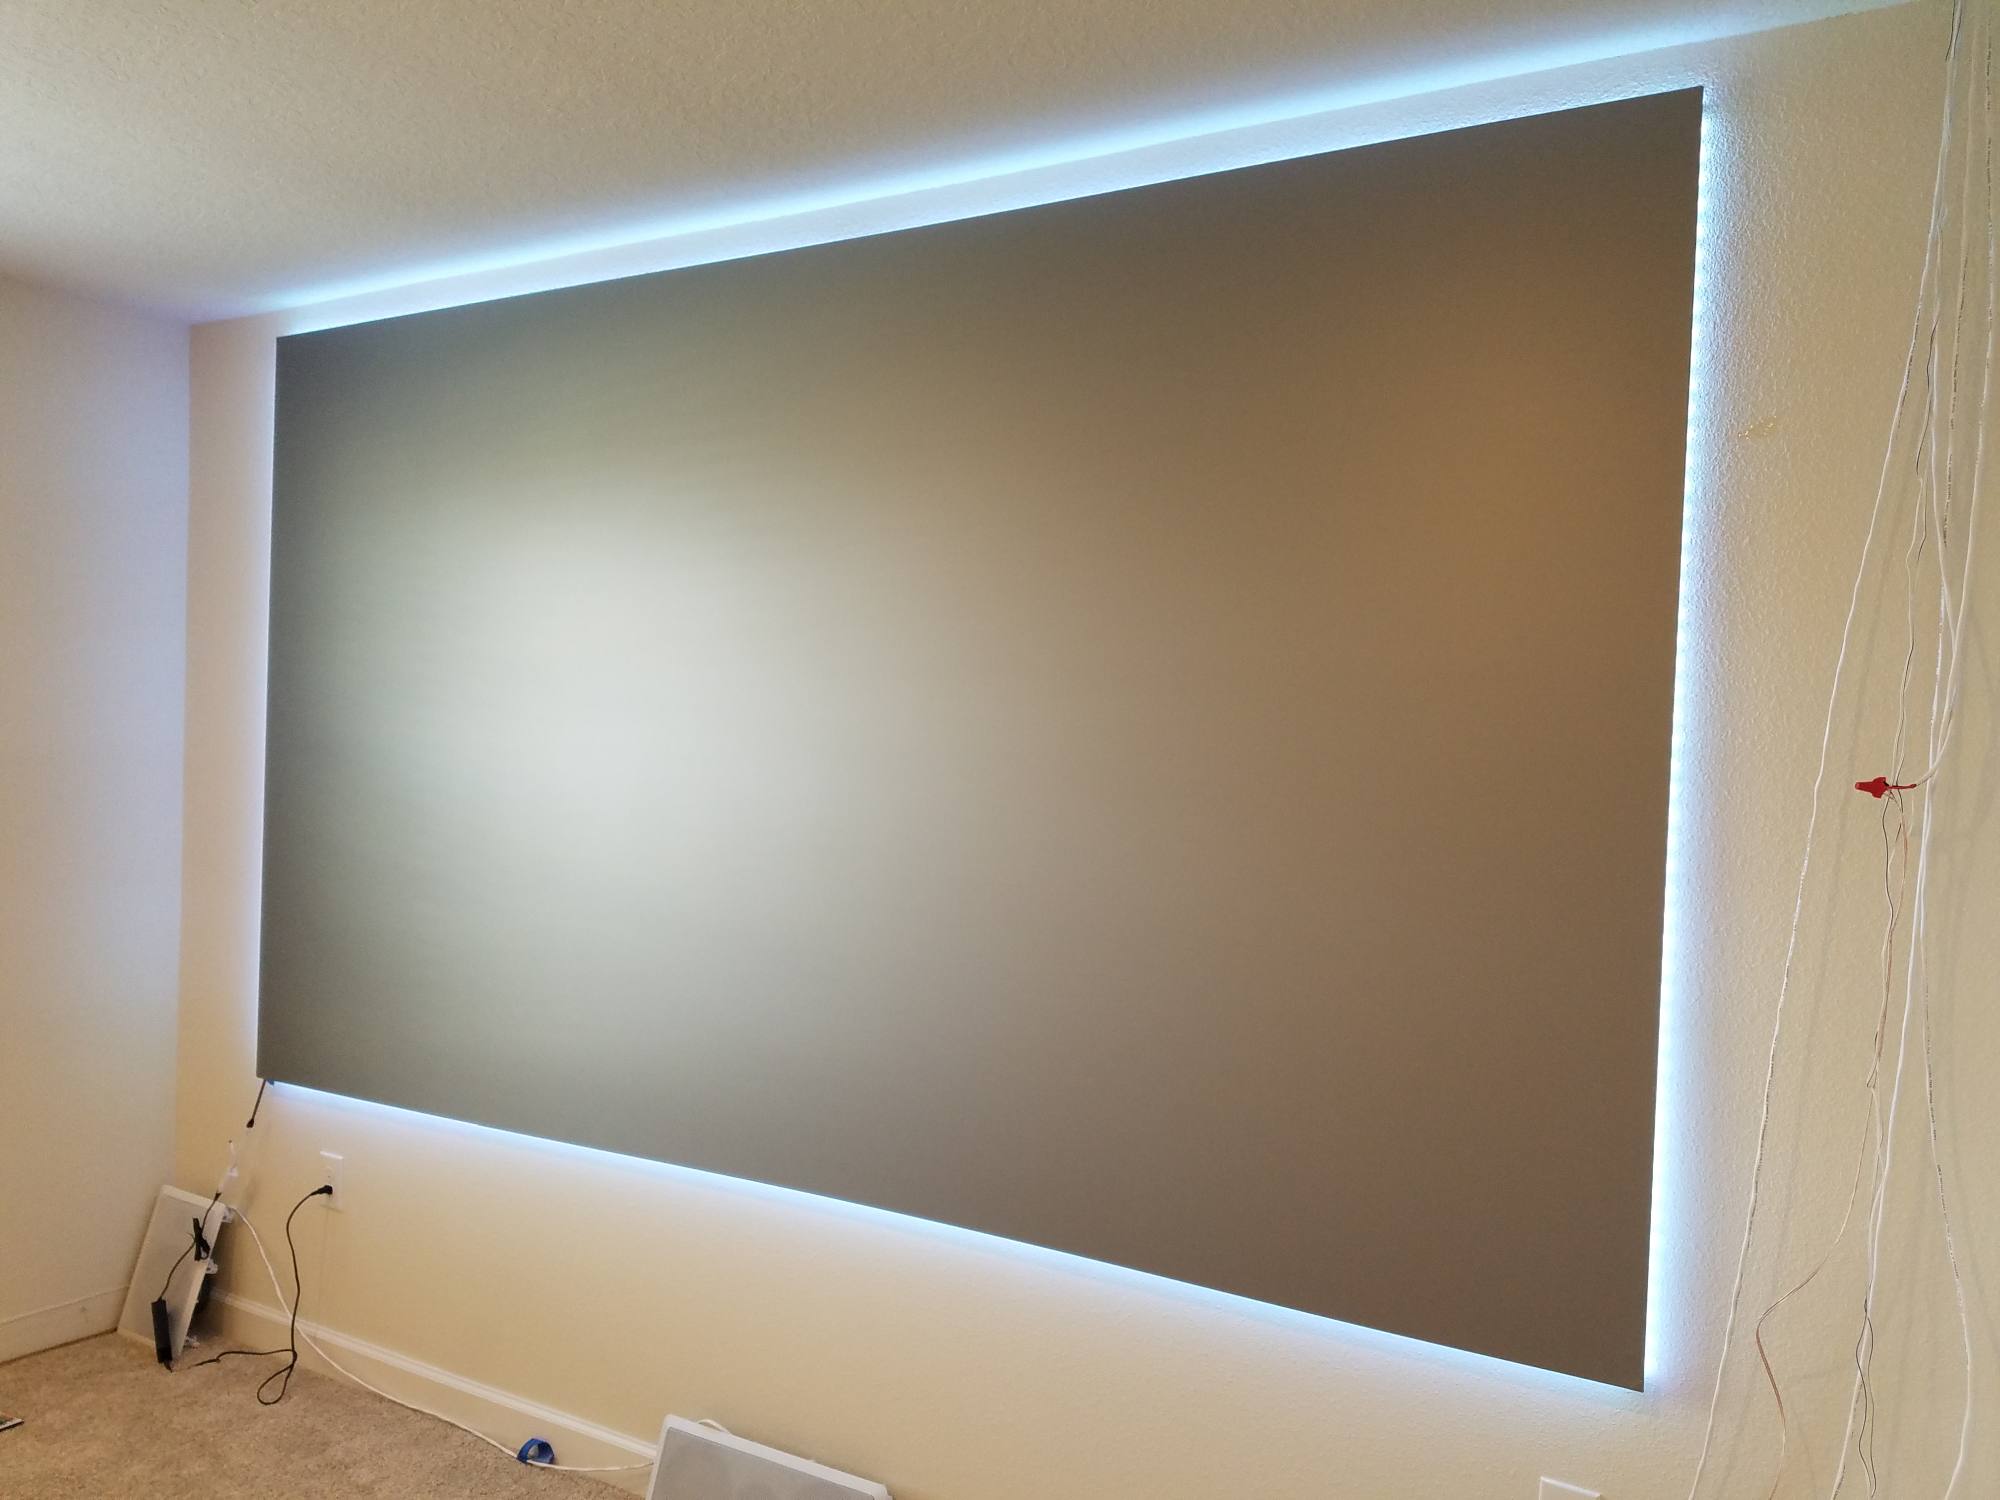
After testing the projector location, I mounted it to the ceiling and ran an electrical outlet right next to it.

Testing The Projector Location
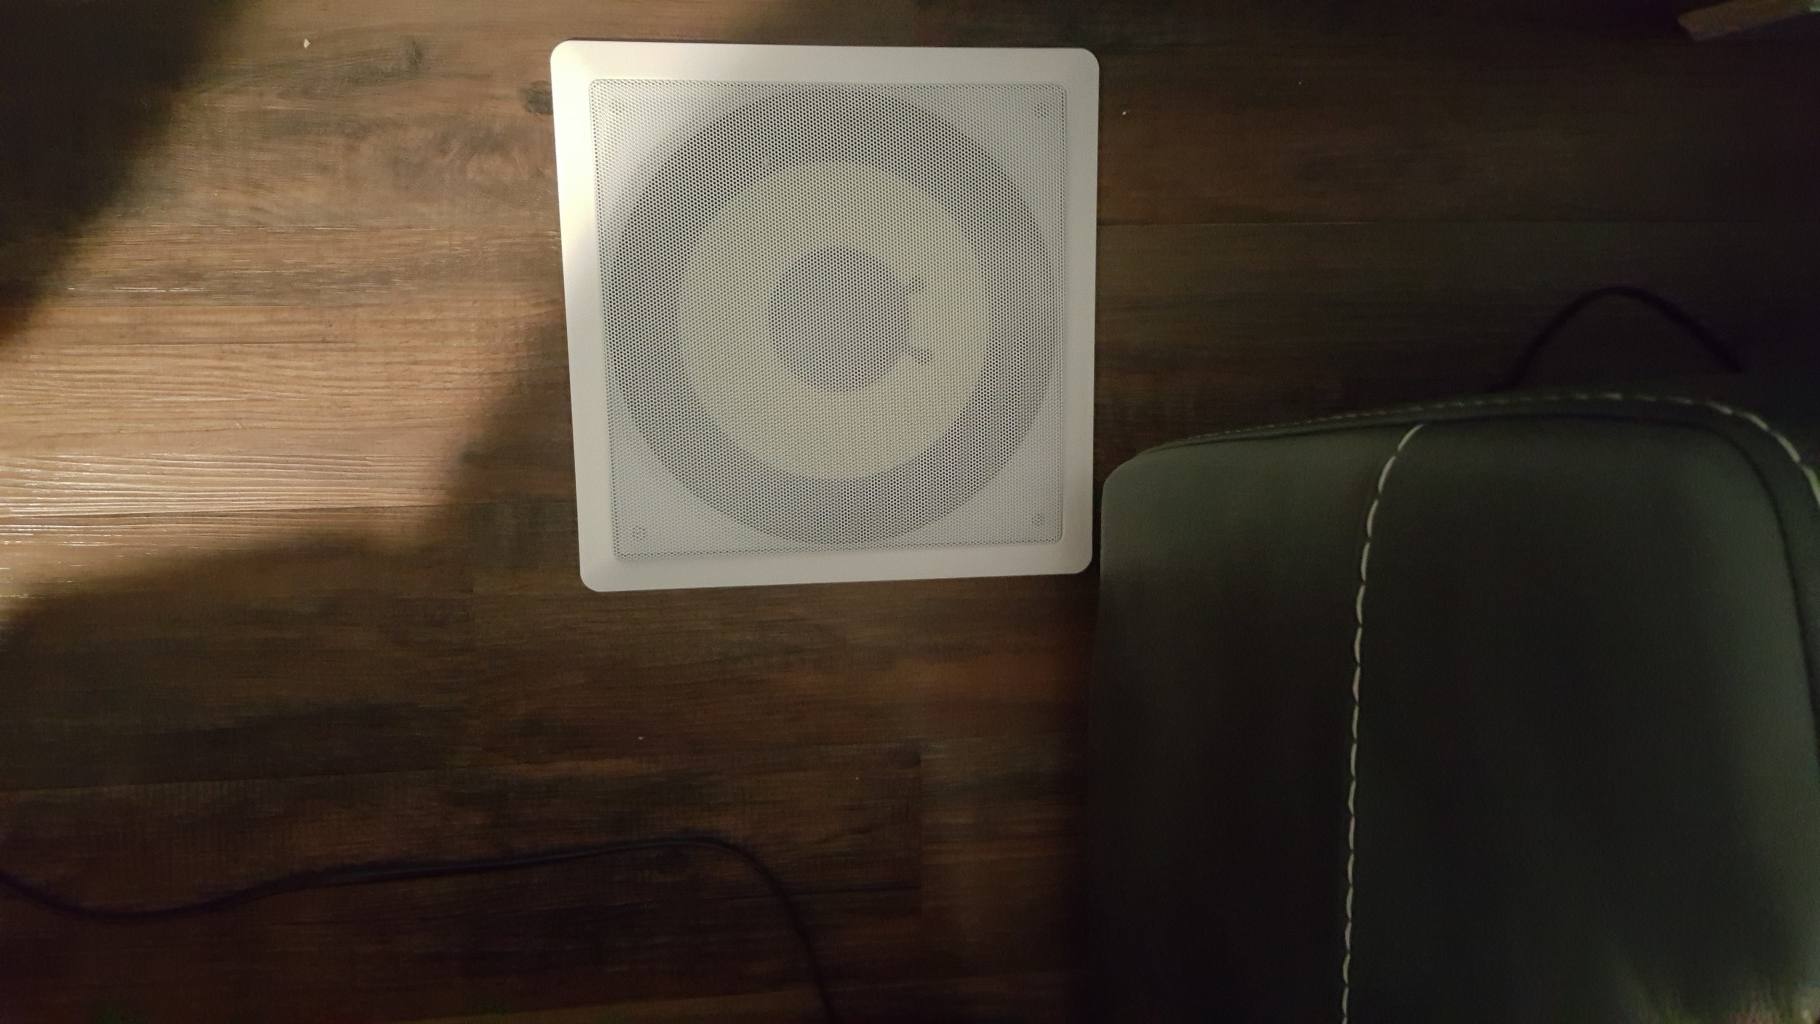
Installing The Wiring For The Speakers
The Home Theater Projector Screen Is Up

The Home Stretch, The Home Theater Entrance Sign and Painting

The entrance sign was not a very hard part of the project. The hardest part was finding the right sized letters to put above the doors.

It did take a while to find the right-sized letters to use, I was able to find these at Target.

Once I found the right letters I:

  • Removed the existing top door molding
  • Cut out a piece of 3/4″ plywood to fill the space between the top of the door and the ceiling
  • Added a crown molding around the top of the plywood and a small piece of molding on the bottom of the plywood to give it more of a finished look.
  • Then centered the letters and painted, voila!
Testing The Letter Size Above The Home Theater Doorway
The Home Theater Riser Is Complete - Still Need To Paint
Installing The Home Theater Entrance Sign

The Finished Home Theater

Here are a bunch of pictures of the finished home theater.

I love the way the theater came out, it’s even better than I was expecting.

There are a few more things I still need to do, like making a home for the remote control, something like a cubby hole or shelf where it can be charged.

DIY Home Theater Entrance Sign
DIY Home Theater Entrance Sign From Front
DIY Home Theater Design - The Final Reveal

What I Would Have Done Differently

If we had to do it all over again, there are a few things I would have done differently. Overall, it would be the same home theater – with a few tweaks.

The Stair Lights

I installed lights in the stairs, which is a look that I thought would be great.
The lights I bought were low voltage, which means they have a transformer, and that means they aren’t dimmable.

In the end, I rarely use the lights in the stairs because they are too bright. If I did this again I would buy regular voltage lights that are dimmable.

The IR Repeater

I bought an IR repeater to have the remote’s signals sent to the closet in the hallway, where the theater equipment is.
The IR repeater worked great, but it turns out the Logitech remote I bought to replace all the remotes uses a radio signal to communicate with the hub (which is in the closet with the equipment) so I no longer need the IR repeater.

Getting 4K HDR Streaming Content

This was an expensive lesson. The projector itself doesn’t do any streaming, you need to have a device connected to it that will do that for you.
My idea initially was to get a 4K DVD player and that will have 4K streaming. The first DVD player I bought supported 4K Netflix but the Vudu app on it did not support HDR.

I was building up a movie library on Vudu and wanted to have it in HDR if that was a possibility. So I went on a quest looking for a 4K DVD player that supported Vudu in HDR.

I found one and it worked great, but it was a bit pricy and the menus were kinda slow to get to the streaming apps. I tweeted the macros on the Logitech and got it to work correctly, but slow. As a DVD player it was really good, and the streaming apps were there – just slow to navigate the menus.

Then for some reason, I went and bought a Roku.

Holy cow, that was a game-changer!

It supported 4K everything, HDR everything, and was lightning fast!

If I had to do this again I’d get the cheaper 4K DVD player to play the Ultra-HD DVDs and use the Roku for any Streaming apps.

The Entire Shopping List

Here’s a list of everything that we are currently using in our home theater.

You can click on the picture to buy the same one for yourself.

Projector

Designing a Home Theater - The Video Projector - Epson Home Cinema 5040UB 3LCD Home Theater Projector with 4K Enhancement

Projector Screen

Designing a Home Theater - The Fixed Projector Screen - Elite Screens - A Fixed Projector Screen

The Projector BackLight Kit

Designing a Home Theater - The Fixed Projector Screen - The LED Kit

The Amplifier

Designing a Home Theater - Home Theater System - Yamaha TS-R7810

The Remote

Designing a Home Theater - Home Theater Remote - Logitech Harmony Elite Remote

The Passive Amplifier

Designing a Home Theater - Home Theater Subwoofer Amplifier

Roku Ultra

Roku Ultra

The Speakers

Designing a Home Theater - Home Theater Speakers - Acoustic Audio HD728 in-wall ceiling home theater 7.2 surround 8 inch speaker system

DIY Home Theater – Finished!

There you have it, pics of the home theater, during the construction and after the DIY home theater was finished.

I hope you find some ideas and tidbits of info in our project that will help you with yours.

What would you do differently in your home theater? Let me know in the comments below!

Enjoy this post? Pin it and share it with others!

DIY Home Theater Design - The Final Reveal - Portrait

How To Start A Grow Bag Victory Garden

How To Start A Grow Bag Victory Garden

How To Start A Grow Bag Victory Garden


Our latest project is indoor gardening. Our initial attempt at a green thumb was trying to give our kitchen scraps a chance at a second life. We’re still doing that, and in addition we’re also planting seeds.

Since Corona Virus is forcing a ton of people into self-isolation, many have taken on new hobbies. With the news now saying that there may be shortages in fresh produce this summer, it came as no surprise that we weren’t the only ones that chose gardening as our new hobby.

So much so that the trend was even given a name, they’re calling them victory gardens.

We would have loved to grow our victory garden in the yard but in our community the HOA doesn’t allow gardens. 🙁

As an alternative, we started using grow bags. We bought a couple of different sizes to accommodate the different types of plants we were thinking of planting.

Disclosure: Some of the links below are affiliate links. If you decide to purchase any of these products, we earn a small commission at no additional cost to you. We recommend these products only because we have experience with them and use them for our own projects. As Amazon Associates, we earn from qualifying purchases.

What You’ll Need To Start Your Grow Bag Victory Garden

You don’t need very much stuff:

  • grow bags
  • potting soil
  • and maybe a bag of seed starter mix if you prefer to start your seeds in a start mix

The Grow Bags

We bought the grow bags in a couple of different sizes, to give us flexibility in what plants we could grow.

The grow bag size you’ll need will, of course, depend on what you plan on growing and how much of it you plan on planting.

We figured we’d use the deeper bags for plants that needed the depth, like potatoes, carrots, and beats. Basically, anything that required a deeper root system.

We also got shallower and wider grow bags, giving us more planting surface for with plantings that don’t have deep root systems. Things like lettuce, scallions, onions, garlic, herbs, etc…

The Deep Grow Bags

For the deep grow bags we purchased a couple of packs of 7 gallon grow bags, measuring 13″ diameter x 12″ high.

Each pack has 8 bags, that’s a whole lotta bags to plant veggies in. 🙂

You can click the picture of the bag to get the same deep grow bags.

The Wider Grow Bags

With the wider grow bags we purchased 3 grow bags, each measuring 24″ diameter x 8″ high. It didn’t indicate how many gallons each grow bag was but they are perfect for the plants with shallower root systems.

You can click the picture of the bag to get the same deep grow bags.

The Potting Soil

The potting soil we used was MiracleGro Performance Organics.

We didn’t know how much potting soil we were going to need, so we took a guess and bought 9 – 25 quart bags.

We ordered it from Lowes and had it delivered.

So far we’ve used a couple of bags and we’re using 4 deep grow bags.

Although only one is filled to the top, the others are filled about half way.

How To Start A Grow Bag Victory Garden- Potting Soil

Prepping Your Grow Bag Garden

Prepping your grow bag garden is really as straight forward as you’d imagine.

  • Unfold the grow bag
  • Fill the grow bag up with potting soil
  • Plant your seeds or transplant your plants
  • give your plants a good watering
  • Place the bags in a bright area without too much direct sunlight

One thing I did notice is that although the grow bags breath, they also do a great job of keeping the moisture.

Be careful not to over water your plants. I did that in the beginning and soon found out the plants didn’t like my overly generous watering.

Warning: The grow bags are designed to breath – which is a good thing. But as a result, they also allow moisture to permeate through the bag. If you’re placing your grow bag on carpet, or wood floors make sure to put something underneath the grow bag so it doesn’t stain or damage your floors. I put a sheet of plastic underneath mine to protect the carpet.

Tip: When using the deeper grow bags you don’t need to go to the top of the bag if what you are planting has shallow roots. You can fold back the top of the bag, similar to what you do to jeans when they are too long.

That way you don’t use more potting soil than you need to.

What Do You Think Of Our Indoor Victory Garden?

That’s pretty much it. So far, we are loving our new hobby. It really is exciting to see the progress the plants make every day.

We’re not at the point of having new veggies yet but at this rate, the veggies will be here before we know it. 🙂

I hope this post inspires you to start your own indoor grow bag victory garden and shed some light into how easy it is to start one.

What did you think? Have you ever grown things in a grow bag? How did it work out for you?

Let me know in the comments below! Thanks for reading.


Enjoy this post? Pin it and share it with others!

How To Start A Grow Bag Victory Garden
5 Veggies You Can Grow From Kitchen Scraps

5 Veggies You Can Grow From Kitchen Scraps

5 Veggies You Can Grow From Kitchen Scraps


First, let me start off with saying there are definitely waaaay more than just 5 veggies you can grow from kitchen scraps, these are just the first ones I tried.

With the Corona Virus causing our vacation rental business to come to a screeching halt, we started putting our attention to other interests.

The latest project we’ve taken on is starting a garden, most likely a container garden.

During my perusing on Pinterest, I found a pin on regrowing vegetables from the kitchen scraps.

I just started this project but already have quite a few types of veggies that can be regrown from kitchen scraps.

Like I said, there’s probably many more vegetables you can do this with, but this is a list of the ones I started with.

Disclosure: Some of the links below are affiliate links. If you decide to purchase any of these products, we earn a small commission at no additional cost to you. We recommend these products only because we have experience with them and use them for our own projects. As Amazon Associates, we earn from qualifying purchases.

5 Vegetables You Can Grow From Kitchen Scraps

#1 – Lettuce

This seems to work with all kinds of lettuce, so far I’ve got butter, red leaf and romaine lettuce regrowing from kitchen scraps.

Out of the 3 the romaine seems to have a head start. To be fair, I was apparently more generous with the amount of base I left on the root – I’m guessing that would make a difference.

5 Veggies You Can Grow From Kitchen Scraps - Lettuce

How To Start

When cutting the base of your lettuce head off, cut it about 1 1/2 – 2″ from the bottom. Then take the base and put it in a container with a bit of water on the bottom.

Make sure to change out the water every couple of days and in a few days you’ll start seeing new growth emerging from the center of the base.

Once you a good amount of growth, your new lettuce plant will probably be happier in soil. I’ve read that it would do fine in water, as long as you change out the water every couple of days.

Personally, when I planted the lettuce in the ground I noticed it started growing better. Maybe its just my imagination, but I’m placing my plants in the soil once they start showing signs of new growth.

Update: I learned recently that lettuce will shoot up right away when the temperature is above 70 degrees. Since we’re in Florida, those temps make it difficult for us to grow lettuce indoors. We keep the temperature around 75 degrees and the romaine lettuce I was testing with, shot straight up.

I’m trying again, this time with butter lettuce. As soon as the lettuce started growing new leaves I put it in dirt. Lets see if that improves things.

I’ll update this post with its progress.

#2 – Basil

We had a long and leggy basil plant that wasn’t producing many leaves anymore. So I figured I’d try to use a cutting to start a new plant.

So far, the basil I’m trying this with hasn’t made any new roots but I’m pretty confident that it will start rooting shortly.

The cutting looks like it’s doing well in the water, and from what I’ve read, basil is a piece of cake to grow from cuttings.

How To Start

You’ll want to give the cutting enough stem so that it can sit in water without the leaves touching the water. If the leaves sit in the water they’ll start rotting and the water will get cloudy and your cutting will probably die off.

So give the cutting a couple of inches of stem.

Take your cutting and place it in a container with enough water for about an inch of the stem to sit in the water.

Place it in a bright area without direct sunlight and wait. 🙂

5 Veggies You Can Grow From Kitchen Scraps - Basil

#3 – Onions

The onions seem to grow pretty easily, it’s been a week and they look like they’re ready to be put into dirt.

Not sure if an actual whole onion will grow from this experiment but the green stems that grow from it can be used in cooking. The entire plant had an onion flavor.

5 Veggies You Can Grow From Kitchen Scraps - Onions

#4 – Scallions

The scallions are the rock stars of my kitchen scrap garden! They have been in water for maybe about 5 days and have several inches of new growth already on them.

How To Start

Similar to the lettuce cuttings, when you cut the base of the scallions off cut it a bit higher than usual. About a couple of inches of the plant from the base.

Put them in a container with water on the bottom and you are all set.

Since they usually already have some roots, these guys didn’t waste any time growing.

5 Veggies You Can Grow From Kitchen Scraps - Scallions

#5 – Garlic

Ok, so this isn’t exactly using kitchen scraps, since you’re taking the entire unused clove and sticking it into the ground.

Maybe it’s more like a garden tithing. 🙂

I took a few small cloves of garlic and planted them in the dirt next to the tomato slice. They were in the dirt about 3 days and I’m starting to see some green on the tops of a few of the cloves.

I’m guessing they could have also had the base of the garlic sitting in a little puddle of water to get it to start growing but I tried sticking it directly in the ground and that seemed to work like a charm.

5 Veggies You Can Grow From Kitchen Scraps - Scallions

Caring For Your Kitchen Scrap Garden

It’s pretty straight-forward to care for it. Place them in an area that is bright but doesn’t have direct sun. For the scraps that are in water make sure to swap out the water every day or other day and for the scraps in dirt make sure their dirt stays moist – without over watering.

Before you know it you’ll start seeing new growth and your kitchen scrap garden will by off to the races! 🙂

Once the kitchen plants turn more into plants (either they grow roots are start growing new leaves) I’ll transplant them into grow bags.

Tip: When cutting the vegetable it seems to help to leave a bit of “meat” along with it. The lettuce and onions that I cut short didn’t seem to grow as fast or well compared to the ones where I left some more “meat”.


That’s My Kitchen Scrap Garden List

There are probably dozens of other veggies you can try this with, these are just the ones I’ve started with. I’m sure I’ll be adding other scraps to the list as I come across new ones.

Once the veggies grow a bit I’ll be transferring them to grow bags.

What did you think? I know I personally will never look at kitchen scraps the same way again. 🙂

Have you ever tried recycling your kitchen scraps? If so what veggies did you try? Did it work for you?

Lemme know in the comments below.

Enjoy this post? Pin it and share it with others!

5 Veggies You Can Grow From Kitchen Scraps

3 Time Saving Tips For DIY Plank Plywood Floors

3 Time Saving Tips For DIY Plank Plywood Floors

Now that we have two DIY plank plywood floors projects (the dining room and the living room) under our belts, we’ve learned a bunch of things – things to do and things not to do. We’re going to cover 3 Time Saving Tips For DIY Wide Plank Plywood Floors.

If you’re planning on making your own wide plank flooring made from plywood, then make sure to take a look at this list – it will save you tons of time… and sanity :).

We wrote detailed articles for each of those projects (see below for links) but we also wanted to write a short article highlighting the biggest time saving tips we have.

Here are the 3 things you need to know for making your own wide plank plywood floors. Following these tips will make your project go smoothly and you’ll end up with better-looking plywood floors.

Disclosure: Some of the links below are affiliate links. If you decide to purchase any of these products, we earn a small commission at no additional cost to you. We recommend these products only because we have experience with them and use them for our own projects. As Amazon Associates, we earn from qualifying purchases.

DIY Plank Plywood Floors Tips

A Bonus Tip First – Cut The Boards Yourself

Yeah, it’s a little different to get the bonus tip first, but a few of the tips piggy back on this one. So it makes sense to share this first.

And I know that cutting the boards yourself sounds like the opposite of a time saver, but let me explain.

There are a few posts out there that recommend having the person at Lowes or Home Depot cut the plywood into planks for you.

I know that sounds like it would save you tons of time, because you’re offloading the cutting on them, but I wouldn’t recommend doing that.

We’ve had home improvement stores cut the plywood for us on other projects in the past.

Although it does save you time – we don’t think it’s worth it. Their cuts are not very accurate, like really inaccurate.

That may be perfectly find for certain projects, but with this project consistent cuts are important.

Having boards that are all about the same width allows your project to go smoother, easier and the end result will look much nicer.

#1 Make A Jig

OMG – If I didn’t use a jig I don’t know if I would have ever finished this project. The jig gives you consistent cuts and also allows you to easily rip through the pile of plywood.

The next best tool to use would have been the table saw, but it’s a super distant second to using a jig.

The jig wasn’t hard to make and it didn’t take very much time.

Take a look at the jig details in the dining room flooring article.

There you’ll find out how to make one and how how to attach it to the circular saw.

DIY Wide Plank Plywood Flooring - Secure The Jig To The Circular Saw Using Screws

#2 Don’t Use A Plywood Blade

This deserves another OMG. I tried using a plywood blade to cut the plywood into planks initially (cause you know, it’s plywood) but that was a BIG MISTAKE!

Ignore the plywood blades – instead, use the cross-cut blades.

Like I said in the dining room flooring article, the plywood blade didn’t even make it through two sheets of plywood.

When I used the cross-cut blade, a single blade did the rest of the plywood for the dining room and also the living room!!

If you’re keeping score, the plywood blade barely ripped 2 sheets of plywood into planks and the cross-cut blade did 19 sheets – and it can still do more.

This is hands down the best blade for cutting plywood planks. It cut through the plywood like butter, and also didn’t splinter the wood at all.

(Click the picture to order the same blade we used on Amazon)


The best blade to cut your plywood planks is a cross cut balde

#3 Skip Sanding Between Polyurethane Coats

When we did the dining room floor, we lightly sanded the bumps out of the coat of polyurethane with 120 grit sandpaper.

It’s what I’ve always thought you needed to do between coats and it’s also what I read in other plywood flooring blog posts.

With the living room floors, we figured that the bumps would even out a little after multiple coats of the poly were applied.

diy plywood floors

Besides, the bumps would add a bit more texture making the floors less slippery.

The only concern we had was how it would feel walking barefoot on the floor with more texture. When we ran our hands on the planks we could clearly feel the additional texture, so we were a bit nervous.

Well, it turns out, the additional texture was barely noticeable when walking on the floor barefoot. Phew, that was a relief!

There You Have It

Those are our time saving tips for DIY wide plank plywood floors. These few simple tips will save you HOURS and HOURS of time. Without them, our project would have taken A LOT longer and would have been harder to do.

The first two tips alone will save you from pulling your hair out!

We hope they will help you with your own wide plank plywood flooring.

Let us know what you think!

Enjoy this post? Pin it and share it with others!

3 Time Saving Tips for DIY Plank Plywood Floors