Selezione di sostituzione Un NAS – Che è meglio

Selezione di sostituzione Un NAS – Che è meglio

Synology DS218+ NAS - Choosing A Replacement NAS


La scelta di sostituzione Un NAS

Il tema della scelta di un NAS di sostituzione è un po 'diverso da quello che mi aspettavo di essere la pubblicazione sul OurProjectIdeas.con. Ma è un progetto che ho recentemente passato attraverso, e ho imparato molto – così ho pensato che vorrei condividere. 🙂

Credo che prima di andare in esso dovrei spiegare quello che un NAS è. NAS è un acronimo che sta per Network Attached Conservazione. It’s basically a drive (o più unità) che si collega alla rete dando un posto per archiviare e condividere file con altri dispositivi sulla rete. Quando è possibile aggiungere più unità nel dispositivo NAS si ha la possibilità di mirroring, dove un disco è una copia esatta dell'altra. Questo aiuta a proteggere contro guasti del disco. E 'un luogo ideale per memorizzare i file elettronici importanti, cose come i documenti e le immagini sono perfetti per questo.

I’ve been using a simple NAS device for about 10 years, ha funzionato grande per tutto questo tempo… until recently. Starting a few months ago, ogni volta e un po NAS perderebbe la sua connessione di rete e non ricollegarlo finché non è stato riavviato.

Le ripartenze sono diventati sempre più frequenti, to the point where we needed a replacement. It turned out to be perfect timing, dal momento che stavamo cominciando a esaurire lo spazio su quel NAS alcun modo.

Rivelazione: Alcuni dei link qui sotto sono link di affiliazione. Se si decide di acquistare uno di questi prodotti, guadagniamo una piccola commissione senza costi aggiuntivi per te. Si consiglia di questi prodotti solo perché abbiamo esperienza con loro e li usiamo per i nostri progetti. Come Amazon Associates, guadagniamo dagli acquisti idonei.

La scelta del dispositivo Un NAS

Ora che siamo stati nel mercato per un nuovo dispositivo NAS che stavo cercando uno che sarebbe in grado di sincronizzare in sé ad un altro NAS remoto.

Non abbiamo avuto questa possibilità con il nostro vecchio NAS, ma che era sempre sulla nostra lista dei desideri. Così ho iniziato la mia ricerca di sostituzione NAS con questo in mente.

Dopo alcune ricerche mi sono imbattuto in un Synology DiskStation DS218 +. It was about the same footprint as our current NAS, ha fatto il mirroring (che la nostra attuale NAS già fatto) ed è stato in grado di sincronizzazione ad un NAS remoto… perfezionare!

Avevo trovato la sostituzione giusta NAS per noi, ora per avviare la ricerca per le unità di mettere nel nostro nuovo dispositivo NAS.

La scelta di drive NAS

It’s funny because I thought the hard part of this project would be choosing the NAS device. Attiva il nostro capire quale unità per ottenere era molto più impegnativo del previsto.

Ci sono fondamentalmente solo tre produttori di unità tra cui scegliere, Seagate, Western Digital e Toshiba.

Ognuno dei produttori fanno di tutti i tipi di unità differenti, unità anche che sono fatti appositamente per i dispositivi NAS.

So I knew I was looking for a NAS drive and I also knew I wanted a drive that was 8 TB.

Since the drives I was currently using were 1 TB and they were almost full, 8 TB seemed like a good next step up.

Vai tranquillo… fino a quando ho guardato le recensioni.


Quando guardo le recensioni mi concentro sulle recensioni negative. That way I get an idea what the worst things I can expect are… vacca sacra che cosa errore. LOL

recensioni negative per un produttore che si direbbe di utilizzare le unità dell'altro produttore.

Ultimately all the bad reviews did was make you feel like there are no good drives out there. There were complaints about drive failures, unità veramente rumoroso e unità terribilmente lento… tutto molto spaventoso.

One complaint I saw over and over again was the write cache on the NAS drives being disabled when used with a Synology NAS. As a result those people complained that their Synology NAS was dog slow. YIKES!!

I decided to change my approach.


A Change In Approach

I already knew what size drive I wanted, and that I wanted it to be a NAS drivenow it was a matter of finding one that was supported in the Synology DS218+.

I felt the best thing to do was to look at Synology’s drive compatibility list.

Here’s a link to the Synology drive compatibility list:

Alla fine, the drives I chose were the Seagate IronWolf 8 TB NAS. A 7200 RPM drive with 256 MB of cache, numero di modello ST8000VN0022.

Una cosa che mi ha davvero preoccupato è la cache di scrittura non essere abilitata sulle unità.

Anche se era sulla lista di compatibilità ero ancora nervoso su di esso.

Con mio grande sollievo, when I look in Storage Manager on the Synology I see that the write cache is enabled, urrà!


Synology DS218+ - Choosing A Replacement NAS - Write Cache Is Enabled for The Drives

Come sono le prestazioni di sostituzione NAS

Permettetemi di dire che non sono molto esigente con qualsiasi cosa. As long as it does what I expect it to do I am a happy camper. However, this NAS replacement has gone so far beyond my expectation it’s just amazing. The Synology DS218+ (e le unità che ho messo in esso) è super veloce. I media e la notte il giorno veloce rispetto al precedente NAS.

L'installazione non è super facile. L'interfaccia grafica guida l'utente attraverso l'intero processo. Synology has done a great job making the setup seamless. I didn’t even have to configure it to mirror, è visto che avevo due unità e si configurato per specchio.. super semplice.

What I Like About The Synology DS 218+ NAS (Oltre alle basi come mirroring unità)


The only features that I was initially looking for in a NAS replacement was for something to do what the old NAS did and have the ability to sync itself to another remote NAS.

Non sapevo quante funzioni nuove che stavo per ottenere con questo nuovo NAS. Il NAS Synology DS218 + è un modo completamente diverso di fare le cose.

In realtà è molto più di un NAS, si tratta di un server Unix muscoloso con unità collegate. Qualunque sia un server Unix non si può fare.

Synology NAS può qualsiasi cosa, Anche un server di posta o un server wordpress.

Qualcosa che amo con Synology è l'App che ti permettono di fare quello che un sacco di siti web come Google fare per voi, the difference is that the data stays in your NAS. It’s something I’ve always wished existed, but never thought there would be something out there that could do it.

Here’s a list of the features or Apps that I love

Recycling Bin

Most NAS devices in our days probably do this but my old one didn’t, and I love this feature.

Moments

This is a Google Photos replacement. The interface is very similar to Google Photos and it does facial recognition, location detection and subjects (categories like cat, cane, garden, sky, beach, eccetera…)

The facial recognition isn’t as accurate as Google’s but it is pretty good. It’s definitely WAY better than not having it.

There’s Also a Moments app that you install on your smart phone that will automatically download your pictures to your NAS for you. How hot is that!

OH, and you can also create albums that you can share with others. You send them a link and they can view your album.

Universal Search

This is a great feature! It basically creates a full text index of all your stuff, including the contents of PDFs, documents and spreadsheets and gives you the ability to search. Holy cow this is a great feature when there is something you are looking for but for the life of you can’t remember where the heck it is.

Chat

Chat does exactly what you think it does, and your chats stay on your NAS. They have a mobile app for phones as well as an app for the desktops.

Notes

This is similar to One Note. I’ve just started using it. I again think it’s great because it stays on your NAS.

Office

This is similar to another Google-like product Google Docs. This gives you the ability to edit office docs without having Microsoft Office and the security of not storing your precious documents on Google.

Drive

This is like DropBox, but having your files stored on your NAS. There’s an app that you install on your Phone or your Desktop that will sync the folder you designate with a folder on your NAS. This gives you automatic backups of folders on your Desktops and/or mobile phone.

Conservazione Analyzer

This app tells you how you are using your storage. Things like what percentage of your data is pictures, video, documents, eccetera. The thing I really like about this app is that it reports on duplicate files. It makes it really easy to clean-up your files

There are a bunch of other Apps available for use on the Synology DS218+ NAS that I have yet to play with, the ones above are currently my favorites.

Audio Server

This app lets you stream the audio files from your NAS to your mobile devices, remotely.

And A Ton More Apps

There are a bunch of other Apps available for use on the Synology DS218+ NAS that I have yet to play with, the ones above are currently my favorites.

Some of the other apps that I’m planning on trying out are Plex Media Server and the Logitech Media Server.

Securing Your NAS Replacement Device

One thing to keep in mind when setting up your Synology NAS is security. Now that the NAS can communicate with devices outside your internal network you need to make sure you protect yourself from hackers.

Here are a couple of threads that I came across and used to secure my NAS device. If you will have your NAS communicating with anything outside your internal network that please please please look through the articles and harden your devices security.

Questo è stato un grande articolo sulla creazione di una password super-super sicuro che si può ricordare:

https://theintercept.com/2015/03/26/passphrases-can-memorize-attackers-cant-guess/

Questo va in dettaglio su ciò che hanno bisogno di essere cambiato sul NAS Synology impostazioni per rendere più sicuro

https://www.reddit.com/r/synology/comments/cdleki/suggested_precautions_when_exposing_your_synology/?ref=share&ref_source=embed&utm_content=title&utm_medium=post_embed&utm_name=cd0e1a92f1f343daa1f9670406a9f4fb&utm_source=embedly&utm_term=cdleki


Che avvolge It Up

That concludes the raving about my new NAS replacement. Whether you’re looking for your first NAS or a NAS replacement, Synology DS218 + è sicuramente quello che si dovrebbe dare un'occhiata a.

I first set out to find a replacement NAS.

Not only did I get that but I also got:

  • a recycling bin
  • Photo backup from our mobile devices to the NAS
  • Photo Album sharing
  • Automatic facial recognition and filing of photos
  • Full Text Search For All My files
  • my own chat server
  • Automatic backup of folders on desktops and mobile devices

In total it cost a little over $700 between the two 8 TB drives and the Synology DS218+. It was a good amount of money but I feel I got a lot of value out of it.

I hope the info in this post helps you on your quest for a NAS replacement. I’d love to hear about your thoughts, commento qui sotto!
Come fare un compensato ritaglio

Come fare un compensato ritaglio

Adding a Pool Filler-It's an Easy Install


Perché ho voluto fare un compensato ritaglio

Ho deciso di fare un ritaglio di compensato, quando non riuscivo a trovare qualcosa che potevo comprare.
Stavamo facendo gli aggiornamenti nella casa vacanze Poconos (Sembra il paradiso). Volevo aggiungere qualcosa al di sopra della TV sul muro accento nella stanza dell'orsoSì, noi chiamiamo le camere da letto. 🙂
Da quando è stato andando nella stanza dell'orso, quale migliore aggiunta poi un orso sul muro.
Ho fatto alcune ricerche sul mio andare su - Pinterest. Ho trovato un sacco di idee per tutte le cose portano.

Controlla la scheda Feels Like Heaven Pinterest qui per dare un'occhiata a quello che ho trovato perni.

Orso Camera Idee consiglio su Pinterest

C'era un sacco di belle idee di sicuro ma non erano esattamente quello che stavo cercando.
Poi ho avuto l'idea: perché non trovare una foto di un orso mi piace,stampalo,trasferirlo a compensato e tagliare fuori.
Non ho trovato tutte le istruzioni su come fare che così ho pensato di fare un po '.

🙂

Rivelazione: Alcuni dei link qui sotto sono link di affiliazione. Se si decide di acquistare uno di questi prodotti, guadagniamo una piccola commissione senza costi aggiuntivi per te. Si consiglia di questi prodotti solo perché abbiamo esperienza con loro e li usiamo per i nostri progetti. Come Amazon Associates, guadagniamo dagli acquisti idonei.

La lista della spesa per Fare una compensato ritaglio

Lista Strumenti

Non abbiamo usato troppi strumenti su questo progetto, here’s a list of the ones we did use.

Sega

Levigatrice a nastro

Lista Supplies

Queste sono le forniture utilizzati in questo progetto

scrap piece of 3/4″ compensato

paint

Paint Brush

This was a straight-forward project. It only took a couple of hours to complete since my cut out was a simple bear shape. If you choose something more complex then your cutout may take longer to finish.

Finding The Right Image

Il pezzo che cercavo era un orso calma, sia a piedi, in piedi o che stabilisce.
Ho fatto un sacco di ricerche e, infine, deciso di utilizzare questa immagine come il mio modello.
La tua foto non ha bisogno di essere un'immagine in bianco e nero, Può essere qualsiasi immagine e può essere di qualsiasi dimensione.
Qui di seguito vi mostrerò come stamparlo per il formato che avete bisogno.

Plywood Bear Cut Out - The Picture I Chose For The Cutout

Determinare il numero di pagine desiderate

This is definitely not an exact science. I wanted my bear cutout to be about 36″ wide – può essere un po 'più grande. Dal momento che stavo per stampare su carta formato lettera, that would translate to about 3 or 4 pages wide.

Stampa l'immagine in formato

Aprite l'immagine utilizzando il programma Microsoft Paint. Aprire Microsoft Paint Premere il tasto finestra sulla tastiera quindi digitare in vernice.
Una volta nel programma di aprire l'immagine che si desidera stampare.

Nota: Sono un utente PC in modo queste istruzioni sono per i PC.

Sono sicuro che è possibile ottenere gli stessi risultati utilizzando un Mac… Io proprio non so come.

Una ricerca su google “stampare un'immagine su più pagine su Mac” probabilmente vi guidare nella giusta direzione.

Plywood Bear Cut Out - Open Microsoft Paint

Cambiare l'Imposta pagina

Qui è dove avviene la magia. Con il vostro aprire la figura in Microsoft Paint, andare in Imposta pagina per raccontare quante pagine che si desidera utilizzare nel vostro fuori stampa.

  • Fare clic sulla freccia verso il basso nel menu in alto a sinistra
  • Fare clic sulla freccia a destra accanto all'opzione di stampa
  • Scegliere Imposta pagina
  • Nella finestra di dialogo Seleziona Imposta pagina “Adattarsi a:” nella sezione Scaling (la casella in basso a destra)

For our bear cut out I chose 4 pages wide by 3 pages high

nel paesaggio, Ogni pagina è di 11″ di larghezza per 8.5″ alta e la stampante ha .5″ margini (nella casella sopra la casella di ridimensionamento nella finestra di dialogo) così l'orso stampare sarebbe di circa 40″ largo, 4 sheets x 10″ di carta stampabile (11″ carta – .5″ margine sinistro – .5″ margine destro).

Now that you changed your page setup, go ahead and Stampa La tua Template Out


Plywood Bear Cut Out - Microsoft Paint Menu
Plywood Bear Cut Out - Change The Page Setup


Nastro insieme le pagine

Ora che avete le vostre pagine stampate, è il momento di mettere insieme per creare il modello di carta.

Nastro insieme le pagine, mettere il nastro in qualunque luogo il sembra per il modello si incontrano.

Mancia: Cut the margins off of the pages using scissors, per rendere più facile su nastro insieme.

Plywood Bear Cut Out - Tape The Paper Template Together
Con il modello assemblato utilizzare un paio di forbici (o un taglierino) per tagliare fuori il vostro modello di carta.

Ora avete il vostro modello di carta

Ora che è tagliato fuori, posizionare il modello sulla parte superiore del compensato e tracciare fuori.

In primo luogo ho usato una matita per tracciare fuori, poi sono andato oltre il segno di matita con un pennarello.

Il pennarello è facile vedere durante il taglio del compensato.

Plywood Bear Cut Out - Trace It Out On The Plywood

Tagliare La Forma compensato

Spiacente non ho preso alcuna foto dell'essere taglio compensato. 🙁

Ho usato una sega alternativo per tagliare la mia figura dell'orso poiché ero alla ricerca di una finitura ruvida. Se si desidera una finitura più pulita poi un seghetto alternativo o un roto-zip mio essere una migliore strumento usare.

Ora abbiamo il nostro ritaglio di compensato!

Sabbia e vernice e hai finito

Con il taglio fuori sagoma, è ora possibile intorno ai bordi con una levigatrice. Per il mio taglio fuori ho voluto un po 'di un aspetto non finito quindi non volevo bordi arrotondati.

Ho levigato i bordi abbastanza per rimuovere la possibilità di ottenere schegge.

Una volta sabbiato, aggiungere un paio di mani di vernice e sei taglia fuori è tutto pronto.

Here’s my finished bear cutout. When I first painted it, Ho scelto un colore chiaro per aggiungere contrasto tra esso e la parete – ma sembrava troppo simile a un orso polare… Non quello che stavo per.

Ho poi dipinto un colore marrone scuro, sembra più simile a un orso nero di un orso polare ora. 🙂

Plywood Bear Cut Out - All Finished

[et_bloom_inline optin_id=”optin_7″]


Cosa hai pensato?

Quello che mi è piaciuto di questo progetto è la possibilità che si aprivano. Si può fare qualsiasi forma, qualsiasi formato usando qualsiasi materiale.

Non sono sicuro di quello che il mio prossimo taglio fuori sarà, ma sono sicuro che l'orso non era il mio ultimo!

Spero che questo articolo far luce sulle possibilità e ha le proprie idee creative in corso. Ti è piaciuto? Che cosa intende fare un ritaglio di compensato di? Cosa faresti in modo diverso?
Condividi i tuoi pensieri nei commenti qui sotto!

Adding a Pool Water Auto Filler

Adding a Pool Water Auto Filler

Perché è necessario installare una piscina di acqua Autofiller

Bene per me, the main reason I wanted to install a pool water autofiller was to prevent my pool pump from dying.

The house is a vacation rental in Kissimmee, e durante la stagione secca (novembre – giugno) il livello della piscina a volte andare inferiore a quello dello skimmer e la nostra pompa piscina sarebbe funzionamento a secco.

Che uccide la pompa della piscina e si ferma anche la circolazione dell'acqua – che non è buono per la piscina.

Another problem we had was with the hose. Sometimes the pool people wouldn’t put it back where it belonged.

Often times the hose would be within mowing distance, meaning the landscapers could accidentally run over the hose with the mower.

We heard stories where that happened to others and the outside faucet got ripped out of the wall when the mower snagged the hose – YIKES!

Shameless Plug

Se siete alla ricerca di una grande casa in affitto a Kissimmes, Villa dal castello può essere la misura perfetta per voi, it’s just 5 minutes from Disney World!

Villa By The Castle - A Top Rated 6 Bedroom Kissimmee Vacation Rental in Windsor Hills

Ho guardato per tutti i tipi di soluzioni, e ci sono alcuni là fuori – a mio parere uno dei due non sembrava bello, ha preso troppo lavoro per installare o non sembrava abbastanza resistente per casa vacanze.

Quando si visita un altro casa vacanze mi sono imbattuto in questa soluzione. Esatto Jerry! Sto parlando del tuo noleggio di vacanze.

Essa non rileva quando l'acqua è bassa, ma lo fa riempire la piscina utilizzando un timer senza la necessità di trascinare il tubo fuori o mettere il tubo di distanza.

Nota: Non rileva ancora quando il livello dell'acqua è basso ma con la nuova aggiunta di B-hyve possiamo accendere in remoto l'acqua sul timer. Abbiamo anche collegato il B-hyve alla nostra automazione in modo che gira sull'acqua per un'ora quando non ha piovuto in 5 giorni.

Rivelazione: Alcuni dei link qui sotto sono link di affiliazione. Se si decide di acquistare uno di questi prodotti, guadagniamo una piccola commissione senza costi aggiuntivi per te. Si consiglia di questi prodotti solo perché abbiamo esperienza con loro e li usiamo per i nostri progetti. Come Amazon Associates, guadagniamo dagli acquisti idonei.

La lista della spesa

Lista Strumenti

Non abbiamo usato troppi strumenti su questo progetto, ecco un elenco degli strumenti che abbiamo usato in questo progetto

Mitre Saw

Lista Supplies

Queste sono le forniture utilizzati in questo progetto

3/4″ PVC tubo pollici

3/4″ Connettori a 90 gradi

3/4″ accoppiatori

Timer

Tubo flessibile adattatore PVC

PVC colla

Cleaner PVC

Questo è un progetto facile abbastanza, ci sono voluti forse un paio di ore per completare – ha reso molto più facile la vita per noi e ci ha dato la pace della mente. Speriamo che farà lo stesso per voi.

Capire dove mettere il Piping

Tutto dipende dove il vostro rubinetto esterno più vicino è e dove sul ponte piscina si desidera posizionare il tubo in PVC.

Ti consigliamo di scegliere un posto che non è troppo evidente o sgradevole.

Abbiamo avuto un rubinetto vicino esterna al riscaldatore e collocato il tubo di PVC destra nell'angolo dove la vasca idromassaggio supera la piscina.

Era il più poco appariscente possibile.

Installing A Pool Auto Filler

Di quanto PVC hai bisogno

Dopo aver identificato il rubinetto all'aperto più vicino e capito dove sul ponte della piscina arriverà il tuo PVC, ora è solo una questione di misura.

Il PVC è disponibile a 8 piedi, in modo da utilizzare un metro a nastro senza bloccare misurare quanti piedi sia dal rubinetto per l'area che si è scelto per le tubazioni – Dividi quel numero per 8 e questo è quanti pezzi di tubazioni hai bisogno. Ne ottengo sempre uno in più per buona misura.

Per ogni svolta, le tue tubazioni faranno, avrai bisogno di un accoppiatore di 90 gradi e un accoppiatore dritto in cui collegherai due lunghezze di PVC insieme.

Per il nostro progetto abbiamo utilizzato:

  • 11 pezzi di PVC
  • 5 coppie da 90 gradi
  • 8 accoppiatori eterosessuali

Disponi le tubazioni

Mi piace posare le tubazioni in PVC lungo il percorso in cui installerò il PVC, rende più facile per me, per visualizzare e assicurarsi che ho tutto quello che ho bisogno.

Per quanto seppellire il tubo, abbiamo pacciamare tutta la casa quindi abbiamo fatto un mini-trench in pacciame e una volta che tutto è stato installato le tubazioni seppellimmo la tubazione in pacciame.

Il timer e lo splitter

Ci sono tutti i tipi di timer sprinkler, abbiamo finito per andare semplice e utilizzando uno che non ha bisogno di batterie – in questo modo che funziona sempre. 🙂

È possibile installare il temporizzatore ovunque sulla tubazione che abbia senso per voi. Per noi abbiamo pensato di installarlo accanto al rubinetto era la scelta migliore.

Avremmo ancora bisogno di usare un tubo su quel rubinetto di tanto in tanto, quindi abbiamo collegato uno splitter per tubo ad esso.

Un lato dello splitter è collegato al riempimento della piscina e l'altro lato al tubo.

Pool Auto Filler - Timer

Aggiornare: Abbiamo cambiato il timer dell'acqua

Di recente abbiamo cambiato il timer dell'acqua in uno che può essere controllato a livello locale o remoto. È l'orbita 24516 B-hyve xD.

Era facile da sostituire, Basta svitare il vecchio timer manuale e avvitare quello nuovo.

C'è un'app che puoi installare sul tuo telefono per controllarla e usiamo Home Assistant per l'automazione domestica nei nostri noleggi di vacanze e ha un gancio in B-hyve, Quindi può anche essere controllato usando l'assistente domestico.

Uso l'assistente di casa per controllare quanta pioggia è caduta nell'ultima settimana e se non è caduta alcuna pioggia, Accendi il timer per un'ora.

Se sei interessato, Inizierò a scrivere post sul blog sull'automazione per le vacanze sul nostro altro sito di blog che è specificamente per le vacanze, you can check out that site by clicking the button below.

[et_bloom_inline optin_id=”optin_7″]

Questo è tutto

Mi dispiace non ho più immagini di questa – but this was done before I was going to start the blog so I didn’t think of documenting everything. 🙂

Prenderò alcune foto del progetto finito e dove ho corso le tubazioni ecc la prossima volta che sono a casa.

Cosa hai pensato? E 'qualcosa che si potrebbe fare per la vostra piscina? Fatemi sapere nei commenti qui sotto!
 

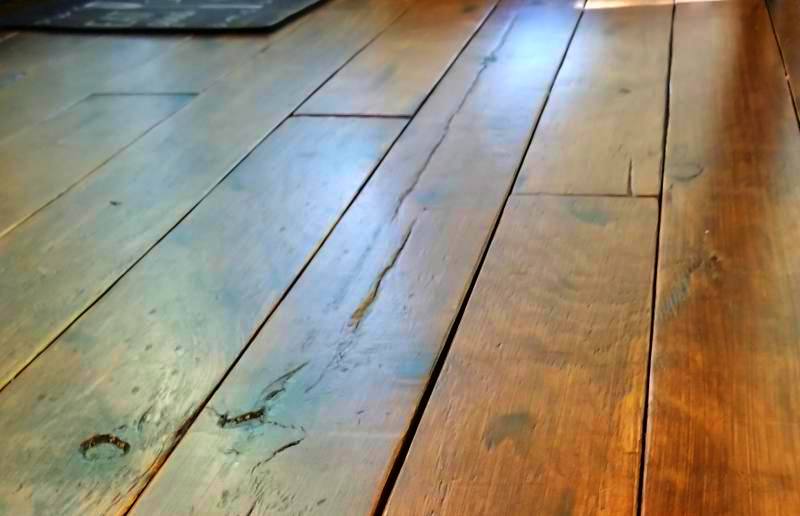
Fai da te Rustico Ampia Plank compensato Pavimentazione

Fai da te Rustico Ampia Plank compensato Pavimentazione

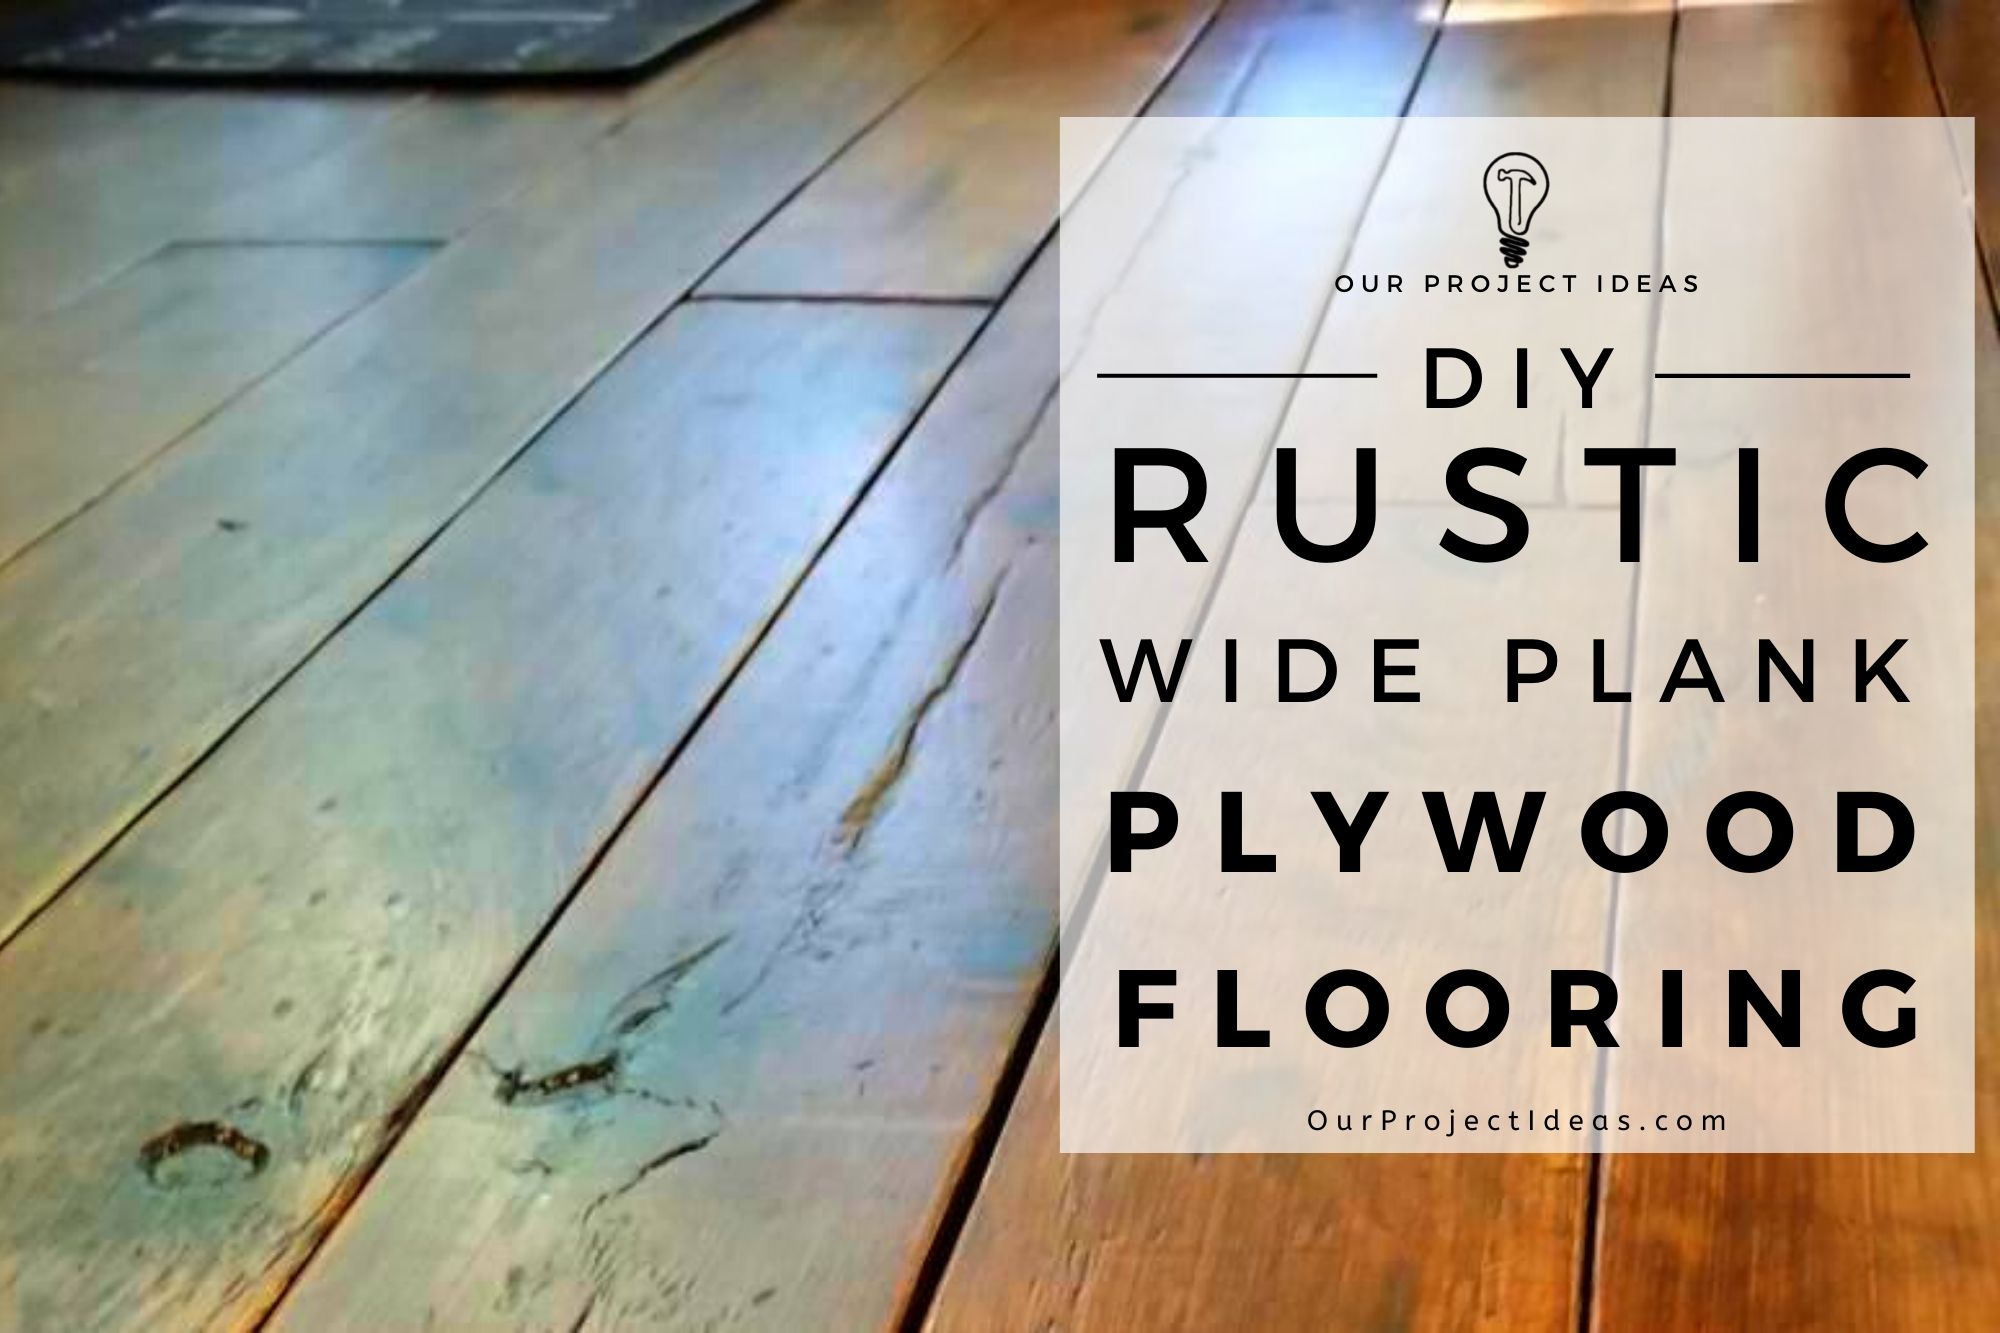
DIY Rustic Farmhouse Wide Plank Plywood Flooring - a great plywood flooring idea - a closeup of the distressing and Knots


As you’d expect, DIY Rustic Wide Plank Plywood Flooring takes much longer to finish than just installing pre-made planks.

This project was the truest sense of DIY. Everything from cutting the plywood into wide plank boards, to sanding, staining, finishing and installing the plywood planks downall of it DIY.

All things considered, the entire project, from start to finish didn’t take that long.

From cutting the planks out of plywood, to finally installing the floors in both the dining room and kitchentook about a week.

If you’re willing to put in the time and sweat, it is absolutely worth it!

The floors look gorgeous (the pictures don’t do it justice) and you really would not know that they are stained plywood floors.

Read on to see what it took to make and install our rustic wide plank plywood floors and how you can install your own unique plywood flooring.

Rivelazione: Alcuni dei link qui sotto sono link di affiliazione. Se si decide di acquistare uno di questi prodotti, guadagniamo una piccola commissione senza costi aggiuntivi per te. Si consiglia di questi prodotti solo perché abbiamo esperienza con loro e li usiamo per i nostri progetti. Come Amazon Associates, guadagniamo dagli acquisti idonei.

Why We Chose Wide Plank Plywood Flooring

Some of the flooring in our Poconos vacation rental needed replacing. Namely, the floating hardwood floor in the dining room and kitchen and the carpet in the living room.

Our goal was to have new floors that look old, warm, and worn – like they had always been there. Fondamentalmente, the more it looked like farmhouse flooring or barn wood the better it was for us.

We looked into tile, stone, and hardwood floors. The problem with all of them was that they all needed a level sub-floor and ours was unevenlike really uneven.

Since the entire house is made of rough-cut oak, the flooring is not even close to being level.

That makes tile, stone and even hardwood flooring very difficult to install. The extra difficulty also translates to very expensive installation costs.

It was time to get creative, DIY floors were in our future. To get more flooring ideas we turned to Pinterest. After a lot of scrolling, we came across rustic farmhouse wide plank plywood flooring!

On Pinterest, there was a gazillion (well maybe not quite that many) plywood flooring ideas, but the one that was the best fit for us was the wide plank flooring.

The pictures of the wide plank plywood flooring projects others had posted were incrediblethis was it! This was the perfect flooring for uneven floors.

We were sold on the idea.

When In DoubtWabi-Sabi

There’s a concept I came across on Pinterest which was instrumental in my choice of plywood over other flooring types.

It’s called wabi-sabi.

It’s a Japanese tradition that is the art of making broken things better than brand new.

The idea is to hi-light the imperfections – make them perfectly imperfect.

With this new perspective, I was looking for imperfections to show offinstead of avoiding them.

If (or when) the floors get a new scuff mark or scratch, it will add to the floor’s character. It’s a very freeing concept that I am really glad I came across.

Click on the picture to see the Pinterest pin that inspired me, I hope it does the same for you.

DIY Rustic Farmhouse Wide Plank Plywood Flooring - wabi sabi - broken is beautiful pinterest pin

Why Use Plywood Flooring? It’s Affordable.

Most people decide to install plywood plank flooring because of it’s affordability.

It’s much cheaper to install a plywood floor than traditional hardwood or even a laminate, heck it’s even cheaper than doing vinyl.

For our plywood farmhouse floors, the cost wasn’t much of a factor in our decision-making process.

Non mi sbagliare, it’s always nice to save some doughit was just lower on our list.

Higher on our list was flooring that was sturdy, looked like it has always been there, fit with the style of the house and would be easy to install on an uneven floor.

Between the option of making wider planks and the spacing between each onewide plank plywood flooring was a perfect fit for this house.

The spacing between each board makes it more forgiving in scenarios like ours where the floor isn’t level.

On top of that, the Japanese concept I came across helped me realize that any blemishes the floor will gain as it ages will only add to the floor’s beauty.

So it didn’t need to be as sturdy as hardwood, we’ll just embrace the imperfections that come along with it! 🙂


Another Reason To Use Plywood Floor Planks? The Versatility

Another huge benefit to plywood floor planks is the design versatility.

I love how my plywood plank floors turned out. There really is nothing I would change, but one thing that’s great about plywood planks is that there is no limit to what you can do.

I LOVE the way the rustic plywood floor planks came out, but the plywood planks could have looked just as good with a modern look.

Take a look at plywood floor planks on Pinterest. You’ll see there is no limit to the style, colore, shape, size, or texture. It’s all just a matter of preferencehow cool is that?

The Cost Of Our DIY Plywood Flooring

We knew that we saved quite a bit of money by choosing plywood faux plank flooring but we didn’t realize how much until someone asked for a breakdown in the comments.

We saved a ton!!

Ovviamente, what you save in dollars you lose in time. We didn’t look at it as a lose of time though, it saw it as a great way to get our creative juices flowing and gave us a flooring that is completely uniqueand it saved us a bunch of money to boot! Winwinwin!

Costo totale
22 fogli di compensato @ $ 32/foglio = $ 704
17 quarts of stain @16.30/quart = $276
5 gallons of Poly @ $12/gallon = $60
TOTAL = $1040

Piedi quadrati
22 Sheets * 32 sq. ft./sheet = 704 sq. piedi.

$ 1040/704 mq. piedi. = $1.47 per sq. piedi.

The Down-side to Plywood Flooring

The only negative I saw with plywood floor planks was the durability. It’s not a hardwood so it would scratch easier than an oak flooring would.

Now with my new wabi-sabi perspective, I’m actually looking forward to the scratches and dents.

The blemishes will only add to the floor’s beauty. If there’s a scratch that is really ugly, I can add something creative to give it beauty.

Perfectly imperfect.

La lista della spesa

Lista Strumenti

Ecco un elenco degli strumenti che abbiamo usato in questo progetto.

Link di affiliazione di seguito può essere quella di oggetti simili quando gli elementi esatti non sono stati trovati on-line.

Cordless Fine Chiodatrice

Batteria extra per Finish Chiodatrice

Levigatrice a nastro

Palm Sander

Mitre Saw

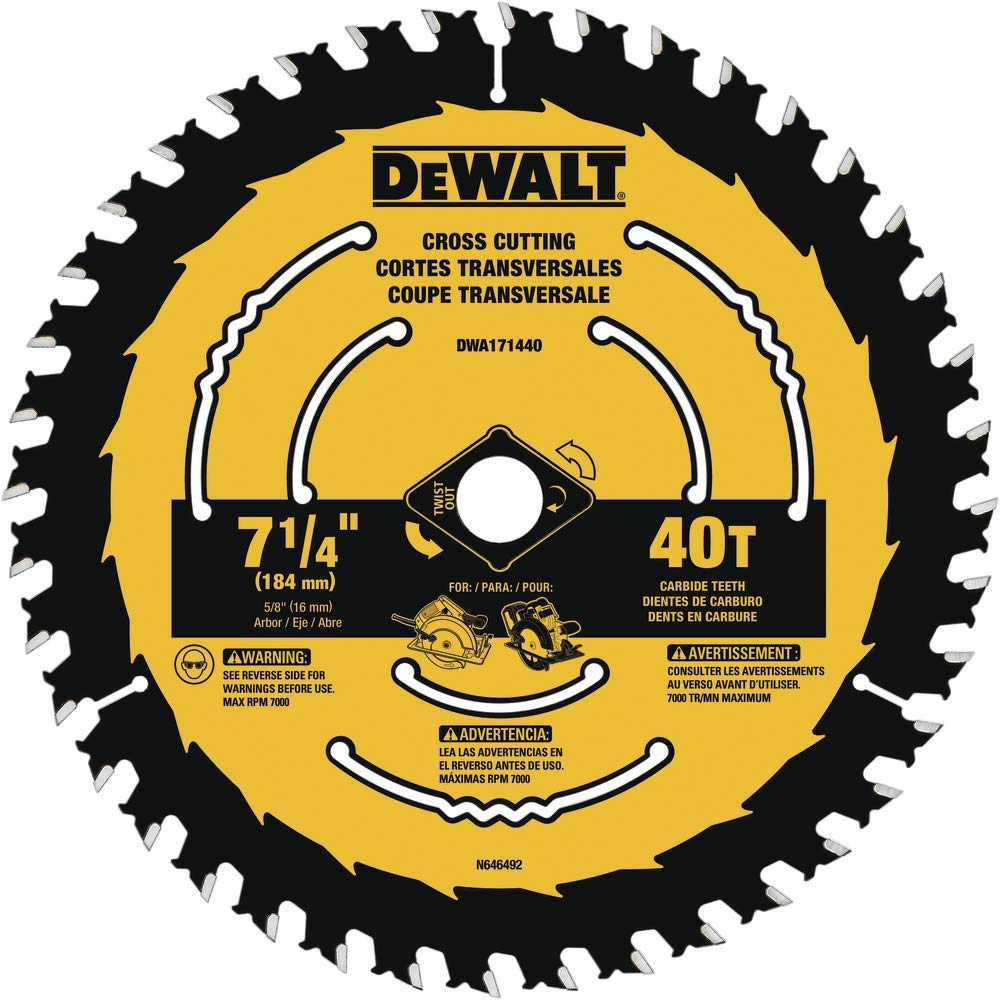
Sega circolare

Cross Cut lama per sega

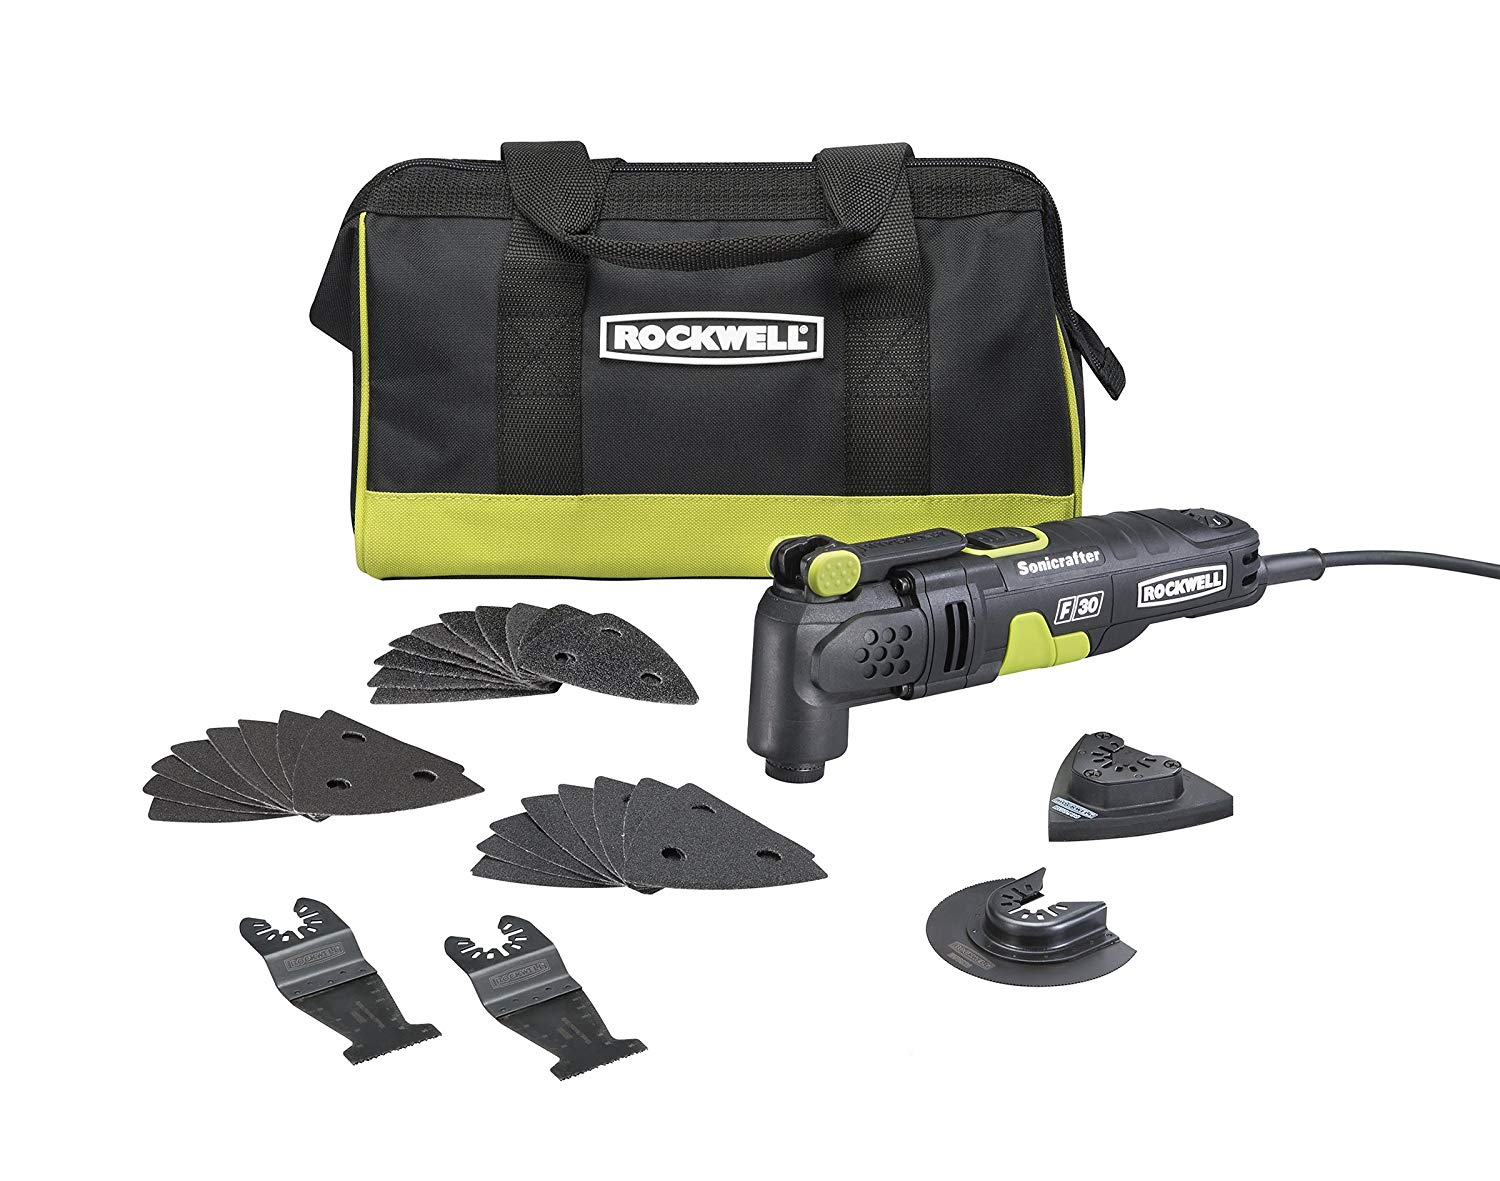
Oscillante Multi-Tool

Protezione acustica Cuffie


Lista Supplies

Queste sono le forniture utilizzati in questo progetto.

Link di affiliazione di seguito può essere quella di oggetti simili quando gli elementi esatti non sono stati trovati on-line.

Varathane Ciliegio Gel Stain – Abbiamo usato circa 7 litri

Poluriratano modificato con olio a base d'acqua – Abbiamo usato 2 galloni

3″ Pennello a setole naturale – 6 pennelli per applicare la macchia

4″ Spazzola sintetica in poliestere – 4 pennelli per applicare il poly

Carta mascherata – Abbiamo usato la carta mascherata per proteggere il ponte quando si applica la macchia e il poli

6 Calibro 1 1/2″ Finisci le unghie

The Plywood Plank Flooring Thickness

The plywood plank flooring thickness we used is 1/2″ thick. If our floors weren’t so uneven we could have used 3/4″, but the flexibility that a 1/2″ plywood has was perfect to conform to our uneven sub-floor’s contours.

I think an added benefit to the 1/2″ plywood is that the spaces in between the planks doesn’t hold dirt as easily.

It may sound like that’s a bit of a stretch but I think if it was 3/4″ plywood, the extra 1/4″ of plywood thickness may make it harder for a vacuum to suck out things that get stuck in the spaces.

We weren’t sure how the spaces were going to fair with dust and things falling in them but so far so good – nothing a good vacuuming can’t fix. 🙂

Other than things possibly getting stuck in the spaces between the planks, I don’t see any reason you can’t use 3/4thick plywood for your plank flooring. Detto ciò, I also don’t really see a benefit to using it over 1/2″ compensato.

The Plywood Plank Width

We wanted the farmhouse or country kind of look, so a wide plank is what we went with.

We also wanted to reduce the amount of wasted plywood, so the width we came up with was 5 7/8″ for each board. That gives us 8 planks per sheet and a tiny strip leftover at the end.

We’ve seen other plywood floors where they went for 8 inch or even 12 inch boards. We didn’t want to make them that wide because we felt it made it obvious that it was a plywood floor.

And a wide board would have shown the dreaded plywood zebra pattern that I don’t care for (more on the plywood zebra pattern later).

The Type Of Plywood We Used

There were a couple of questions in the comments about the type of plywood that was used for the plywood planks.

The plywood is regular 3-ply, cheapy weepy, plain Jane, rough finished 1/2pine plywood.

The exact name from Lowes is:

Plytanium 15/32CAT PS1-09 Square Structural Plywood Pine

Fondamentalmente, the cheapest plywood we could get.

Since we wanted a rustic look the knots and imperfections weren’t a problem.

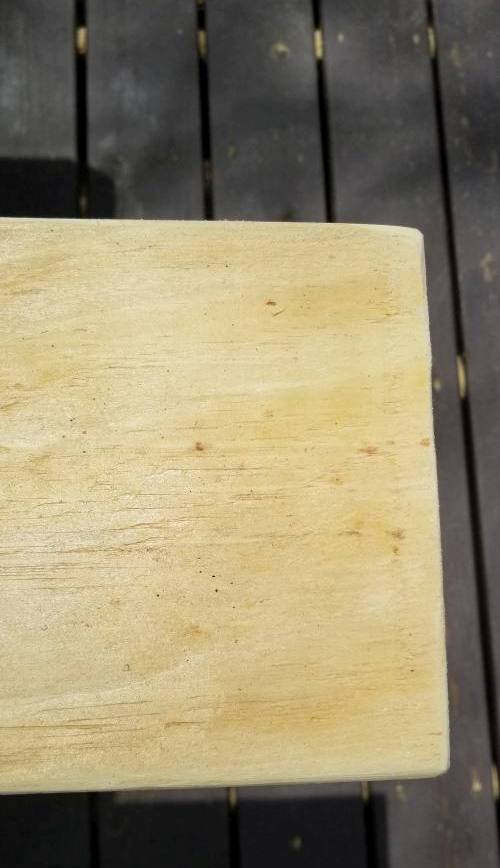
The plywood is a regular rough finish plywood

Some Before Pics

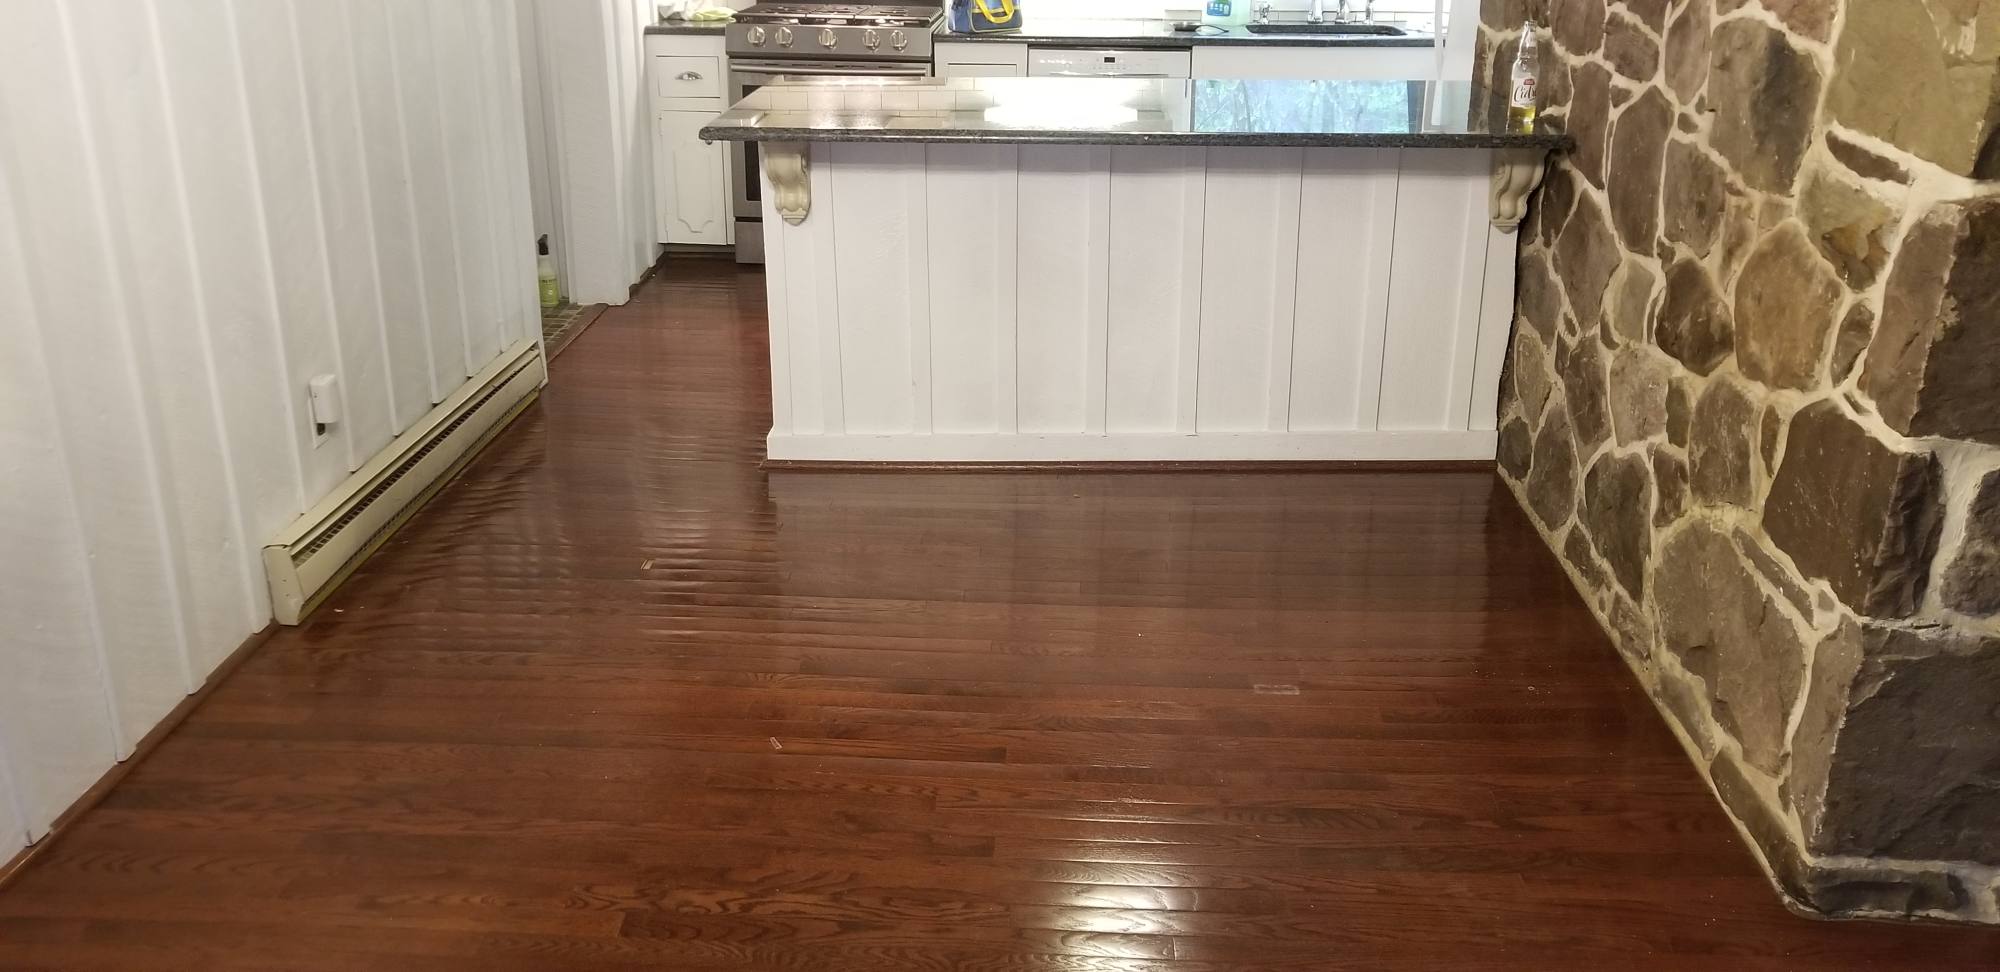
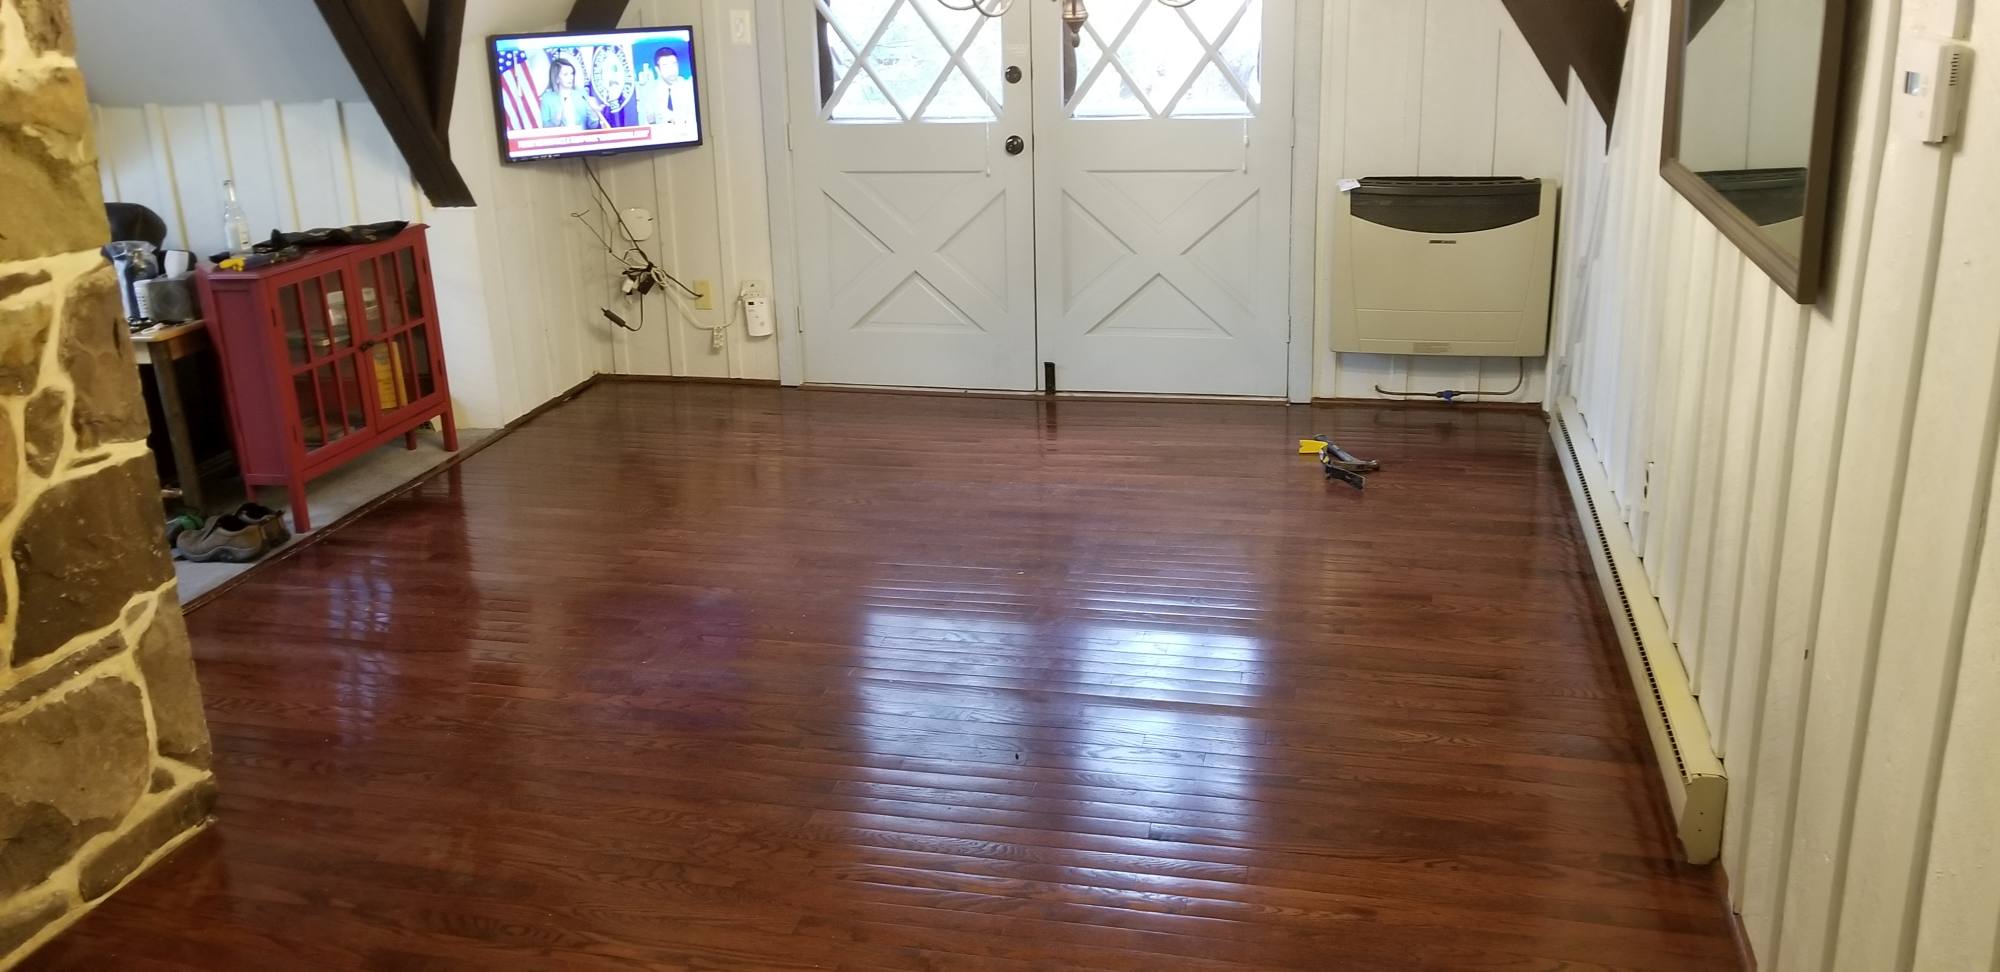
Here are some before pics of the space with the original floor.

We loved the color of the original floors, but the flooring never really went with the style of the house. It was a 3/8floating floor and the wood strips were fairly thin. Because it was floating and a pretty thin floor, it always sounded a bit hollow when you walked on it.

The real problem with the old flooring was buckling in some spots, probably because of the way it was installed.

That buckling was one of the reasons we felt the wide plank flooring made of plywood would be perfect for this space.

The wide plank flooring has spacing around each board, that spacing would prevent the new floor from buckling.


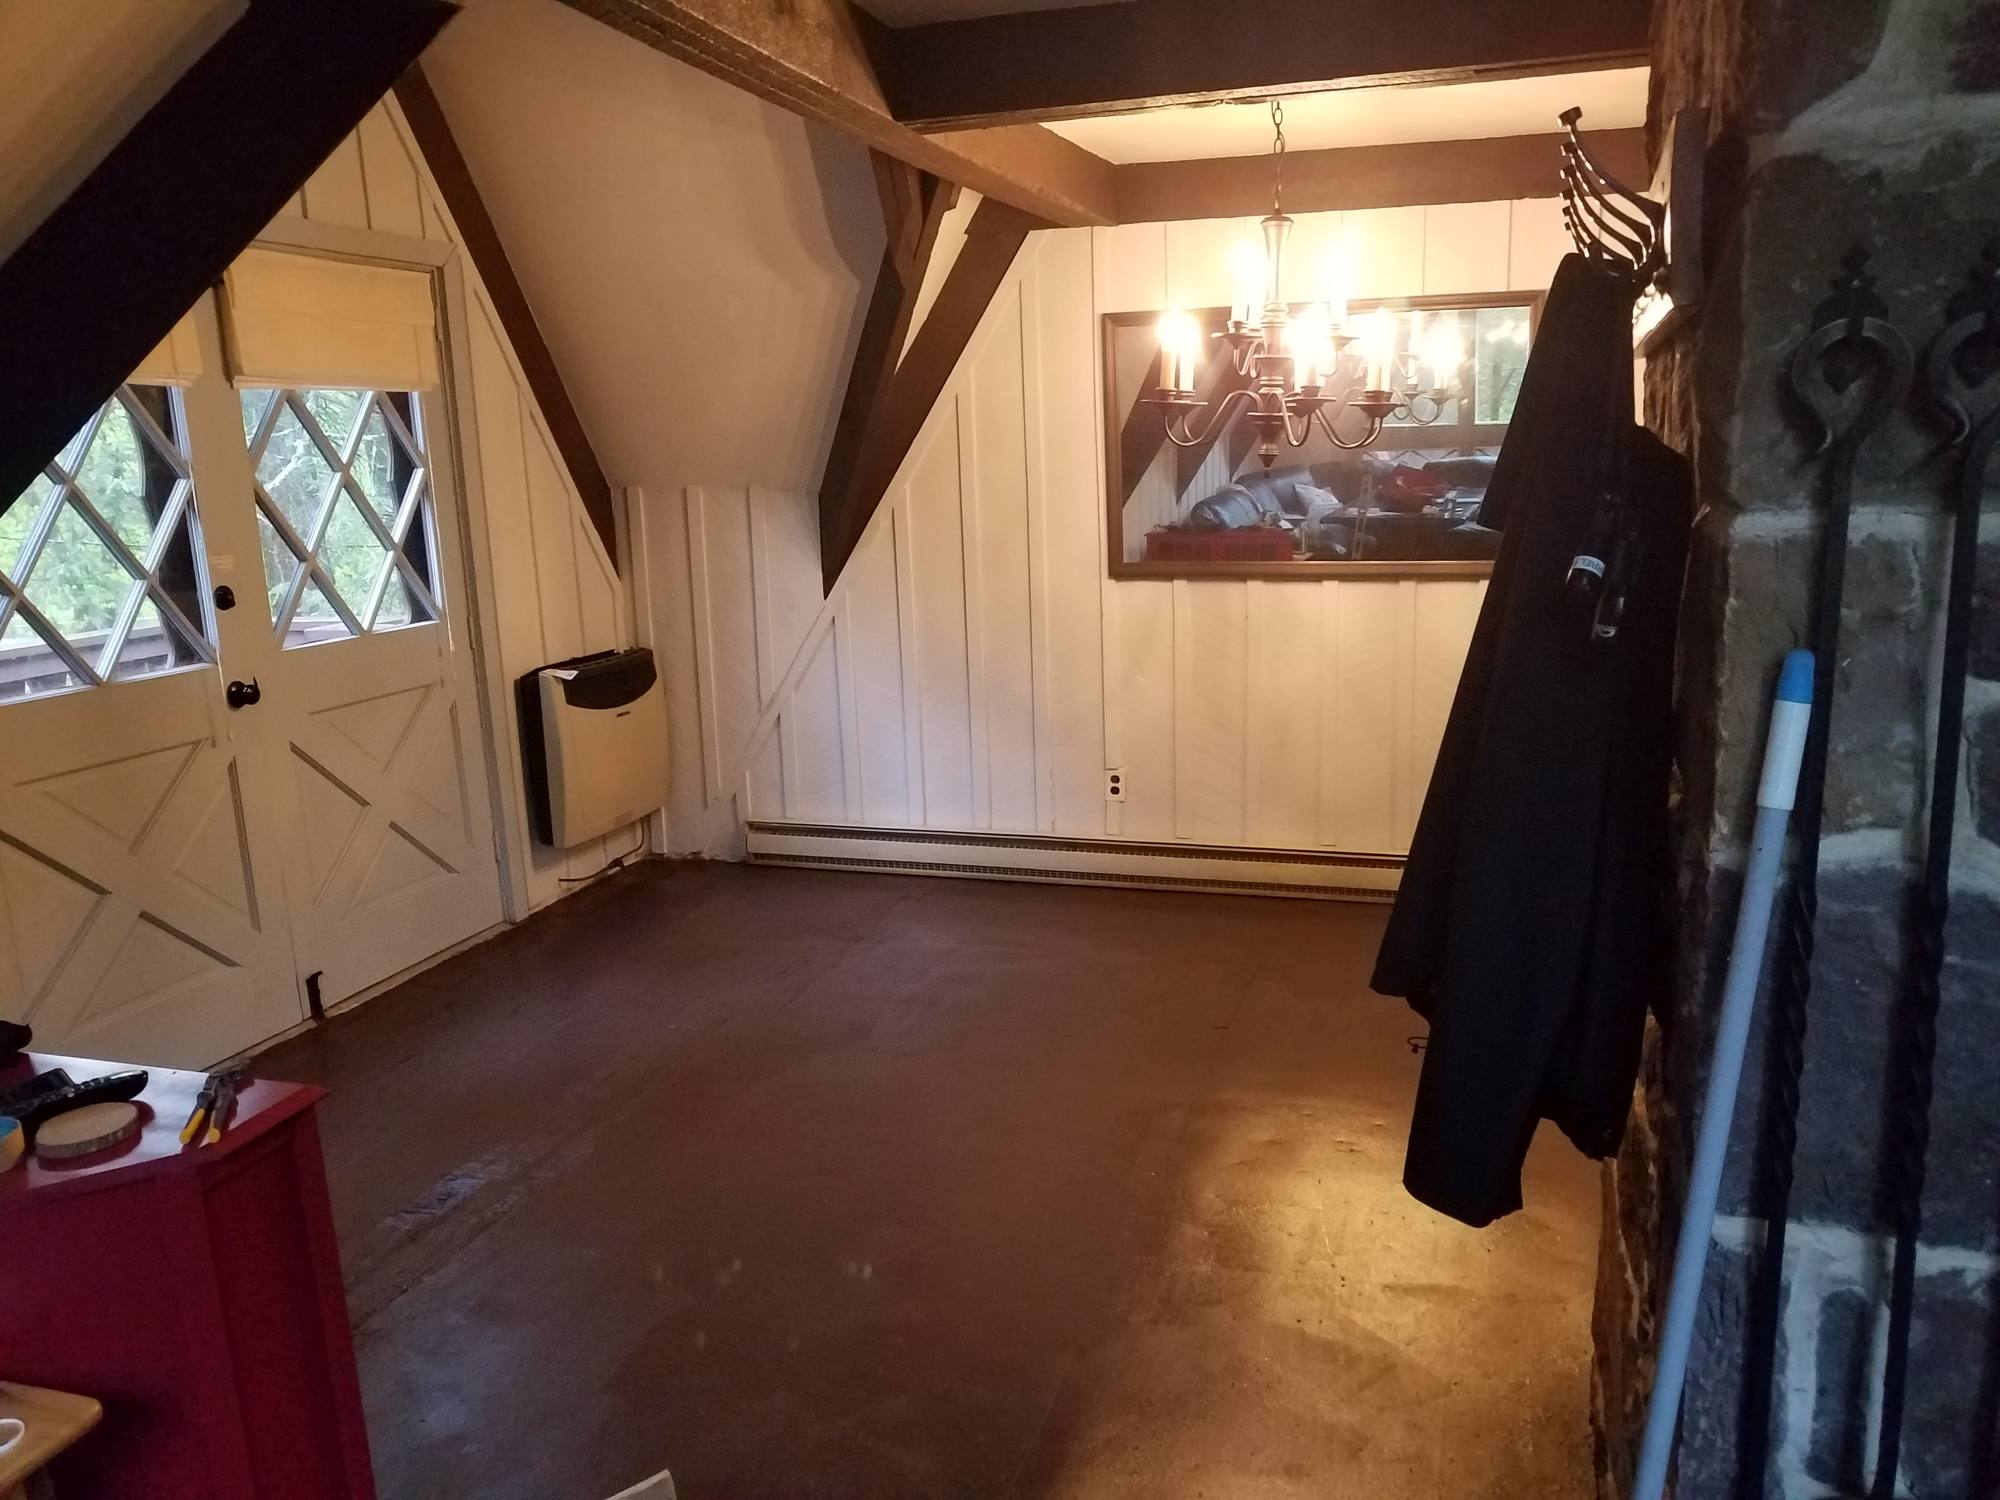
DIY Farmhouse Wide Plank Floor Made From Plywood - The Dining Room Subfloor With Staples Removed

How Much Plywood Do You Need

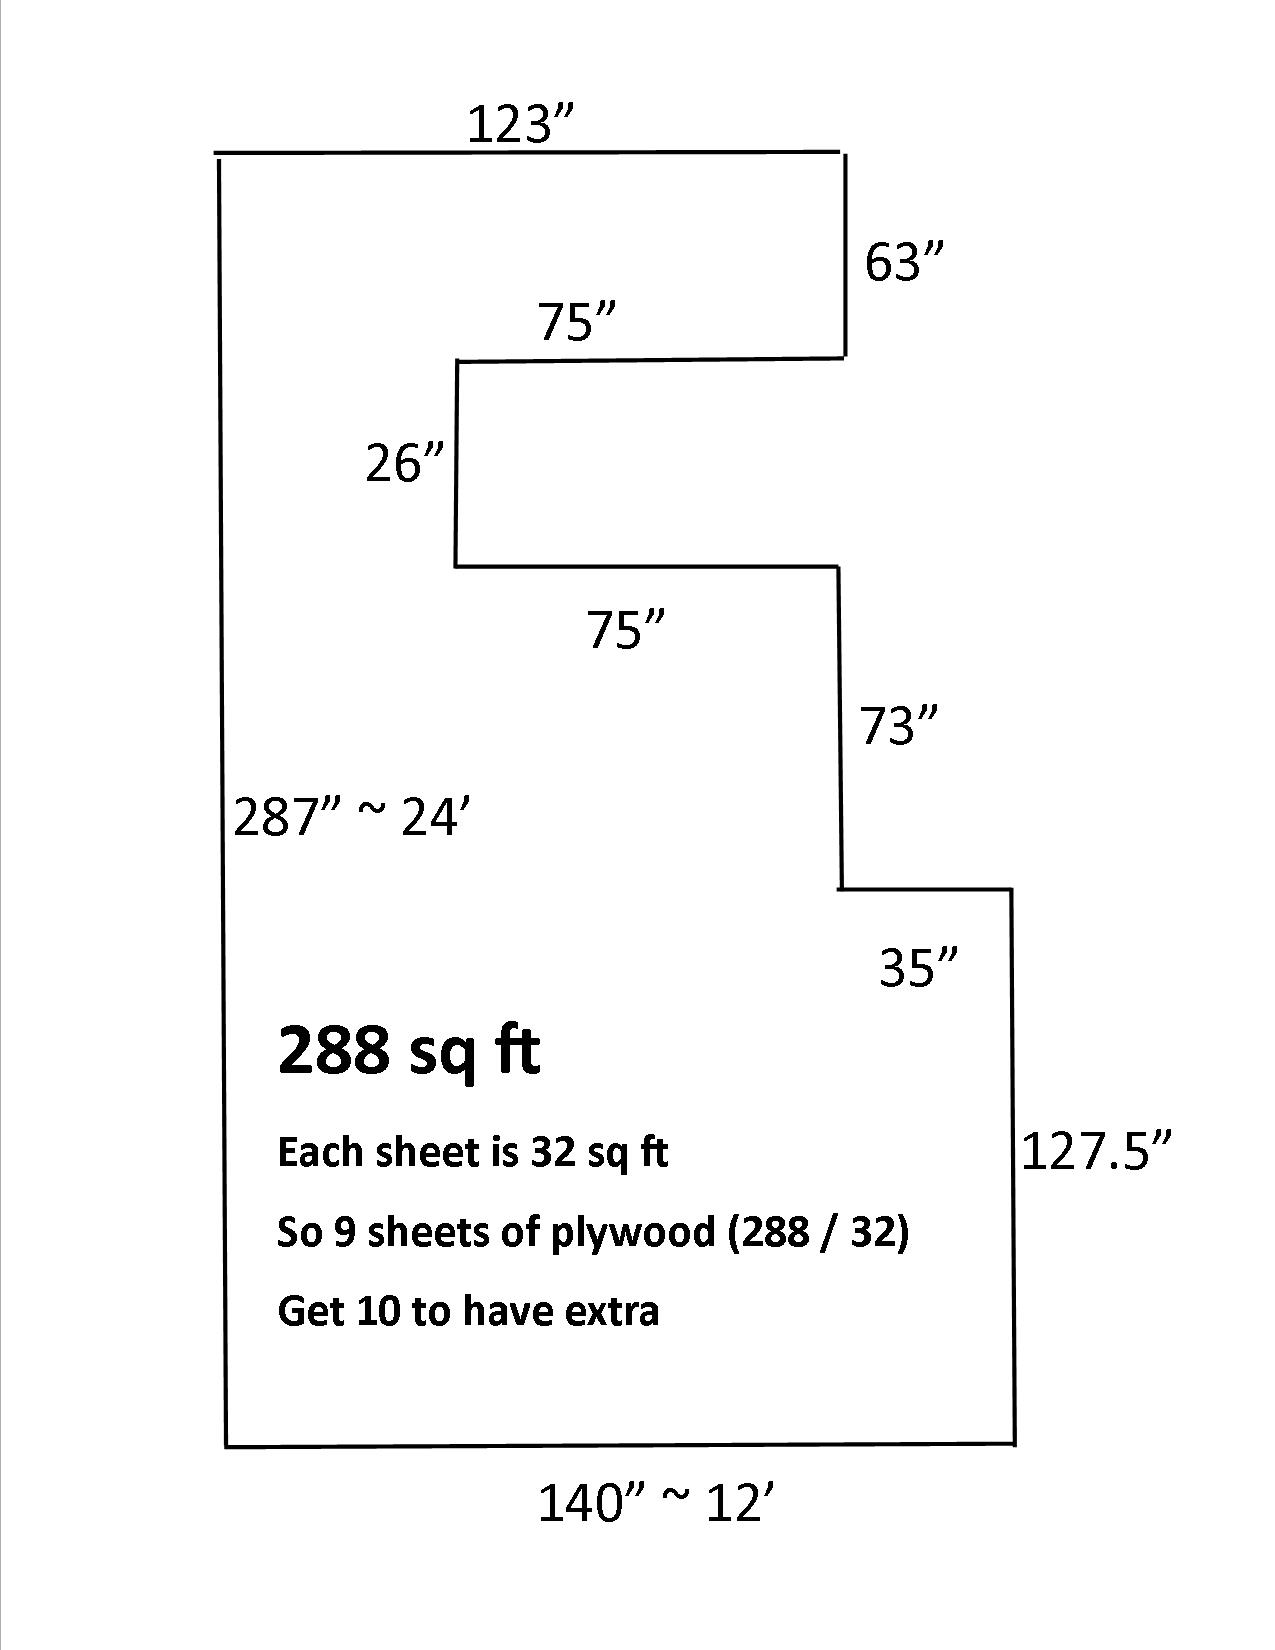
The measurements don’t need to be super precise. Rounding up the measurements and adding an extra plywood sheet to the total should give you enough wiggle room.

For our space, I treated it like a big rectangle. The length was 287″ (rounded up to 24′) and the width was 140″ (rounded up to 12′).

24 x 12 is 288 sq feet.

Each sheet of plywood is 4′ x 8′ so that gives you 32 square feet per sheet.

When I divided the total sq feet (288) by the sq feet per sheet (32) it told me I needed 9 sheets of plywood.

Then I added an extra sheet as a buffer.

DIY Rustic Farmhouse Wide Plank Plywood Flooring - Dining Room And Kitchen Measurements Floor Plan

The Final Numbers

We bought 10 sheets of 1/2″ plywood for our project and once completed, we had about 1 sheet left over.

Prepping the Subfloor

Total Time: 2 people about 2 hours

The original floor was a 3/8hardwood floor that was installed with a lot of staples…. like a lot of staples.

At first, it felt like the staple removal was taking FOREVER.

Once we got into a rhythm though it really only took a couple of hours for us to get just about all of them out.

DIY Farmhouse Wide Plank Floor Made From Plywood - The Dining Room Subfloor With Staples Removed

Subfloor Painting

Total Time: 1 person about an hour

The subfloor we had was unpainted plywood.

If we installed the wide plank plywood flooring without first painting the lighter colored subfloor, it would have shown through the spaces in between the planks.

To prevent that from happening, we painted the subfloor a very dark brown color, using paint that we already had.

Any dark paint color would do the jobjust stick to a paint that is an eggshell or satin.

You don’t want a shiny subfloor showing through the spaces between the boards.

DIY Farmhouse Wide Plank Floor Made From Plywood – How To Install Plywood Flooring - The Dining Room Subfloor Painted Dark Brown

Cutting The Plywood Into Planks

Total Time: With the right blade this would take less than 2 hours for 10 sheets

I keep calling them planks or boards but basically, this step is where I took the sheets of plywood and cut them into long strips.

A lot of the Pinterest posts I came across said they had a person from Lowes or Casa Depot cut the sheets for them.

E 'sicuramente un'opzione. Ho usato i loro servizi di taglio in passato, quando i tagli non avevano bisogno di essere molto precisi.

In questo caso, I wanted more precise cuts, così ho scelto di farlo io stesso.

It takes A LOT longer but I thought having consistently sized plywood planks was worth the extra time.

Quel modo, I was sure each piece was going to be about the same width.

To make cutting the pieces MUCH easier and to keep them the same width I made a jig.

They say hind site is 20/20, well looking back on it I would still cut the plywood strips for flooring myself.

I recently used the cutting services for another project where I didn’t care about the width they cut it an man o man, I don’t think there were two cuts that were the same width.


DIY Rustic Farmhouse Wide Plank Plywood Flooring - Cutting plywood flooring into wide planks - A Sheet of Plywood Ripped Into Planks

The Best Saw Blade To Use

We had 10 sheets of plywood to cut into wide plywood planks. I figured that a plywood blade would be the best. I thought anything else would leave a really rough edge on the wood.

Bene, I was very, very wrong.

Do Not Use A Plywood BladeUse a Cross Cut Blade instead

The plywood blade didn’t last very long and took a lot of effort to go through the plywood. It started smoking and having a lot more difficulty cutting barely halfway into the second sheet of plywood.

I ended up having to go out and buy another blade. This time I tried a cross cut blade, OMG what a difference.

The cross cut blade went through the plywood like butter and left an even better cut than the plywood blade did. I was able to do the rest of the plywood using just that one cross cut blade.

If you want to get the same cross cut blade I used, just click the picture below.

DIY Farmhouse Wide Plank Floor Made From Plywood - Choosing the right blade to cut your floor boards is key - this is the best blade for ripping the plywood into planks

The Jig

A jig is fancy talk for a template. It really made a tedious and time-consuming task super easy.

It was basically a 1/2piece of scrap plywood I had with a scrap piece of 1 x 4 screwed to it.

The space between the saw blade and the piece of 1 x 4 was 5 7/8″, the thickness we wanted our plywood flooring planks to be.

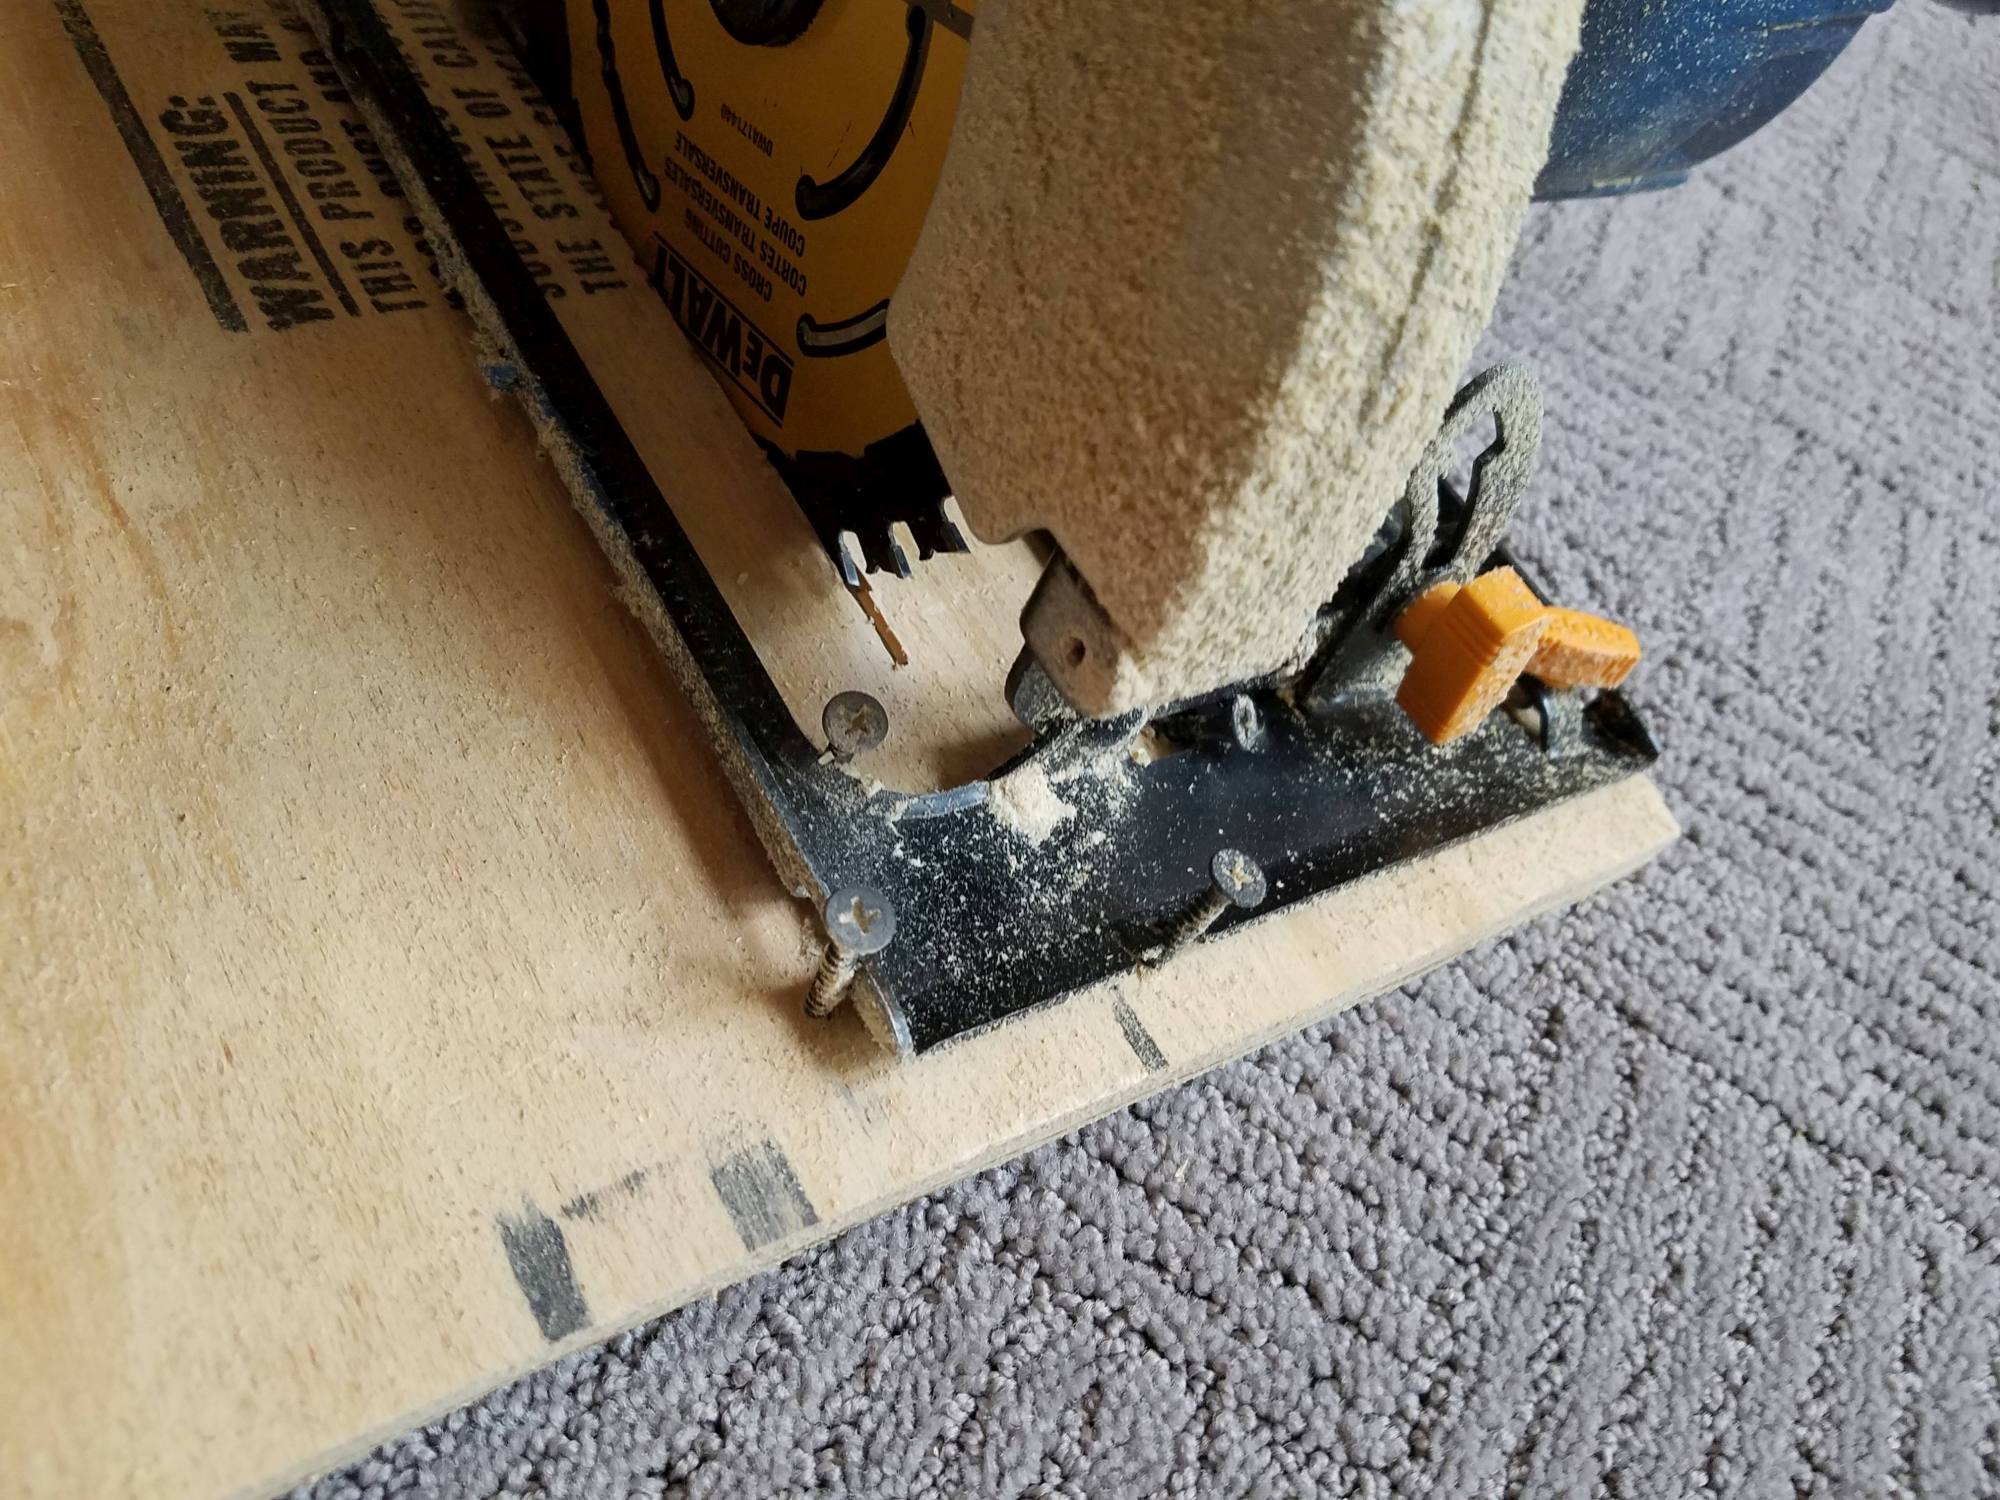
To make the jig I put the blade of the saw all the way up, secured the saw to the plywood with screws all around the saw, wedging it in place.

Then I slowly lowered the saw into the plywood and measured 5 7/8from the inside of the plunge cut and that’s where I screwed in the 1 x 4.

DIY Rustic Wide Plank Plywood Flooring - Secure The Jig To The Circular Saw Using Screws
DIY Rustic Wide Plank Flooring Made From Plywood - cutting the sheet into floor boards - the jig used to rip the plywood into planks - top view
DIY Rustic Wide Plank Flooring Made From Plywood - bottom view - this jig made ripping the plywood so much easier

For more info on the jig and some extra tips on cutting the planks check out this post, 3 Consigli per risparmiare tempo per DIY Plank Compensati Pavimenti.

Mancia: If you’re cutting your own boards you need to make a jig. When making your jig, extend the 1 x 4 way in front and way behind the saw, like it is in the pictures.

That lets you line up the saw way before the blade comes in contact with the plywood. It also gives more stability, ending up with a straighter cut.

Sanding Each Plank

Total Time: 2 people about a day and a half

This part took a while, but it’s important to put the time into it.

We sanded the face of the plywood to remove any splinters and the text that’s sometimes stamped on the plywood.

We also used the sander to round the edges all around the face of each plank.

The rounded edge gives it a really nice finished look and helps in cases like ours, where the floors aren’t very level.

Rounded edges give a soft transition between two planks when they don’t quite line up.

This is also where you choose which side of the plywood will be the face, the pretty side or the ugly side.

When we were choosing sides, I’d say we chose the ugly side 80% of the time.

It went against what I would normally do, but now I kinda wish I went with the ugly side more.

We used a belt sander to do most of the sanding. You could use a palm sander if you’re not doing too much flooring but in our case, the belt sander was much faster.

The sandpaper we used was 120 grit, it was perfect for the belt sander.

DIY Rustic Farmhouse Wide Plank Plywood Flooring - round off all the edges

During this part of the project, you’ll have your doubts about using the gnarly part of the plywood.

BUT TRUST ME – once you put the stain on the plywood you will be blown away at how good it looks.

Alla fine, the most beautiful planks were the ones with imperfections.

Mancia:

If a plank has a knot or crack in it, don’t put it to the side or use it in an area you can’t see.

Invece, make it more noticeable. Dig into the knot or crack with the sander to emphasis the crack or knot more. It’ll help remove splinters that are around the knot or crack and also add character.

DIY Farmhouse Wide Plank Floor Made From Plywood - do not be afraid of imperfections

Distressing The Plywood Plank Flooring

Total Time: We did this at the same time as sanding so it’s included in the day and a half spent sanding

This is the distressing part of the distressed plywood floors.

There were three weapons of choice for applying the plywood’s character (a.k.a. distressing), un martello, a big pair of pliers and a propane torch.

Out of the three I used the pliers the most and the hammer the least.

Using pliers, I’d repeatedly hit the face of the plywood with the back corner of the pliers.

With the hammer, I used the side of the hammer, and the claw to make indentations in the plywood.

If you look at the floor right above the hammer in the picture you’ll see the indentations the back of the pliers left.

I also used a utility knife to open up any cracks in the wood, to make them more pronounced.

I did it by putting the knife at an angle and cutting along the crack, opening up the crack, similar to what is done to cracks in concrete when you want to fill a crack.

The distressing (a.k.a character building) is a key step for distressed rustic plywood floors.

The where and tear makes the planks look authentic, the more distressing the better.

DIY Wide Plank Floor Made From Plywood - meet the character builders

Adding Even More CharacterBurning The Plywood Boards

The propane torch was by far my favorite character builderand it wasn’t because it spoke to my inner pyro…. well maybe a little because of my inner pyro lol.

Burning the plywood gives an instant amazing aged look.

This is another part of the process where I hesitated a lot.

But once the stain goes on, the plywood planks instantly transform into a beautifully aged floorboard!

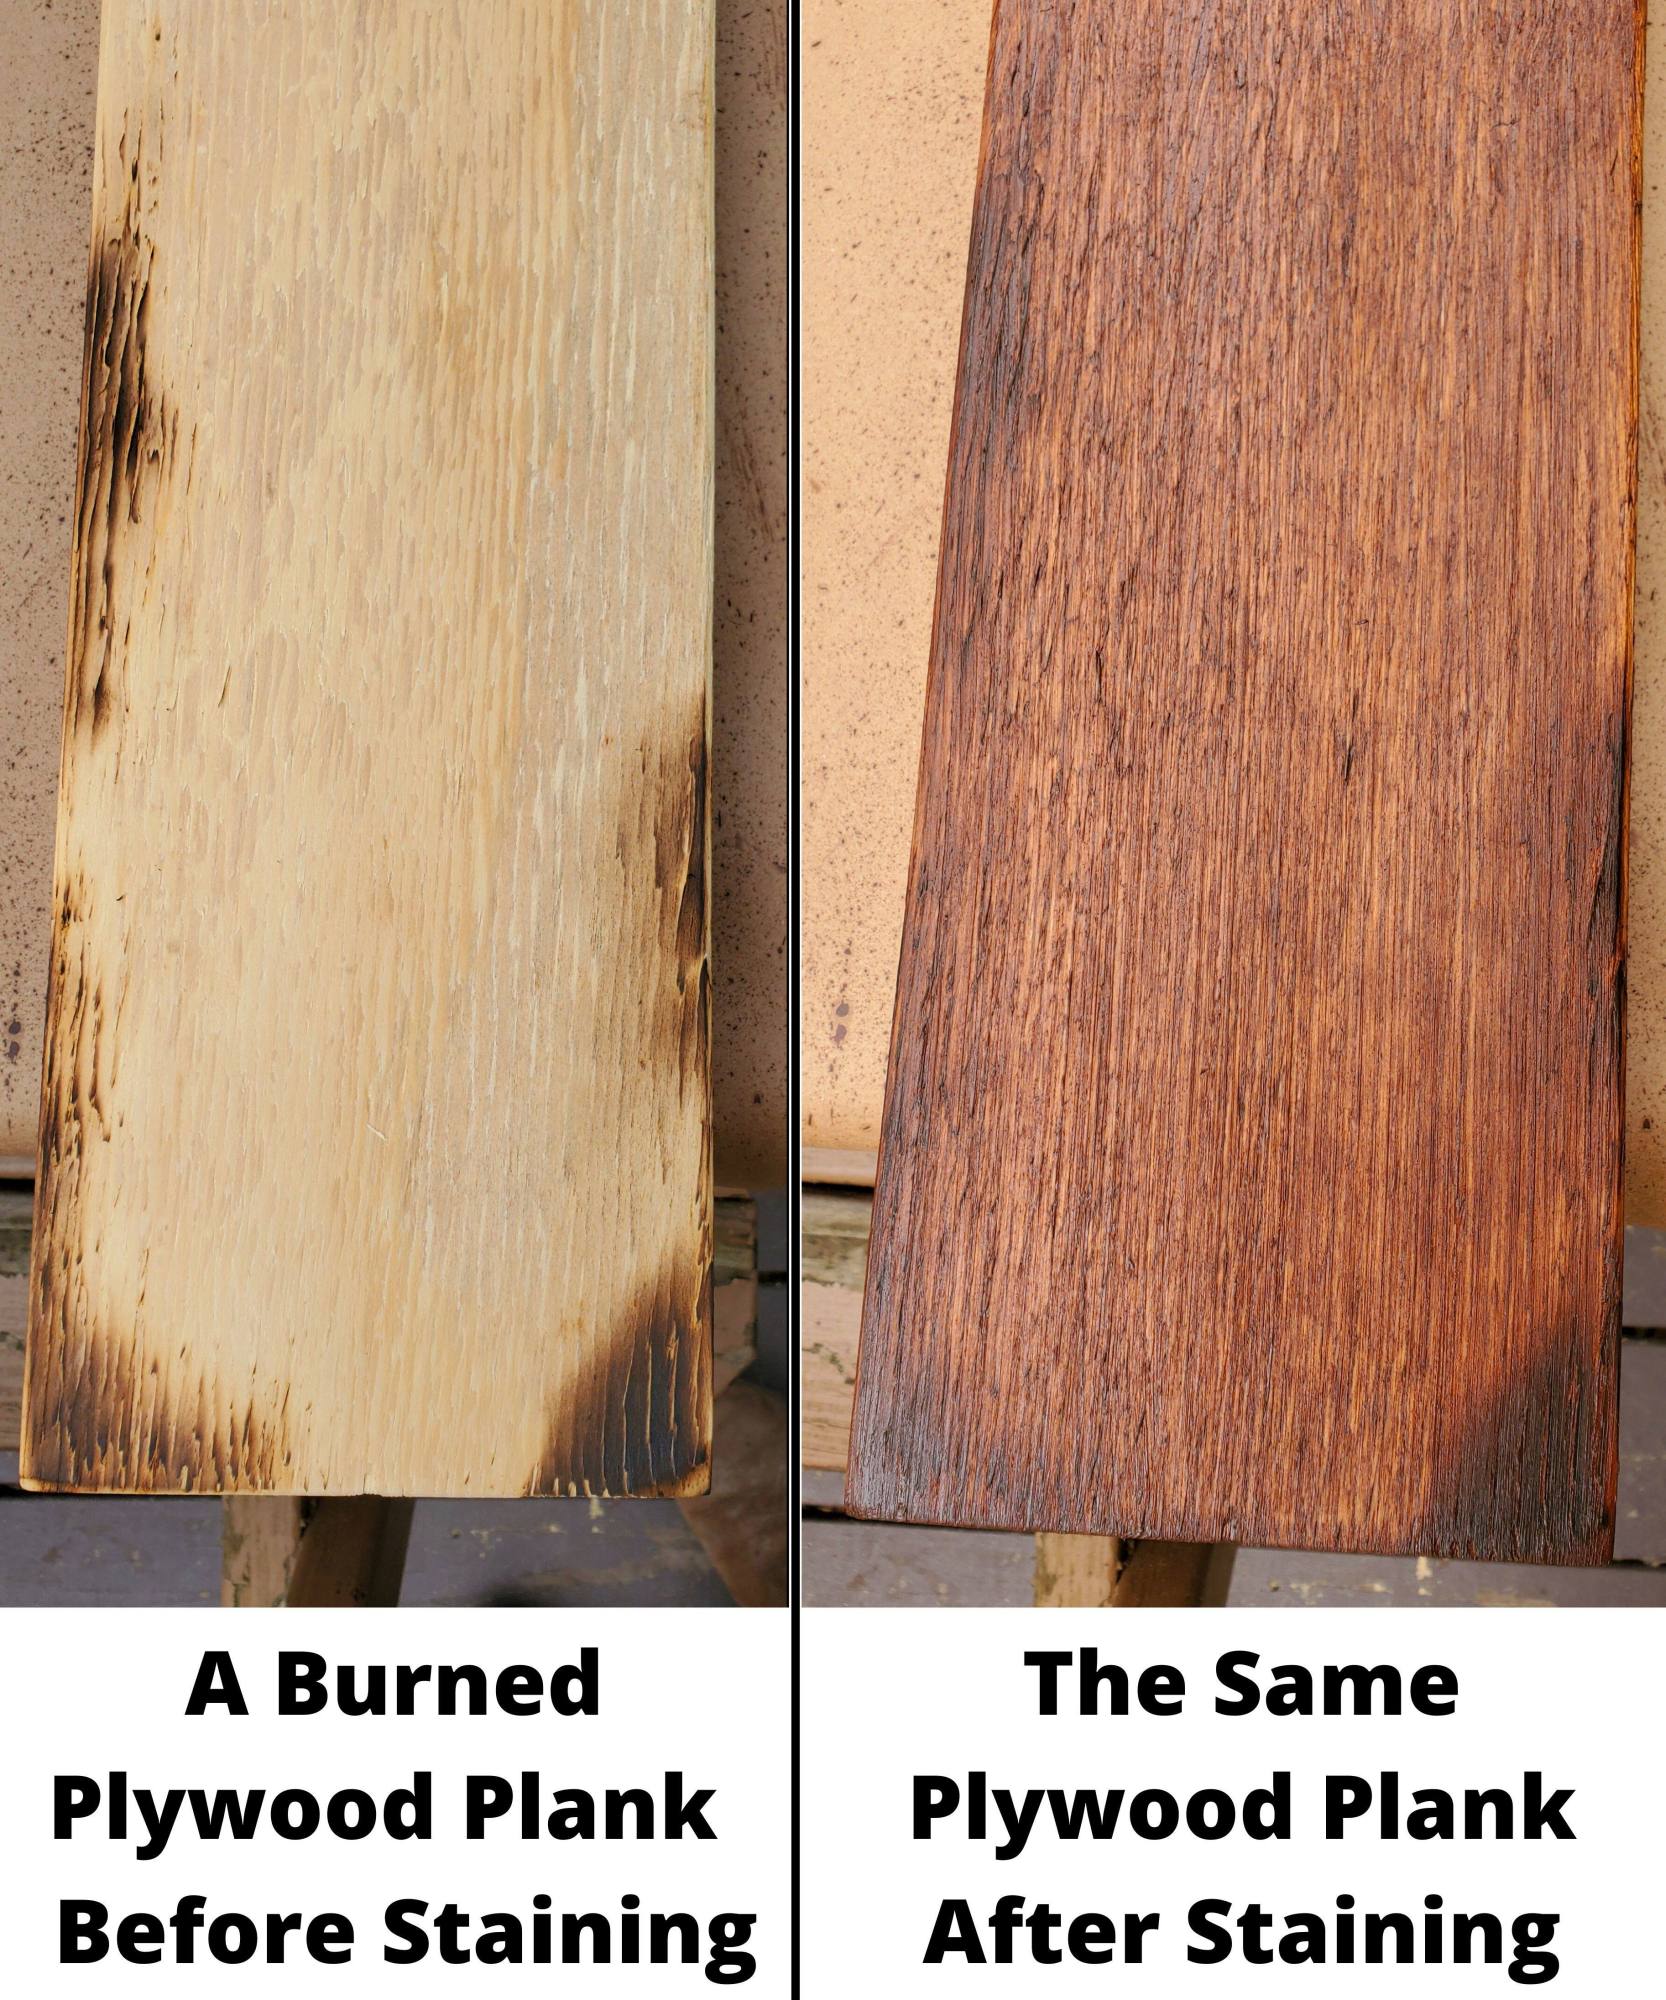
Take a look at the before and after picture of the burned plywood plank.

When burning the wood there are definitely thoughts of Oh My God! This is too much!

Ma, as soon as the stain goes on, it blends the darkness of the burn the the rest of the plywood colors beautifully.

Whenever we came across a plank that looked a little boring, we burned some character into it to liven things up. 🙂

Take a look at the arrows in the picture, each one of those dark marks is the work of the propane torch.


Mancia: When burning the plywood, the lighter parts of the wood burn much easier than the darker parts.

Since I was avoiding that plywood zebra pattern, I didn’t burn the wood where there was a heavy pattern.

Burning that area would only emphasize the patternand I didn’t want that.

If the part of the wood was either only dark or only light then it was eligible for burning.

DIY Farmhouse Wide Plank Floor Made From Plywood - burned plywood floors from the propane torch
DIY Wide Plank Plywood Flooring - .a Burned Plywood Plank Before And After Staining

Here’s a video of how we burned the rustic wide plank plywood flooring.

We Chose Gel Stain, This is Why

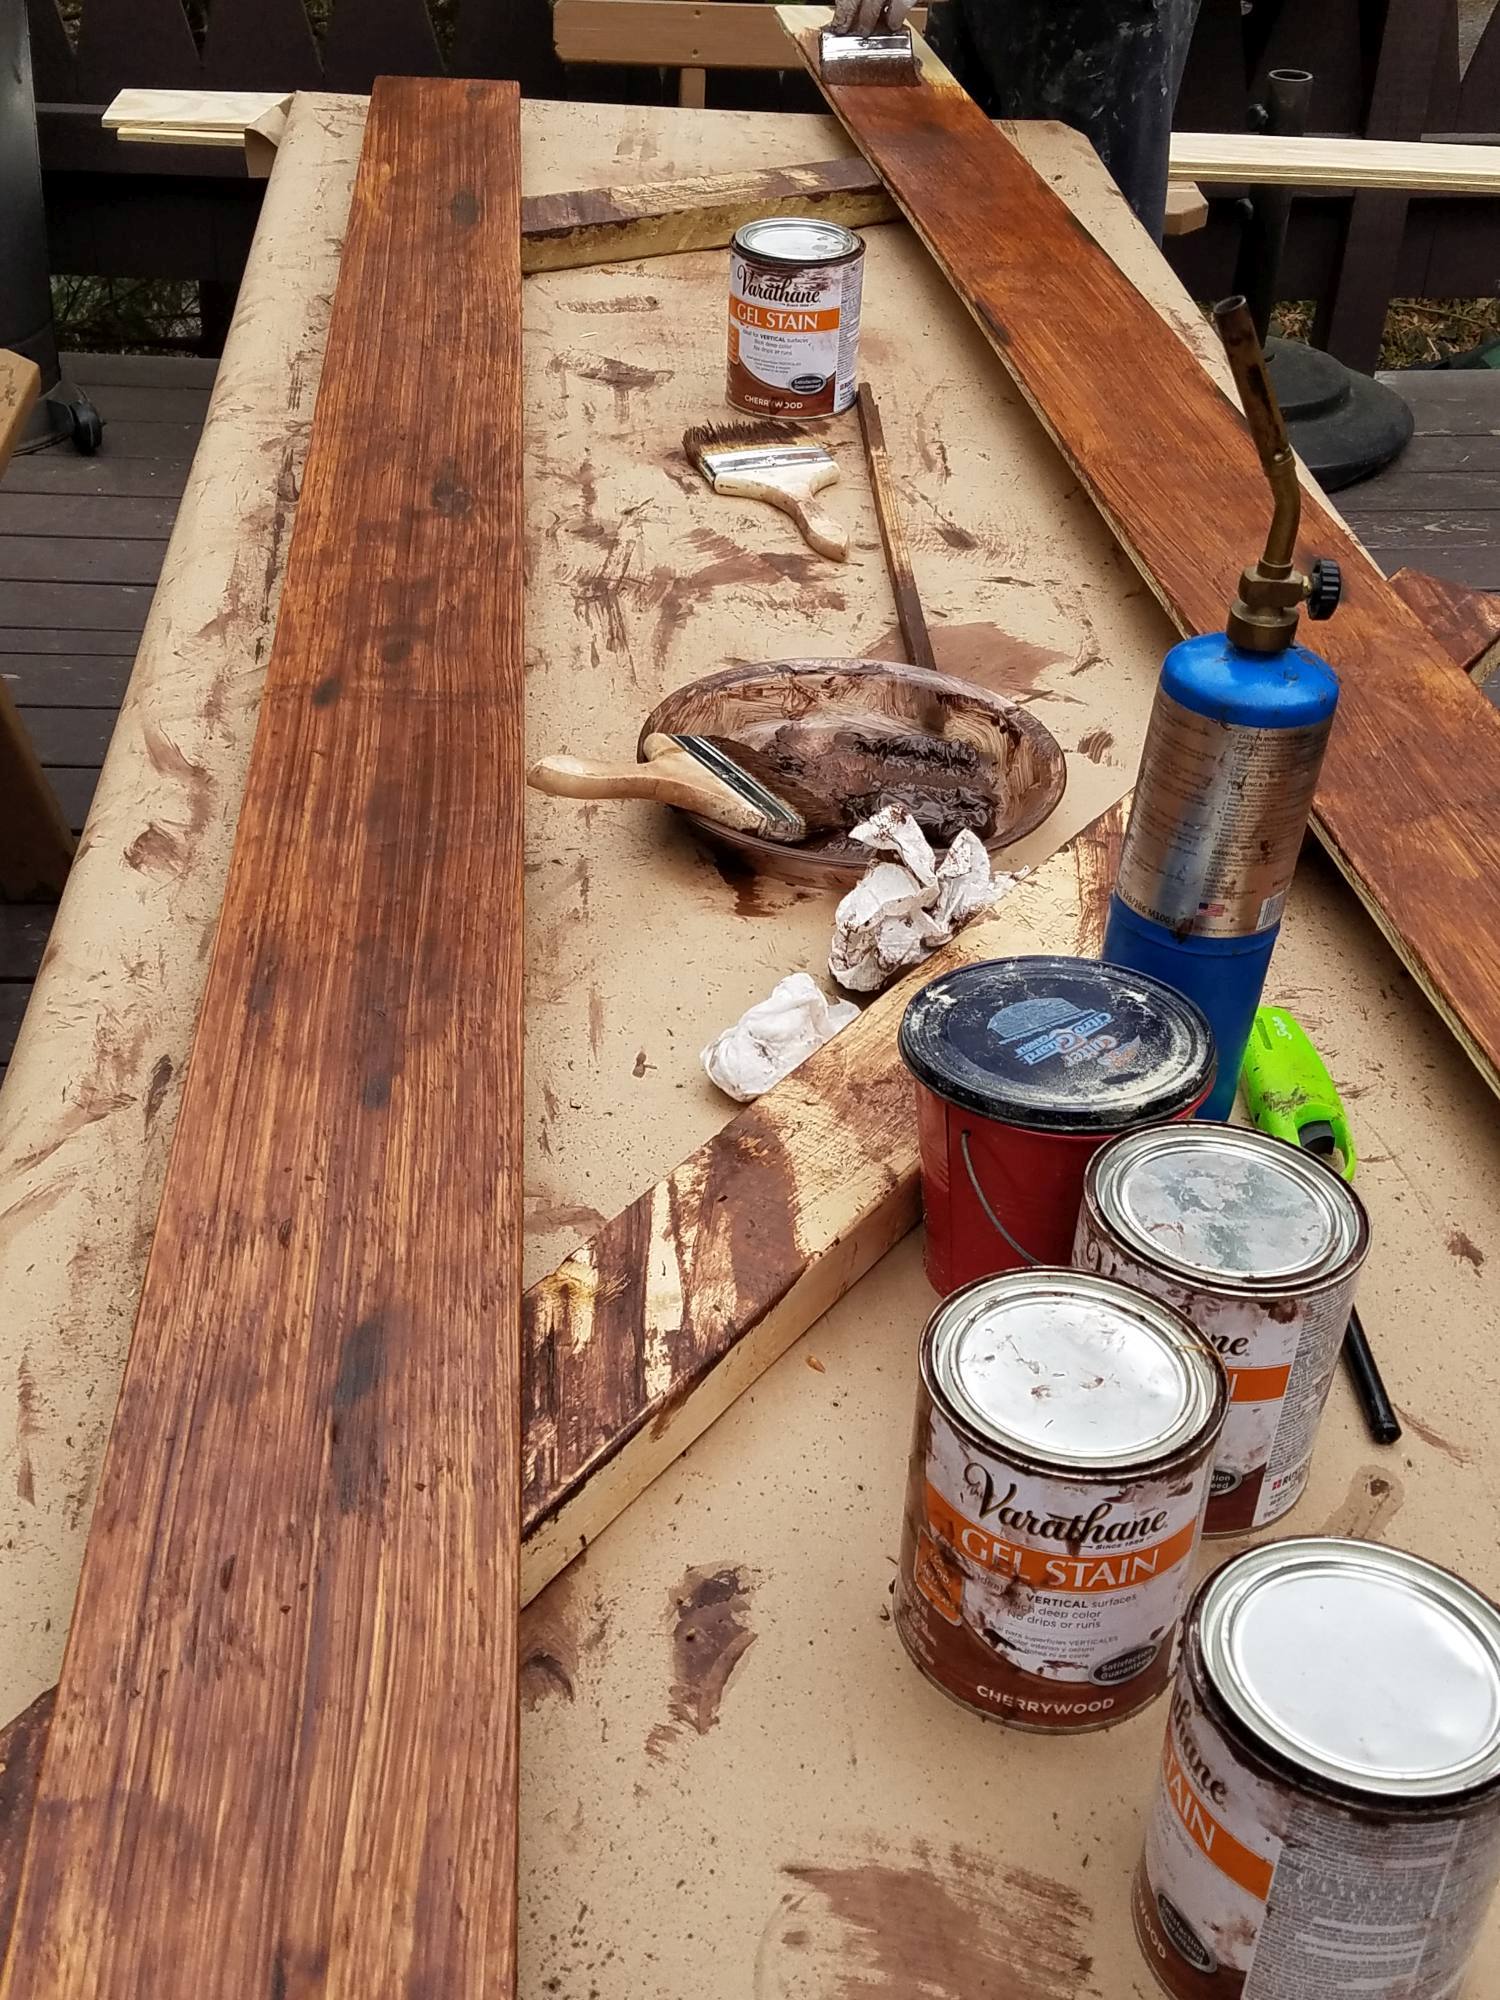
The process started with trying out a bunch of different stains on scrap pieces of plywood first, and this was by far our favorite!

We went with a gel stain instead of a regular stain because it does a really good job of covering up that plywood zebra pattern that we didn’t want.

It’s totally a personal preference, but I don’t like the pattern you get from regular stain on plywood floors.

Take a look at this picture I copied from Pinterest, for an example of what I’m talking about.

Regular stain is more liquid and gets absorbed by the plywood at different rates. Softer parts of the wood absorb the stain faster than the denser parts of the wood.

A workaround would also be to use a wood conditioner before applying regular stain.

Invece, we used the gel stain.

Because we used the gel, we were able to skip the wood conditioner.

Plus, the gel stain added a nice wood grain pattern on the surface of the board, making it look less like plywood.BONUS!

DIY Rustic Farmhouse Wide Plank Plywood Flooring - zebra plywood pattern I wanted to avoid

The Gel Stain We Chose

The gel stain we used had a dark color and created a lighter stain on the wood. The result was a cherry colored wood with a dark grain pattern on top, exactly what we were looking for.

The thicker you applied the stain the darker the board would be.

Anche, the longer you waited before brushing the excess stain off the darker the plank will be.

If a plank had a heavy zebra pattern on it, we put the stain on thick and waited a bit more before dry brushing it.

That did a pretty good job of minimizing the zebra pattern.

The brush we used for the stain was a cheap wide (about 4″) real bristle brush.

The stain has a strong polyurethane smell to it, so we did the staining out on the deck and also let the boards dry out there.

If you’re going to do the same, make sure to first check the weather forecast!

We used about 7 quarts of stain to do our project.

Staining Plywood Floors

Total Time: 2 people about a day

When we stained the plywood floors, we did one coat of stain using the dry brush technique.

Fondamentalmente, first we applied the stain with the wet brush, then used a dry brush to brush off the excess stain.

With every pass of the dry brush, we would wipe off the dry brush on a paper towel to remove the majority of the stain from it.

We chose the dry brush method because it leaves a nice dark wood pattern.

When applying the stain and dry brushing, we were able to play with the texture that the stain leaves on the plywood.

Mixing it up and using wavy brush strokes to simulate a grain or brushing around a knot in the wood added uniqueness to each board.

Ricorda, the longer the stain is left on and the longer it dries before using the dry brush, the darker the board will be.

We typically applied the stain and waited a couple of minutes before using the dry brush.

If we came across a board with lot of that zebra pattern on it we applied a thicker coat and let it sit a little longer.

The thicker coat and longer wait time did a better job of masking the zebra pattern.

Once the stain was applied we waited 24 hours before applying the polyurathane.

DIY Farmhouse Wide Plank Floor Made From Plywood - stained plywood flooring - Stain Plywood Floors - applying the gel stain and leaving brush strokes that look like wood grain
DIY Farmhouse Wide Plank Flooring Made From Plywood - Applying Gel Stain and distressing to the wide plank plywood floor boards

Applying The Finish

Total Time: 2 people about a day and a half

For the finish we used a clear satin, water based, oil-modified polyurethane.

This product was perfect for our project because it didn’t change the color of the stain, dried quickly and best of all it’s oderless!

If you’ve ever done any sort of polyurethane project. you know that the smell from polyurathane is no jokeand it lingers for days and days. This has no smell at all!

We went with a satin finish because we wanted an aged look and a glossy floor would be the opposite of that.

Three thin coats of poly were applied on all the boards, including the sides of the boards. Between each coat, we waited about 2 hours before applying the next coat.

We then waited 24 hours after the last coat before installing the boards.

We didn’t sand between the first and second coats but did do a light hand sanding with 120 grit sandpaper before applying the final coat.

The brush we used for the poly was a cheap wide (about 6″) synthetic brush.

We used 2 gallons of polyurethane for our project.

Click her to buy the same polyurethane I used

Mancia: When applying any polyurethane, bubbles are something you want to avoid.

That’s because the bubbles don’t pop. Invece, they dry into polyand that’s not a good look. lol

To prevent bubbles, mix the poly using a mixing stick using smooth circular motions.

No shaking the can here!

Aggiornare: When we originally did the dining room floor we did a light sanding before the final coat of poly.

Recently we did the living room floor and for that flooring, we skipped the sanding before the poly.

We figured not sanding would give the planks a bit more texture and save us a boatload of time.

It worked out really well! From now on, we won’t be sanding before the final poly coat.

It’s All About That Space

The spaces between each plank were perfect for the style we were looking for.

The spacing would give it more of that farmhouse feel and prevent the buckling that the previous floor suffered from.

A few of the posts on Pinterest mentioned using quarters as spacers, so that’s what we used.

Our ampia listone pavimenti in compensato has small variations in the spacing, mostly because of the uneven floorsbut that’s okwabi-sabi. 😉

Where To Start Laying The Plywood Planks

I used a tip I came across on one of the Pinterest posts, starting on the side of the room where the floor is the most visible.

For our space the most visible part of the floor was by the front door so that’s where we started.

When we reached the opposite end of the space we ended up with the last row of planks needing to be ripped in half.

DIY Wide Plank Floor Made From Plywood - Starting The Wide Plank Plywood Floor Install

Make Sure To Space Out The Seams

Each plank was 8 feet long and the room was a little over 12 feet wide, so there weren’t too many seams to work with.

The rule of thumb is to not have two consecutive rows with seems less than a foot apart from each other.

DIY Wide Plank Floor Made From Plywood - make sure to space out the seams - This is the plywood flooring in the kitchen

Cutting The Plywood Boards To Length

I used a miter saw to cut the boards to length. Pretty straight forward. One tip is to make sure the blade reaches full speed before you start cutting into the plywood. That’ll give you a clean, smooth cut.

Mancia: Every once and a while making a cut would create a thin line of bare wood at the very edge of the cut. When that happened I used a dark colored sharpie to color that bare wood and that blended it right in.

I used a black sharpie but a brown sharpie would work just as well.

I actually used the sharpie a lot with the length-wise cuts.

Securing The Rustic Wide Plank Plywood Flooring In Place

Total Time: 1 person a solid day
On Pinterest, I found different methods of securing the planks. Some suggested glue or liquid nails, others said nails, and a few did both.
The glue or liquid nails sounded too permanent to me. If I ever want to change the flooring in the future, nailing it down would be the best approach.
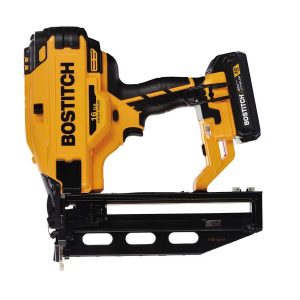
I opted for face-nailing the planks using a nail gun. I bought a battery-powered Bostitch nail gun, it was perfect for the job.
This nail gun has a rapid-fire feature. If you press and hold the trigger it shoots nails in rapid successionlike it’s air-powered cousin.
That feature makes quick work of installing these floors.
The nails I used were 16 gauge 1 1/2″ straight nails.
I put a nail in about every 6 – 12″ all the way around the board.
The nail heads are super tiny and the nailgun did a good job of countersinking them into the planks so they are barely noticeable.
We used about 4 packs of nails for the project

Mancia: If you end up buying the same nail gun I’d recommend also buying an extra battery. It already comes with one battery, buying the extra battery will help keep your project moving along.


One More Note

The plywood flooring we installed is 1/2″ thick and the previous flooring was 3/8″ thick.

The 1/8difference meant any spaces where the previous flooring used to fit – the new flooring no longer did.

That difference meant a lot of undercutting. Not only the door moldings but all the furring strips that cover the seams of the oak boards on the walls.

I could have done it with a dovetail saw, but since I had quite a few cuts to do, I bought an oscillating tool. It worked perfectly!

The tool comes with a bunch of different attachments. I haven’t used it for anything else yet but I can think of a few different uses for it in the future.

plywood flooring install - the nail gun

All Done – Questo è tutto!

COSÌ, all told, it took roughly a week to do the plywood plank floorsfrom complete start to complete finish. Including the old floor removal, subfloor painted, 10 sheets of plywood cut into strips, levigato, angosciato, stained, polyied and installed.

This was a good sized project with a lot of effort put into it, but it was well worth it. We now have a completely unique floor that fits perfectly with the house, and looks fantastic!!

In the fall, we’re going to install the same rustic wide plank plywood flooring in the living room, and I’m really looking forward to it.

We’re also going to do a unique transition between the living room and dining room floorscan’t wait.


Aggiornare: Bene, we redid the living floors recently and we also installed the wood slice accent flooring. Everything turned out perfect!

We wrote about those experiences also, check out those posts here:

Wood Slice Accent Flooring

Pavimentazione in listoni larghi per casa colonica


[et_bloom_inline optin_id=”optin_7″]

Some Pictures

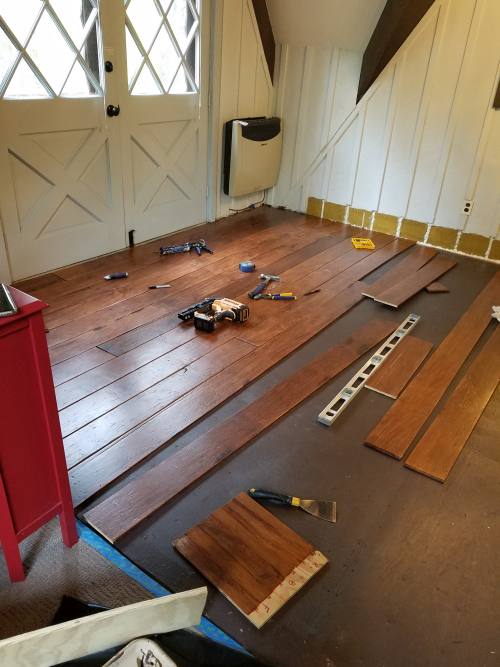
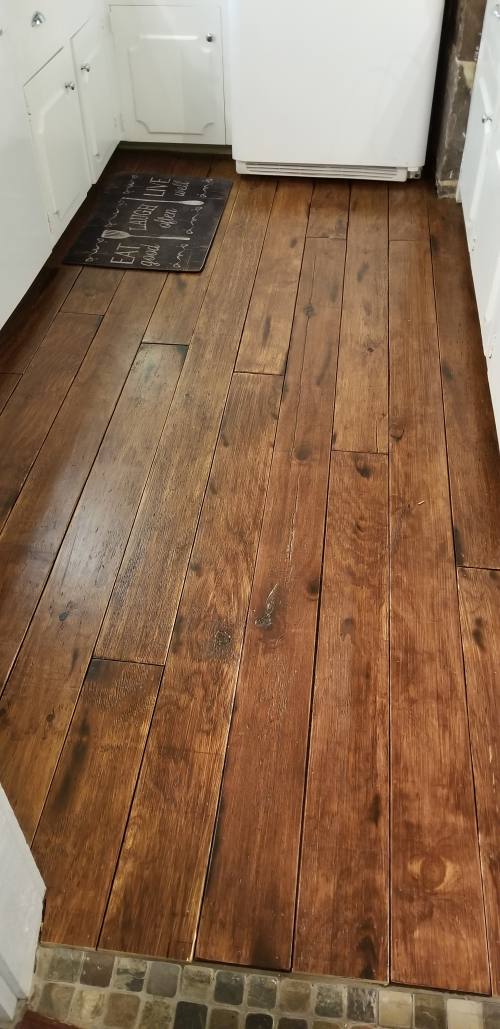
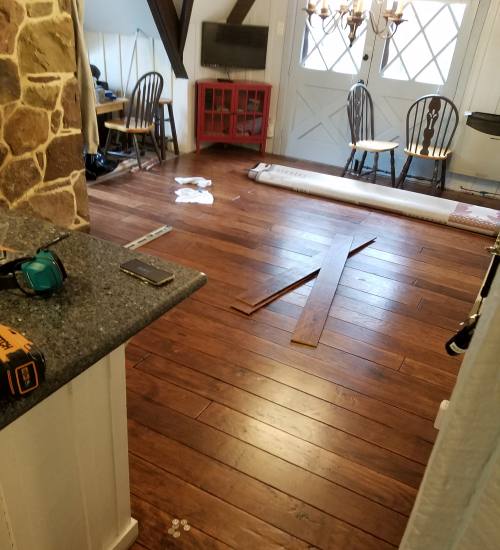
Here’s some more pics of the work in progress and the finished plywood plank flooring.

Fammi sapere cosa ne pensi, c'è qualcosa che avresti fatto diversamente??

Condividi i tuoi pensieri nei commenti qui sotto!
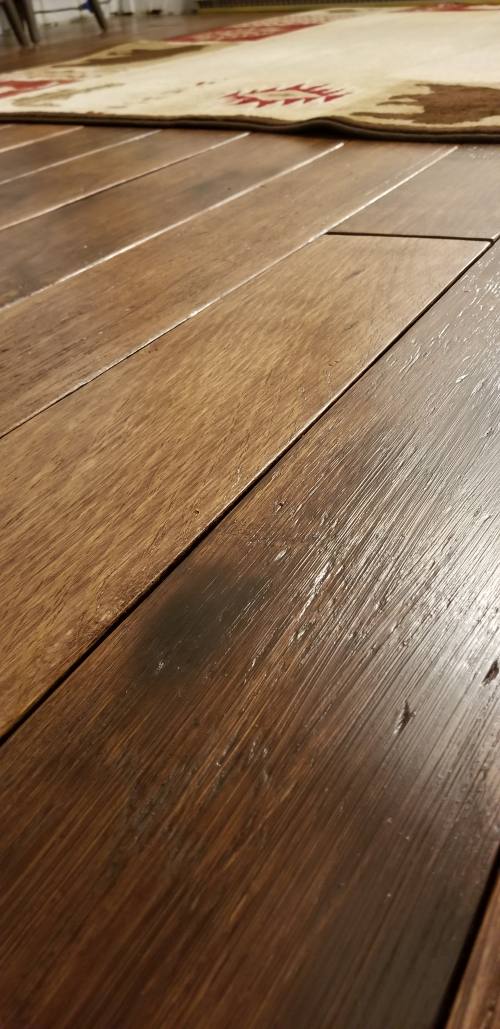
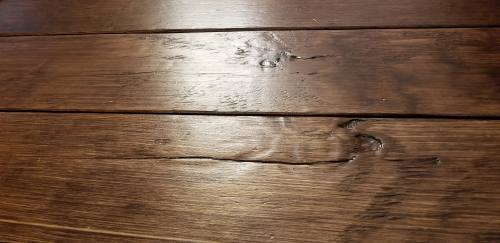
DIY Rustic Wide Plank Plywood Flooring - Close up pictures Of The Distressed, burned and stained plywood floors
DIY Rustic Wide Plank Flooring Made From Plywood - a closeup of the distressing
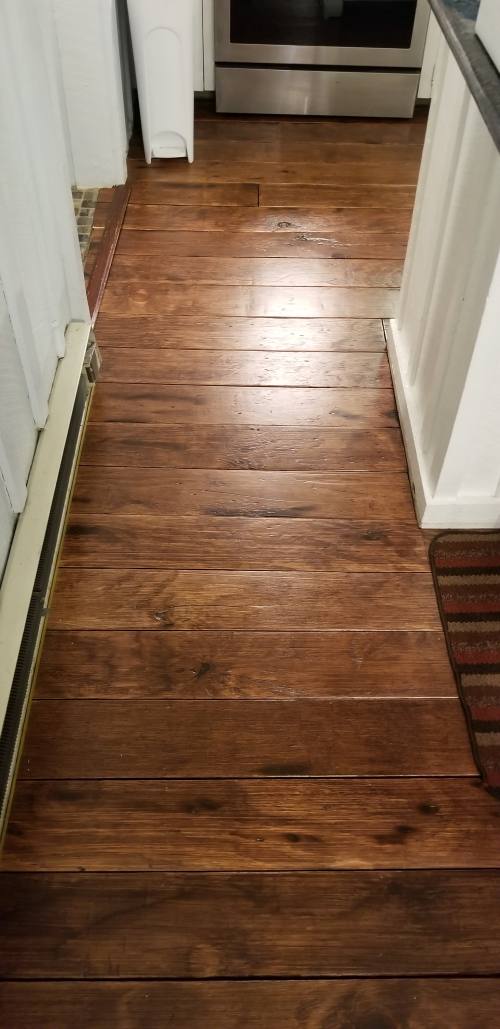
DIY Wide Plank Floor Made From Plywood - The Plywood Plank Flooring In The Kitchen
DIY Farmhouse Wide Plank Floor Made From Plywood - Distressed Floor - The stained plywood floors are perfect for that farmhouse look
DIY Farmhouse Wide Plank Floor Made From Plywood - In the middle of installing the plywood plank flooring in the Dining Room
DIY Rustic Farmhouse Wide Plank Plywood Flooring - a closeup of the distressing on the barn board plywood flooring in the kitchen
DIY Rustic Wide Plank Plywood Flooring - The Plywood Plank Flooring In The Dining Room
DIY Rustic Wide Plank Plywood Flooring - the finished product - The stained plywood floors are perfect for that farmhouse look
DIY Farmhouse Wide Plank Flooring Made From Plywood - The Floor Boards Drying Outside After Polyurethane Was Applied

Godetevi questo post? Appuntalo e condividilo con gli altri!

DIY Rustic Wide Plank Plywood Flooring - a closeup of the distressing and Knots