5 verdure puoi crescere dagli scarti della cucina

5 verdure puoi crescere dagli scarti della cucina

5 Veggies You Can Grow From Kitchen Scraps


Primo, let me start off with saying there are definitely waaaay more than just 5 veggies you can grow from kitchen scraps, questi sono solo i primi che ho provato.

Con il Corona Virus che ha causato una brusca interruzione della nostra attività di affitto per le vacanze, abbiamo iniziato a porre la nostra attenzione su altri interessi.

The latest project we’ve taken on is starting a garden, most likely a container garden.

During my perusing on Pinterest, I found a pin on regrowing vegetables from the kitchen scraps.

I just started this project but already have quite a few types of veggies that can be regrown from kitchen scraps.

Come ho detto, there’s probably many more vegetables you can do this with, but this is a list of the ones I started with.

Rivelazione: Alcuni dei link qui sotto sono link di affiliazione. Se si decide di acquistare uno di questi prodotti, guadagniamo una piccola commissione senza costi aggiuntivi per te. Si consiglia di questi prodotti solo perché abbiamo esperienza con loro e li usiamo per i nostri progetti. Come Amazon Associates, guadagniamo dagli acquisti idonei.

5 Vegetables You Can Grow From Kitchen Scraps

#1Lettuce

This seems to work with all kinds of lettuce, so far I’ve got butter, red leaf and romaine lettuce regrowing from kitchen scraps.

Out of the 3 the romaine seems to have a head start. To be fair, I was apparently more generous with the amount of base I left on the rootI’m guessing that would make a difference.

5 Veggies You Can Grow From Kitchen Scraps - Lettuce

How To Start

When cutting the base of your lettuce head off, cut it about 1 1/2 – 2″ from the bottom. Quindi prendete la base e mettetela in un contenitore con un po 'd'acqua sul fondo.

Assicurati di cambiare l'acqua ogni due giorni e in pochi giorni inizierai a vedere una nuova crescita emergere dal centro della base.

Una volta che hai una buona quantità di crescita, la tua nuova pianta di lattuga sarà probabilmente più felice nel terreno. Ho letto che andrebbe bene in acqua, fintanto che cambi l'acqua ogni due giorni.

Personalmente, quando ho piantato la lattuga nel terreno ho notato che iniziava a crescere meglio. Forse è solo la mia immaginazione, ma metto le mie piante nel terreno quando iniziano a mostrare segni di nuova crescita.

Aggiornare: I learned recently that lettuce will shoot up right away when the temperature is above 70 degrees. Dato che siamo in Florida, quelle temperature ci rendono difficile coltivare lattuga in casa. We keep the temperature around 75 degrees and the romaine lettuce I was testing with, sparato verso l'alto.

Sto provando di nuovo, this time with butter lettuce. As soon as the lettuce started growing new leaves I put it in dirt. Lets see if that improves things.

I’ll update this post with its progress.

#2Basil

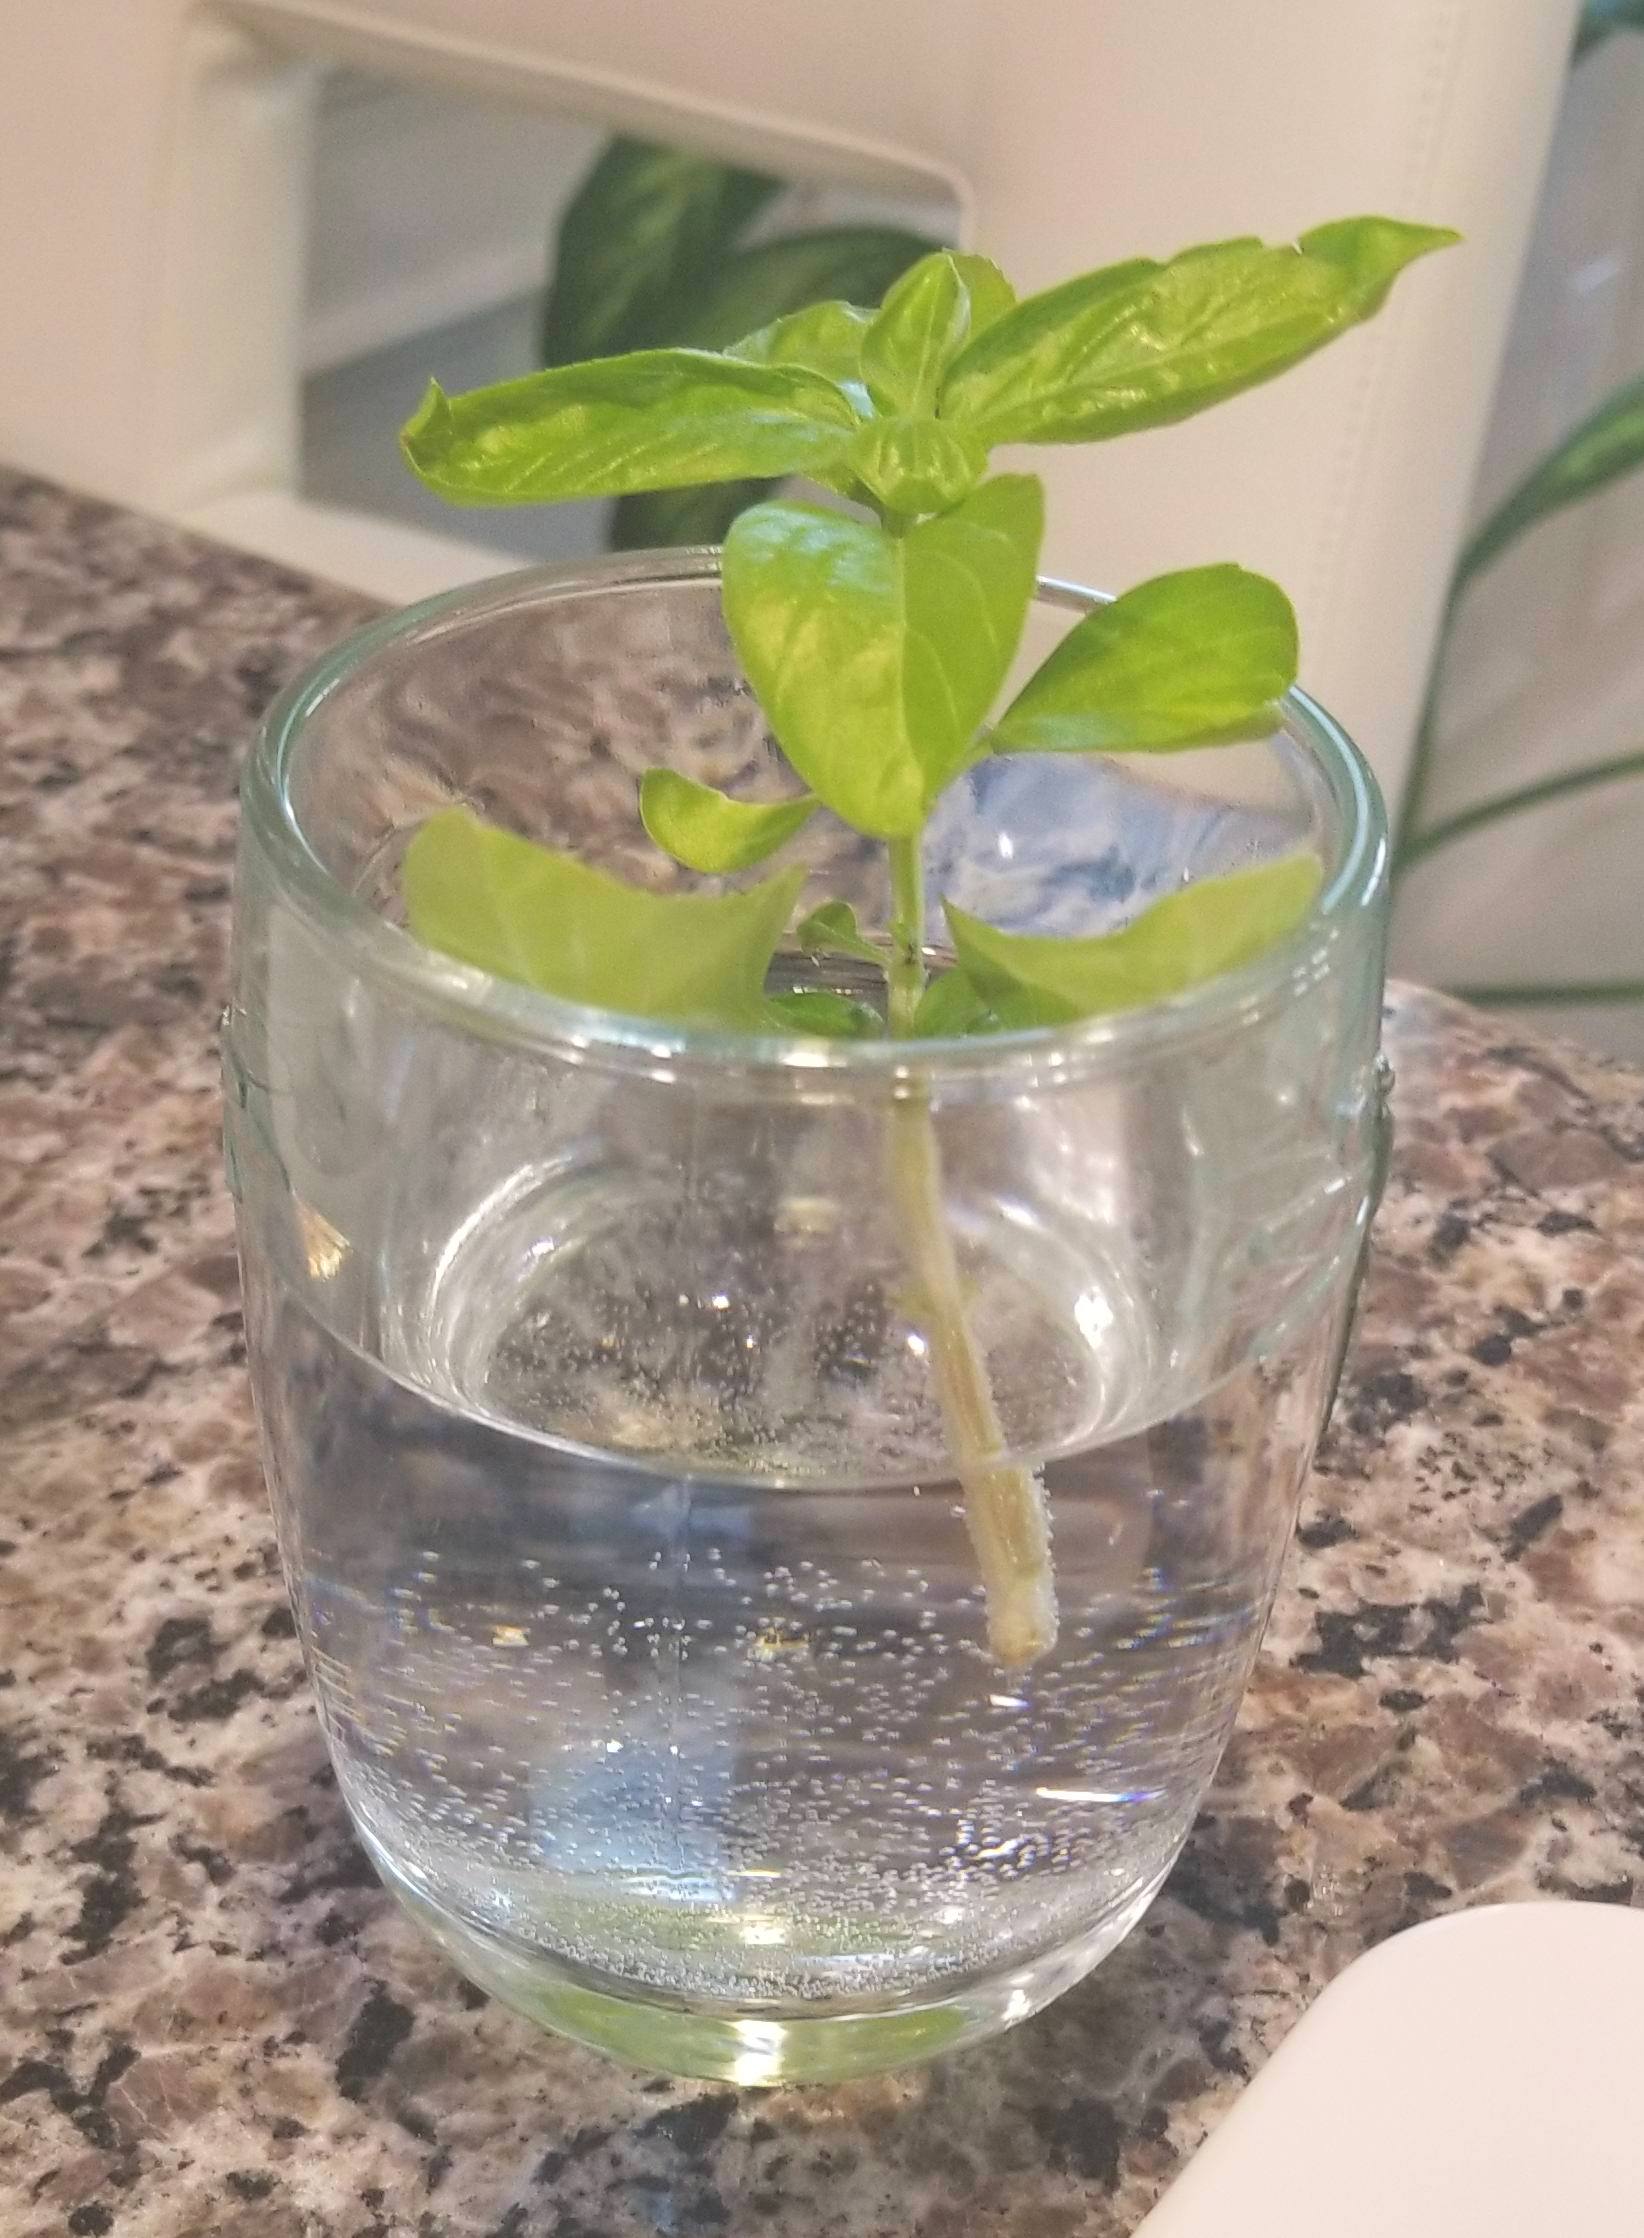
We had a long and leggy basil plant that wasn’t producing many leaves anymore. So I figured I’d try to use a cutting to start a new plant.

So far, the basil I’m trying this with hasn’t made any new roots but I’m pretty confident that it will start rooting shortly.

The cutting looks like it’s doing well in the water, and from what I’ve read, basil is a piece of cake to grow from cuttings.

How To Start

You’ll want to give the cutting enough stem so that it can sit in water without the leaves touching the water. If the leaves sit in the water they’ll start rotting and the water will get cloudy and your cutting will probably die off.

So give the cutting a couple of inches of stem.

Take your cutting and place it in a container with enough water for about an inch of the stem to sit in the water.

Place it in a bright area without direct sunlight and wait. 🙂

5 Veggies You Can Grow From Kitchen Scraps - Basil

#3Onions

The onions seem to grow pretty easily, it’s been a week and they look like they’re ready to be put into dirt.

Not sure if an actual whole onion will grow from this experiment but the green stems that grow from it can be used in cooking. The entire plant had an onion flavor.

5 Veggies You Can Grow From Kitchen Scraps - Onions

#4Scallions

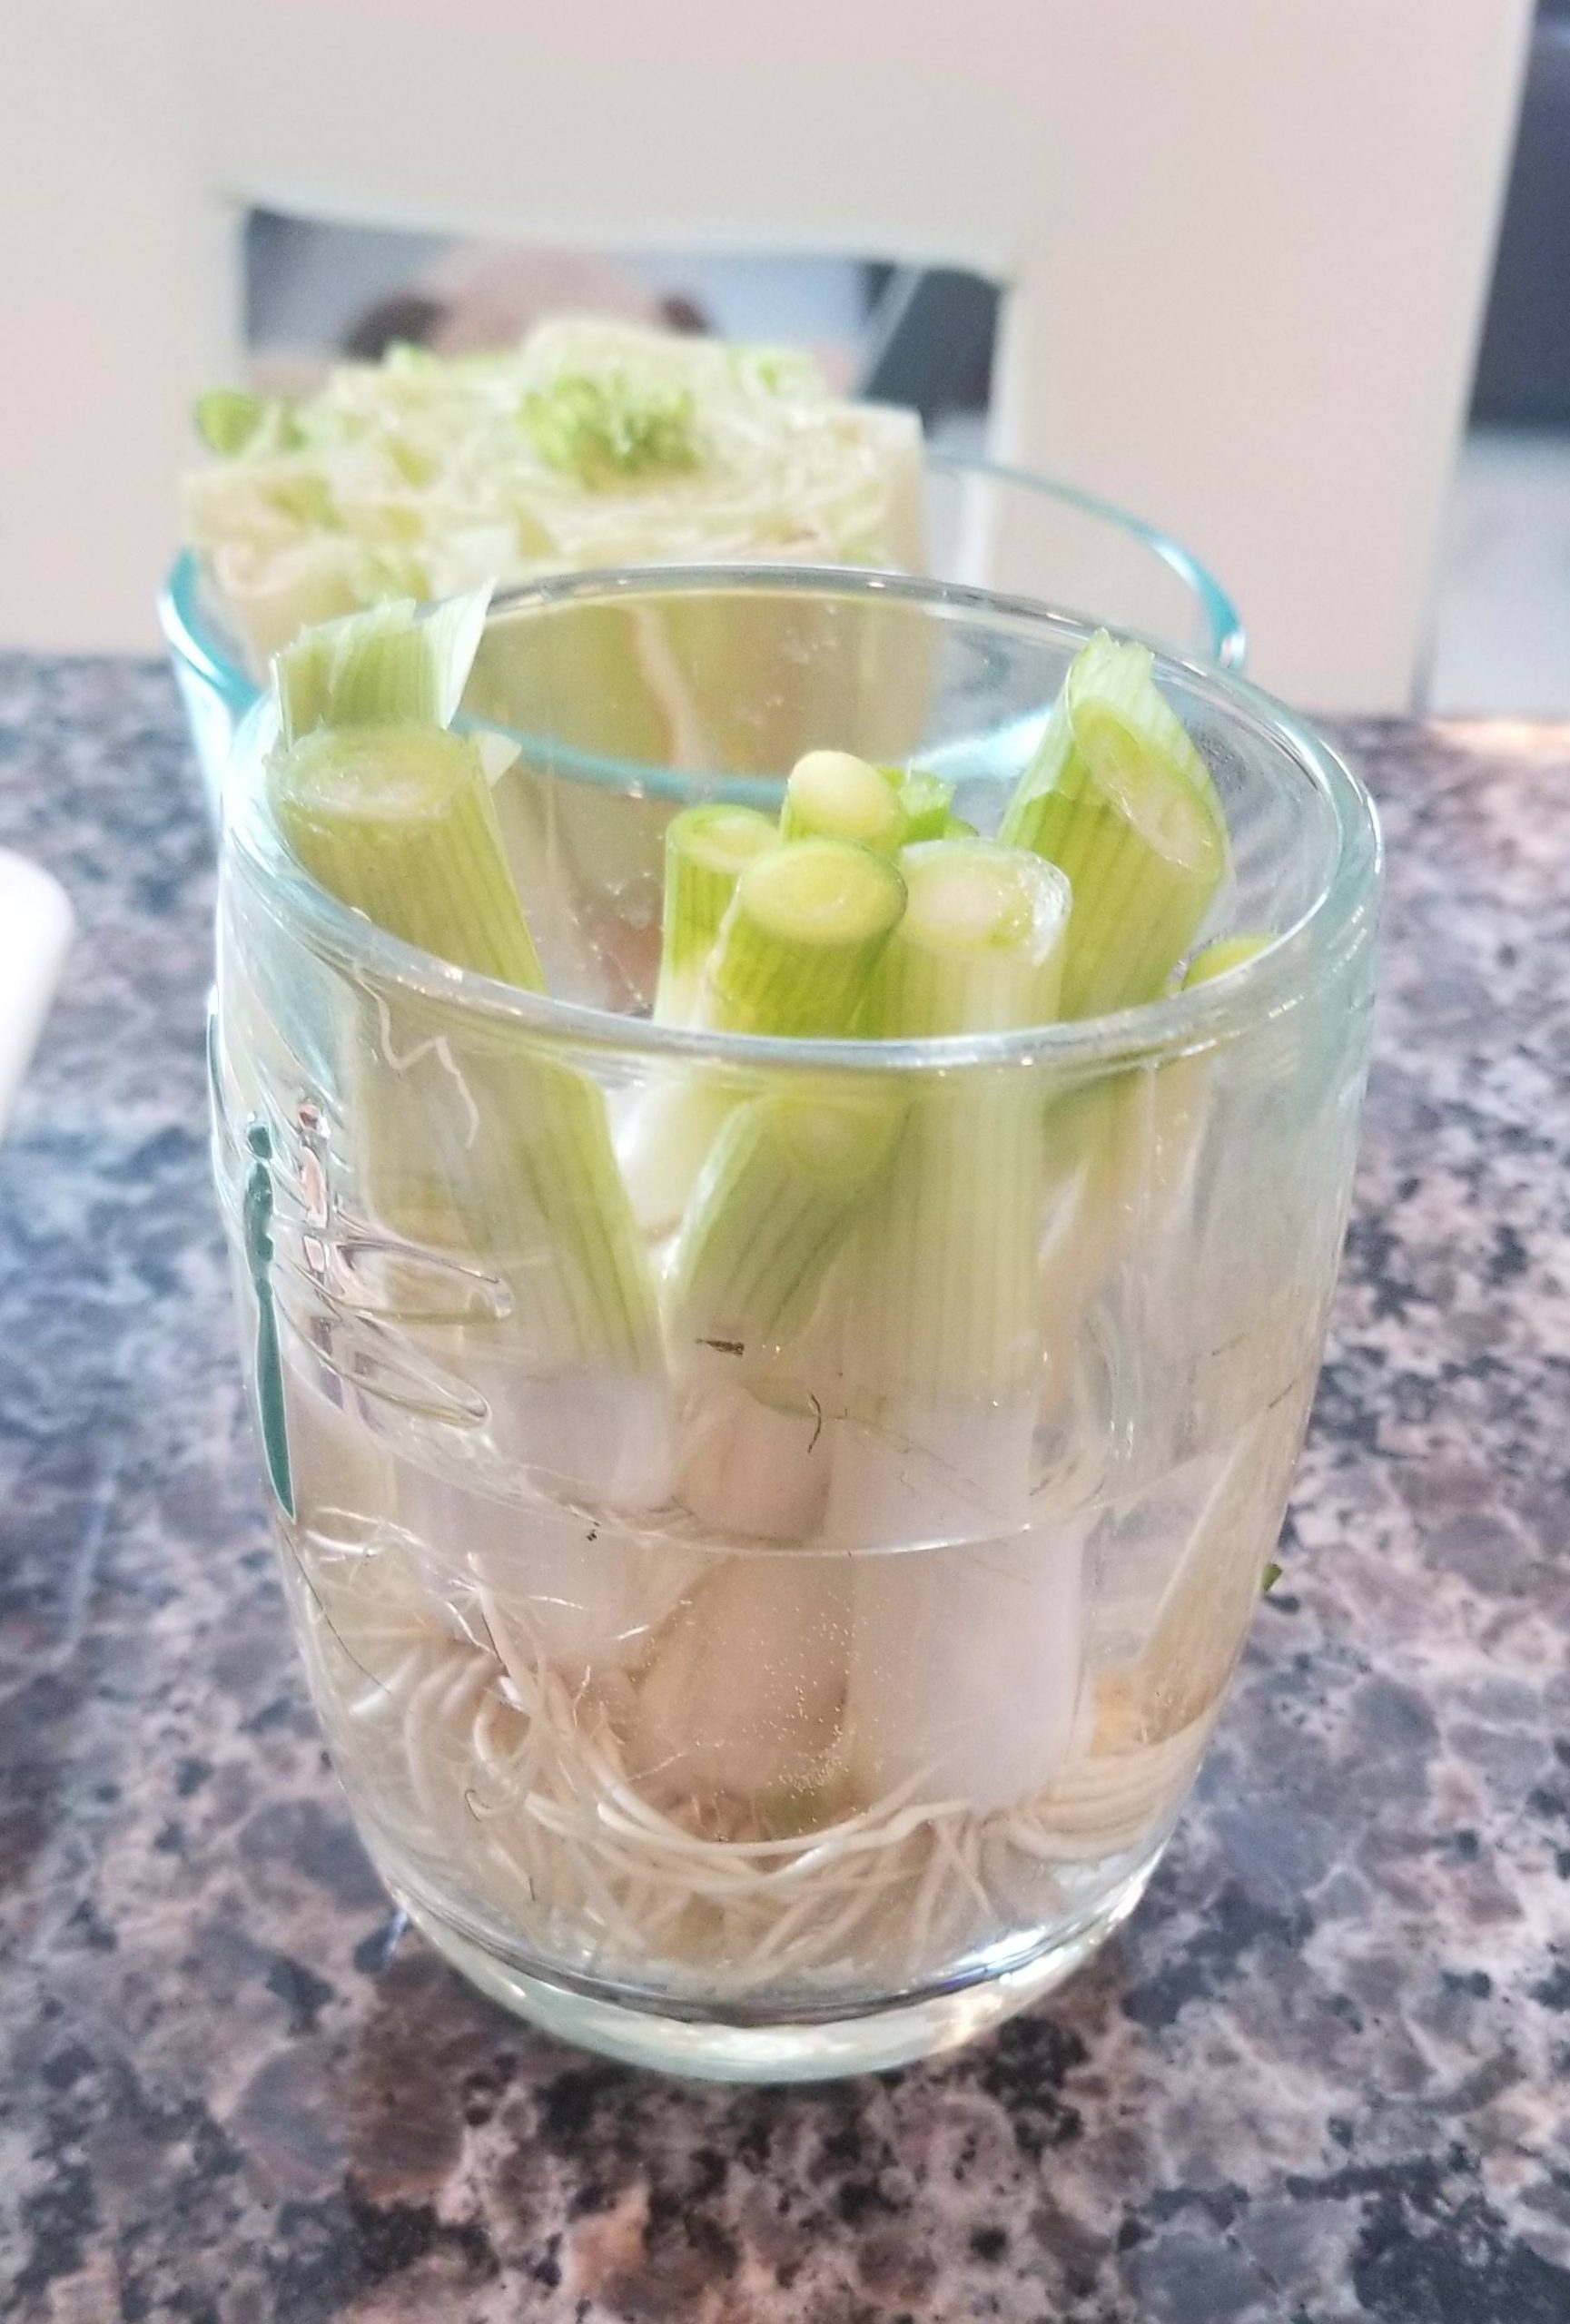
The scallions are the rock stars of my kitchen scrap garden! They have been in water for maybe about 5 days and have several inches of new growth already on them.

How To Start

Similar to the lettuce cuttings, when you cut the base of the scallions off cut it a bit higher than usual. About a couple of inches of the plant from the base.

Put them in a container with water on the bottom and you are all set.

Since they usually already have some roots, these guys didn’t waste any time growing.

5 Veggies You Can Grow From Kitchen Scraps - Scallions

#5Garlic

OK, so this isn’t exactly using kitchen scraps, since you’re taking the entire unused clove and sticking it into the ground.

Maybe it’s more like a garden tithing. 🙂

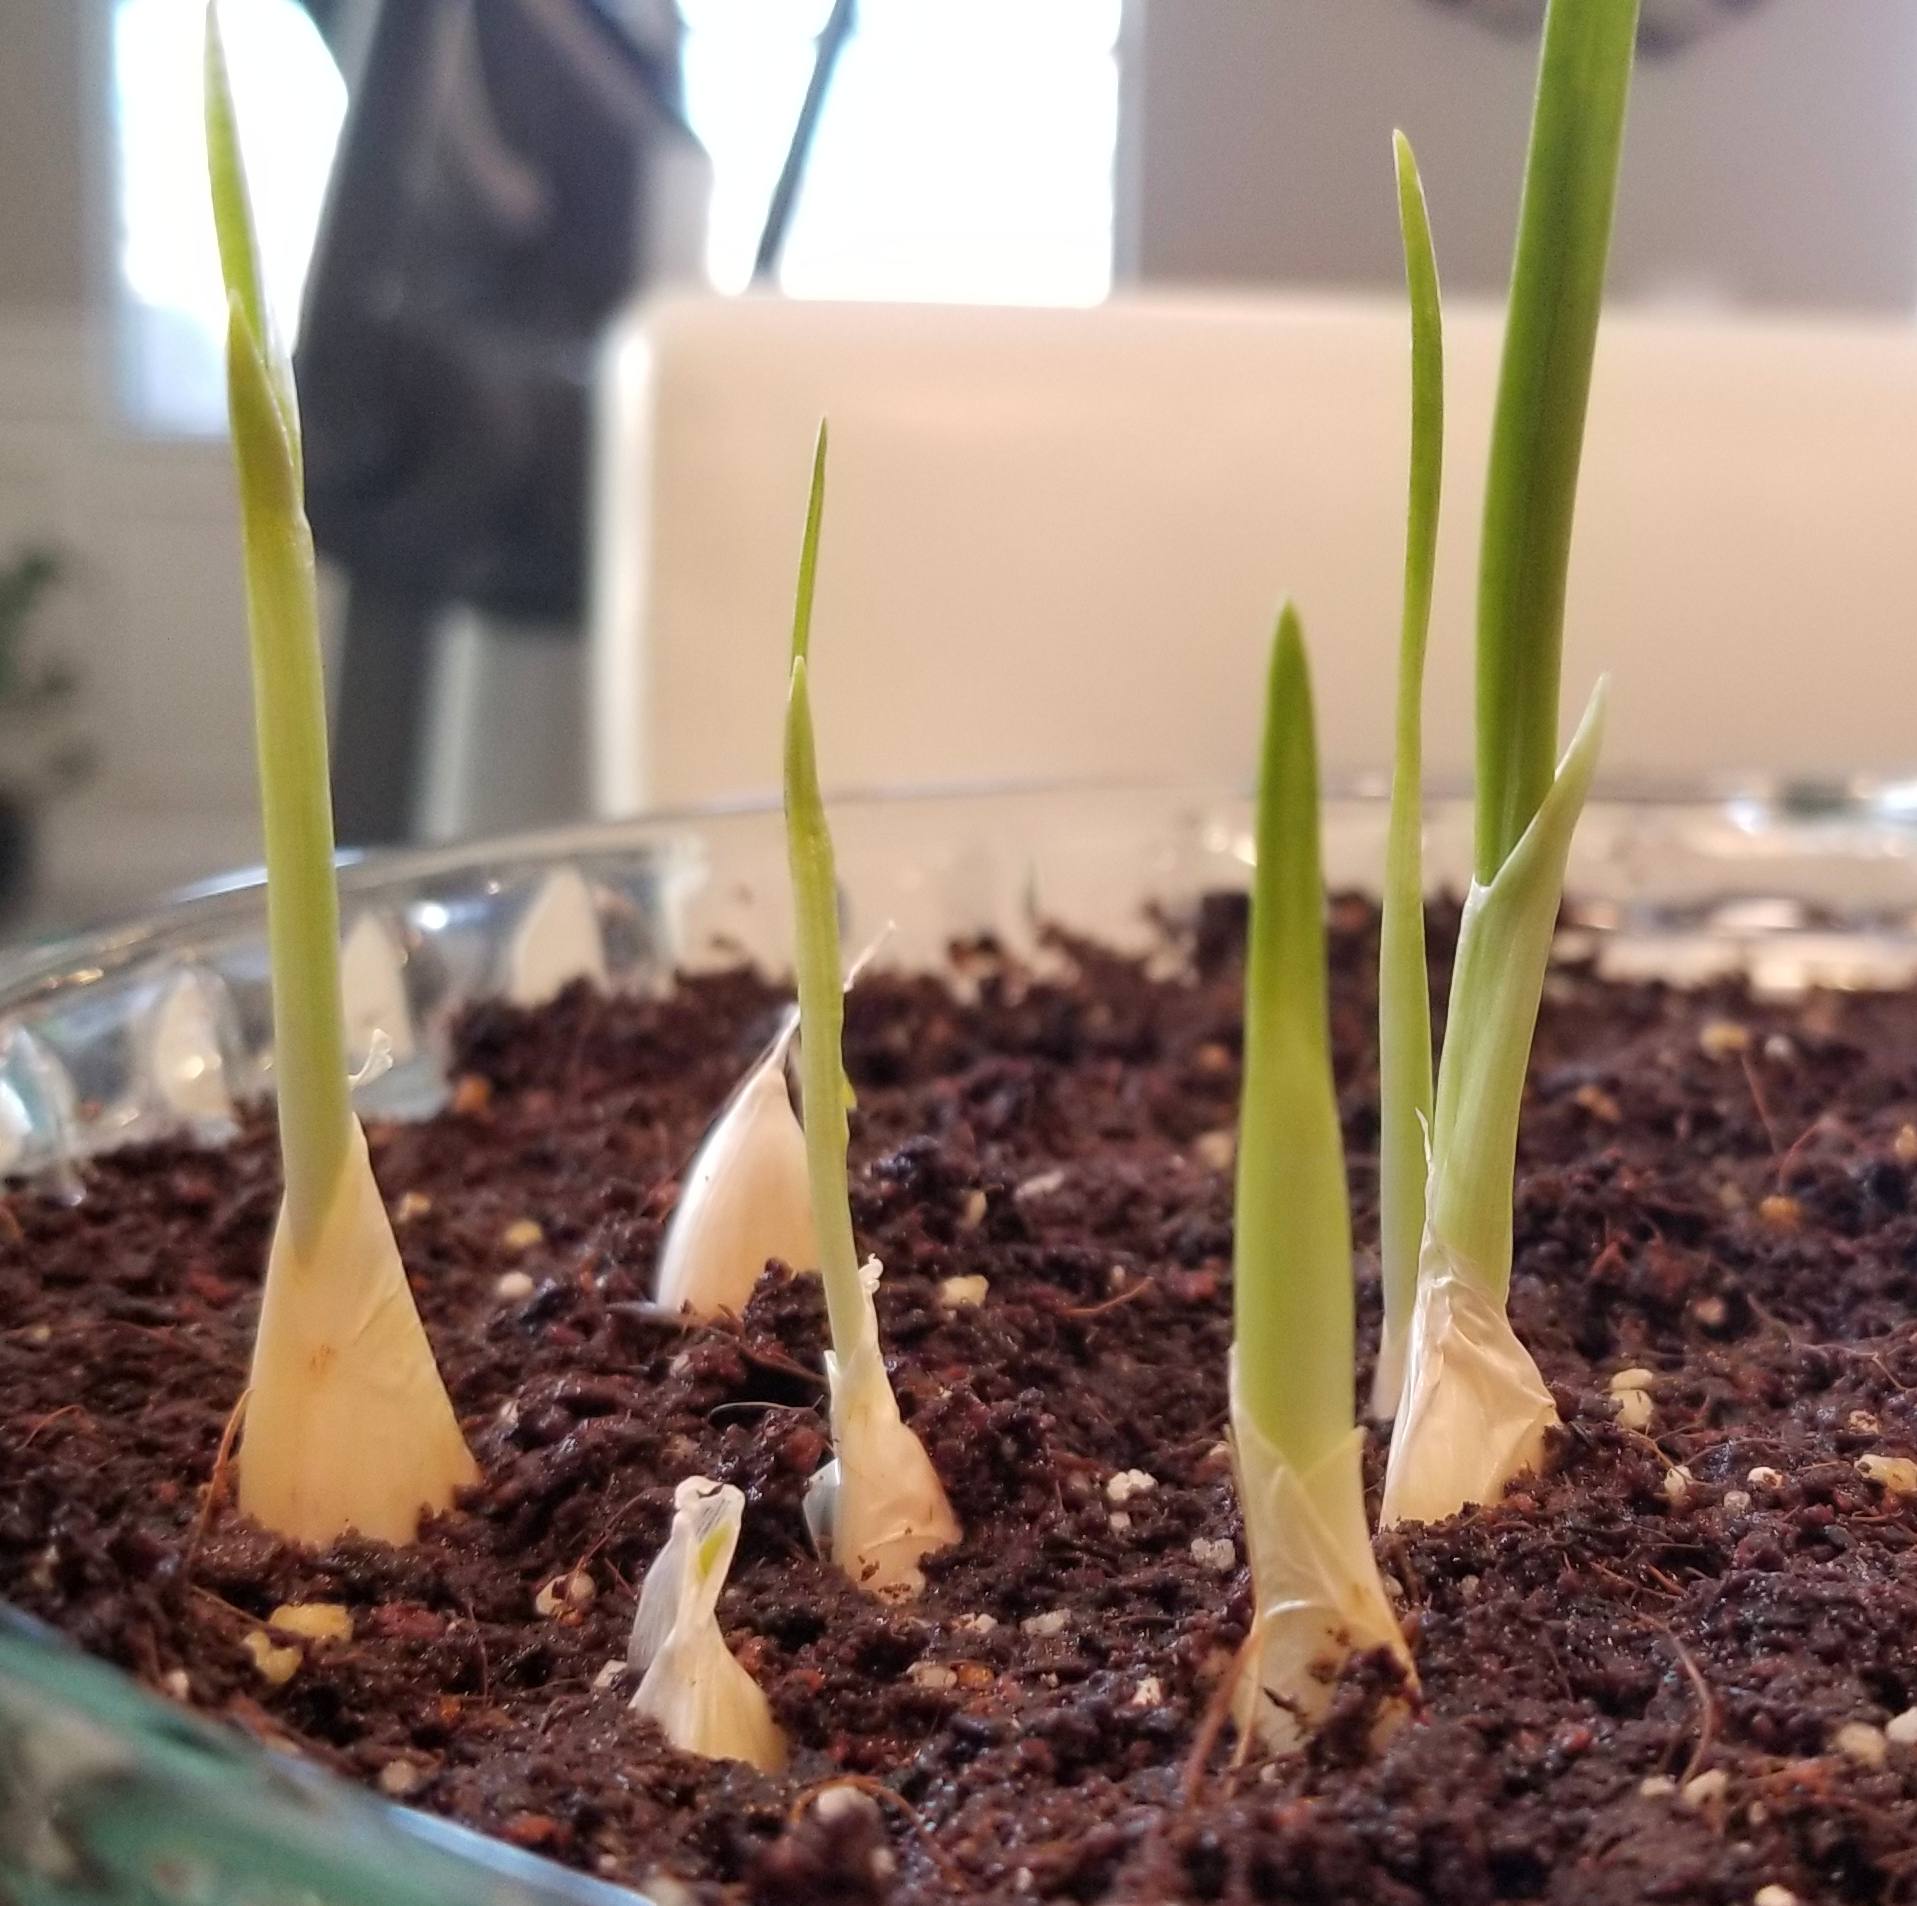
I took a few small cloves of garlic and planted them in the dirt next to the tomato slice. They were in the dirt about 3 days and I’m starting to see some green on the tops of a few of the cloves.

I’m guessing they could have also had the base of the garlic sitting in a little puddle of water to get it to start growing but I tried sticking it directly in the ground and that seemed to work like a charm.

5 Veggies You Can Grow From Kitchen Scraps - Scallions

Caring For Your Kitchen Scrap Garden

It’s pretty straight-forward to care for it. Place them in an area that is bright but doesn’t have direct sun. For the scraps that are in water make sure to swap out the water every day or other day and for the scraps in dirt make sure their dirt stays moistwithout over watering.

Before you know it you’ll start seeing new growth and your kitchen scrap garden will by off to the races! 🙂

Once the kitchen plants turn more into plants (either they grow roots are start growing new leaves) I’ll transplant them into grow bags.

Mancia: When cutting the vegetable it seems to help to leave a bit ofmeatalong with it. The lettuce and onions that I cut short didn’t seem to grow as fast or well compared to the ones where I left some moremeat”.

[et_bloom_inline optin_id=”optin_7″]


That’s My Kitchen Scrap Garden List

There are probably dozens of other veggies you can try this with, these are just the ones I’ve started with. I’m sure I’ll be adding other scraps to the list as I come across new ones.

Once the veggies grow a bit I’ll be transferring them to grow bags.

Cosa hai pensato? I know I personally will never look at kitchen scraps the same way again. 🙂

Have you ever tried recycling your kitchen scraps? If so what veggies did you try? Did it work for you?

Lemme know in the comments below.

Godetevi questo post? Appuntalo e condividilo con gli altri!

5 Veggies You Can Grow From Kitchen Scraps

3 Consigli per risparmiare tempo per DIY Plank Compensati Pavimenti

3 Consigli per risparmiare tempo per DIY Plank Compensati Pavimenti

Ora che abbiamo due progetti di pavimenti in compensato fai-da-te (la sala da pranzo e il soggiorno) sotto le nostre cinture, abbiamo imparato un sacco di cose – cose da fare e cose da non fare. Stiamo andando a coprire 3 consigli per risparmiare tempo per pavimenti in compensato a listoni larghi fai da te.

Se hai intenzione di realizzare il tuo pavimento in legno compensato, quindi assicurarsi di dare un'occhiata a questa lista – ti farà risparmiare tonnellate di tempo… e la sanità mentale :).

Abbiamo scritto dettagliato articoli per ciascuno di tali progetti (vedi sotto per i link) ma abbiamo anche voluto scrivere un breve articolo mettendo in evidenza le grandi punte di risparmio di tempo che abbiamo.

Ecco le 3 cose che devi sapere per realizzare i tuoi pavimenti in compensato a listoni larghi. Seguendo questi suggerimenti renderà il vostro progetto senza intoppi e si ritroverà con pavimenti in compensato migliori dall'aspetto.

Rivelazione: Alcuni dei link qui sotto sono link di affiliazione. Se si decide di acquistare uno di questi prodotti, guadagniamo una piccola commissione senza costi aggiuntivi per te. Si consiglia di questi prodotti solo perché abbiamo esperienza con loro e li usiamo per i nostri progetti. Come Amazon Associates, guadagniamo dagli acquisti idonei.

Suggerimenti per pavimenti in compensato fai-da-te

Prima un suggerimento bonus – Tagliare i bordi Yourself

si, è un po 'diverso per ottenere il bonus suggerimento prima, ma alcune delle punte di nuovo su questo piggy. Quindi ha senso di condividere questa prima.

E so che il taglio delle tavole da soli suona come l'opposto di un risparmio di tempo, ma lasciatemi spiegare.

Ci sono alcuni post là fuori che consigliano di avere la persona presso Lowes o Casa Depot ha tagliato il compensato in assi per te.

So che sembra che ti farebbe risparmiare un sacco di tempo, perché stai scaricando il taglio su di loro, ma non consiglierei di farlo.

Abbiamo avuto casa negozi di miglioramento tagliato il compensato per noi su altri progetti in passato.

Anche se lo fa risparmiare tempo – non pensiamo che ne vale la pena. I loro tagli non sono molto precisi, piace molto imprecisa.

Che possono essere perfettamente trovare per alcuni progetti, ma con questo progetto i tagli consistenti sono importanti.

Avere schede che sono tutti circa la stessa larghezza permette il progetto di andare più liscia, più facile e il risultato finale sarà molto più piacevole.

#1 Crea una maschera

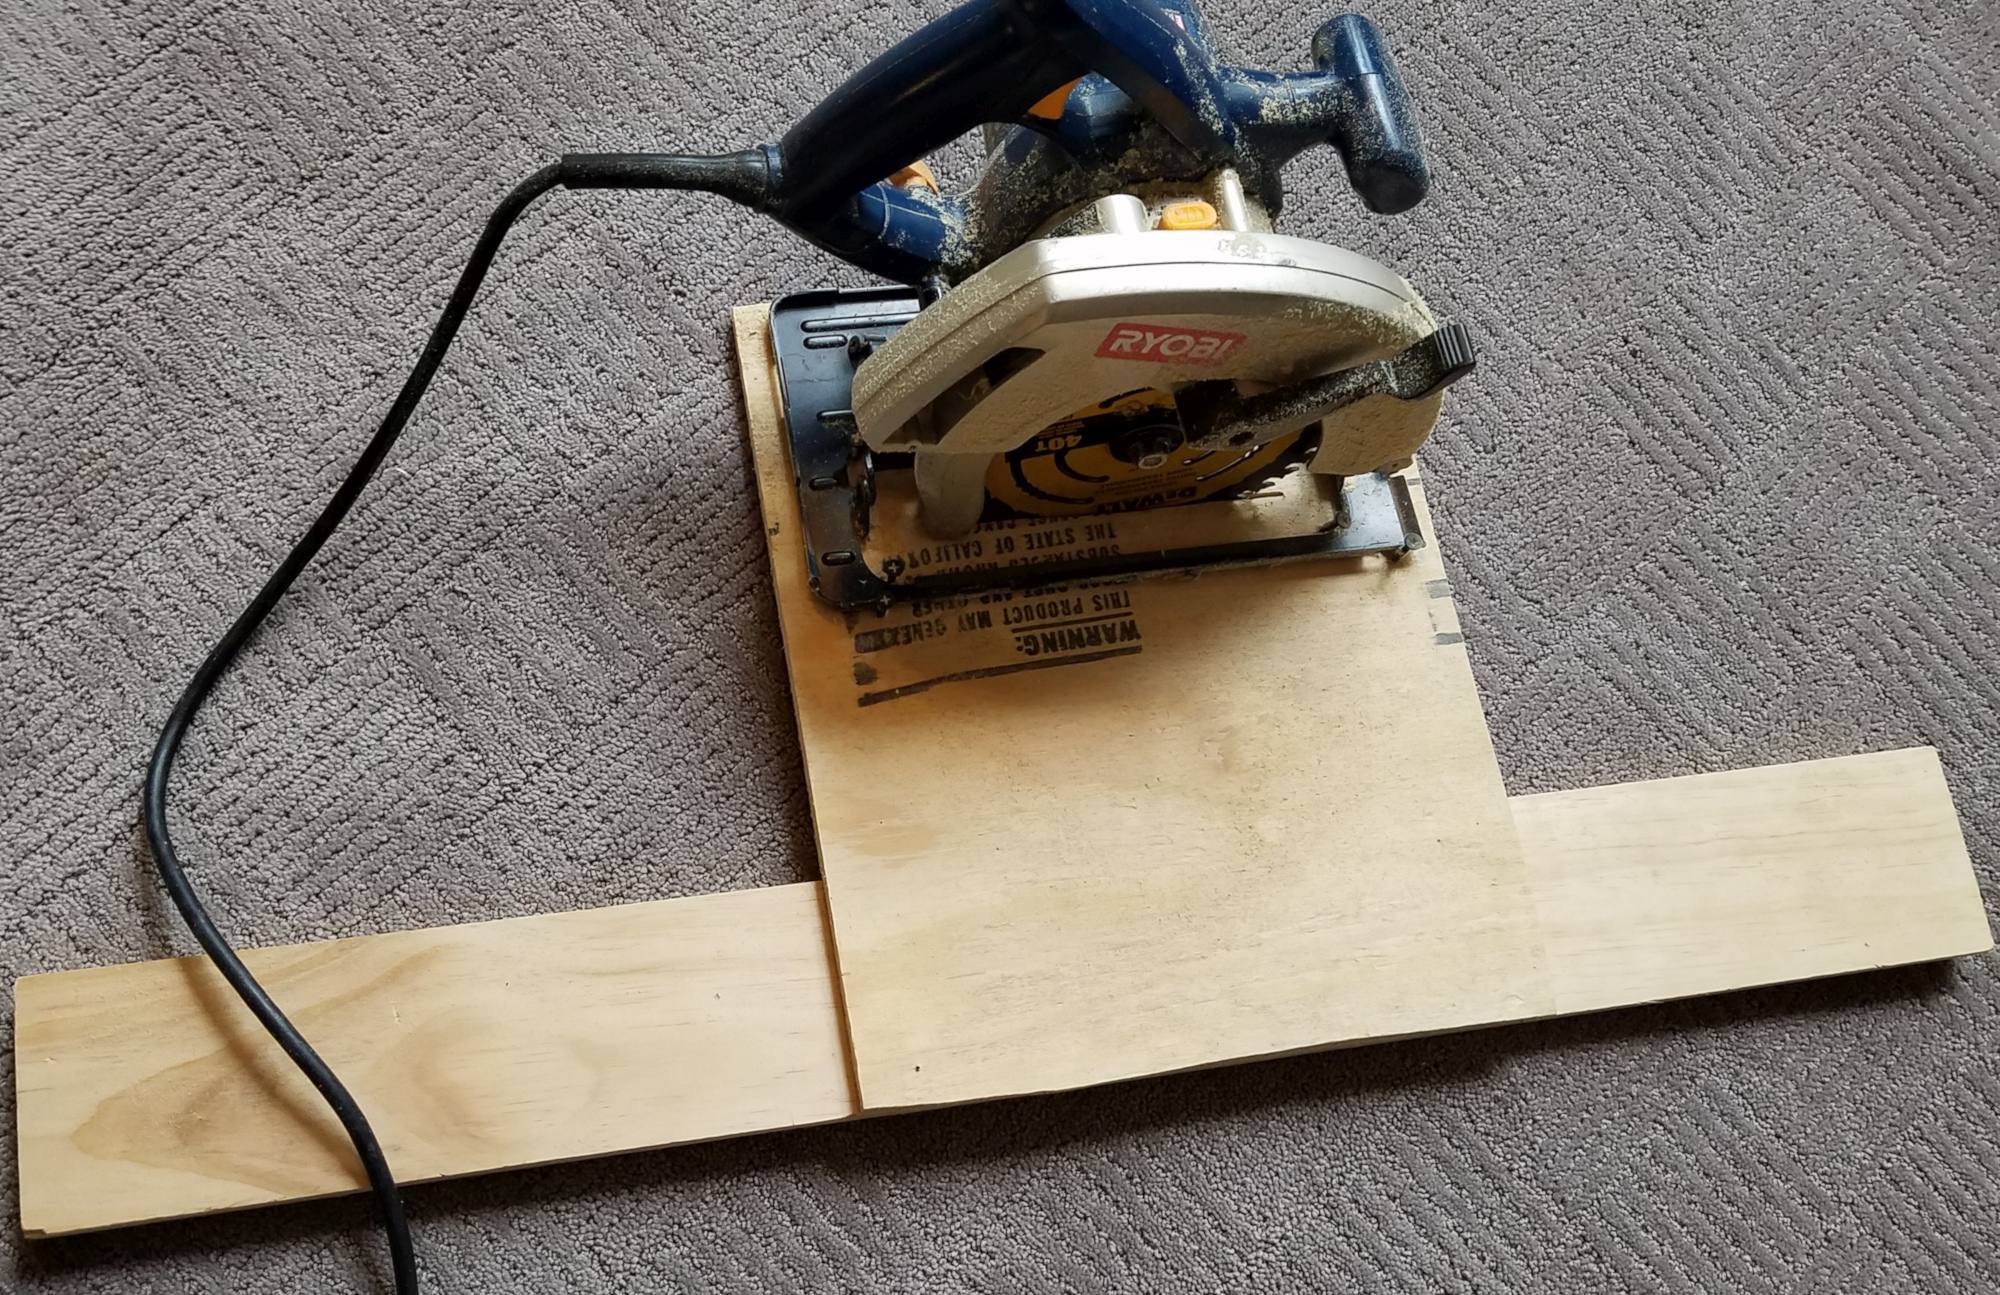
Oh mio Dio – Se non ho usato una maschera non so se avrei mai finito questo progetto. La maschera ti dà tagli costanti e permette anche di rippare facilmente attraverso la pila di compensato.

Il prossimo migliore strumento per l'uso sarebbe stata la sega circolare, ma è un secondo molto distante dall'uso di una maschera.

La maschera non è stata difficile da realizzare e non ci è voluto molto tempo.

Dai un'occhiata ai dettagli della maschera in articolo pavimentazione sala da pranzo.

Lì scoprirai come realizzarne uno e come fissarlo alla sega circolare.

DIY Wide Plank Plywood Flooring - Secure The Jig To The Circular Saw Using Screws

#2 Non utilizzare una lama di compensato

Questo merita un altro OMG. Inizialmente ho provato a utilizzare una lama per compensato per tagliare il compensato in assi (perché lo sai, è compensato) ma è stato un GRANDE ERRORE!

Ignora le lame di compensato – anziché, utilizzare le lame a taglio incrociato.

Come ho detto in articolo pavimentazione sala da pranzo, la lama di compensato non riusciva nemmeno a passare attraverso due fogli di compensato.

Quando ho usato la lama a taglio incrociato, un lama singola ha fatto il resto del compensato per la sala da pranzo e anche per il soggiorno!!

Se stai tenendo il punteggio, la lama per compensato ha strappato a malapena 2 fogli di compensato in assi e la lama a taglio trasversale ha strappato 19 fogli – e può ancora fare di più.

Questa è senza dubbio la migliore lama per tagliare assi di compensato. Ha tagliato il compensato come il burro, e inoltre non scheggiava affatto il legno.

(Fare clic sull'immagine per ordinare la stessa lama che abbiamo usato su Amazon)


The best blade to cut your plywood planks is a cross cut balde

#3 Evita la levigatura tra gli strati di poliuretano

Quando abbiamo fatto il pavimento della sala da pranzo, Abbiamo levigato leggermente i dossi dalla mano di poliuretano con 120 carta vetrata a grana.

È quello che ho sempre pensato che dovessi fare tra una mano e l'altra ed è anche quello che ho letto in altri post del blog sui pavimenti in compensato.

Con i pavimenti del soggiorno, abbiamo pensato che le protuberanze si sarebbero leggermente uniformate dopo l'applicazione di più mani di poli.

diy plywood floors

Oltretutto, i dossi sarebbero aggiungere un po 'più consistenza rendendo i piani meno scivoloso.

L'unica preoccupazione che avevamo era come si sentirebbe camminare a piedi nudi sul pavimento con più consistenza. Quando abbiamo fatto le nostre mani sulle tavole abbiamo potuto chiaramente sentire la consistenza aggiuntivo, quindi eravamo un po 'nervosi.

Bene, si scopre, la consistenza supplementare era appena percettibile quando si cammina a piedi nudi sul pavimento. Uff, che è stato un sollievo!

Ecco qui

Questi sono i nostri suggerimenti per il risparmio di tempo per i piani in compensato di larghezza della plancia fai da te. Questi pochi semplici consigli ti faranno risparmiare ORE e ORE di tempo. Senza di loro, il nostro progetto avrebbe richiesto molto più tempo e sarebbe stato più difficile da fare.

I primi due punte da soli vi salverà da tirare i capelli!

Speriamo che vi aiuterà con il proprio ampio listone pavimenti in compensato.

Fateci sapere cosa ne pensate!

[et_bloom_inline optin_id=”optin_7″]

Godetevi questo post? Appuntalo e condividilo con gli altri!
3 Time Saving Tips for DIY Plank Plywood Floors

Fai da te Casale ampio calpestio plancia in compensato

Fai da te Casale ampio calpestio plancia in compensato

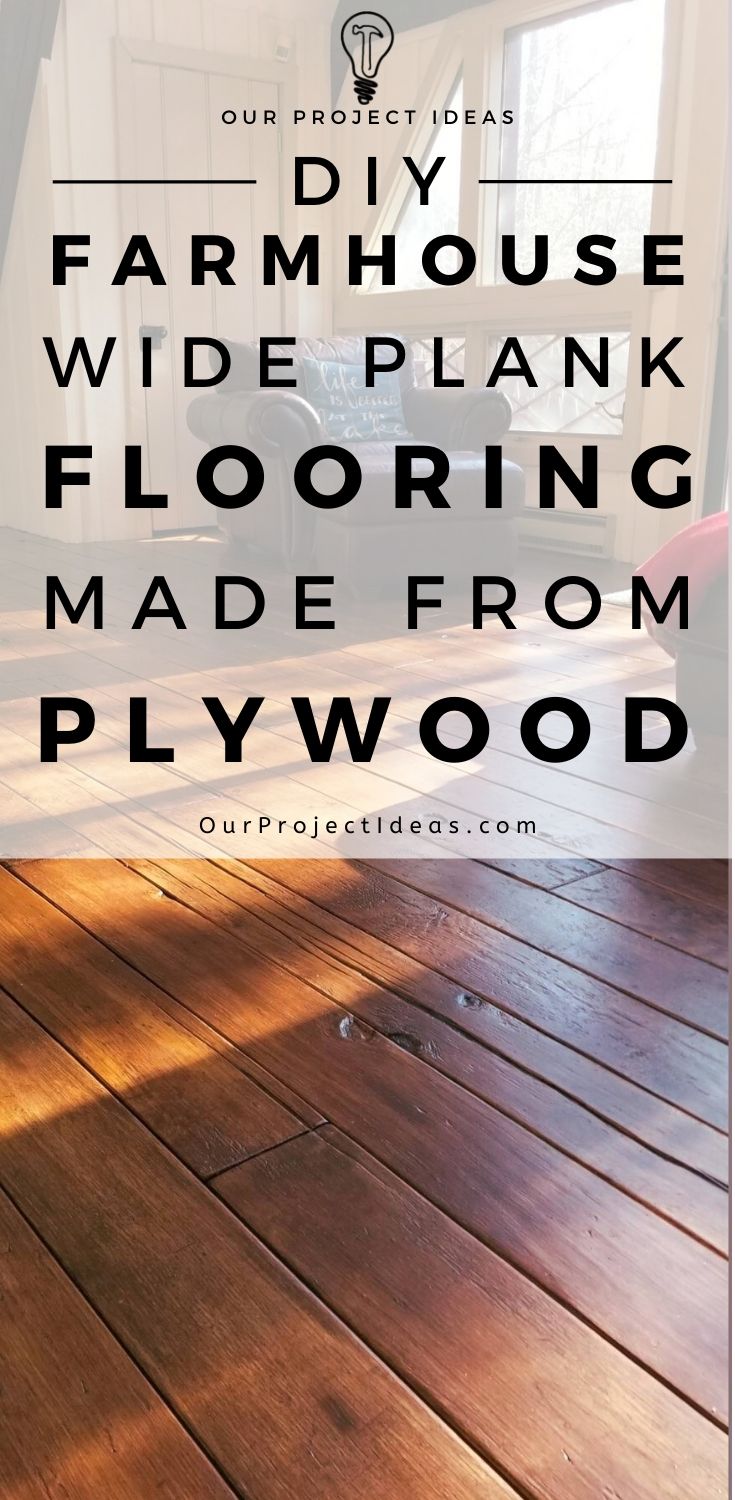
Il primo progetto di pavimento in assi larghe della fattoria realizzato con compensato che abbiamo realizzato è stato nella sala da pranzo all'inizio dell'anno.

Bene, ci è piaciuto così tanto che abbiamo realizzato lo stesso ampio pavimento in assi nel soggiorno.

Per la maggior parte, entrambi i pavimenti sono stati realizzati allo stesso modo, con un paio di eccezioni. In questo articolo, esamineremo le differenze tra i due piani.

Controlla la articolo per pavimento in compensato per sala da pranzo per vedere ulteriori dettagli passo dopo passo.

Per quanto riguarda il tempo, Per completare l'ampio pavimento in assi della sala da pranzo è stata necessaria circa una settimana, mentre per il soggiorno è stato necessario molto più tempo.

Il soggiorno è un po' più grande, ma ciò che ha davvero aggiunto tempo al progetto sono stati lo scintillio e il end pavimenti grano intarsio.

Dall'inizio alla fine, ci sono volute poco più di due settimane per finire il pavimento del soggiorno.

Rivelazione: Alcuni dei link qui sotto sono link di affiliazione. Se si decide di acquistare uno di questi prodotti, guadagniamo una piccola commissione senza costi aggiuntivi per te. Si consiglia di questi prodotti solo perché abbiamo esperienza con loro e li usiamo per i nostri progetti. Come Amazon Associates, guadagniamo dagli acquisti idonei.

Cosa abbiamo fatto di diverso con questo pavimento in assi larghe della fattoria

I metodi che abbiamo utilizzato per il pavimento nella sala da pranzo e il soggiorno erano più o meno gli stessi.

Nel soggiorno, abbiamo tirato su il vecchio tappeto, graffette rimosse, ha dipinto il sottopavimento di un colore scuro e ha posato il pavimento nello stesso modo in cui è stato fatto nella sala da pranzo.

La larghezza, la lunghezza e lo spessore delle assi di compensato erano gli stessi, e tagliamo, levigato, angosciato, colorato e aggiunti 3 strati di poliuretano alla pavimentazione Quasi allo stesso modo.

Abbiamo apportato alcune piccole modifiche che ci hanno fatto risparmiare un po' di tempo e potrebbero aver aggiunto un po' più di carattere al nostro pavimento in assi di compensato fai-da-te.

Ecco le cose che abbiamo fatto un po 'diversamente, questo va in giro.

Non abbiamo carteggiato tra i cappotti di poliuretano

Quando abbiamo fatto il pavimento della sala da pranzo, Abbiamo levigato leggermente i dossi dalla mano di poliuretano con 120 carta vetrata a grana.

Con i pavimenti del soggiorno, Abbiamo pensato che i dossi sulle assi di compensato sarebbero stati applicati un po 'dopo aver applicato più mani di poli.

Oltretutto, i dossi sarebbero aggiungere un po 'più consistenza rendendo i piani meno scivoloso. Non che i pavimenti della sala da pranzo siano scivolosi – era solo un modo per giustificarlo nella mia testa. 😉

L'unica preoccupazione che avevo era come si sarebbe sentito a piedi nudi sul pavimento con più consistenza.

Si scopre, nonostante sentendo chiaramente la trama aggiuntiva quando si esegue la mano sulla tavola, era appena percettibile quando si cammina su di esso a piedi nudi.

La lista della spesa

Lista Strumenti

Ecco un elenco degli strumenti che abbiamo usato in questo progetto, è fondamentalmente lo stesso elenco di strumenti dal progetto pavimento in sala da pranzo.

Link di affiliazione di seguito può essere quella di oggetti simili quando gli elementi esatti non sono stati trovati on-line.

Cordless Fine Chiodatrice

Batteria extra per Finish Chiodatrice

Levigatrice a nastro

Palm Sander

Mitre Saw

Sega circolare

Cross Cut lama per sega

Oscillante Multi-Tool

Protezione acustica Cuffie

Tabella Saw


Lista Supplies

Queste sono le forniture utilizzati in questo progetto.

Link di affiliazione di seguito può essere quella di oggetti simili quando gli elementi esatti non sono stati trovati on-line.

Varathane Ciliegio Gel Stain – Abbiamo usato circa 7 litri

Poluriratano modificato con olio a base d'acqua – Abbiamo usato 2 galloni

3″ Pennello a setole naturale – 6 pennelli per applicare la macchia

4″ Spazzola sintetica in poliestere – 4 pennelli per applicare il poly

Carta mascherata – Abbiamo usato la carta mascherata per proteggere il ponte quando si applica la macchia e il poli

6 Calibro 1 1/2″ Finisci le unghie

È stato utilizzato un nuovo generatore di personaggi

Lo stesso cast originale di costruttori di personaggi è stato utilizzato per le assi di compensato del soggiorno. Un martello, pinze, e una torcia a propano… e questa volta abbiamo aggiunto un coltello multiuso all'arsenale.

Per la sala da pranzo, scavavamo nelle fessure del legno usando le levigatrici per aprire le fessure e ammorbidire i bordi.

Questa volta abbiamo utilizzato un taglierino per allungare e allargare le fessure nel legno.

Poi abbiamo ammorbidito i bordi delle crepe con la levigatrice.

Il risultato è stato addirittura migliore di quanto immaginassimo.

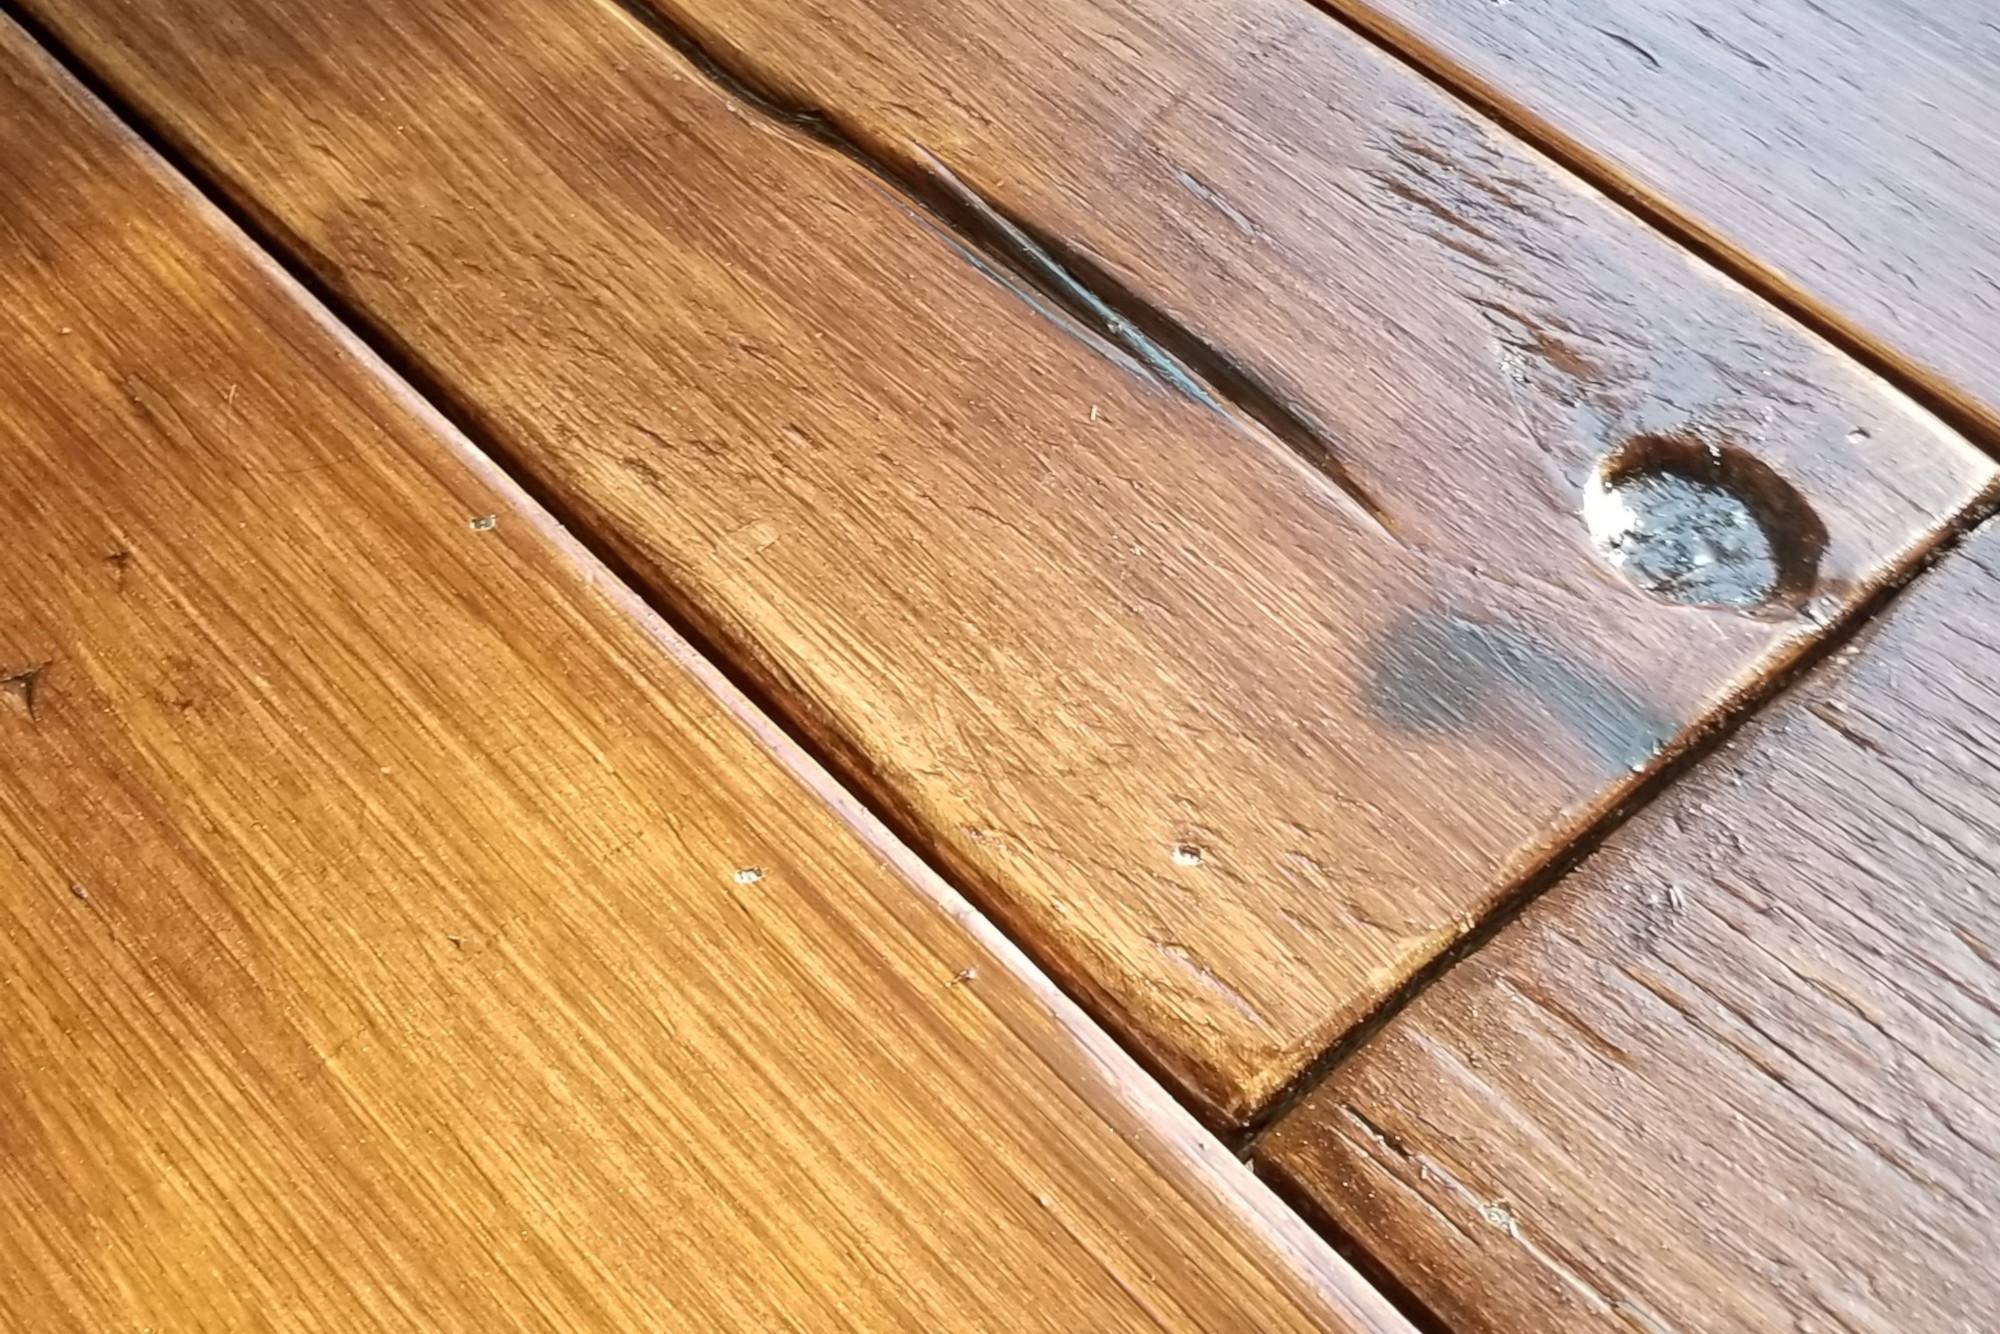
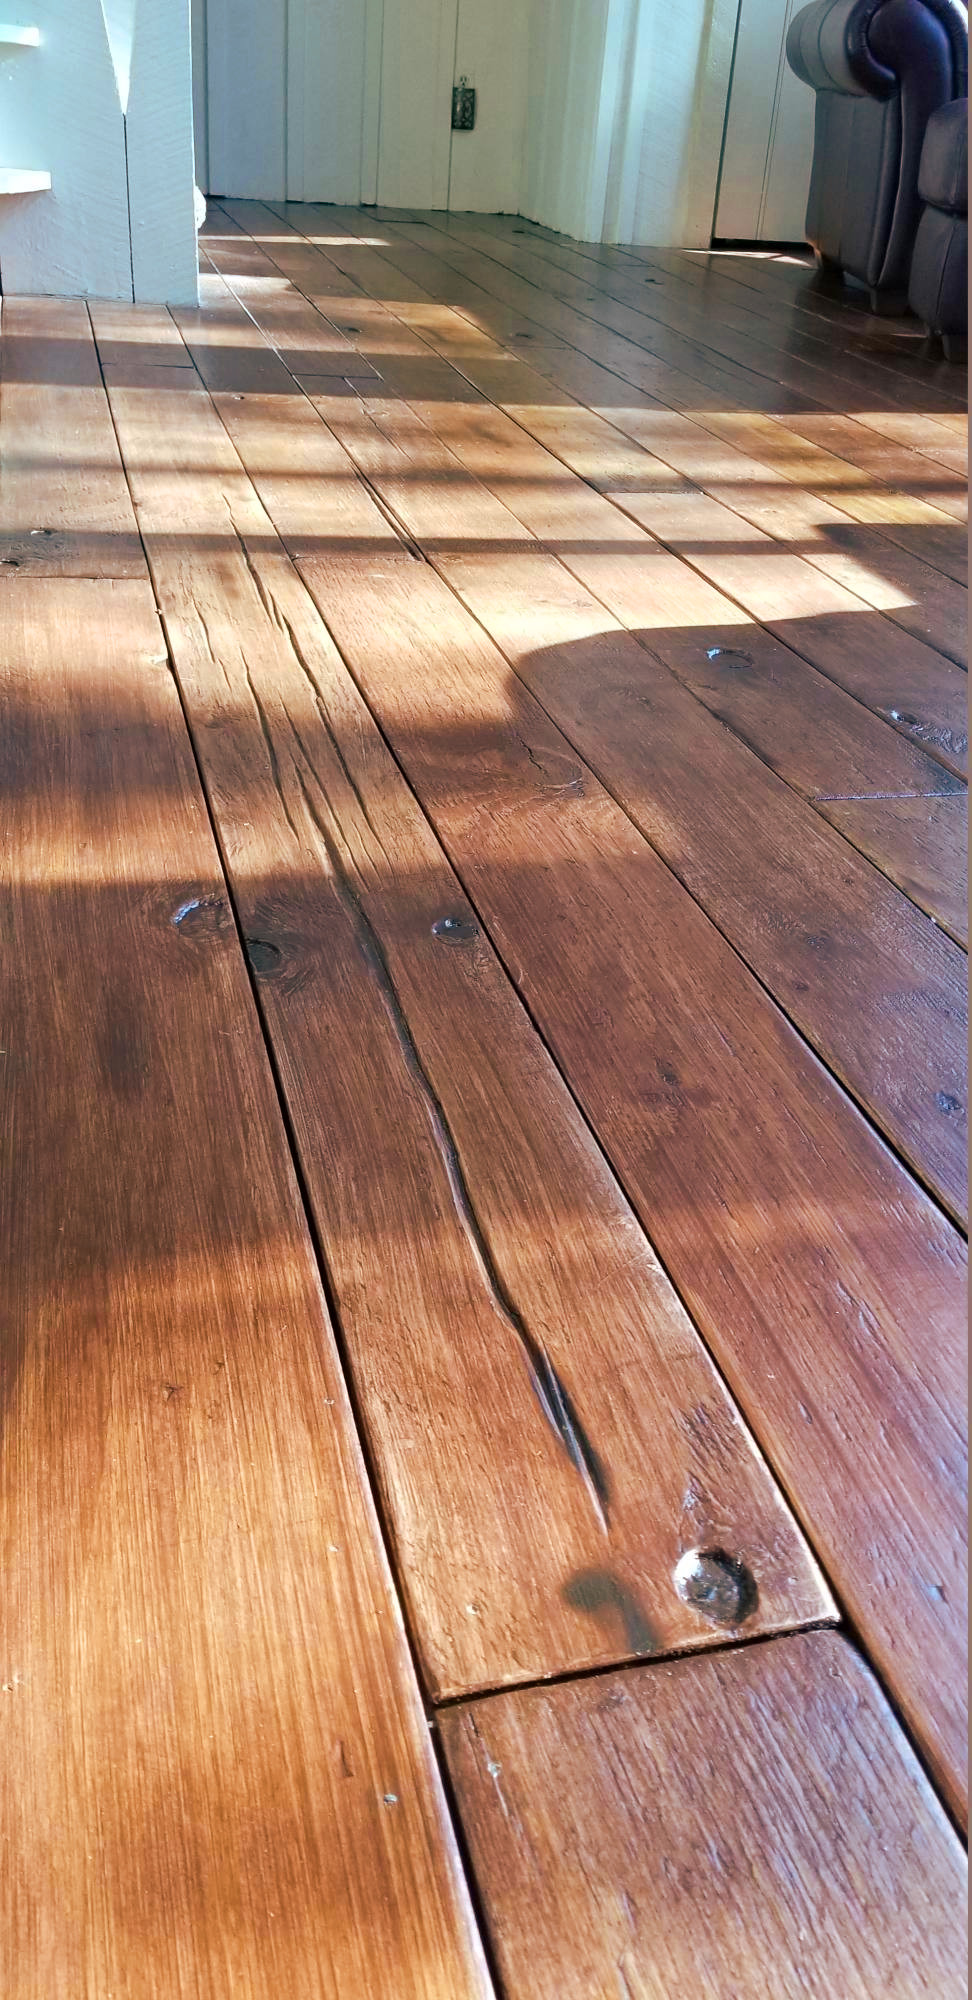
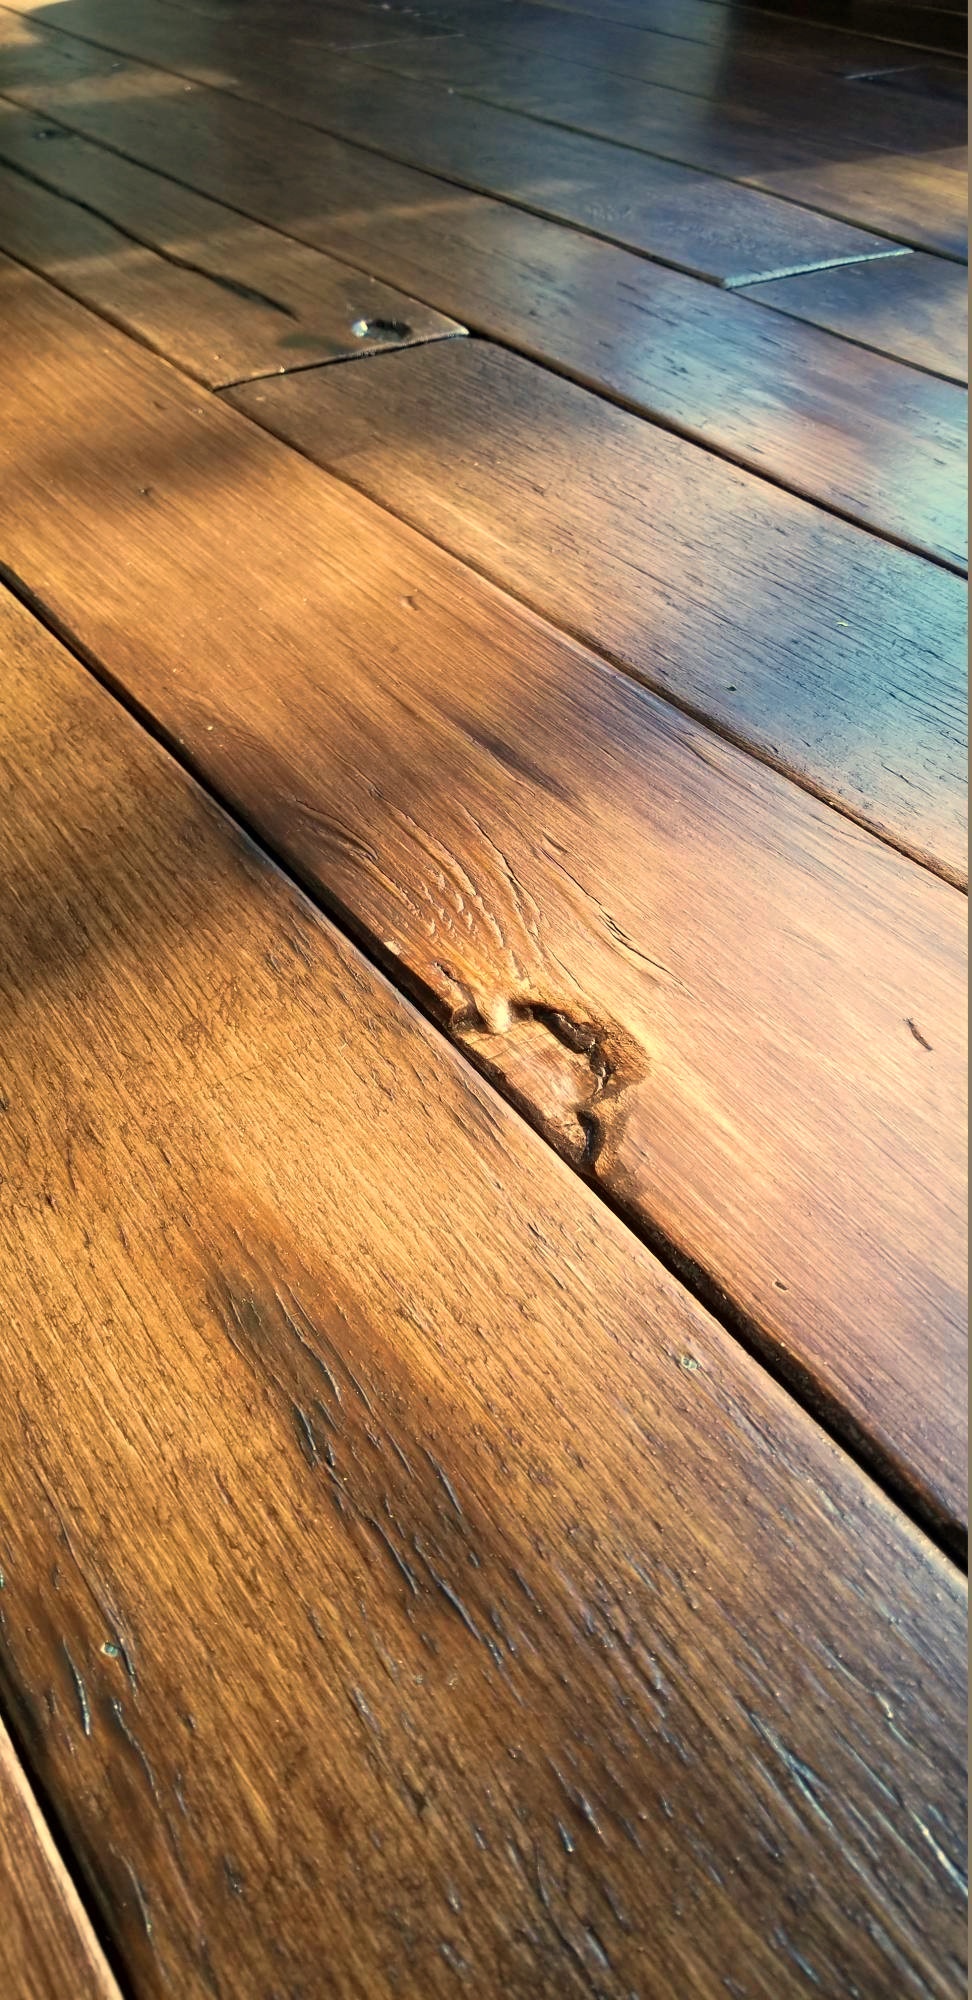
Le profonde crepe che abbiamo fatto con il taglierino ci hanno dato l'invecchiamento, pavimento in assi larghe della fattoria guarda cosa stavamo cercando.

Non immagineresti nemmeno che fosse compensato.

DIY Farmhouse Wide Plank Flooring Made From Plywood - The Plywood Floor Finished - Close up of the Distressing Done With A Utility Knife

Abbiamo aggiunto Spessori

I pavimenti del soggiorno erano molto più irregolari di quelli della sala da pranzo.

Al punto che abbiamo dovuto aggiungere degli spessori nei punti bassi per cercare di livellare un po' le cose.

Ho fatto il giro del pavimento con un bordo dritto, e ovunque ci fosse un tuffo, Ho aggiunto degli spessori.

Dato che sapevo che avevo bisogno di una buona quantità di spessori, Li ho ricavati da un foglio da 1/4″ compensato. Ho strappato il foglio in 1″ strisce utilizzando la sega da tavolo.

Una volta il pavimento è stato spessorato, abbiamo dipinto il pavimento di un colore marrone scuro, proprio come abbiamo fatto nella sala da pranzo.

DIY Farmhouse Wide Plank Flooring Made From Plywood - The Plywood Floor Finished - Wood Strips Used To Fill The Low Spots
DIY Farmhouse Wide Plank Flooring Made From Plywood - The Plywood Floor Finished - Starting The Plywood Flooring Install

[et_bloom_inline optin_id=”optin_7″]

Il pavimento in compensato del soggiorno è finito!

Come ho detto, il pavimento del salotto ha preso molto più tempo per fare che il pavimento sala da pranzo ha fatto. Ci sono voluti poco più di due settimane per terminare, Non avevo incasinato con il pavimento in legno accento fetta, avremmo finito in circa 2 settimane.

Controlla la fetta pavimenti in legno accento progetto qui

Noi amiamo la fattoria ampia listoni sia nella sala da pranzo e il salotto. Questo stile è la misura perfetta per questa casa, non avremmo potuto immaginare una soluzione migliore.

Tra i due piani, Direi che mi atterrei ai gradini utilizzati sul pavimento del soggiorno.

La levigatura tra i poliziotti sembra non essere necessaria, and using the utility knife to expand on the cracks in the wood added sooo much more character to the living room floorLOVE IT!

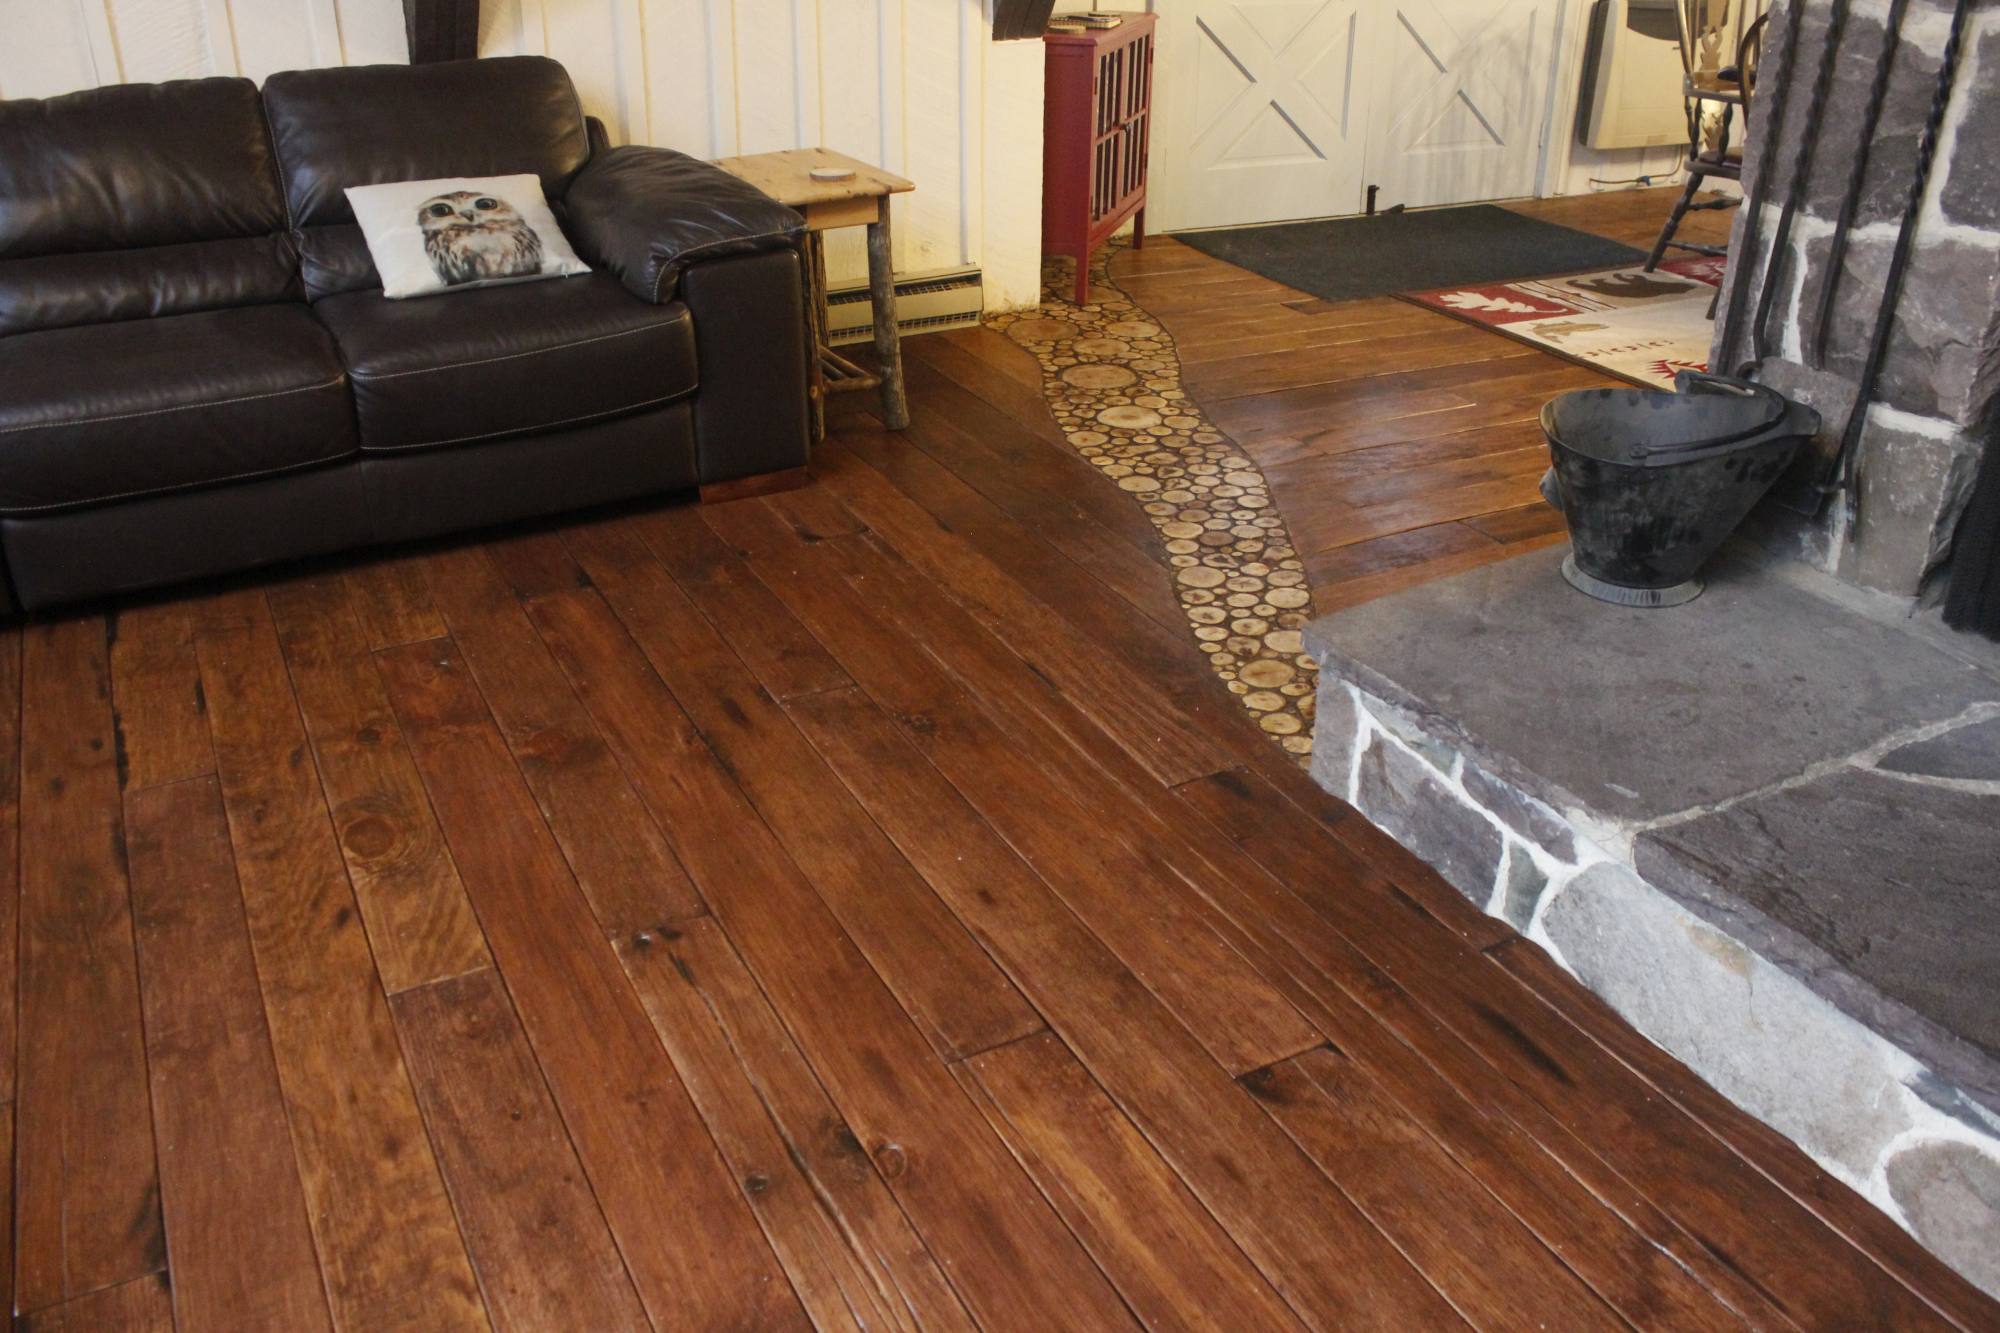
Here are a few more pictures of the stained plywood floors on the living room floor.

Fammi sapere cosa ne pensi, is there something you would have done differently? Are you thinking of doing DIY plywood floors in your home?

Condividi i tuoi pensieri nei commenti qui sotto!


DIY Farmhouse Wide Plank Flooring Made From Plywood - The Plywood Floor Finished - Close up of the Distressing
DIY Farmhouse Wide Plank Flooring Made From Plywood - Close up of The Plywood Floor In The Living Room By The Wood Accent
DIY Farmhouse Wide Plank Flooring Made From Plywood - The Plywood Floor Finished - Finished Plywood Floor Seen From The Stairs
DIY Farmhouse Wide Plank Flooring Made From Plywood - The Plywood Floor In The Living Room By The Wood Accent
DIY Farmhouse Wide Plank Flooring Made From Plywood - The Plywood Floor Finished
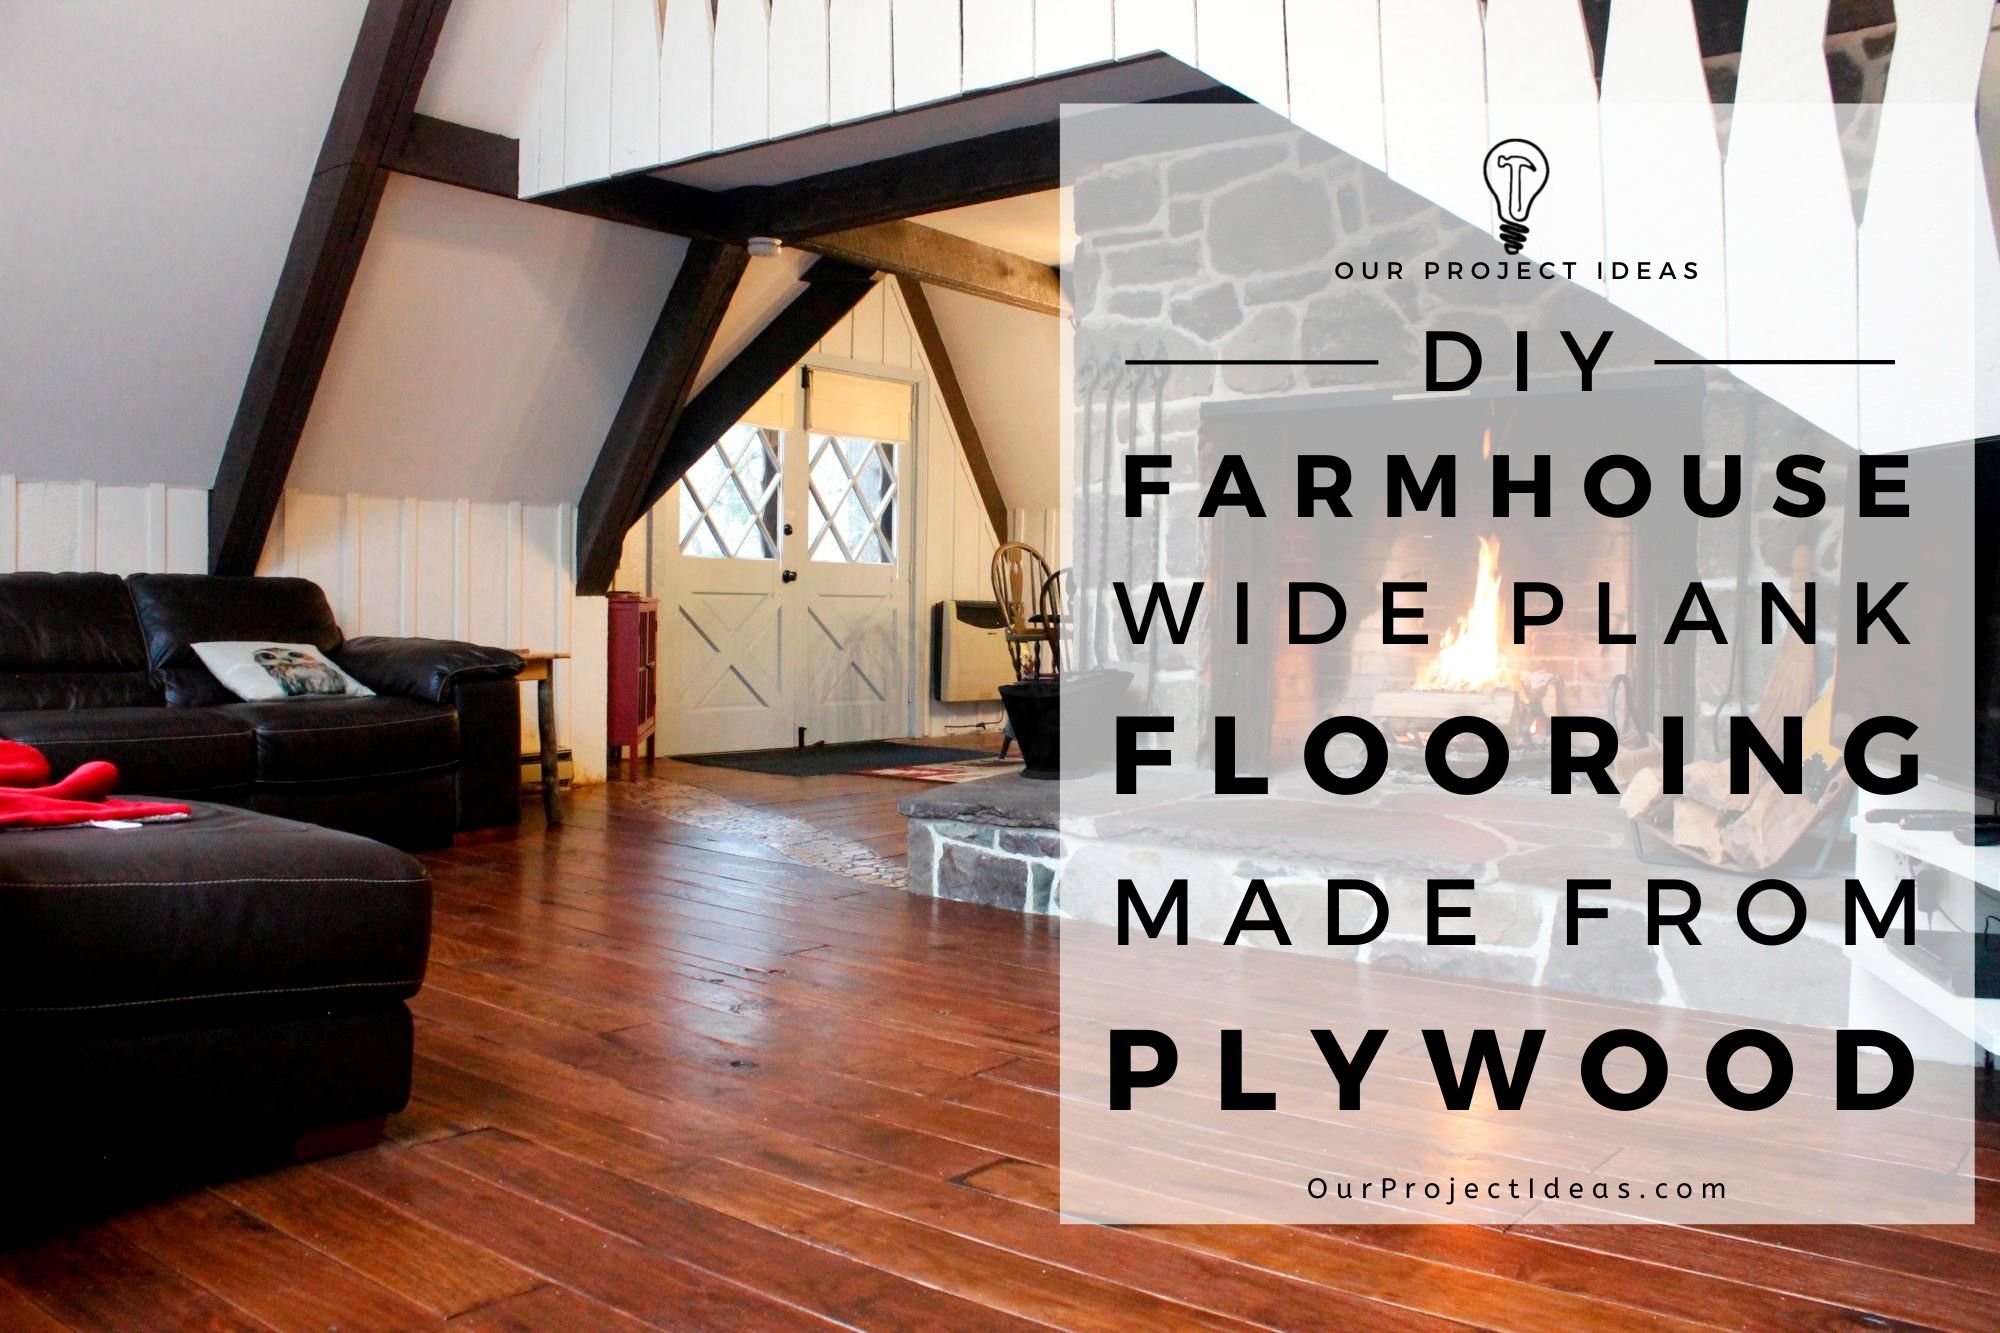
DIY Wide Plank Plywood Flooring
DIY Farmhouse Wide Plank Flooring Made From Plywood - The Plywood Floor Finished - Another Close up of the Distressing
DIY Farmhouse Wide Plank Flooring Made From Plywood - The Plywood Floor Finished - Seen From The Corner Of The Fireplace
DIY Farmhouse Wide Plank Flooring Made From Plywood - The Plywood Floor Finished By The Fireplace
DIY Plywood Plank Flooring

Godetevi questo post? Appuntalo e condividilo con gli altri!
DIY Farmhouse Wide Plank Flooring Made From Plywood
DIY Farmhouse Wide Plank Flooring Made From Plywood Fireplace - Ritratto
DIY Farmhouse Wide Plank Flooring Made From Plywood Closeup - Ritratto
DIY Farmhouse Wide Plank Wide Plank Plywood Flooring

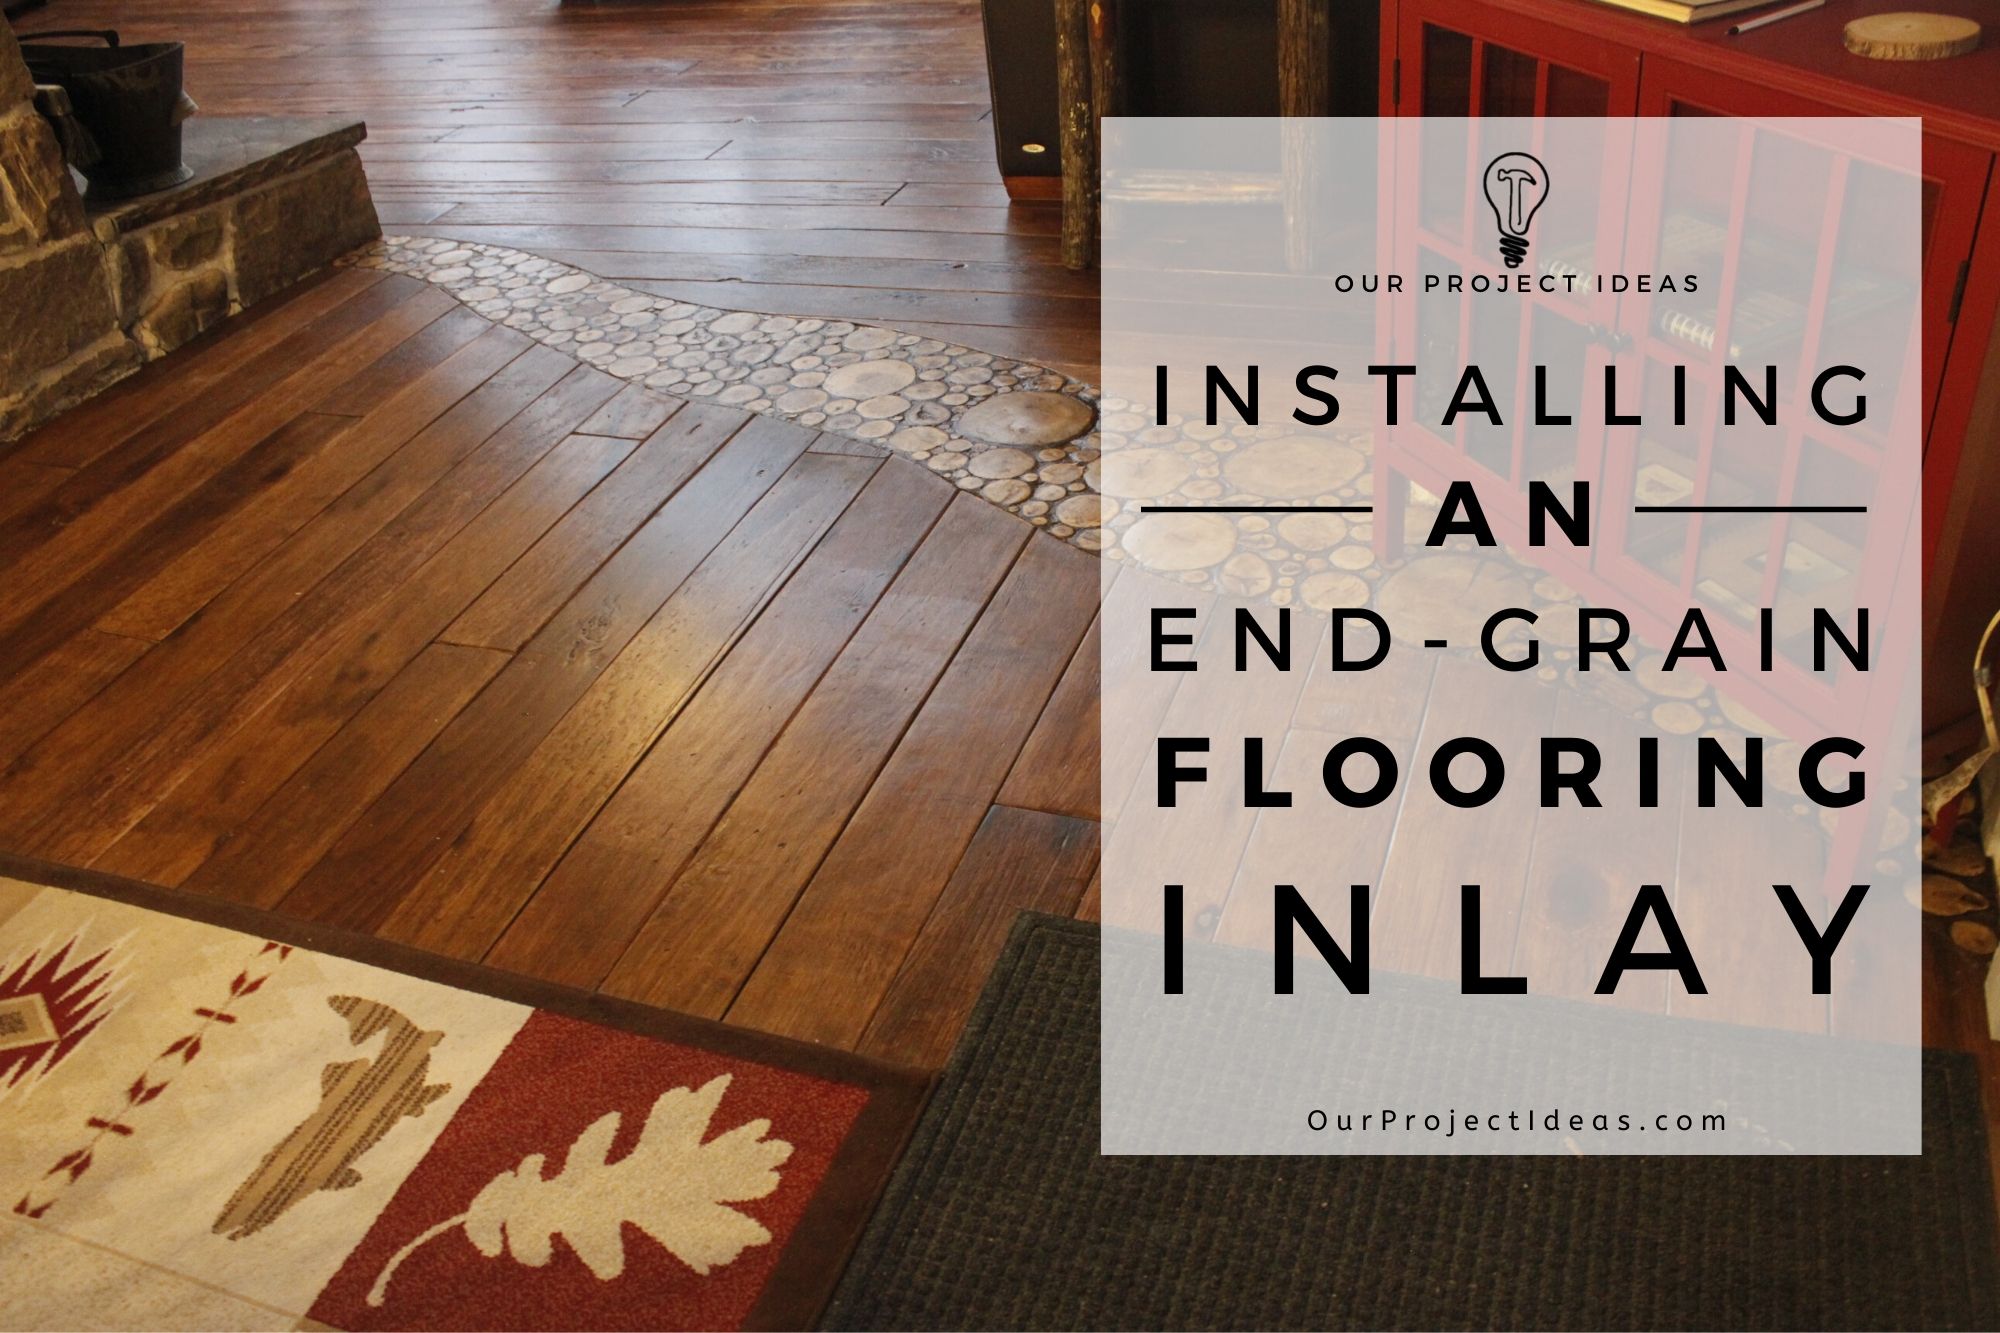
Installazione di An End Grain Pavimentazione Intarsio

Installazione di An End Grain Pavimentazione Intarsio

Installing An End Grain Flooring Inlay


La creazione di un intarsio per pavimenti in grana fine era qualcosa che non vedevo l'ora di fare per mesi. We installed plywood wide plank flooring in the dining room and kitchen earlier this year and the living room was next on the list. Here’s a post with details on what we did with the living room floor.

The flooring in the dining room and living room were going to be laid in different directions and a regular threshold separating the two spaces was going to bewell pretty boring.

While initially doing my Pinterest research on flooring, I came across pins with different floor designs created using wood slices.

That gave me the idea of doing an end grain flooring as an inlay. It was the perfect solution!

I couldn’t wait to try this project.


Rivelazione: Alcuni dei link qui sotto sono link di affiliazione. Se si decide di acquistare uno di questi prodotti, guadagniamo una piccola commissione senza costi aggiuntivi per te. Si consiglia di questi prodotti solo perché abbiamo esperienza con loro e li usiamo per i nostri progetti. Come Amazon Associates, guadagniamo dagli acquisti idonei.

La lista della spesa

Lista Strumenti

Ecco un elenco degli strumenti che abbiamo usato in questo progetto.

Link di affiliazione di seguito può essere quella di oggetti simili quando gli elementi esatti non sono stati trovati on-line.

Levigatrice a nastro

Palm Sander

Mitre Saw

Oscillante Multi-Tool

RotoZip

Protezione acustica Cuffie


Lista Supplies

Queste sono le forniture utilizzati in questo progetto.

Link di affiliazione di seguito può essere quella di oggetti simili quando gli elementi esatti non sono stati trovati on-line.

Poluriratano modificato con olio a base d'acqua we used 1 gallon

4″ Spazzola sintetica in poliestere – 4 pennelli per applicare il poly

Liquid Nails

What Is End Grain Flooring?

End grain flooring is basically branches and logs cut into slices, then placed in a pattern, in our case, it’s the shape of a river. The slices are glued into place and grout is applied to fill in the spaces between the slices. Then a protective finish is applied and you have yourself an end grain floor!

I call it a wood river, but I’ve seen it called a bunch of different names. Wood slice flooring, pavimentazione fine del grano, log end flooring, cordwood floor and even cross-cut tree slice flooring to name a few.

Figuring Out The End Grain Flooring Inlay Layout

The beauty of doing a floor inlay is that there is no limit to the design you make. It can be as simple or ornate as you want.

Since our house is in the Poconos, in a wilderness setting, we figured a river made of wood would go with the house and its surrounding nature.

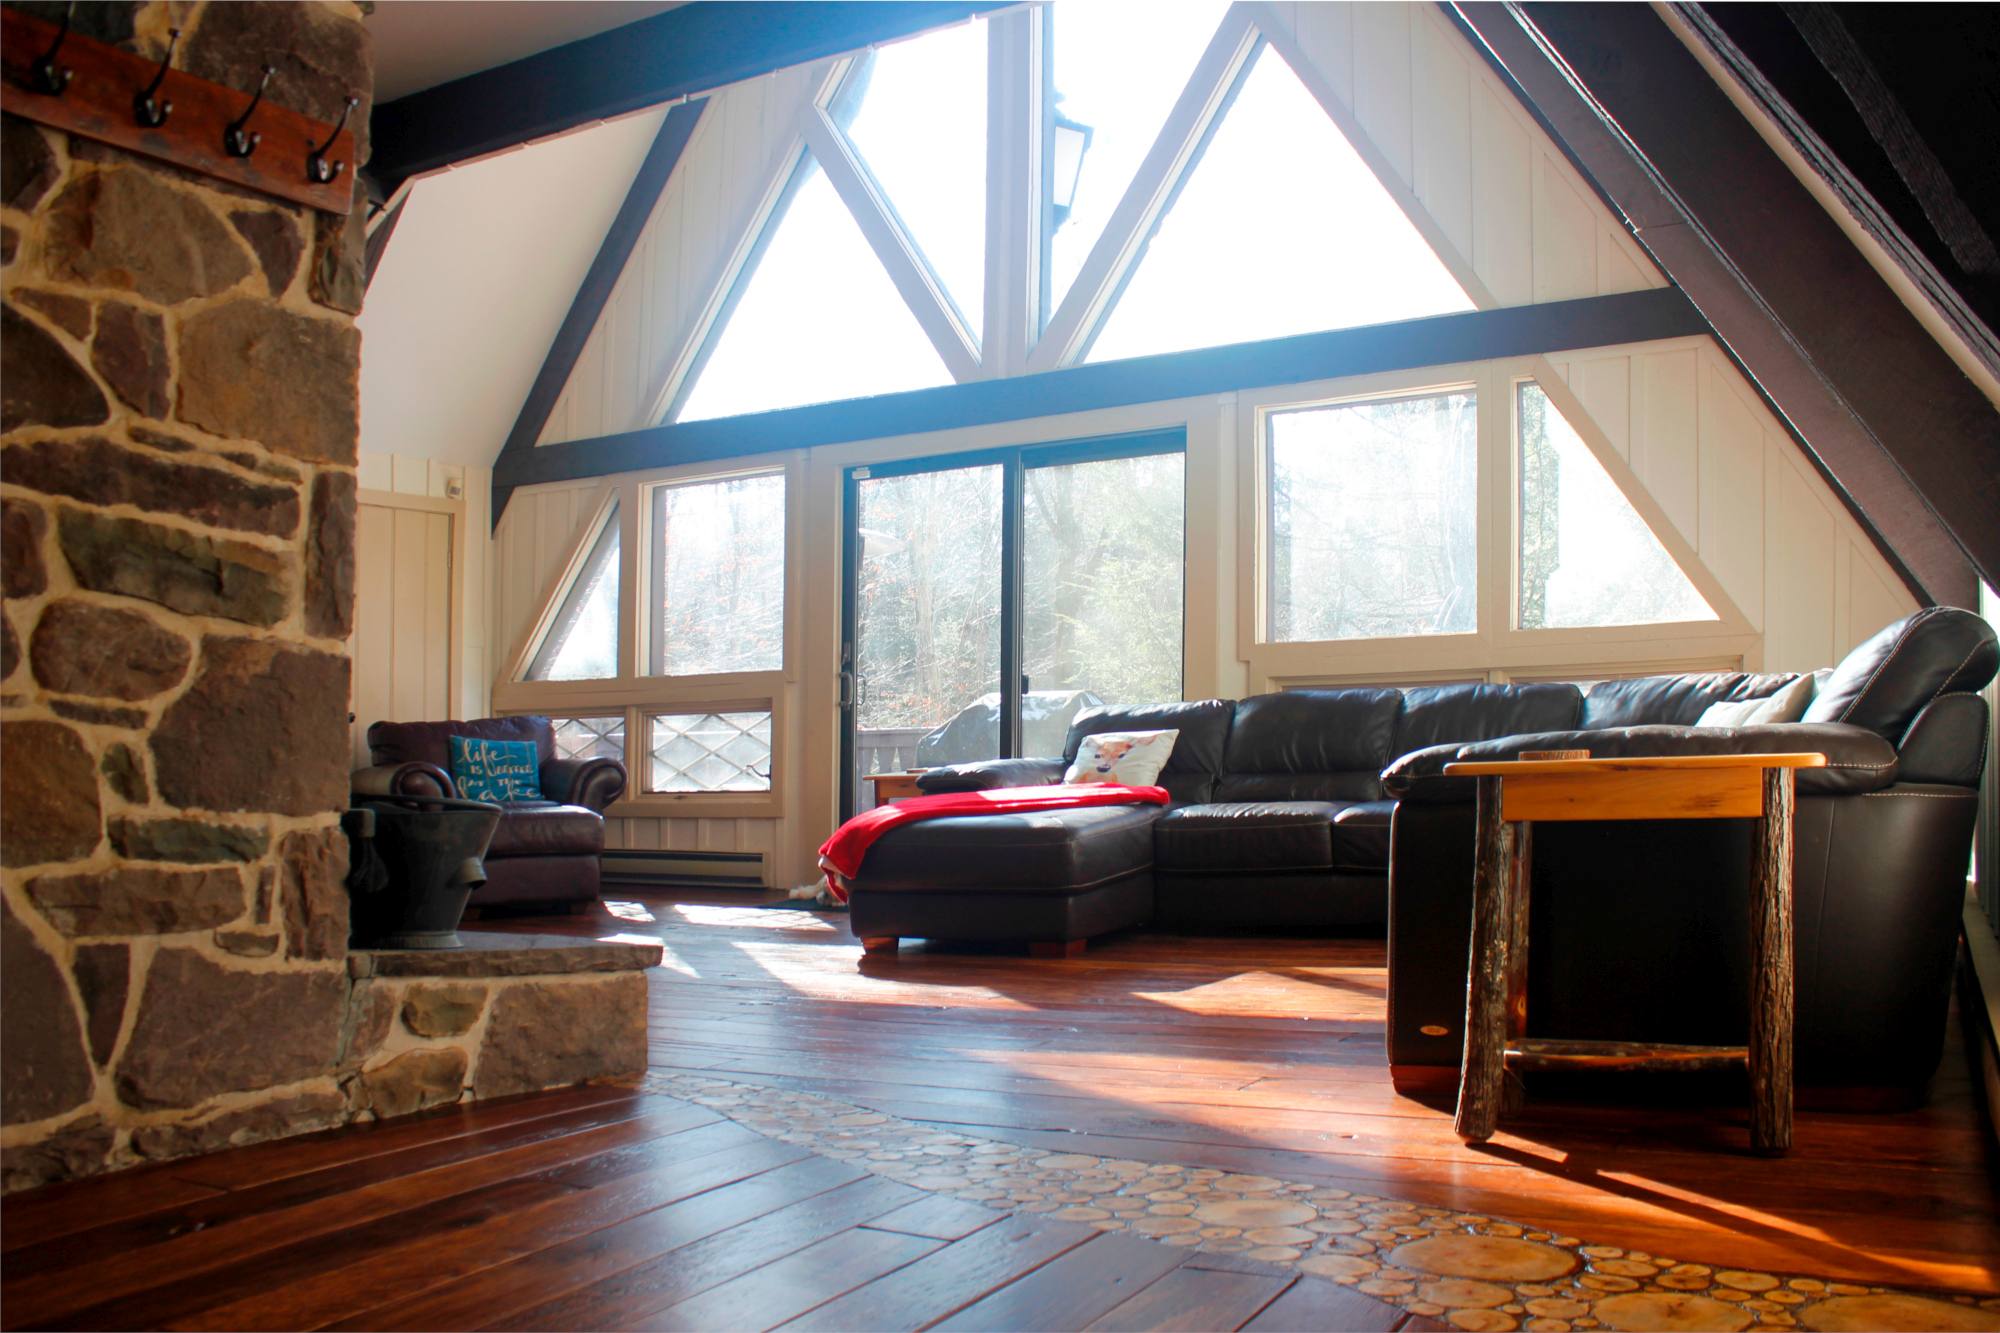
The end grain flooring inlay would separate the dining room from the living room. Starting in the corner of the dining room and making it’s way to the corner of the living room fireplace.

We wanted the flooring inlay to start off wider on one side and have it gently curving its way across the space.

We had the idea when we did the dining room earlier in the year and that’s also when I started cutting the wood slices for the river and traced out the shape of the wood slice flooring accent.

We were going to do the living room floors and the inlay a few months later, so that gave the wood slices time to dry.

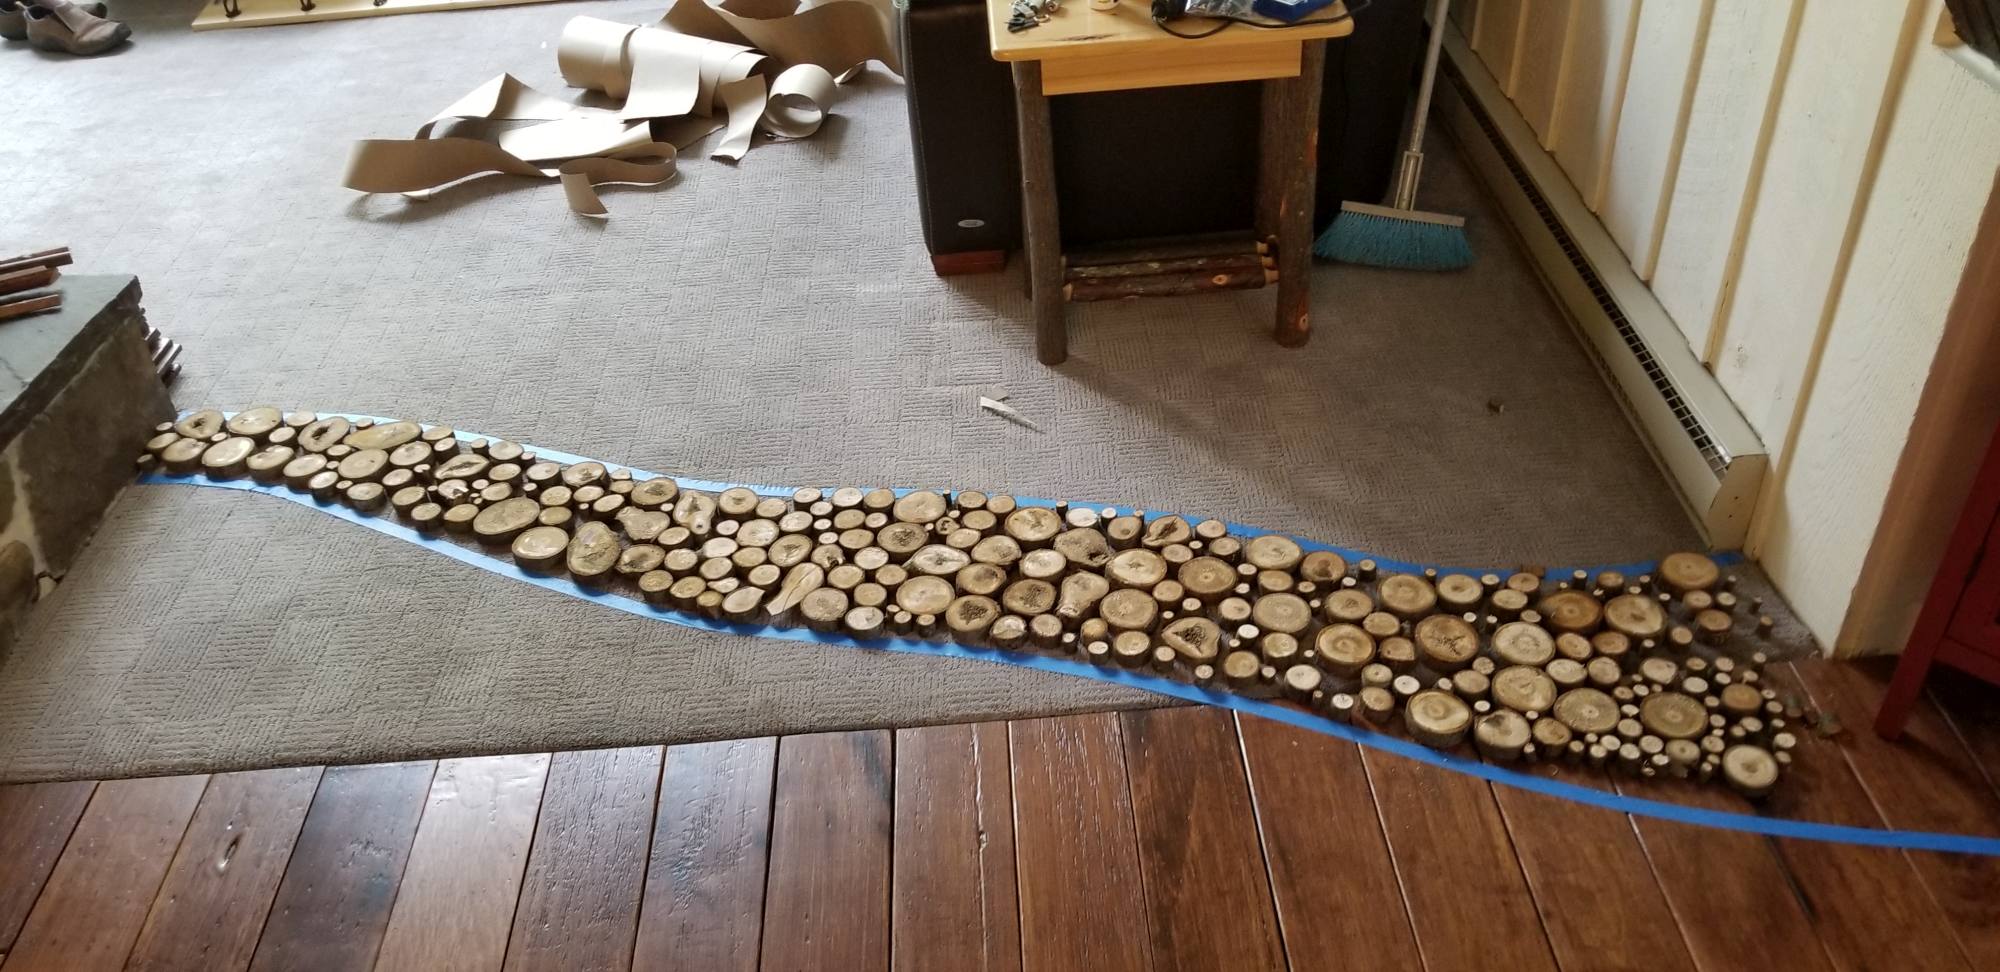
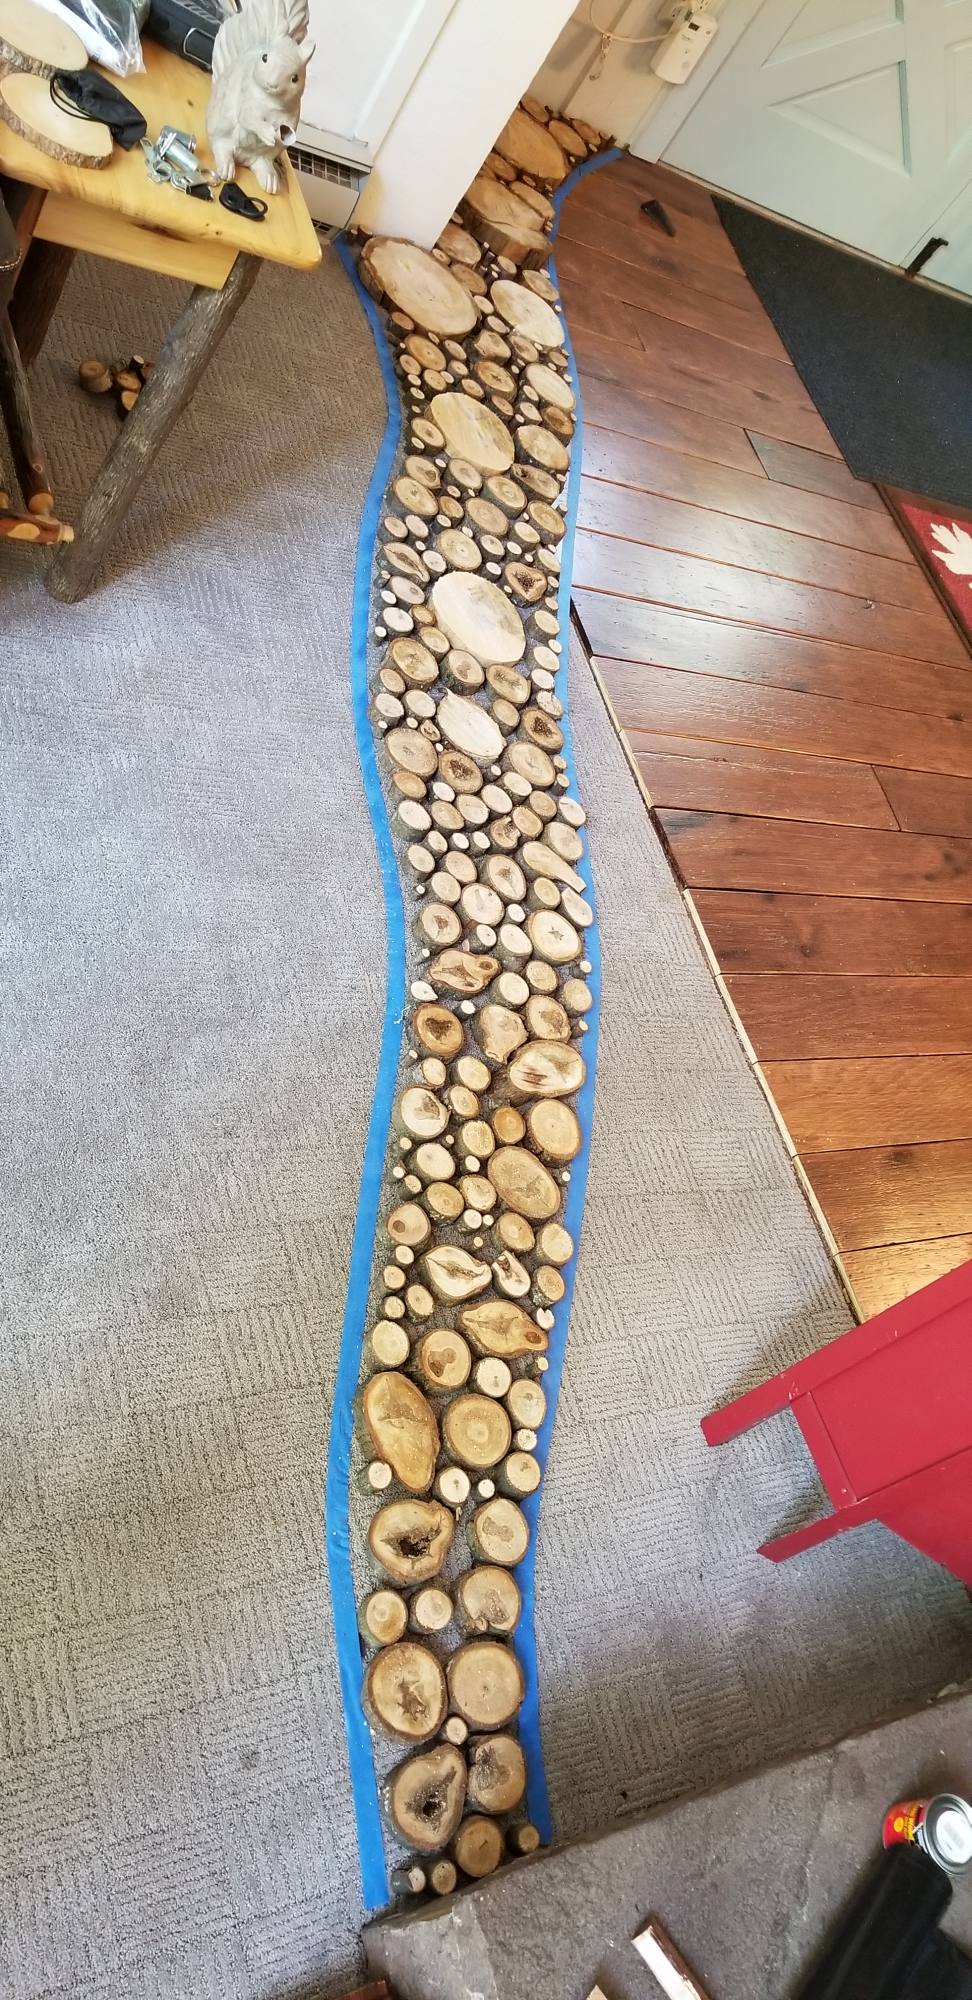
Installing An End Grain Flooring Inlay - The Inlay Traced Out Using Tape and Filled in With Wood Slices - Seen From The Dining Room
Installing An End Grain Flooring Inlay - The Inlay Traced Out Using Tape

Cutting The Wood Slices

Now that the general shape of the end grain flooring inlay was in place, the next step was to fill it in with wood slices. Ho avuto un po 'di rami che erano caduti sulla nostra proprietà e ha iniziato tagliandoli alla larghezza ho pensato che avevo bisogno… ne riparleremo più avanti.

Ho tagliato abbastanza pezzi di legno per riempire l'intarsio, con un mazzo di vari spessori ramo. Li ho tagliati a maggio per farli asciugare fino a pochi mesi prima di installarli in autunno.

Il pavimento era 1/2″ spessa ed i pavimenti sono irregolari così taglio del legno fette un po 'più spessa… almeno questo è quello che ho pensato….that was a big mistake. E 'importante per loro tagliare alla giusta dimensione destra fuori del blocco.

Ho usato una sega per tagliare le fette, è andata piuttosto veloce considerando quanto sono stati necessari molti fette.

Tip importante: When cutting the wood pieces try to cut them as close to the final thickness as possible.

Non ho fatto che con questo progetto e mi ci sono voluti giorni per ottenere le fette fino alla giusta dimensione.

Ho tagliato le fette 3/4″ e la maggior parte delle fette di legno doveva essere circa 1/2″… un grosso errore.

Quel qualcosa in più 1/4″ era una lotta per rimuovere.

Installing An End Grain Flooring Inlay - The Inlay Traced Out Using Tape - Seen From The Living Room

Drying The Wood Slices

I had cut most of the wood slices months ago so those were dry when I was ready to install them.

But I guess I was able to get the wood slices tighter together when I was actually doing the projectso I needed more wood slices.

I found this article on drying the wood slices.

http://theplywood.com/drying-wood-in-oven

Using the oven on low heat (200 F), the wood slices were dry in a couple of hours so it worked really well.

Cutting The End Grain Flooring Inlay Into The Floor Boards

The original plan was to cut each floorboard individually using a rotozip. I was going to cut them outside since the rotozip causes a lot of dust.

Invece, I ended up cutting the floorboards in place using the Oscillating Multi-Tool. That worked really well and it didn’t make very much dust.

After the boards were cut I went over the cut with the belt sander to soften the curves and round off the edge of the boards. That way there aren’t splinters. 🙂


Installing An End Grain Flooring Inlay - Where The Inlay Will Go
Installing An End Grain Flooring Inlay - Floor Boards Are All Cut
Installing An End Grain Flooring Inlay - Figuring Out What Floor Boards To Use Next To The Inlay
Installing An End Grain Flooring Inlay - The Inlay Cut Into The Floor Boards and Wood Slices In Place - Seen From Fireplace

Placing The Wood Slices In The Inlay

When placing the slices inlay, make sure to mix up the different sizes. That way it looks more organic and natural.

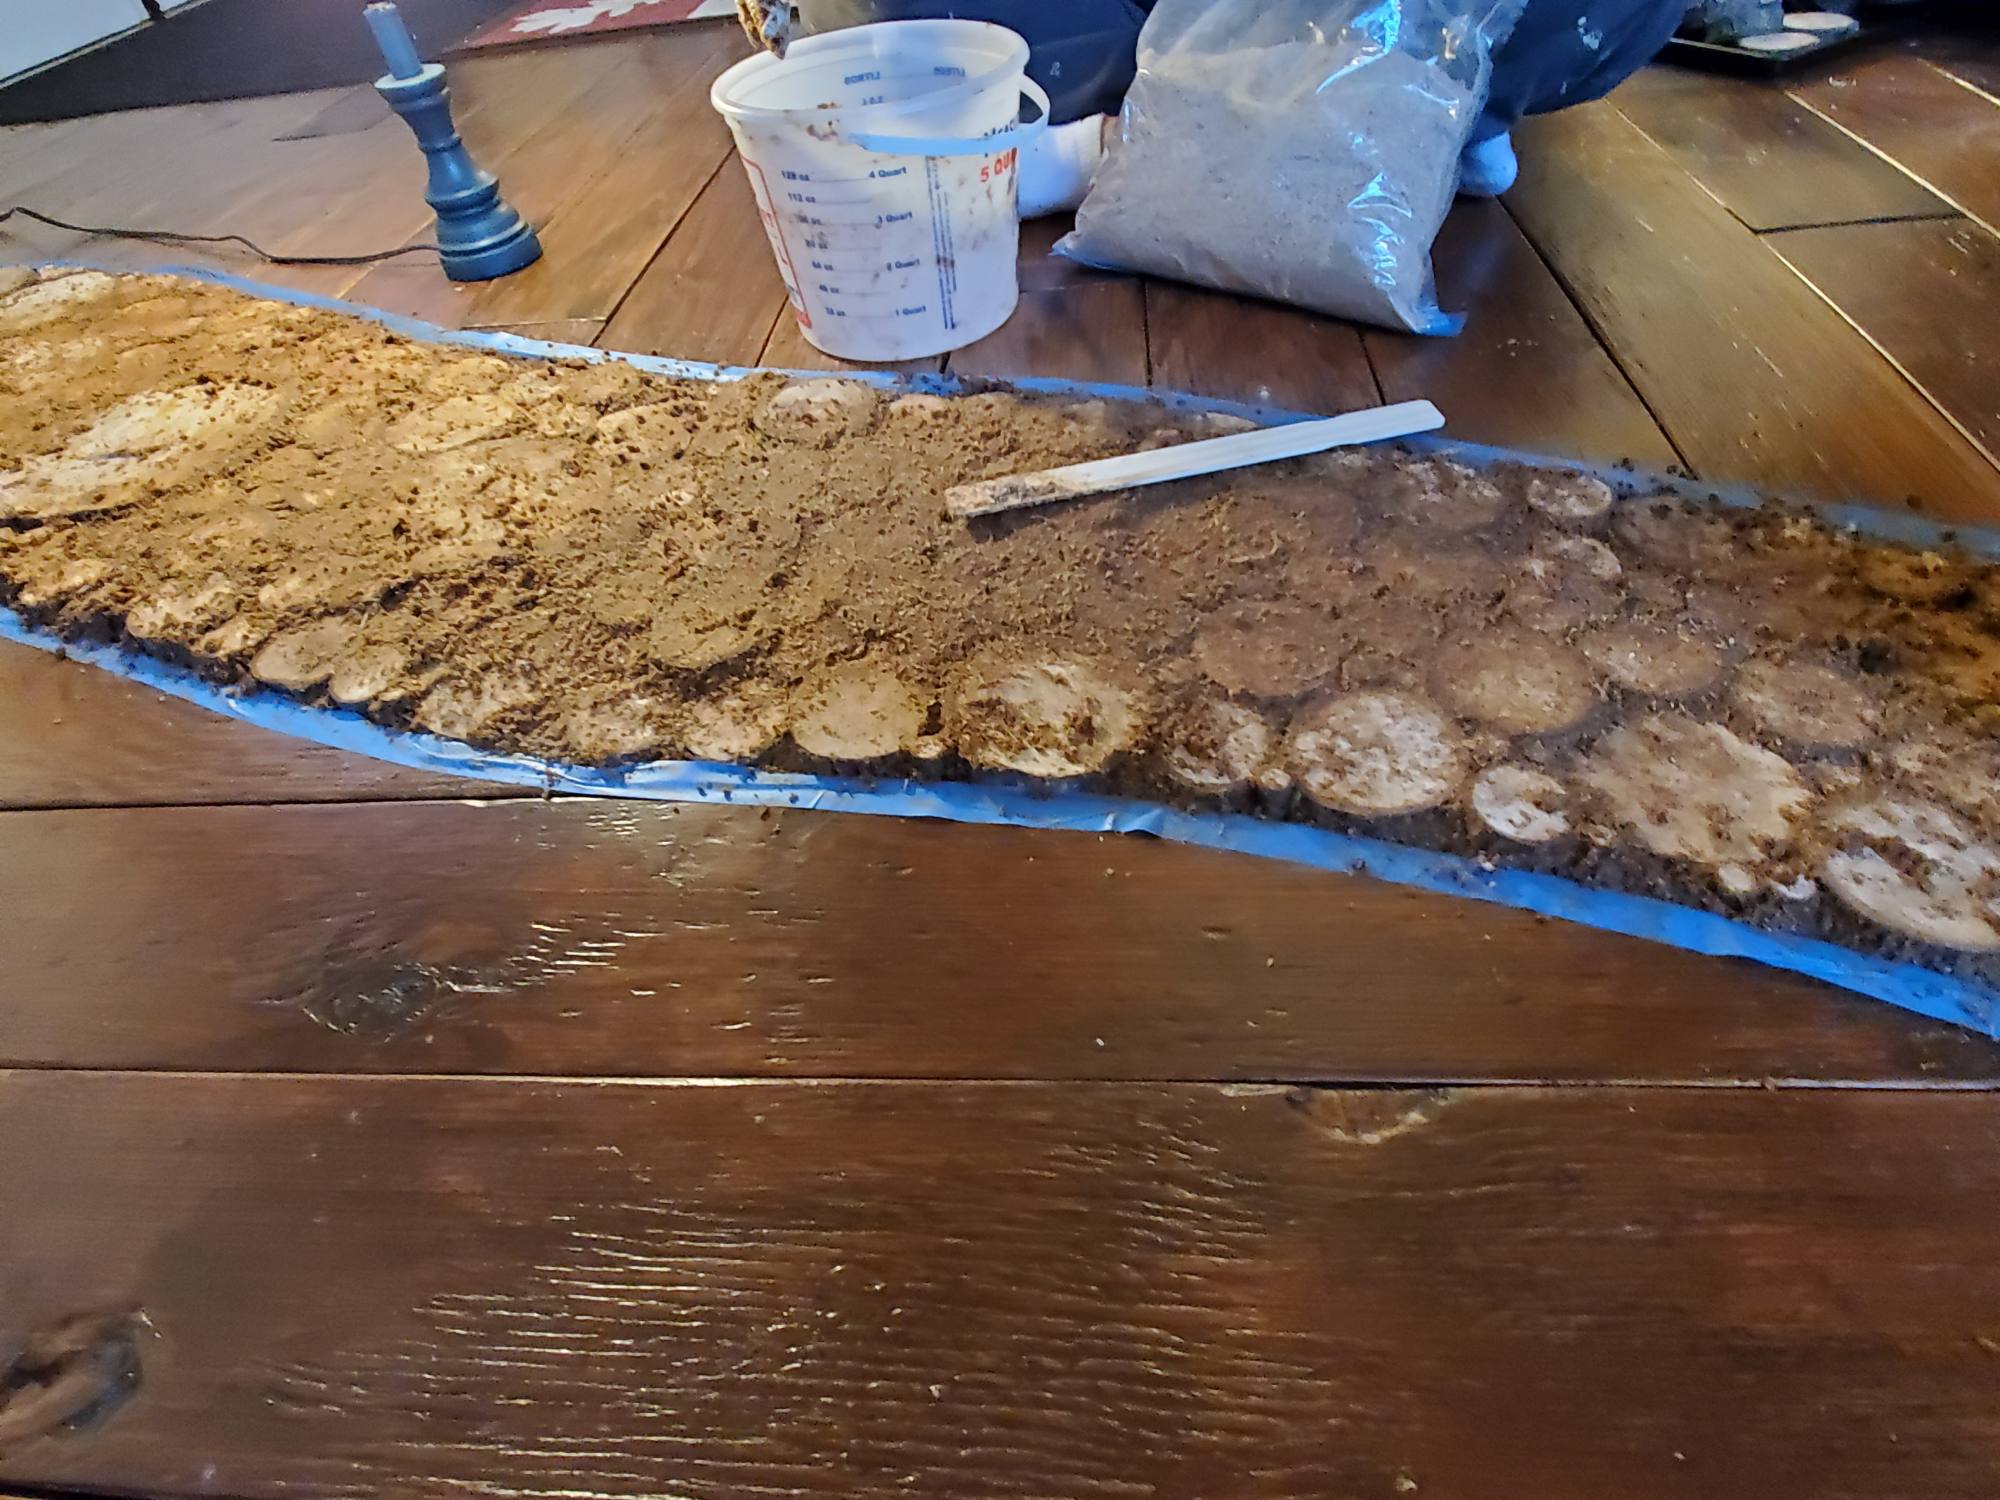
I secured the wood pieces in place with liquid nails. It just takes a dollop on the back of each piece and applying a little pressure to get it to set.

Installing An End Grain Flooring Inlay - The Inlay Cut Into The Floor Boards and Wood Slices In Place - The Inlay Cut Into The Floor Boards and Wood Slices In Place

Seal The Wood Slices Before Applying The Grout

I sealed the wood slices before applying the grout by applying a coat of the polyurethane. Otherwise the grout will darken the wood slices. You’ll be sanding everything down later but sealing the slices makes it easier to get them back to the lighter color.

Mixing The Sawdust Grout

I found an article from Bob Villa that talks about the grout that can be used with the wood slices. It’s called sawdust grout.

https://www.bobvila.com/articles/quick-tip-sawdust-grout/

Sawdust grout is a combination of 2 parts sawdust to 1 part polyurethane.

I used a water based, oil-modified fast drying polyurethane for the sawdust grout mix and the finish.

The polyurethane dries quickly and it’s orderless.

It’s the same one we used on the plywood wide plank floor boards in the living dining room and kitchen.

Applying The Sawdust Grout

The Grout is a pretty dry paste that can be pushed into all the nooks and crannies between each wood slice.

Using latex gloves grab a small glob of Grout and push it into the spaces between the wood slices.

Installing An End Grain Flooring Inlay - The wood slices are in place and the sawdust grout is being applied

Sanding The End Grain Flooring Inlay

I used a belt sander to sand down the wood pieces.

Ovviamente, that was only after I fixed my huge mistake of cutting the wood slices the wrong thickness.

The sand paper I used was 36 grit. I wanted something that gave the wood pieces a rough texture so they wouldn’t be slippery.

Because sanding is a pretty messy task, I tented off the area, that way the dust didn’t go all over the house.


Installing An End Grain Flooring Inlay - The Inlay Tented Off To Reduce The Dust Around The House While Sanding

This is what the wood slices and the sawdust grout looked like after the sanding was done.

I sanded the wood slice inlay to the height of the flooring on either side of it. I also used the sander to knock off the edges of each of the wood slices, removing any hard edges that may be uncomfortable to walk on.

Installing An End Grain Flooring Inlay - The Inlay After Grout Dried And Sanded Before Poly Finish

Adding The Polyurathane Finish

The polyurethane was the same one I used on the wood board flooring and in the sawdust grout mix.

I put three coats of finish on the end grain flooring inlay.

Although the poly is colorless, it did give the wood slices a little bit of a yellow tint.

The sawdust grout also darken quite a bit when I applied the poly on top of it.


Installing An End Grain Flooring Inlay - The Inlay After Grout Dried And Sanded After Poly Finish

[et_bloom_inline optin_id=”optin_7″]

More Pics Of The End Grain Flooring Inlay

Installing An End Grain Flooring Inlay - cross cut flooring inlay from the dining room
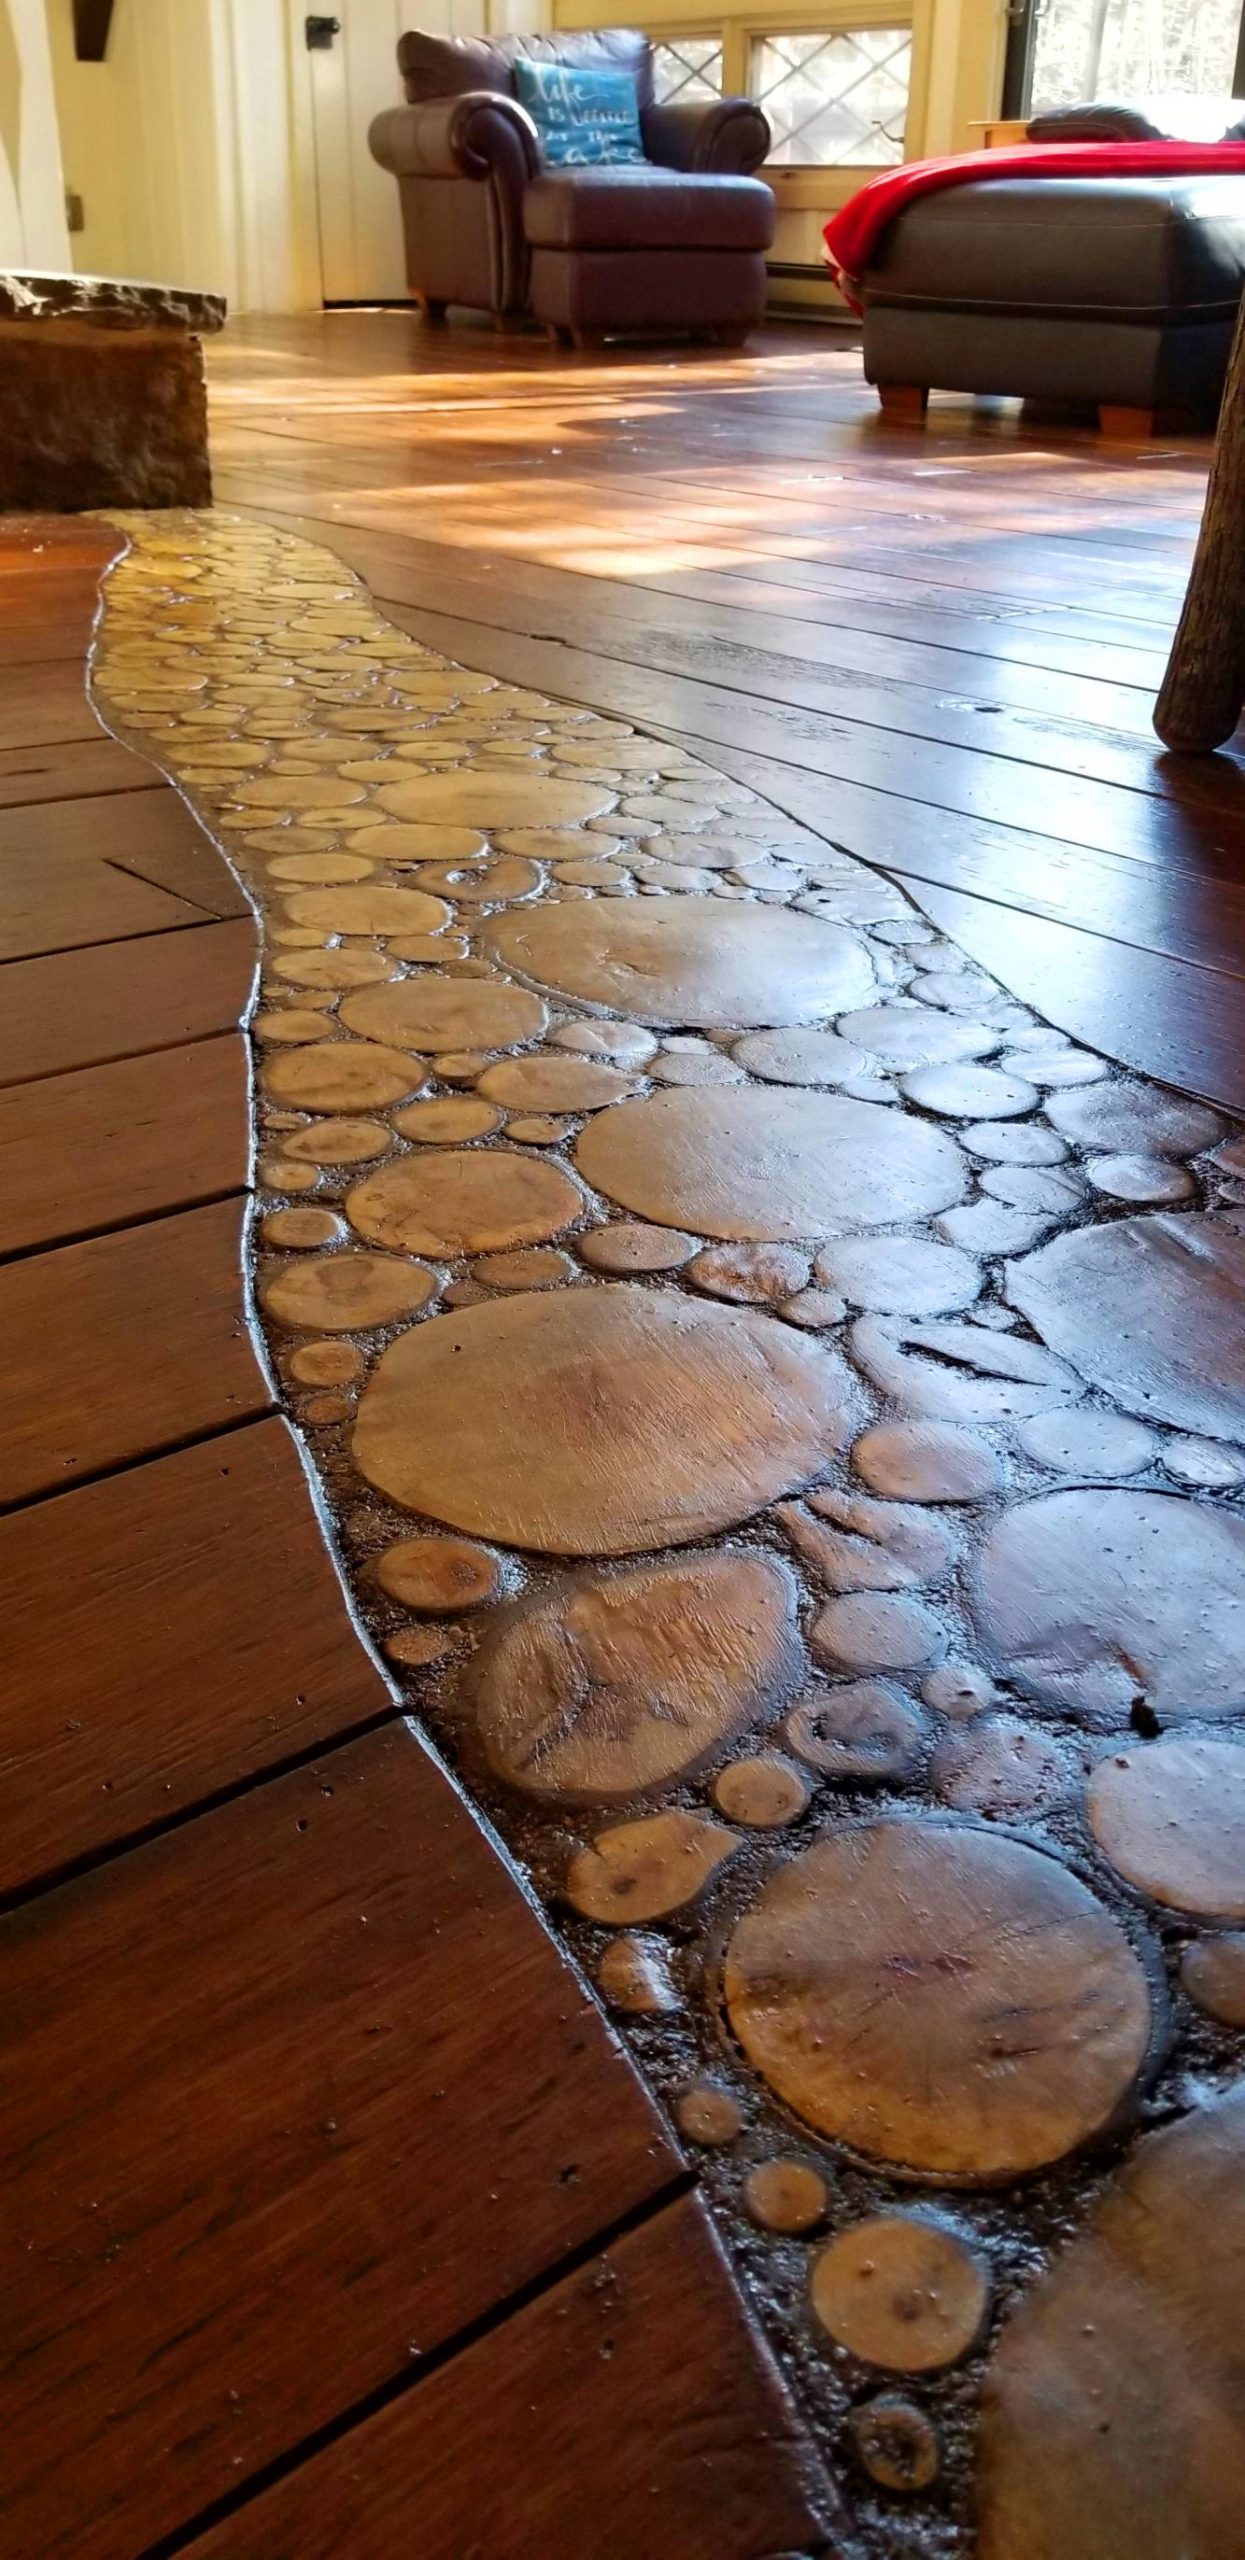
Installing An End Grain Flooring Inlay - The End Grain Flooring Inlay Finished
Installing An End Grain Flooring Inlay - End Grain flooring Inlay from the fireplace
Installing An End Grain Flooring Inlay - Finished - Seen From The Dining Room
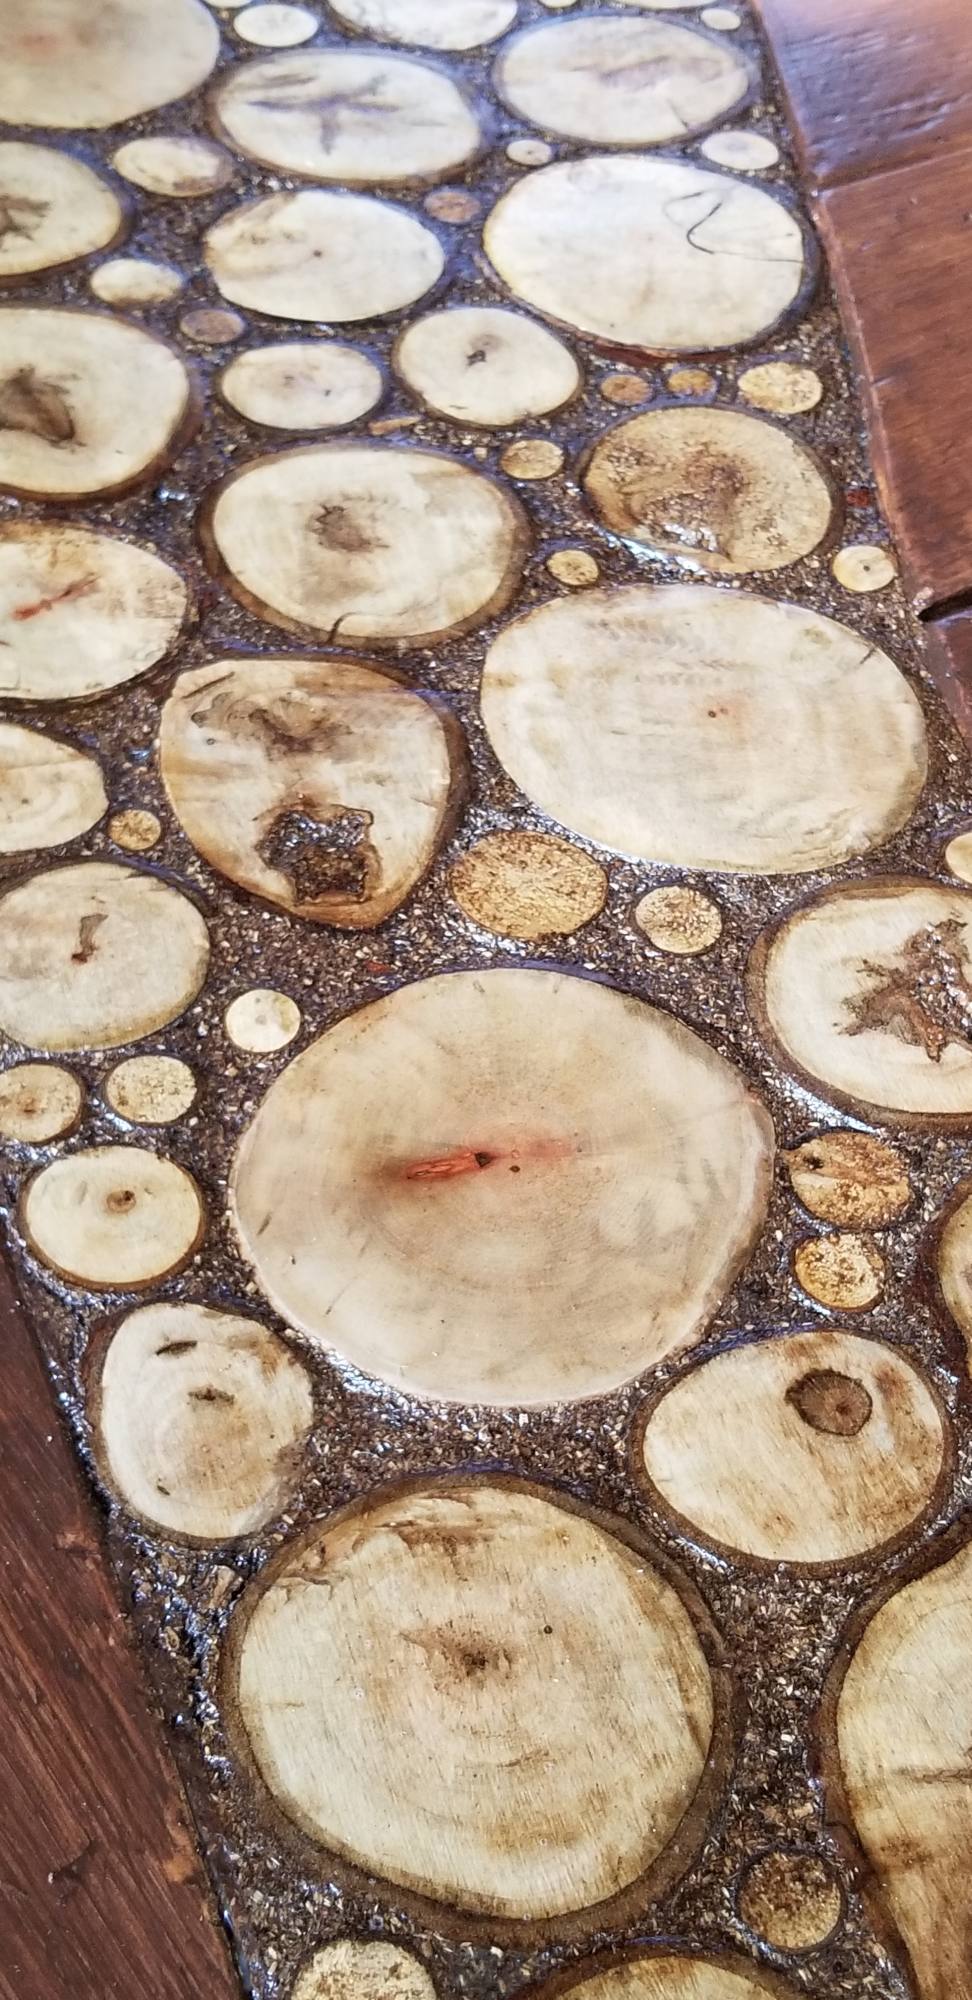
End Grain Flooring Inlay Finished - Log End Wood Floor Inlay Closeup
Installing An End Grain Flooring Inlay - End Grain flooring Inlay toward the fireplace

What Do You Think?

We love the way the end grain flooring inlay turned out. It’s so much more character than a simple threshold would have given.

What do you think? Do you like the way it turned out? Cosa faresti in modo diverso? We’d love to hear your feedback.

Godetevi questo post? Appuntalo e condividilo con gli altri!
Installing An End Grain Flooring Inlay - A closeup of the End Grain Flooring Inlay Finished
Wood River Finished - Wood slices flooring accent closeup

Home Theatre Design - Home Theatre telecomando

Home Theatre Design - Home Theatre telecomando

Designing a Home Theater - Home Theater Remote - Choosing The Right Remote


What To Look For In A Home Theater Remote Control

Anche se non può essere stato nella vostra Home Theatre design, avrete bisogno di un controllo remoto home theater.

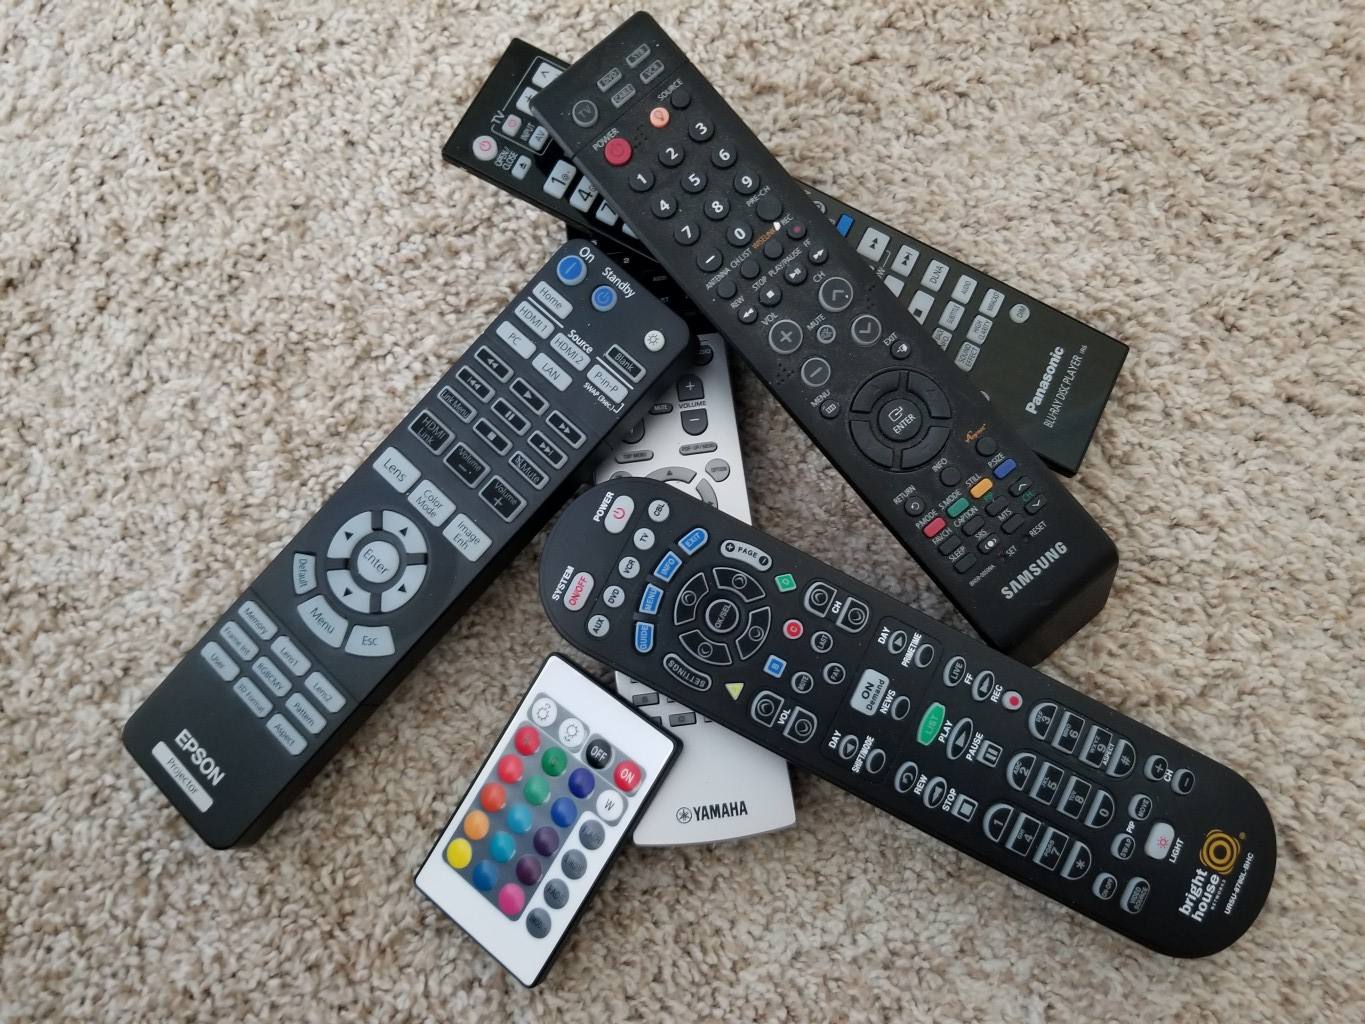
Setting up a home theater buries you in remotes pretty quick. It becomes a 3 or 4 remote task to do anything unless you get a home theater remote.

There are a few different calibers of remote controls. Se si desidera solo per ridurre il numero di telecomandi avete, poi un telecomando universale di base sarebbe fare il trucco.

Ma, se si desidera un telecomando che non si limita a controllare l'A / V attrezzature, le scelte saranno sottile.

Caratteristiche come le luci e / o persiane che controllano. O la creazione di macro / scene che si accendono e spengono i vari dispositivi a seconda dell'attività.

In questo articolo, Vado oltre quello che ho guardato quando si sceglie mio telecomando e come impostare il tutto.

Rivelazione: Alcuni dei link qui sotto sono link di affiliazione. Se si decide di acquistare uno di questi prodotti, guadagniamo una piccola commissione senza costi aggiuntivi per te. Si consiglia di questi prodotti solo perché abbiamo esperienza con loro e li usiamo per i nostri progetti. Come Amazon Associates, guadagniamo dagli acquisti idonei.

Perché non usare i telecomandi che avete

Choosing the right remote control will completely change your home theater experience. A typical home theater will have at least 3 remotes (for the TV/Projector, Suono surround, Cable box or DVD Player).

Fumbling between all the remote becomes a pain pretty quickly. Many of the remotes that come with home theater equipment do try to be universal-ish. But they still fall short with home theater scenarios.

The Remote Criteria

The remote I was searching for would control:

  • the projector
  • The surround sound amplifier
  • 4K BluRay DVD player
  • The Cable Box
  • Some way of controlling Insteon lights
UN Casa Teatro Remote that can control all that is pretty sophisticated. And the more features a remote has, the more expensive it gets.

On the low end, they are about $100. These remotes will have a low limit on the devices that can it can control and no macros. On the super fancy high end, there is a complete casa automation system. That system can control just about any electronic device, ma certo, it’s at a cost. The Savant is one of those sistemi and runs about $1000 a room.

For my scenario, Ho già un casa sistema di automazione in modo da Savant non era qualcosa che avevo alcun interesse in.

Mio casa sistema di automazione è un sistema basato Insteon. Un controller universale Dispositivi ISY (Modello ISY 994i / IR Pro) che i controlli tutto. Cose come la serratura della porta, i termostati, luci, e sensori di porta.

Logitech Harmony ultima casa

Dopo alcune ricerche, E 'diventato chiaro alla famiglia di telecomandi Harmony è il miglior valore per le caratteristiche. Sono stati nel commercio telecomando per un tempo molto lungo e che si sono distinti nel corso degli anni.

Che un telecomando Harmony, si basa la vostra scelta su quanti dispositivi si pensa di controllo. Il telecomando Harmony ho scelto era l'ultima casa. It can control up to 15 devices with up to 15 activities. Le attività sono fondamentalmente le macro. Premere uno dei pulsanti macro, e girerà su tutti gli apparecchi necessari accesi per tale attività.

Aggiornare: The remote that I chose is now discontinued. Il Logitech Harmony Remote Elite è l'ultima remota home theater da Logitech. Sembra un po 'diverso, ma le specifiche sono molto simili.

Un vantaggio ulteriore è che l'armonia Elite telecomando funziona anche con Alexa!


Designing a Home Theater - Home Theater Remote - Logitech Harmony Elite Remote

Logitech Harmony Elite

Logitech Harmony Remote Control Elite, Hub e App, funziona con Alexa

Logitech Harmony Principale Ultimate Caratteristiche

L'Armonia Principale Ultimate (e l'armonia Elite) è un telecomando ricco di funzionalità.

  • The Harmony App On your Droid or iPhone lets you control your devices using the app
  • Configure macros or activities to set up all your devices with a click of a button
  • Control up to 15 Devices
  • Control devices using infrared, IP and Bluetooth
  • It Syncs the cable providers channel line up with your remote. When the cable provider changes channels around your remote will update itself
  • Save your favorite channels as favorites, which show up as icons in the remote’s screen
  • a digital screen on the remote allows you to customize buttons and activities
  • The hard buttons are all back-lit (very important when you are sitting in a dark theater)

The Parts To The Home Theater Remote Control Setup

There are three physical parts to the remote control. The remote control itself, a Hub and infrared blaster cables.

The hub is the brains of it all, and the remote control communicates to the hub using RF (radio). It’s great for home theater setups like mine, where the AV equipment is in a closet out of sight.

The hub should go where the majority of your electronics are since it’s the one doing most of the controlling.

The AV Equipment

In this setup, there’s a total of 6 devices listed in the MyHarmony app:

  • Universal Devices ISY-994i/IR (Home Automation)
  • Yamaha TSR-7810 (Amplificatore)
  • Epson PowerLite Home Cinema 5040UB (Projector)
  • Arris DCX3600M (Cable/DVR)
  • Panasonic DMP-UB900 (4K BluRay Player)
  • Windows Computer

Setting Up The Remote For Your Home Theater

Harmony has done a great job with their remote controls. The basic initial setup was pretty straight forward.

You’ll need to install their MyHarmony software and run the setup. You can either install it on your PC or on your phone and it will guide you through the setup process.

During setup, the hub was able to automatically detect the Yamaha amplifier on the WiFi. For the other devices (cable box, DVD player and projector) I needed to supply the make an model. Based on the make an model, it knew the full set of remote codes for them.

Much easier than the old days where you had to teach your universal remote the codes for each function.


A Home Theater Gotcha

If you have a theater like mine, you have AV equipment tucked away in a closet close by but out of sight.

The Harmony Hub goes in the closet along with all the AV equipment, but one gotcha is the projector.

Inizialmente, I wasn’t sure if I’d have to run one of the infrared blasters into the theater to get it to turn on/off the projector.

Bene, luckily Harmony had already thought of that. In the MyHarmony App, you determine what controls the device, either the remote or the hub.

That’s done here:

  • Go to the MyHarmony App and click settings
  • Click More >>
  • Remote and Hub Assignments

Problem solved.

Aggiornare: The solution above worked great, but it would only work if you were in the room to turn on the projector. I sometimes use the MyHarmony app on my phone to turn the theater equipment on or off from outside the room.

Since the remote controlled the projector, the projector didn’t turn on. In
the end, I ran one of the IR blasters from the Harmony hub to the theater, and that worked like a charm.

Getting Harmony To Talk To Insteon

Come ho detto prima, my casa automation is Insteon based. When I was setting up my casa theater I expected to one day be able to control the lights. And maybe even the curtains using my casa theater remote control.

Insteon has a user-friendly device called InsteonHub, which Harmony can communicate with natively.

My setup uses a Universal Devices controller, which is more flexible but not as user-friendly. Inizialmente, it didn’t seem obvious how I could get Harmony and Insteon to talk to each other.

At first, I thought I’d have to use some sort of Rest based commands to control the lights using the Harmony remote.

During my googling, I did see something using a Raspberry PI and something called ISY Helper to do just that.

From what I understand, the ISY Helper is the go-between for the Harmony and your ISY.

For my setup, it sounded like way too many moving parts.

Luckily the ISY I purchased had infrared, I think you can also buy the add-on module for the ISY if your ISY doesn’t have IR.

What Insteon Devices Can You Control With Harmony

With the Insteon Hub, I think you can only control the lights. With the infrared module in the ISY, you can control everything that the ISY can control.

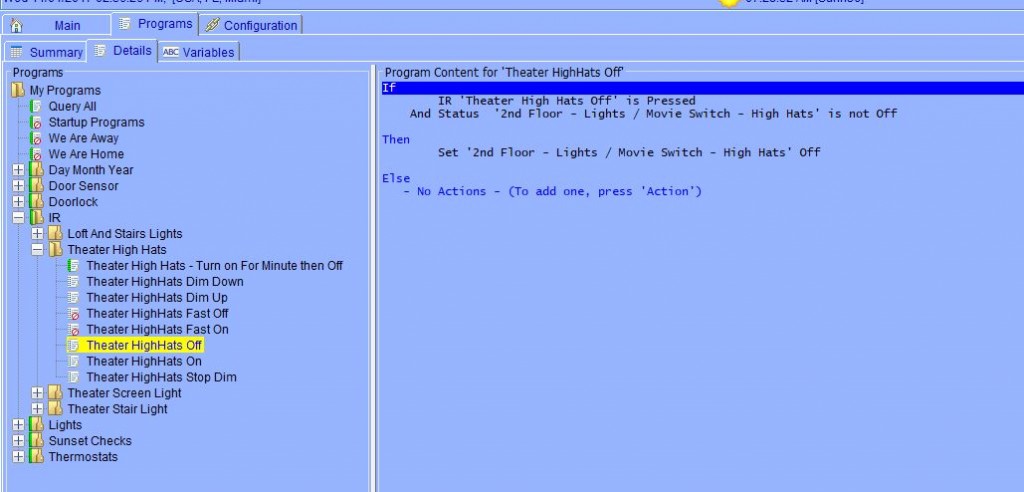
On the ISY you would create a program with the things you want the ISY to do. Then assign that program to an IR code.

Let’s say you want to set the temp at a certain level, dim the lights in the theater and lock the front door for the evening.

Create a program with those steps and assign it to an IR code. Now create an activity on your remote that sends that IR code, you’re all set!

Pretty cool! And you have no limit to the possibilities.

In realtà, you only have 40 IR codes to play with. But each of those codes can be configured to do a whole lot on the ISY side.

Add ISY To The Remote

Adding the ISY to the remote was straight forward. Add a new device in the Harmony app. And use Universal Devices as the manufacturer and ISY994i/IR as the model number.

As soon as you do that it will add the 40 infrared codes that the ISY uses into the remote.

Setup On The ISY

To add the IR codes on the ISY side was just as easy. Go into the admin console, click the IR tab and click the ‘Import Default IR Codes’ button. That adds the same 40 infrared codes into the ISY.

Using You ISY From The Remote

I wanted to be able to turn off/on Insteon lights using the remote control. Both within Harmony activities and independent of the activities.
To add your ISY IR commands on the remotes menus click the buttons option in the MyHarmony app.
Under ‘Screen Options’ select your ISY device, in my case, I called it Lights. and click Go.
Here you can add soft buttons for each IR command you would like to control directly from the remote.
Here’s a list of my configured soft buttons under Lights:
  • High Hat On
  • High Hat Off
  • Screen Light On
  • Screen Light Off
  • Stair Light On
  • Stair Light Off
  • Loft Dim/Off

The ISY Listed as a device on the remote

Designing a Home Theater - The Fixed Projector Screen - The Edgeless Screen
Designing a Home Theater - Home Theater Remote - Logitech Harmony Elite Remote - The Digital Screen with the ISY Commands Listed As Soft Buttons

High Hat Off Program In ISY Admin Console

Designing a Home Theater - Home Theater Remote - Logitech Harmony Elite Remote - ISY Program To Turn Off The High Hats

Setting Up Harmony Activities

This is where the Veramente cool functions of the remote control start to shine.
With the Harmony remote you can set up activities. Activities are basically macros with functions for any of your configured devices.
An example of an activity that I have set up is “Watch TV”. When I press the button for that activity it does the following:
  • Powers on the projector
  • Sets the projector input to HDMI1
  • Powers on the amplifier
  • Sets the amplifier input to HDMI2
  • Powers on the Cable/DVR
  • Turns of the lights in the Movie Theater

When you are done watching TV and want to turn everything off, just press the button next to the activity again and it’ll turn everything off.

Now if you have a casa theater and don’t yet have a remote control with macros, I think you can appreciate how this remote can have everything on, set and ready to go with the press of one button.

No more fumbling with every remote control you have to get things set up just to watch TV.

Before Harmony these were my steps:

  • Get the projector remote, press the power button
  • Get the amplifier remote, press the power button and set it to HDMI2
  • Get the Cable remote, press the power button
  • If the lights were on, get up and press the button to turn them off

A big difference in user experience.

In a way, the remote control is the mortar in the electronic building blocks of your home theater. It changes your experience completely.

Tweaking The Harmony Activities

MyHarmony has a GUI that helps you create activities in a pretty intuitive way. To set up a basic activity is not very difficult, it’s appena a matter of following the prompts.
Once the activity has been created the software will ask you to test the activity. I’d say the majority of what it sets up works pretty nicely.
Activities need tweaking with devices that take a long time to turn on or if it uses cursor commands. An example would be clicking left once then up then enter.
No matter how complex the activity, after a bit of tweaking things will work pretty reliably.
Below are my activities along with their settings.

My Activities List

Here are all my configured activities and settings. Il “Lights – IR004entry triggers theTurning off the Movie Theater lightsprogram on the ISY.

The Watch Amazon activity is an example of an activity using cursor movements. The DVD Player has no built-in button for Amazon so I used cursor movements to select the AmazonApp.

I also added mute at the beginning and the volume down at the end because of an annoying ding sound the DVD player made. Every time the cursor in the interface moved there was a ding, and I didn’t like hearing it.

Designing a Home Theater - Home Theater Remote - Logitech Harmony Elite Remote - The Digital Screen with the Activities List

Watch TV

  1. ProjectorPower On
  2. ProjectorInput HDMI 1
  3. Amplificatore – Power On
  4. Amplificatore- Input HDMI 2
  5. Cable DVRPower On
  6. LightsIR004

Watch A Movie

  1. ProjectorPower On
  2. ProjectorInput HDMI 1
  3. Amplificatore – Power On
  4. Amplificatore- Input HDMI 2
  5. Cable DVRPower On
  6. LightsIR004

Watch Netflix

  1. Blu-Ray PlayerPower On
  2. Amplificatore – Power On
  3. Amplificatore – Input: HDMI 1
  4. ProjectorPower On
  5. ProjectorInput: HDMI 1
  6. Wait 10 sec
  7. Blu-ray PlayerNetflix
  8. LightsIR004

Watch Amazon

  1. Amplificatore – Power On
  2. Amplificatore – Input: HDMI 1
  3. Blu-Ray PlayerPower On
  4. ProjectorPower On
  5. ProjectorInput: HDMI 1
  6. Wait 15 sec
  7. Amplificatore – Mute
  8. Blu-ray PlayerInternet
  9. Wait 14 sec
  10. Blu-ray PlayerDirectionLeft
  11. Wait 2 sec
  12. Blu-ray PlayerDirectionDown
  13. Wait 2 sec
  14. Blu-ray PlayerOK
  15. Amplificatore – VolumeDown
  16. LightsIR004

[et_bloom_inline optin_id=”optin_7″]

Summing It All Up

Having a Harmony Home theater remote control is way better than trying to manage 6 remotes…. but I had no idea how much better the experience was going to be.

The remote control makes it a real pleasure to turn on and off your devices. If you have a home theater getting a Harmony remote control is a must!

The simplicity of use that a remote like this gives you is amazing.

In my opinion, a home theater design is incomplete if it doesn’t include a home theater remote control.